72BajaBen Baja Rebuild Thread

Offroad VW based vehicles have problems/insights all their own. Not to mention the knowledge gained in VW durability.
User avatar
72bajaben
Posts: 1360
Joined: Wed Aug 09, 2006 10:37 pm

72BajaBen Baja Rebuild Thread

Post by 72bajaben »

Well after many years of overseas deployments, 2 houses and 2 more kids...its finally time. The poor ole baja has been sitting for about 11 years and she is getting a complete ground up rebuild.

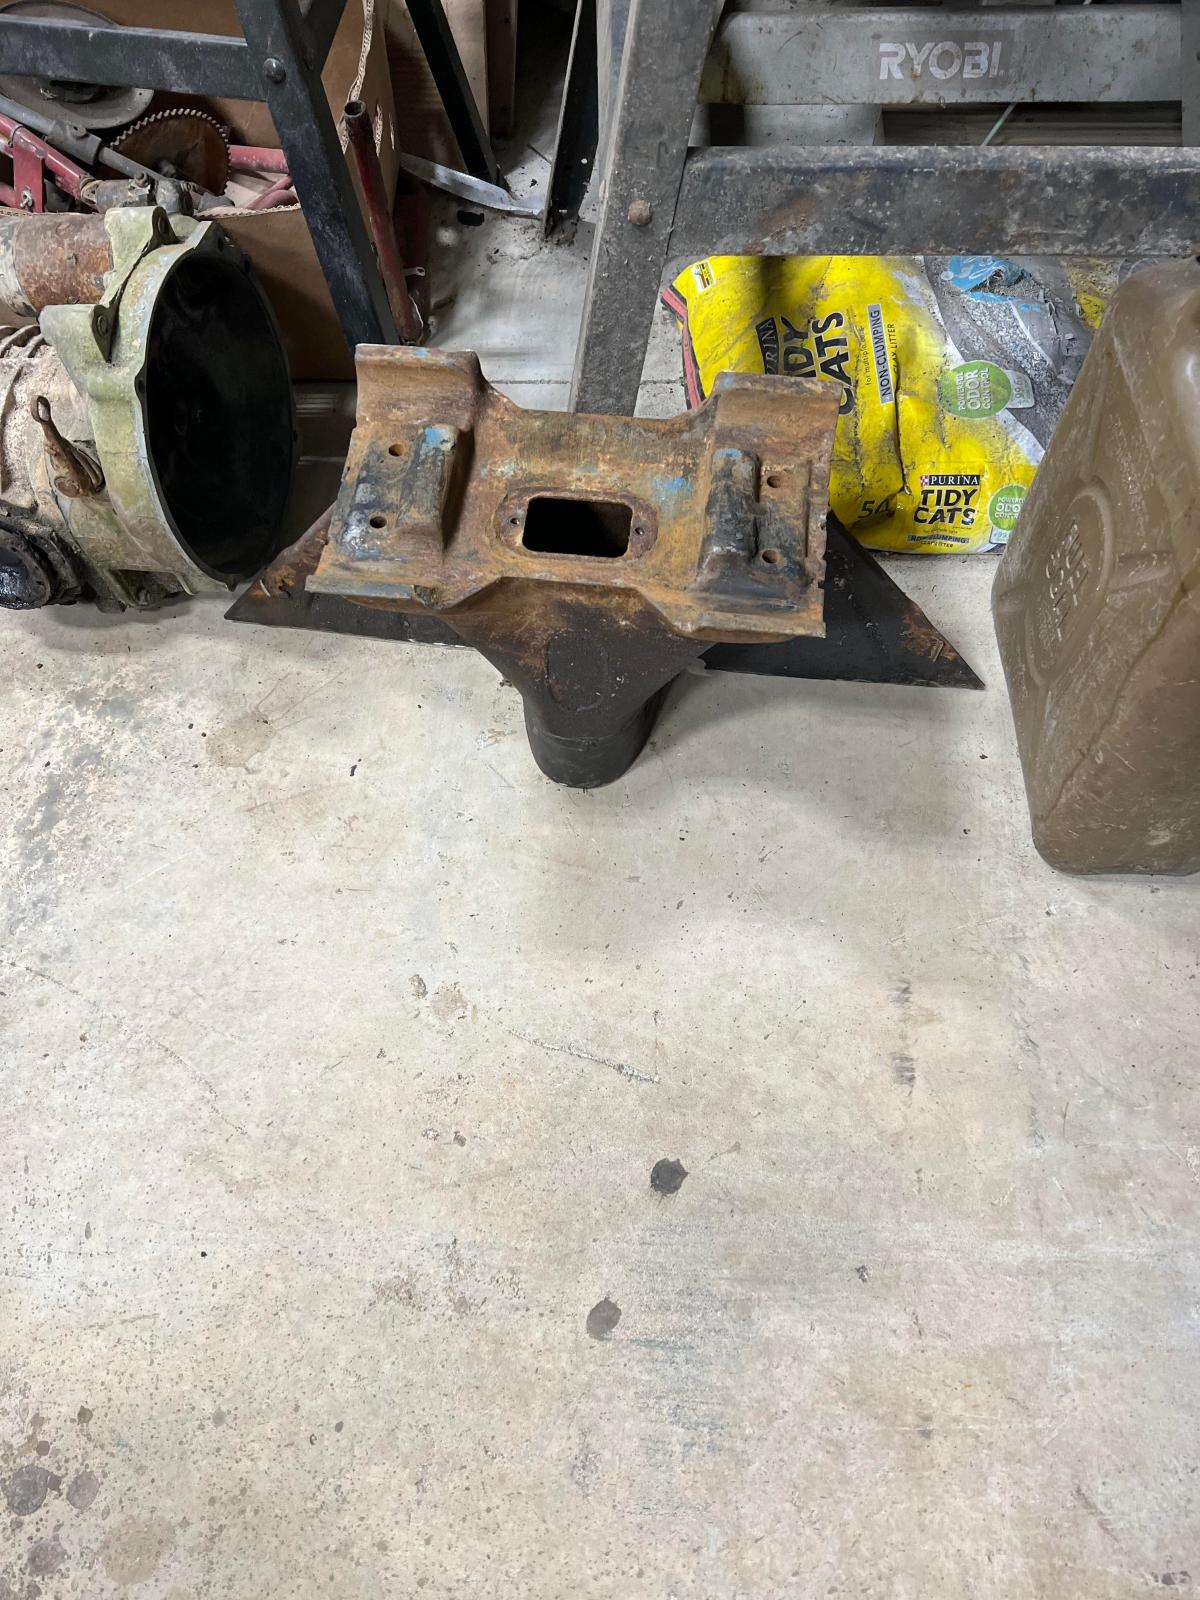
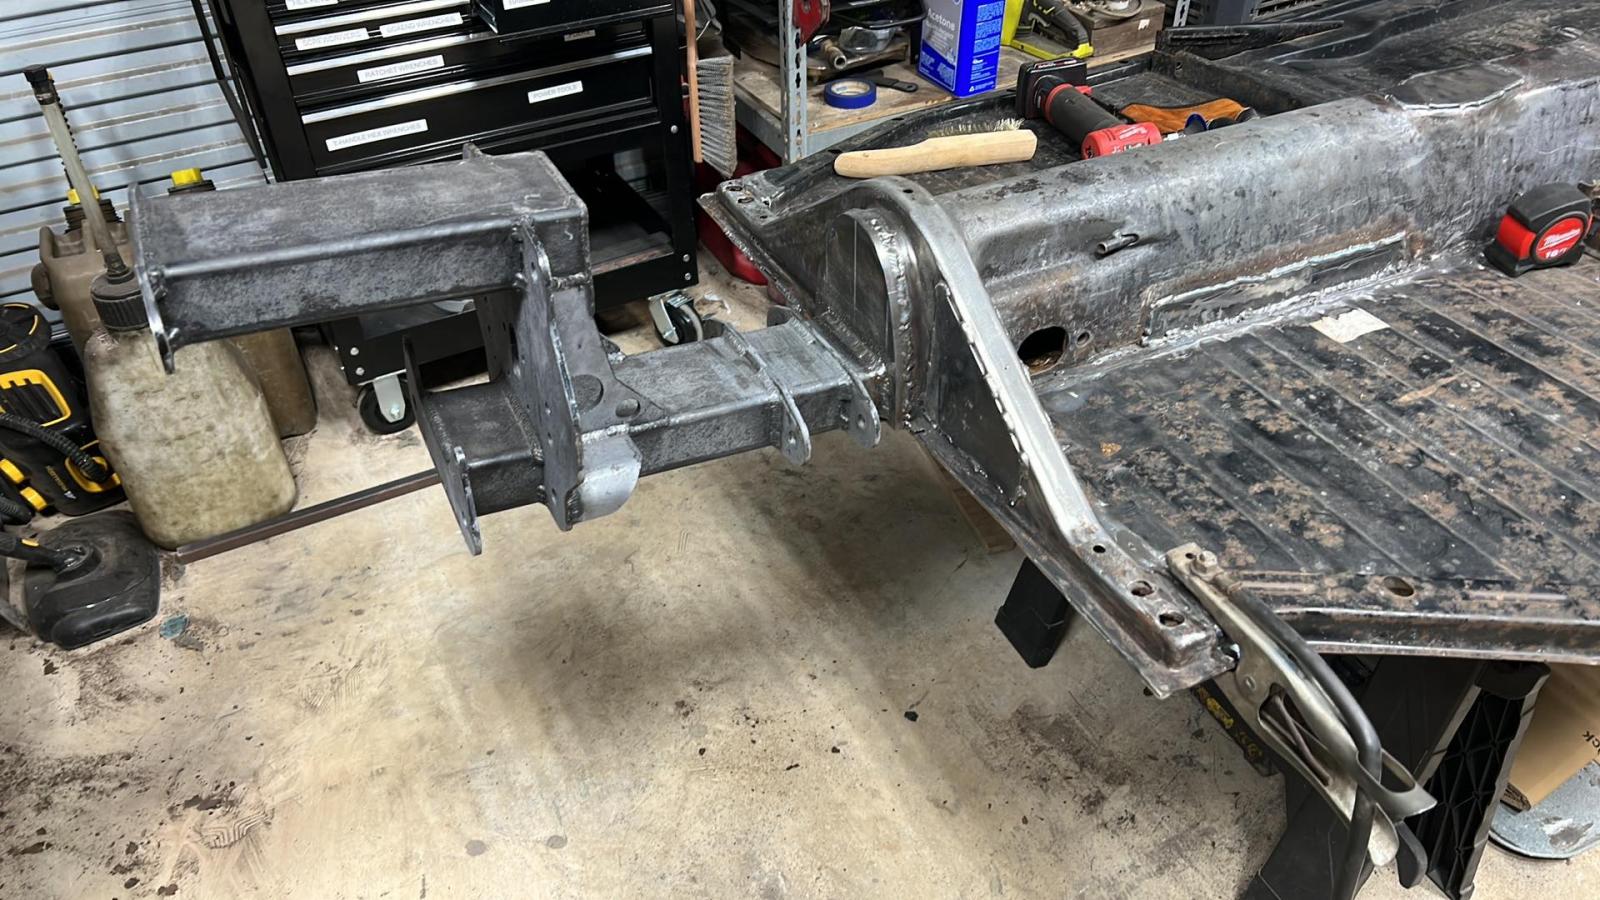
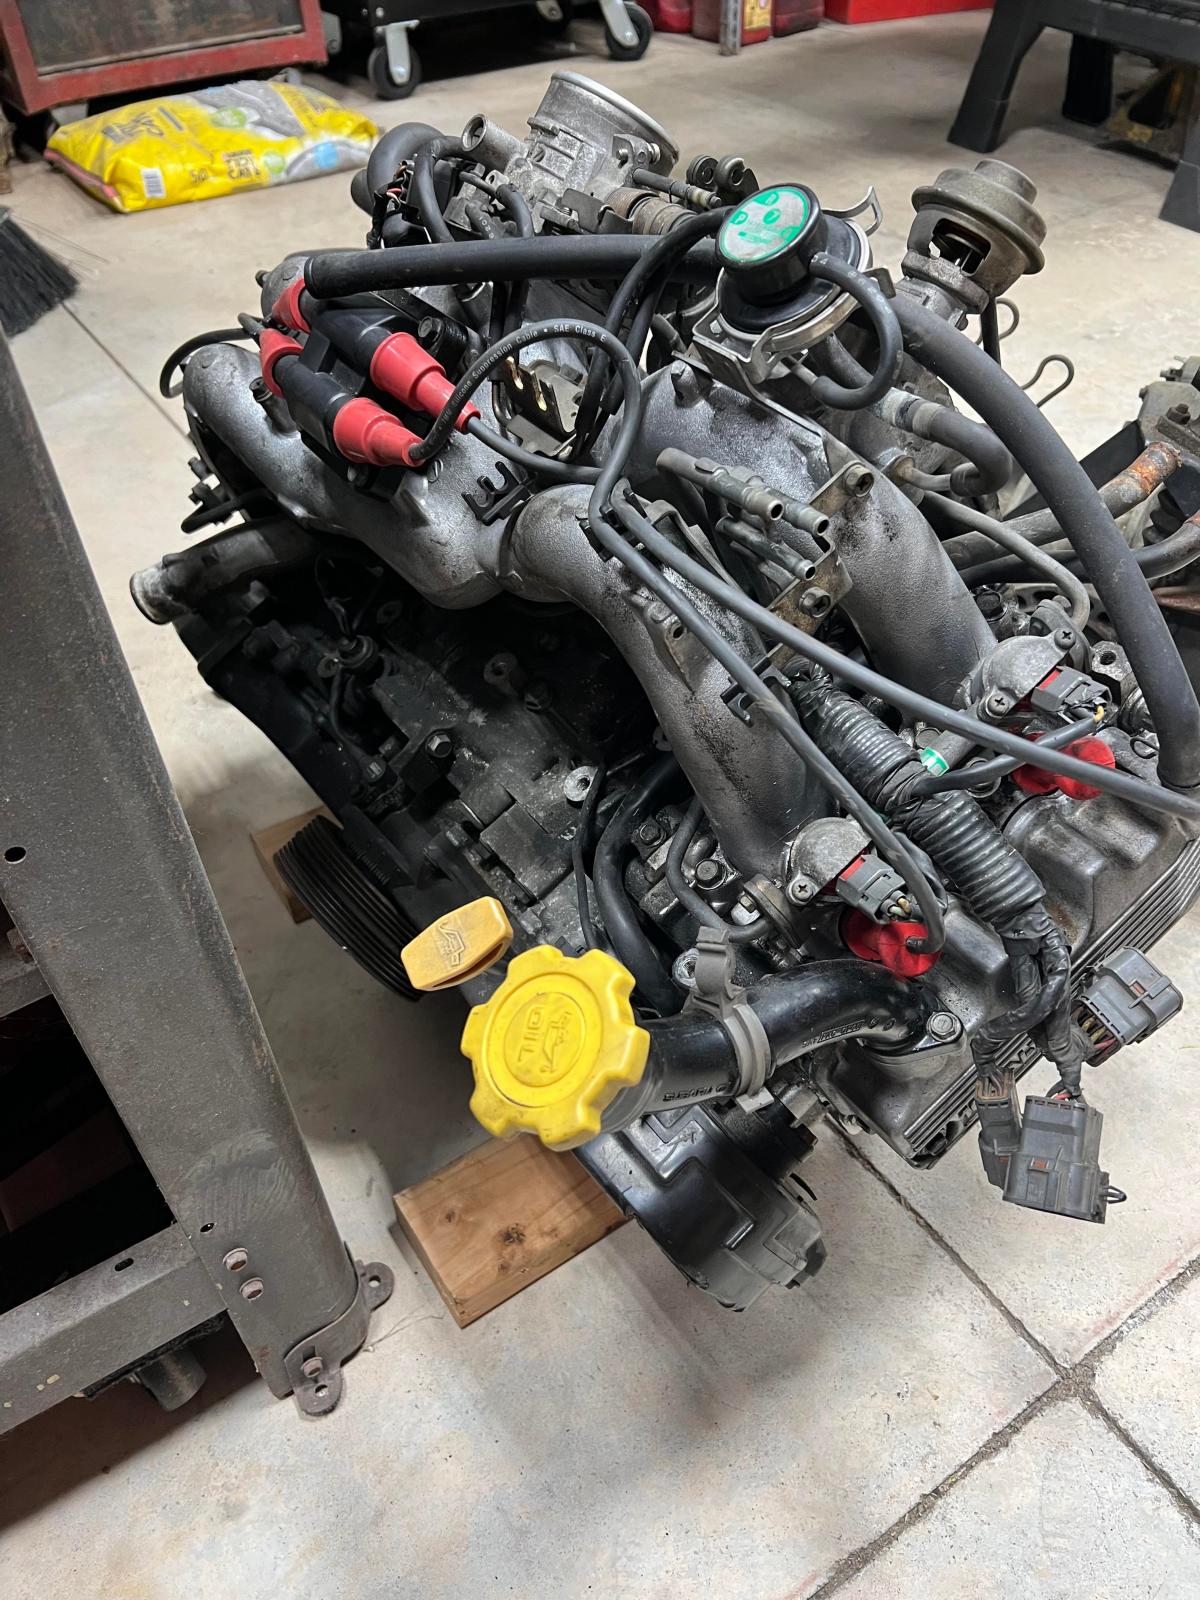
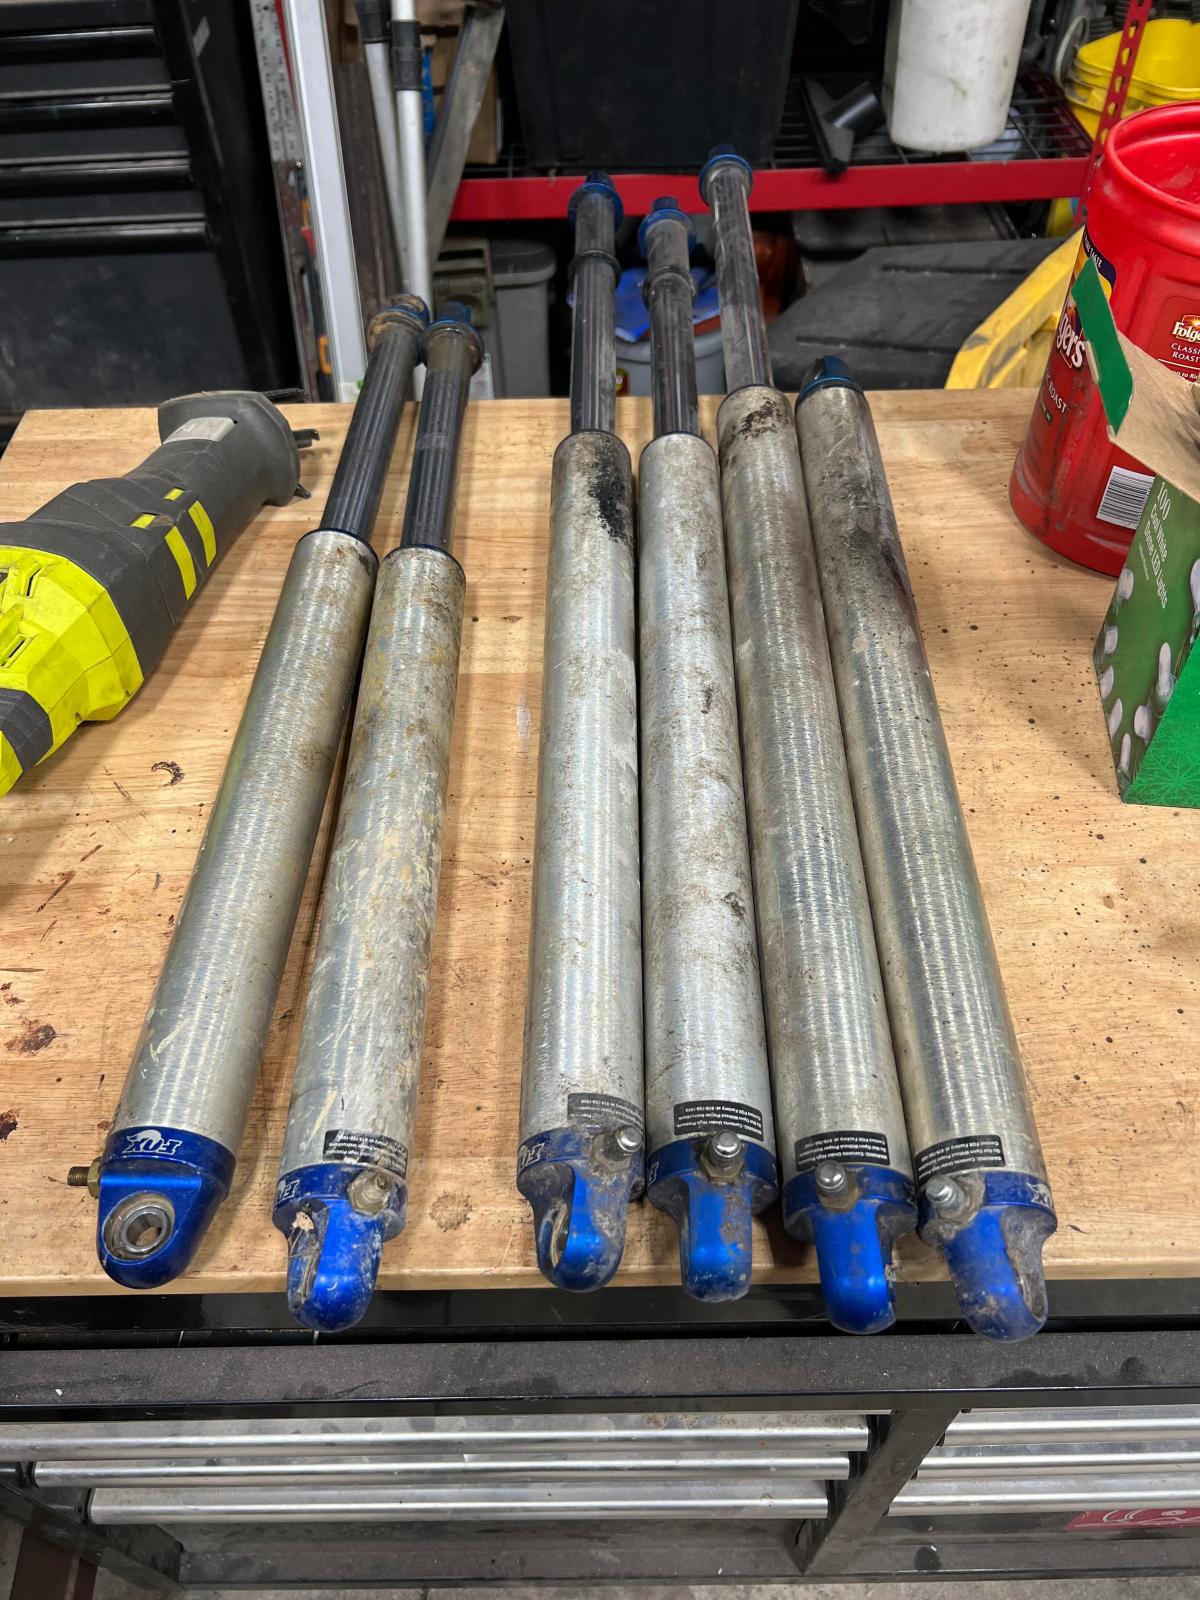
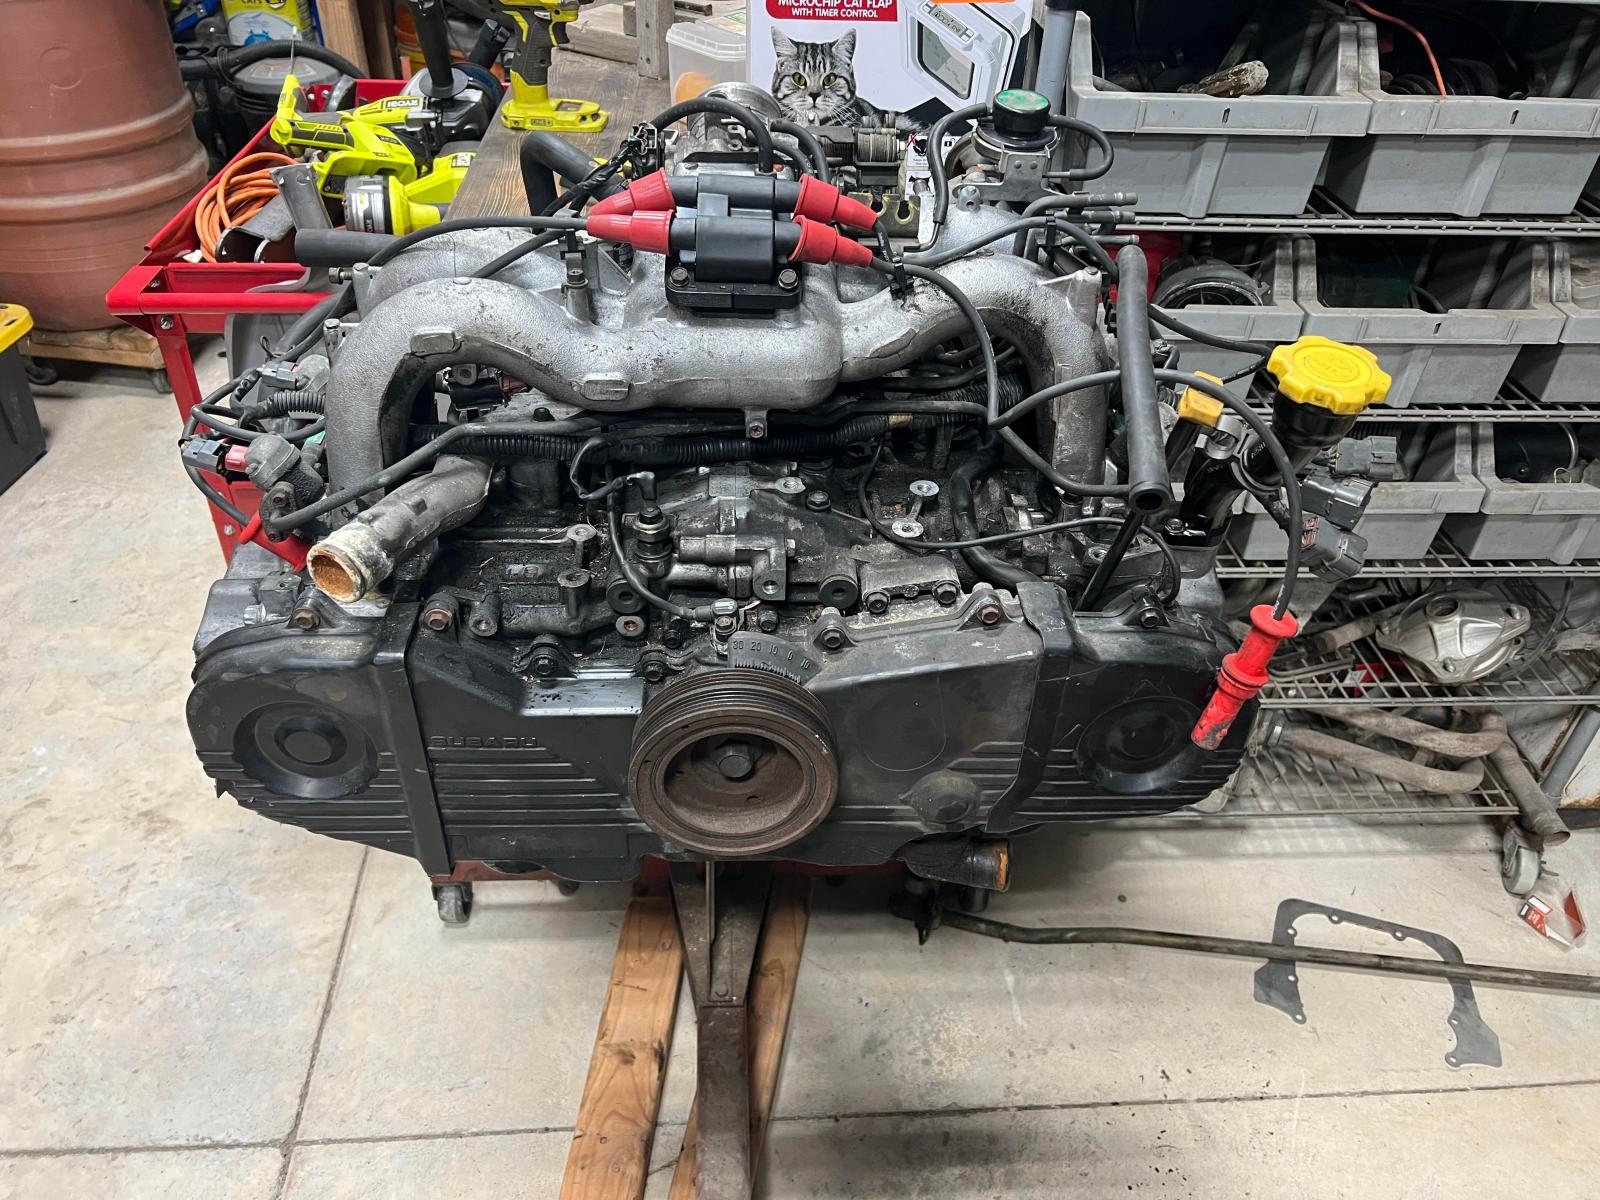
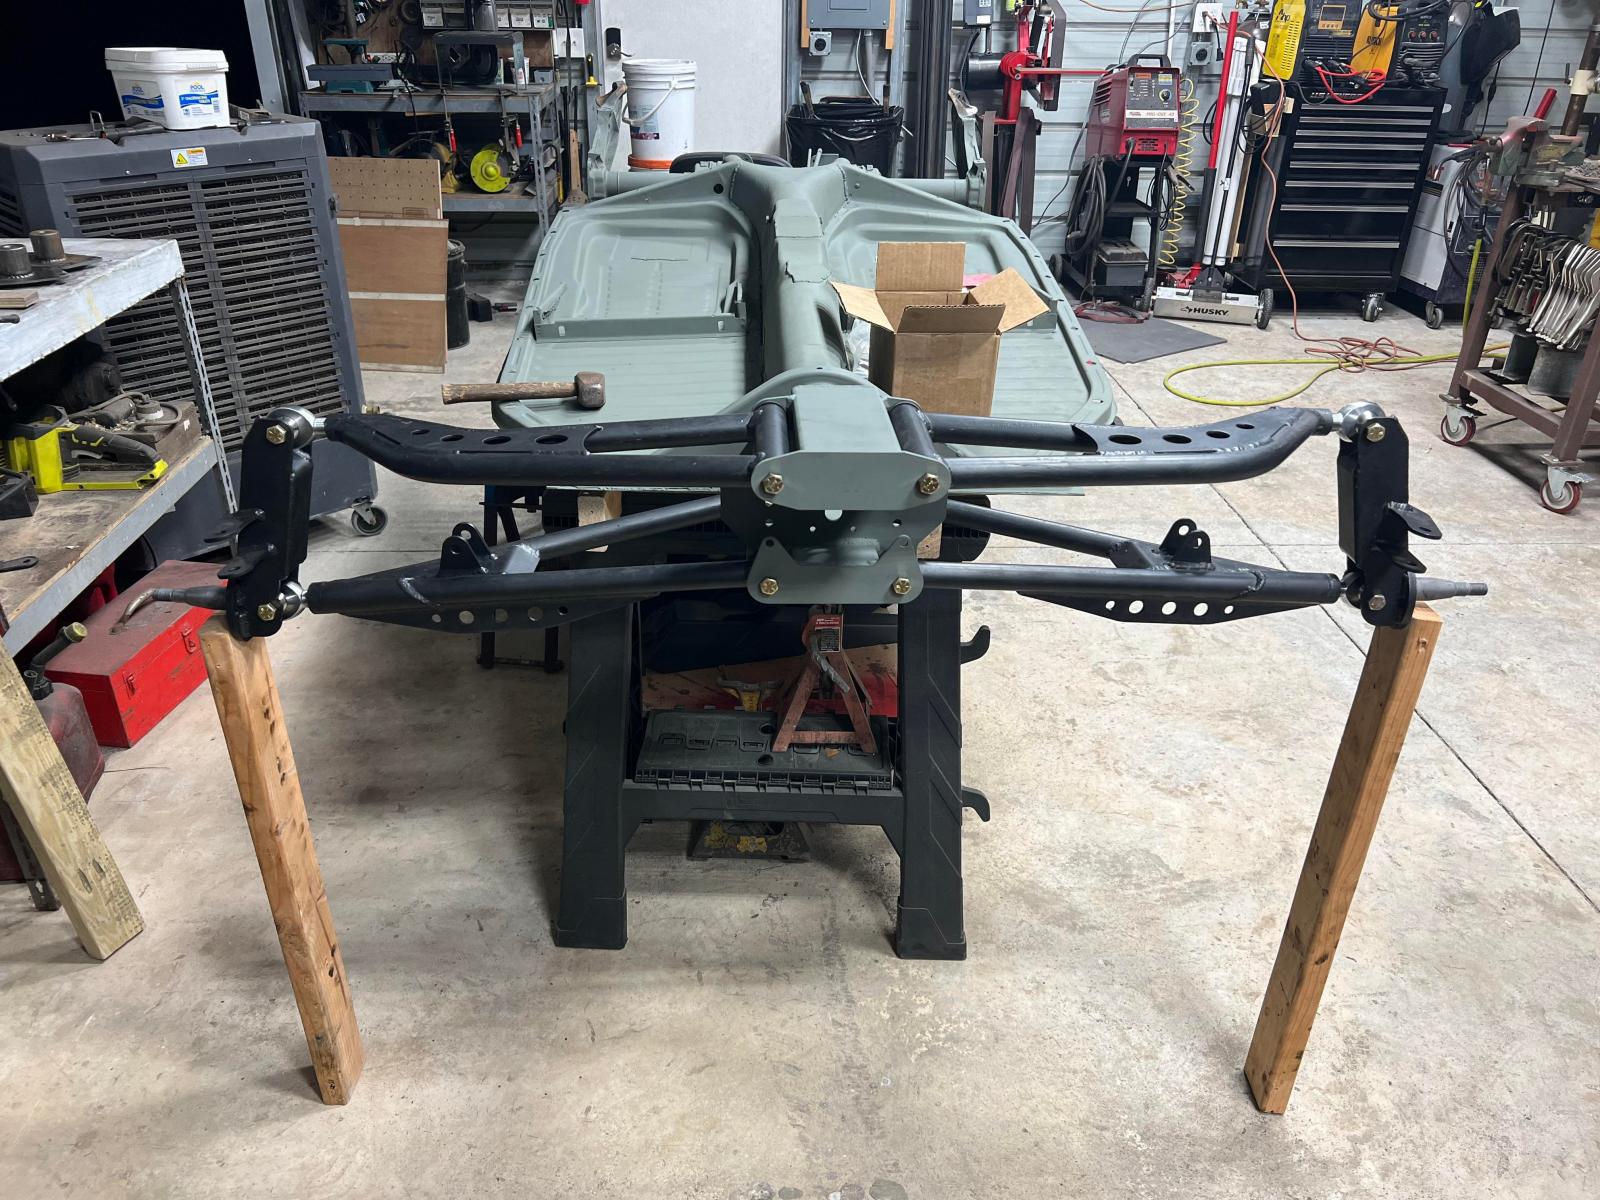
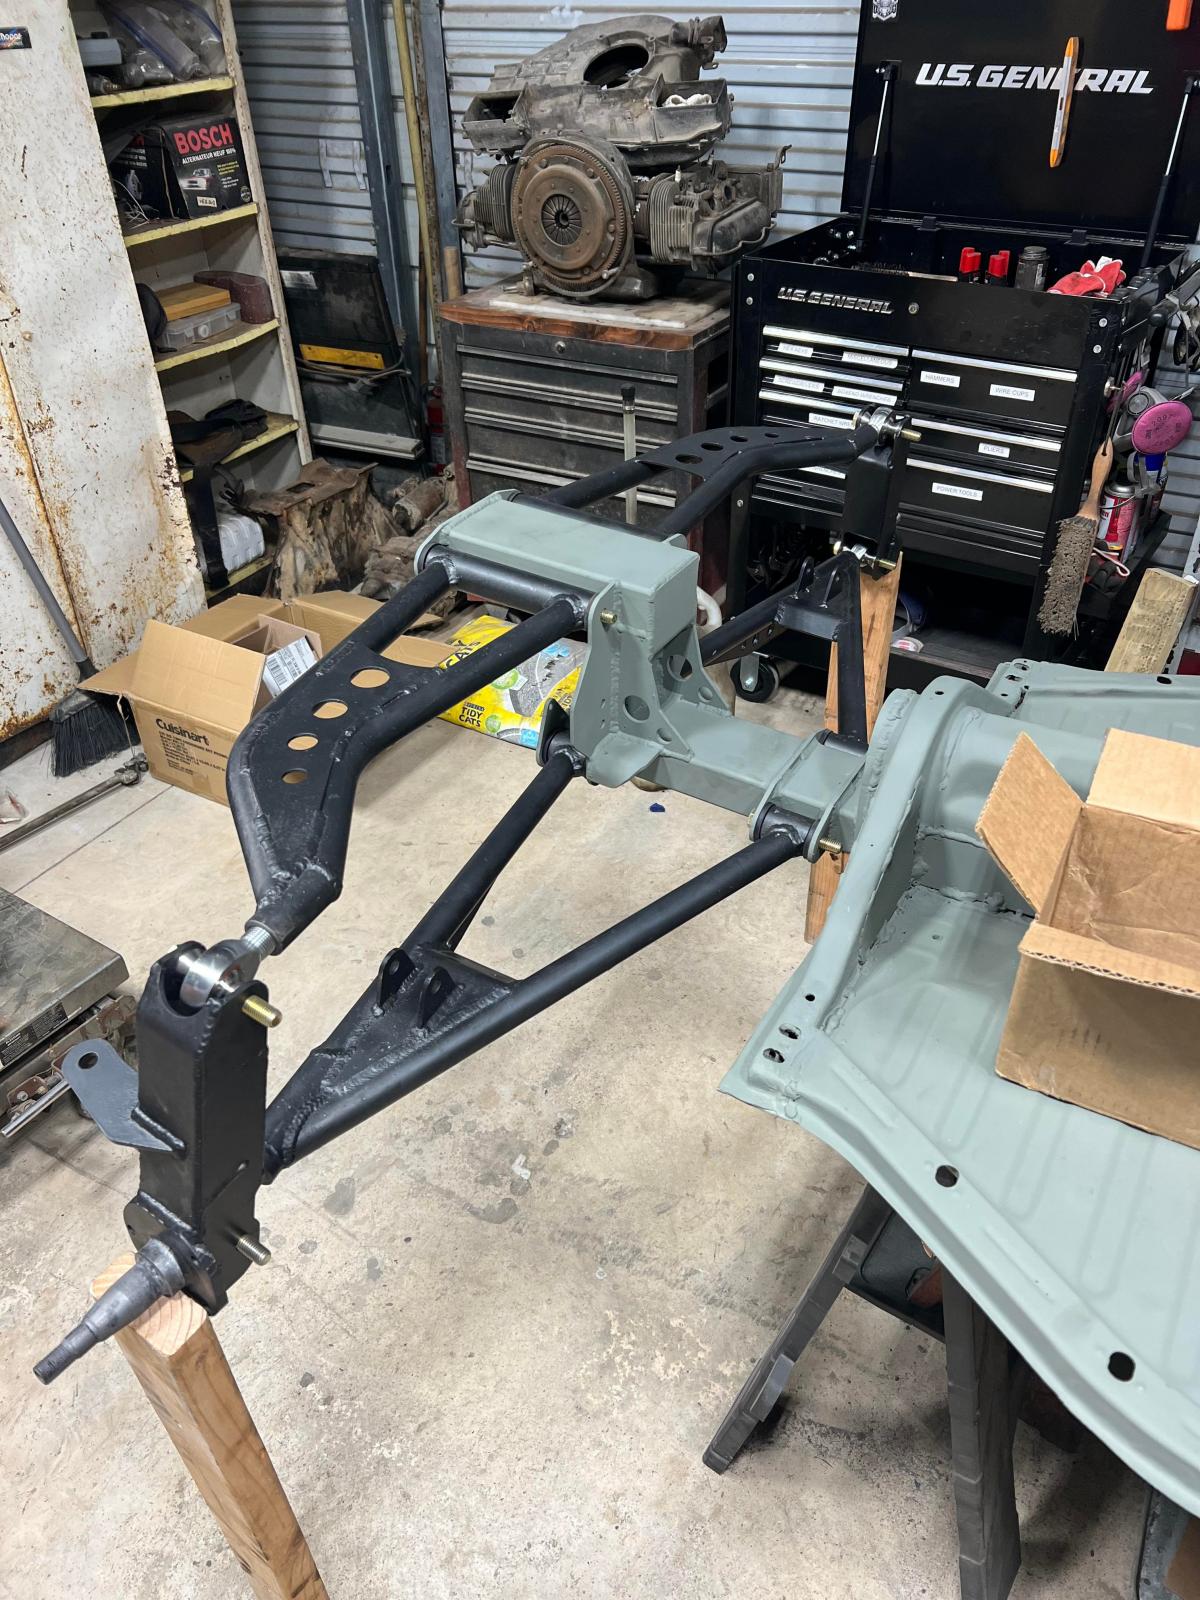
I debated long and hard between a long travel beam setup and A-arms. I eventually decided to go with the Nichols Fab A-Arm kit. Im also going 3x3 in the rear. Im also going to be upgrading to a 094 side shift 6 rib and Subaru EJ22.

So here is the current progress. Its been about 4 weeks since I brought the baja into the shop.

Here is what she looked like when I bought it back in 2006 in Long Beach California.

Image

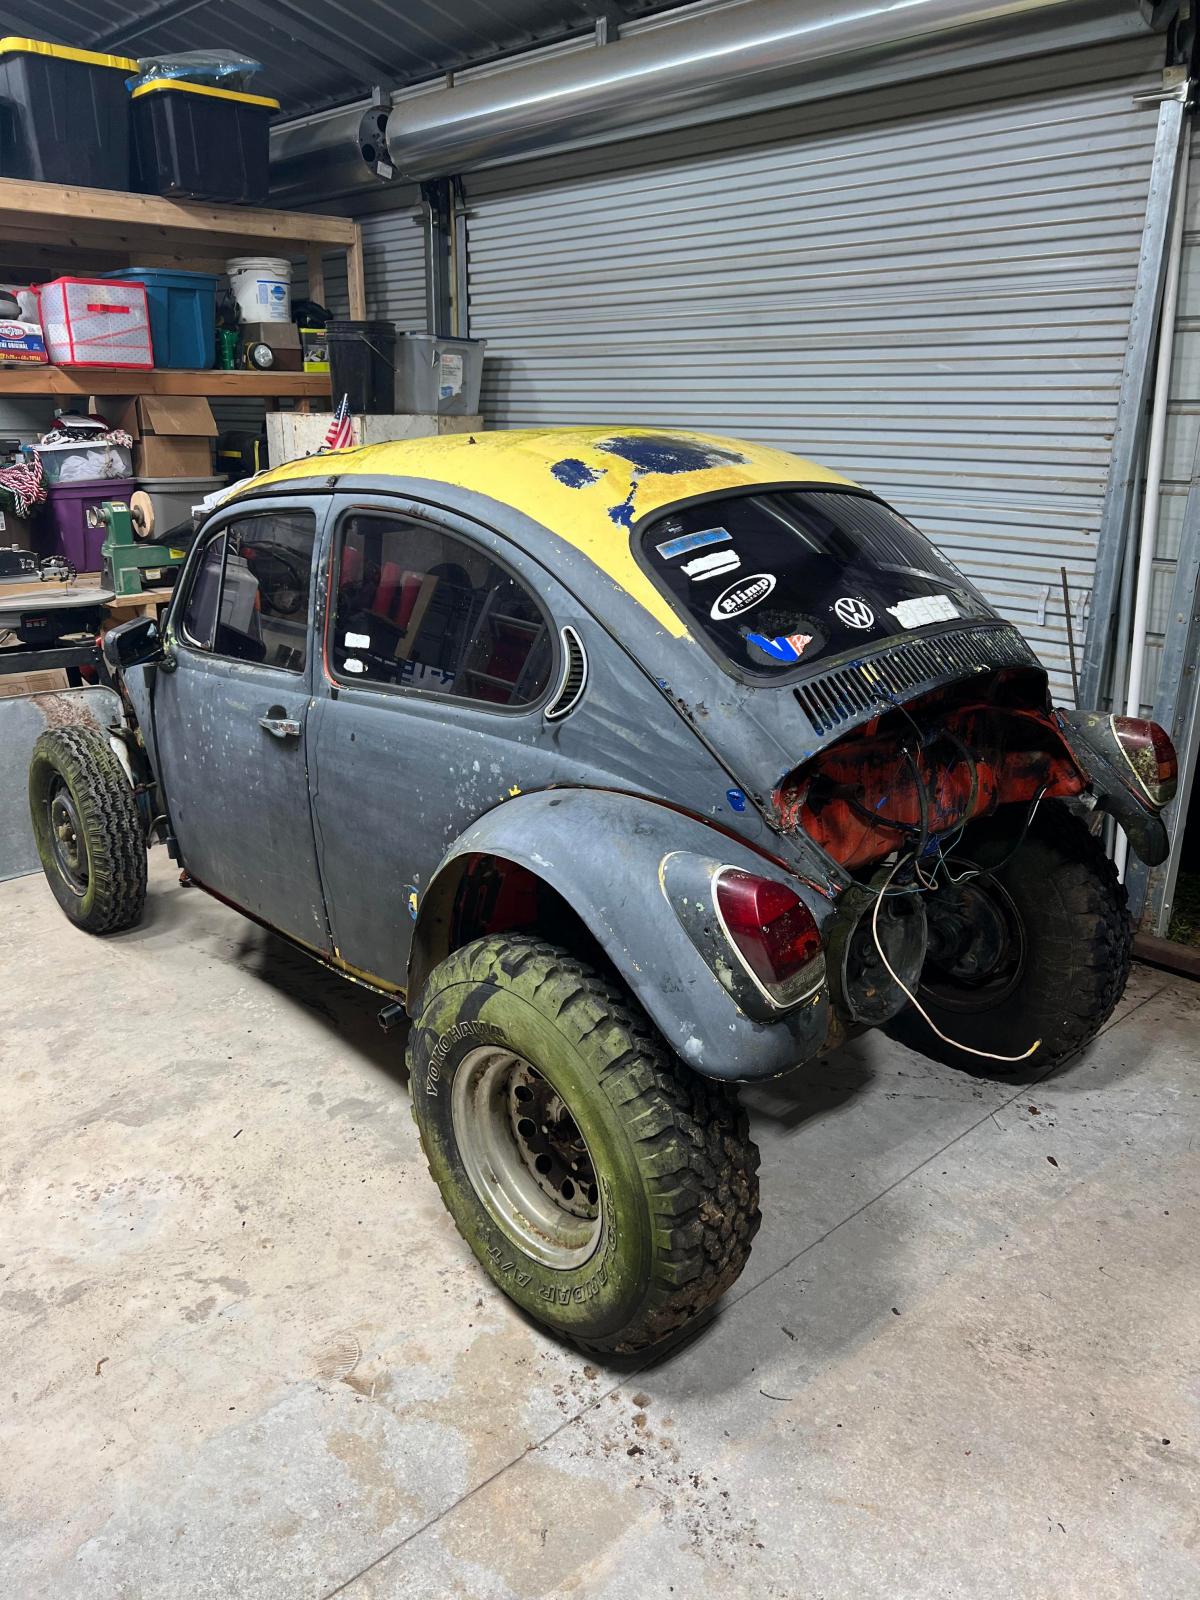
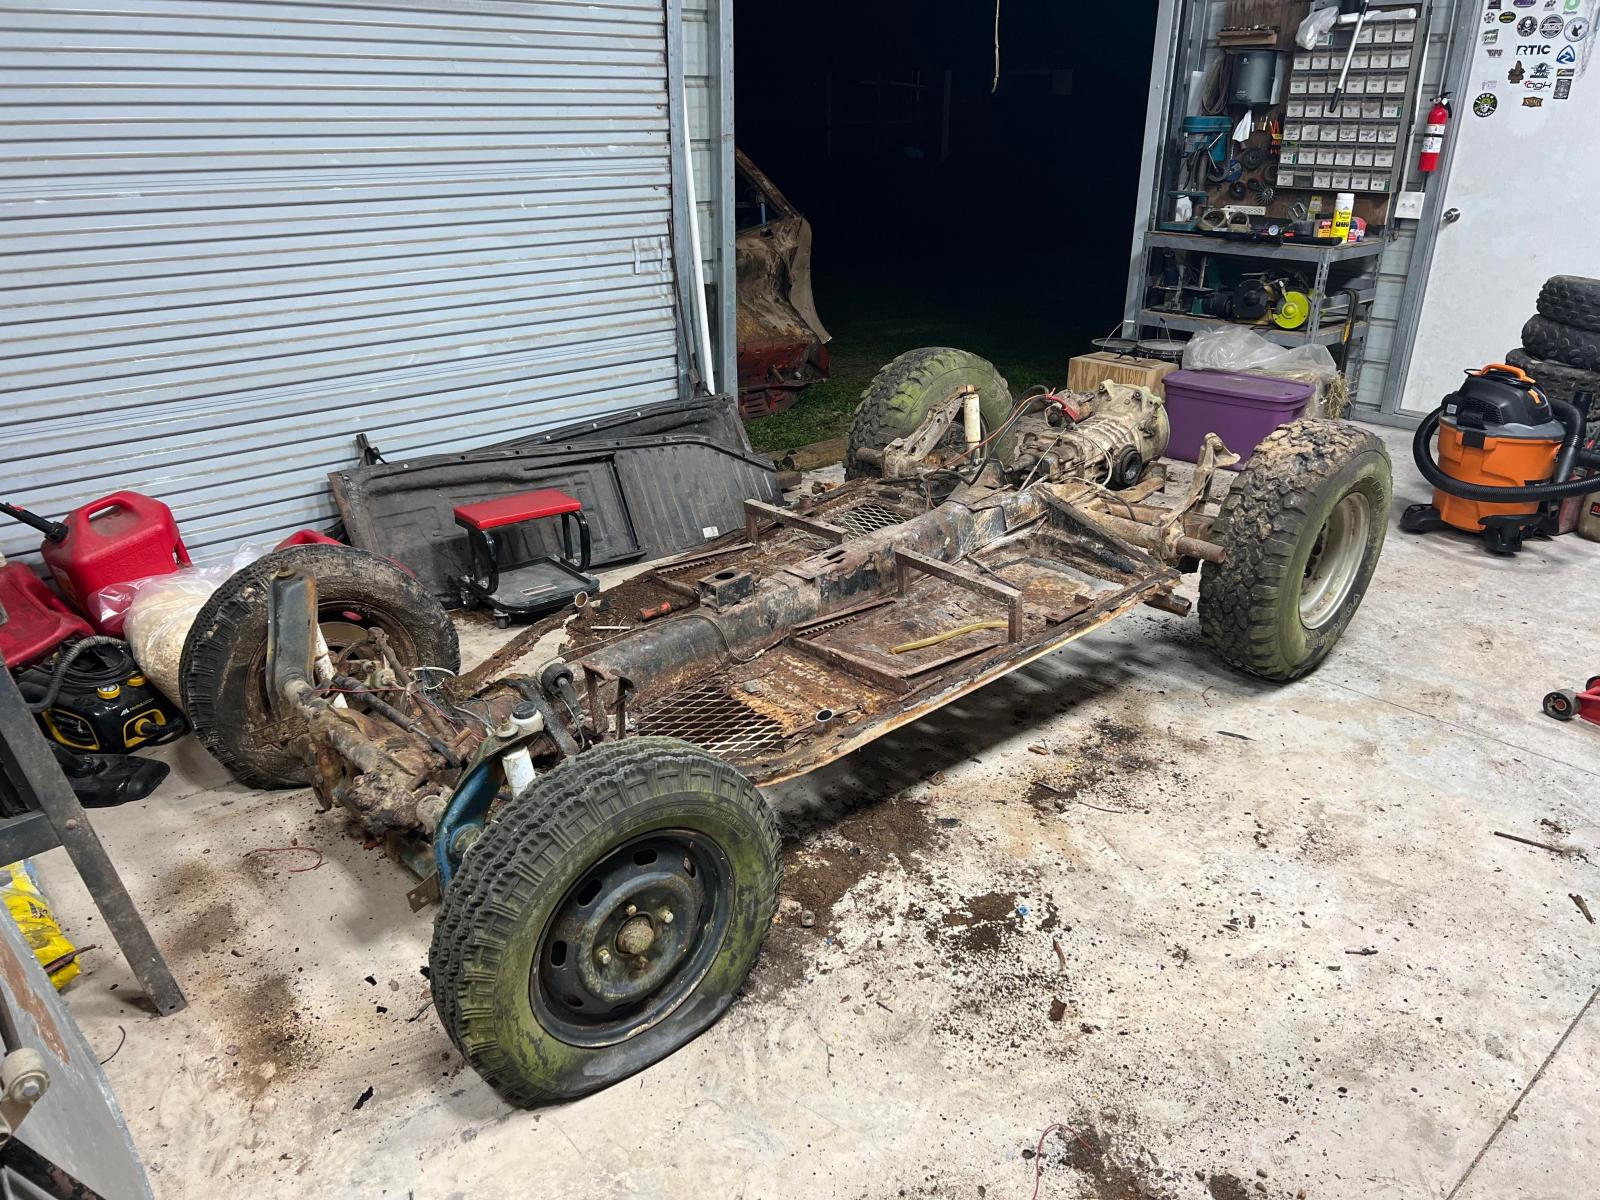
And after thrashing on it for years, then sitting for the last 11...This is what she looked like when I pulled her into the shop.

Image
Image

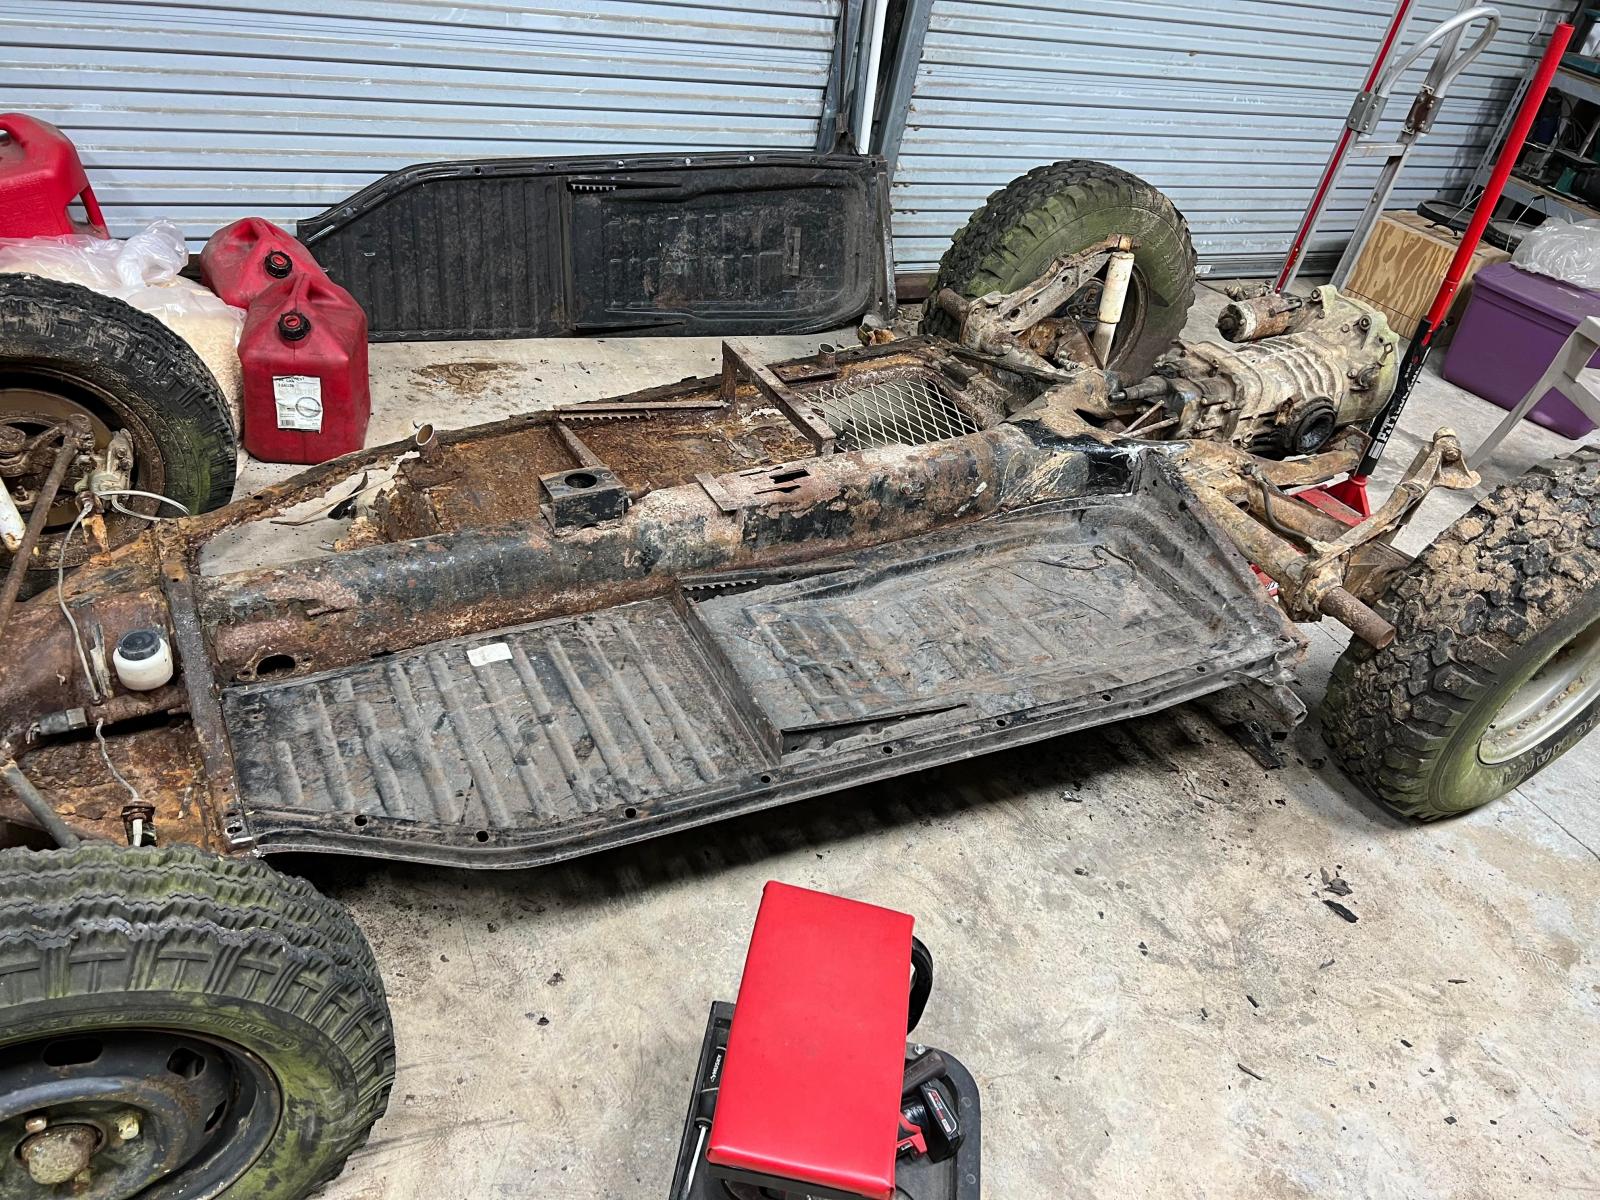
I started by cutting off the rotting body. Im keeping it for now to harvest some sheet metal from it to patch up the "new" body.

Image
Image

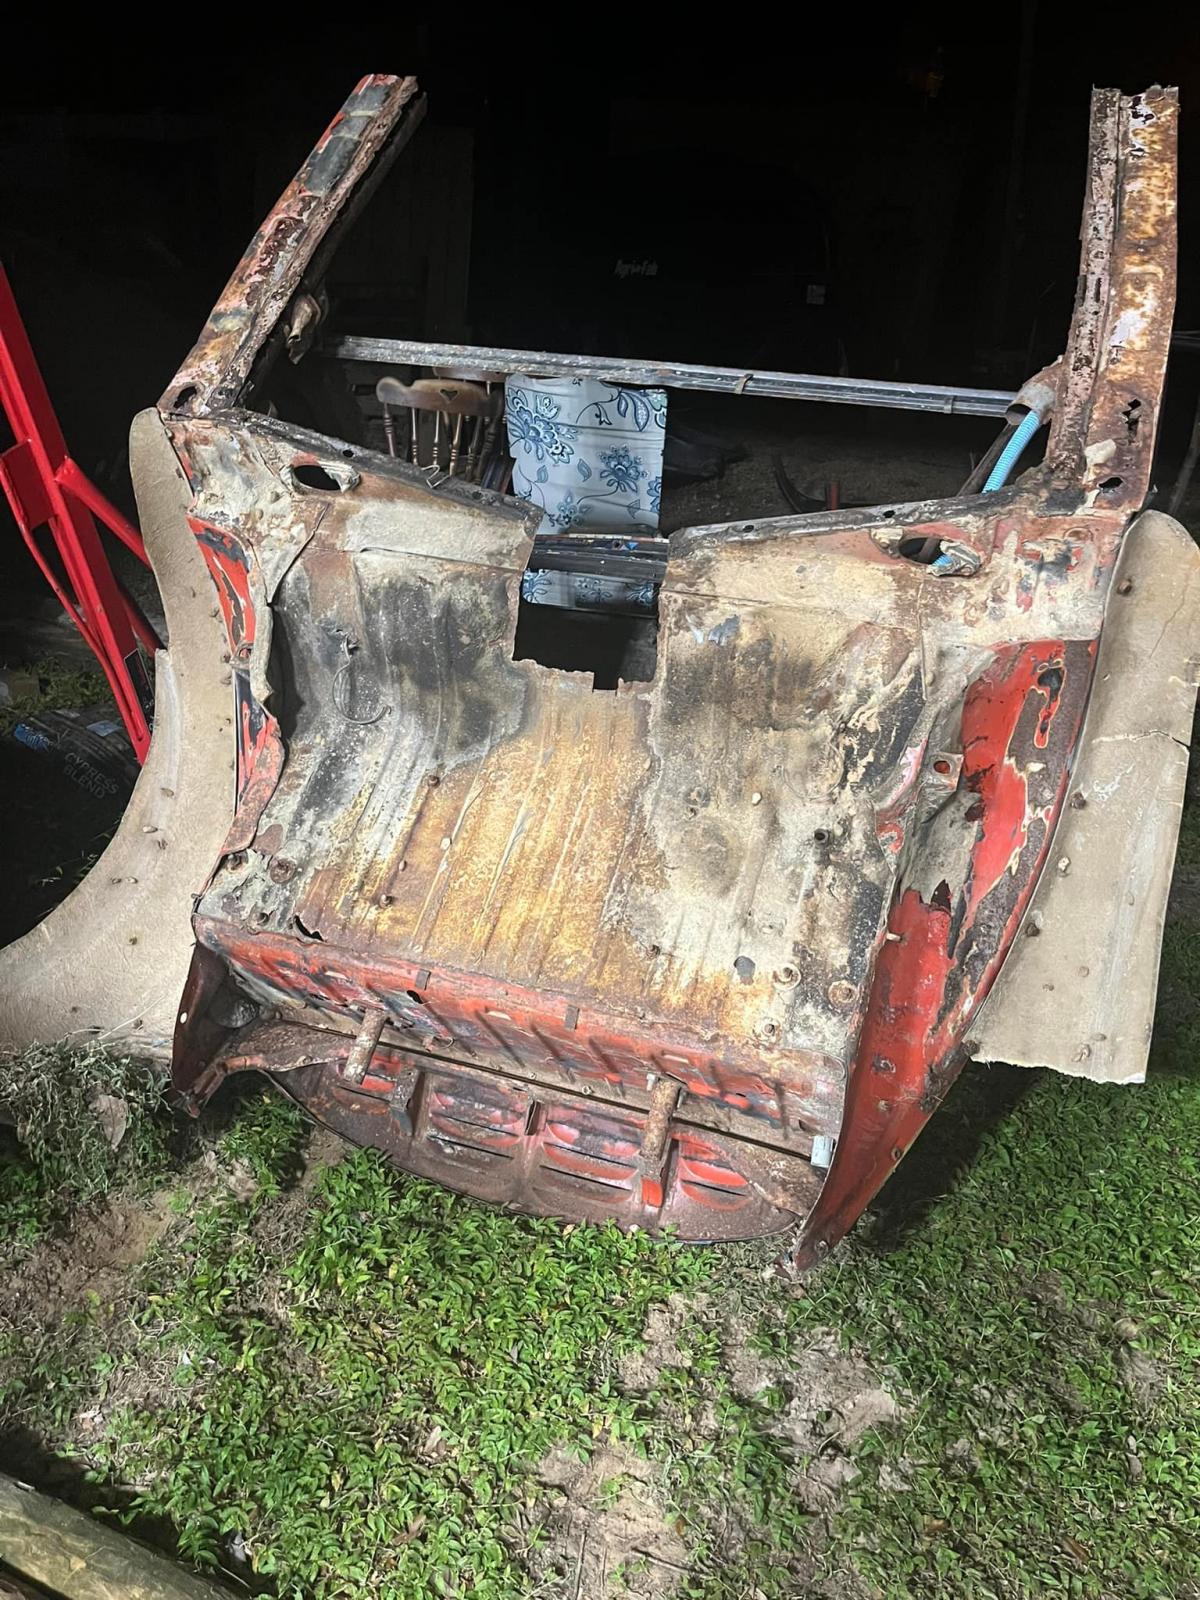
As you can see...the pans were in really rough shape. They were already falling apart when I bought it...but didnt have the place or means to fix them. So expanded metal was the option at the time.

Image
Image

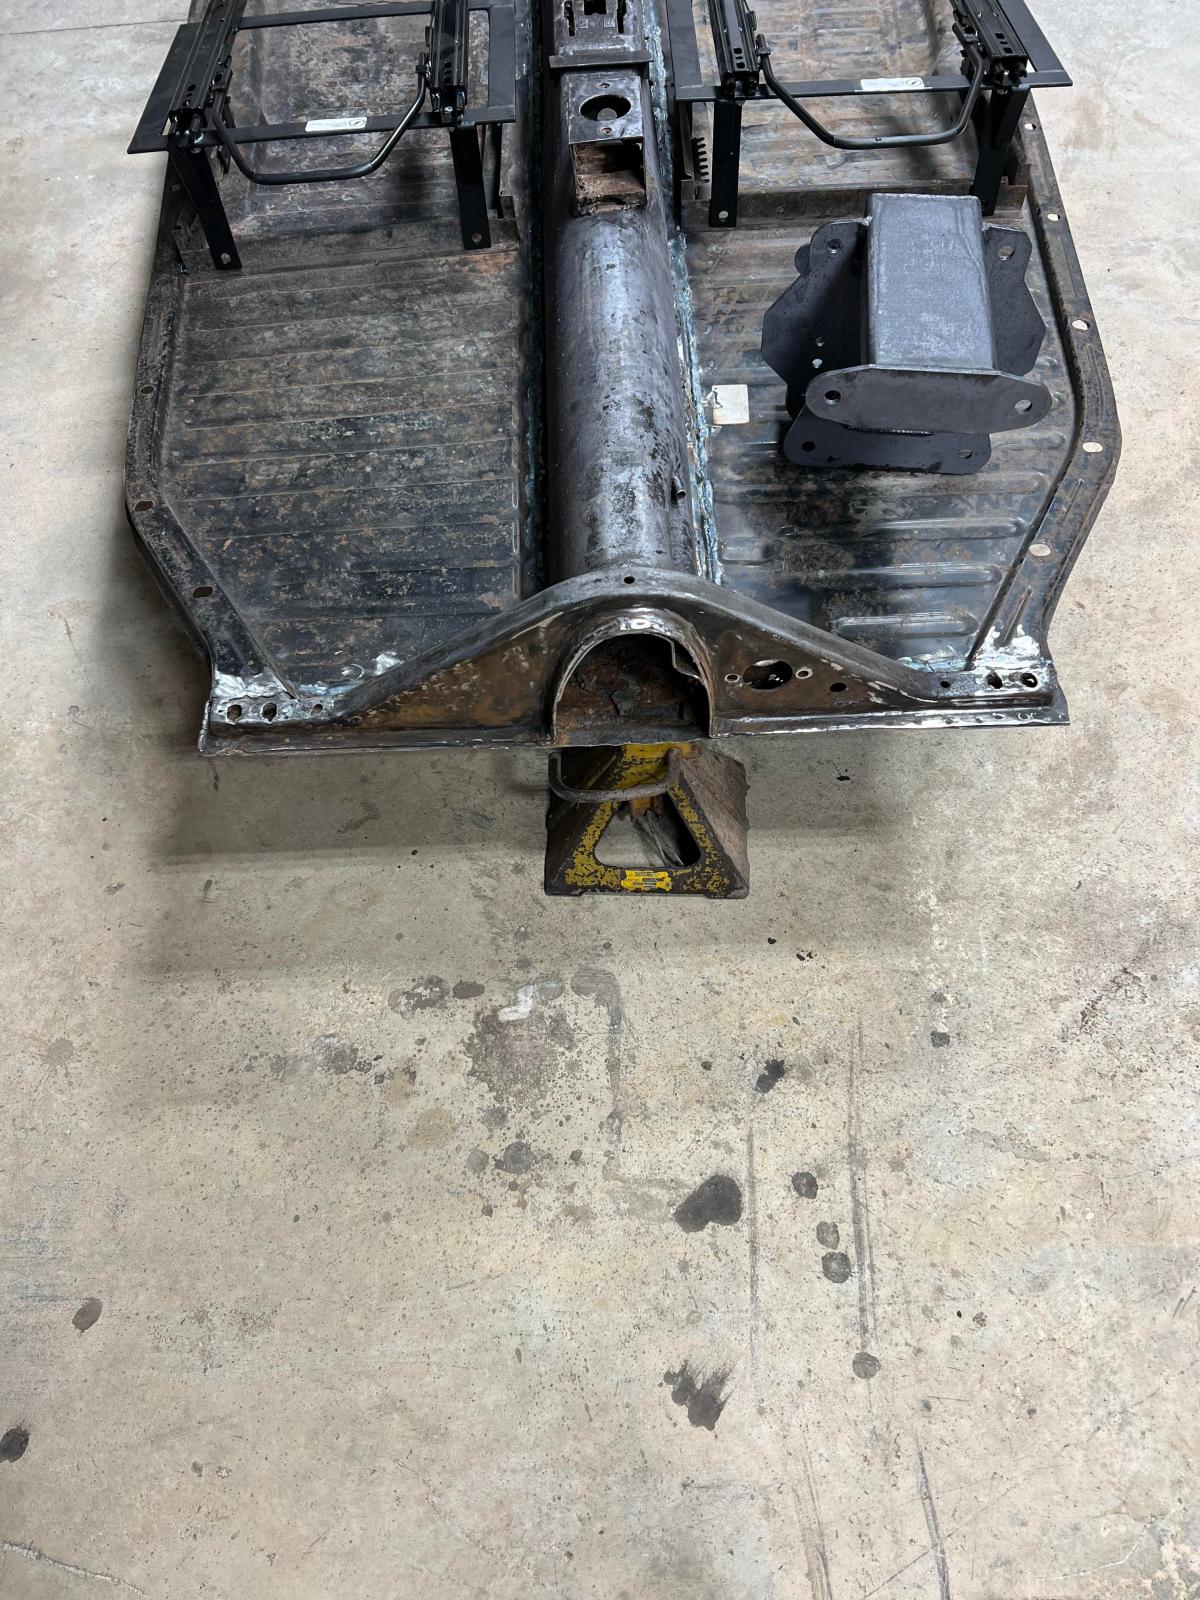
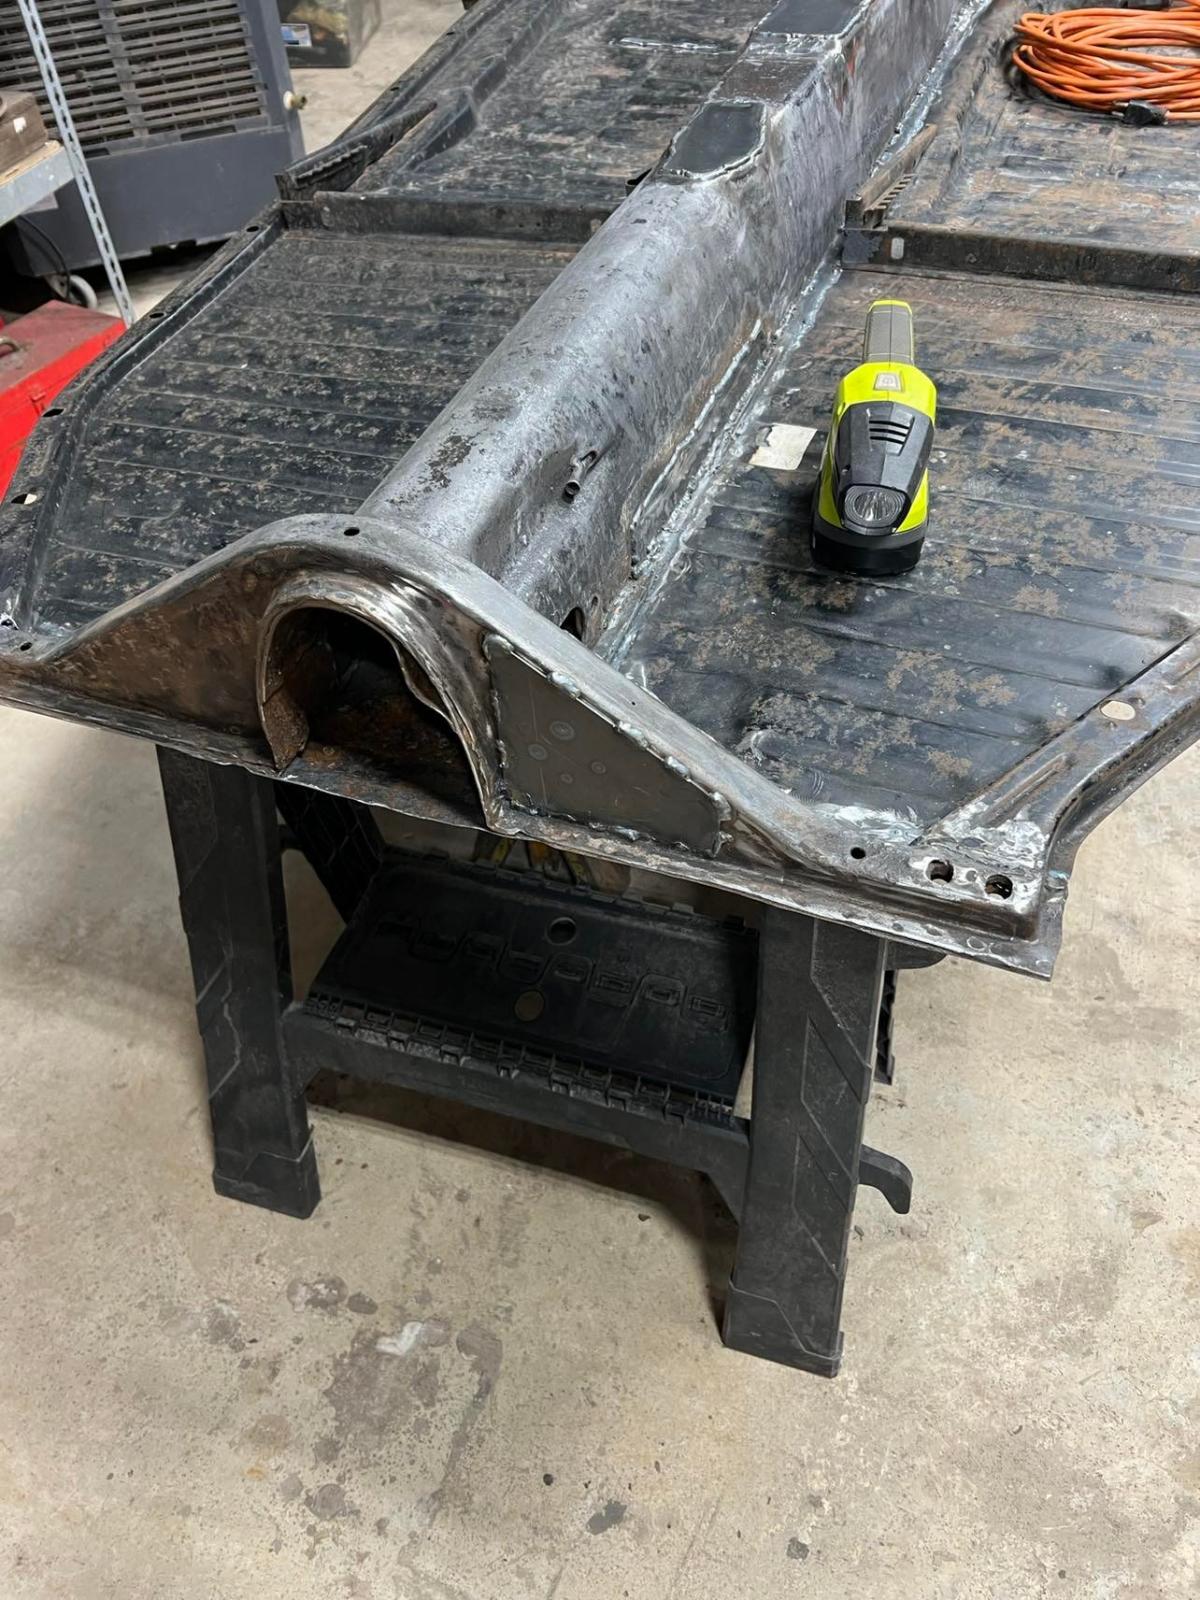
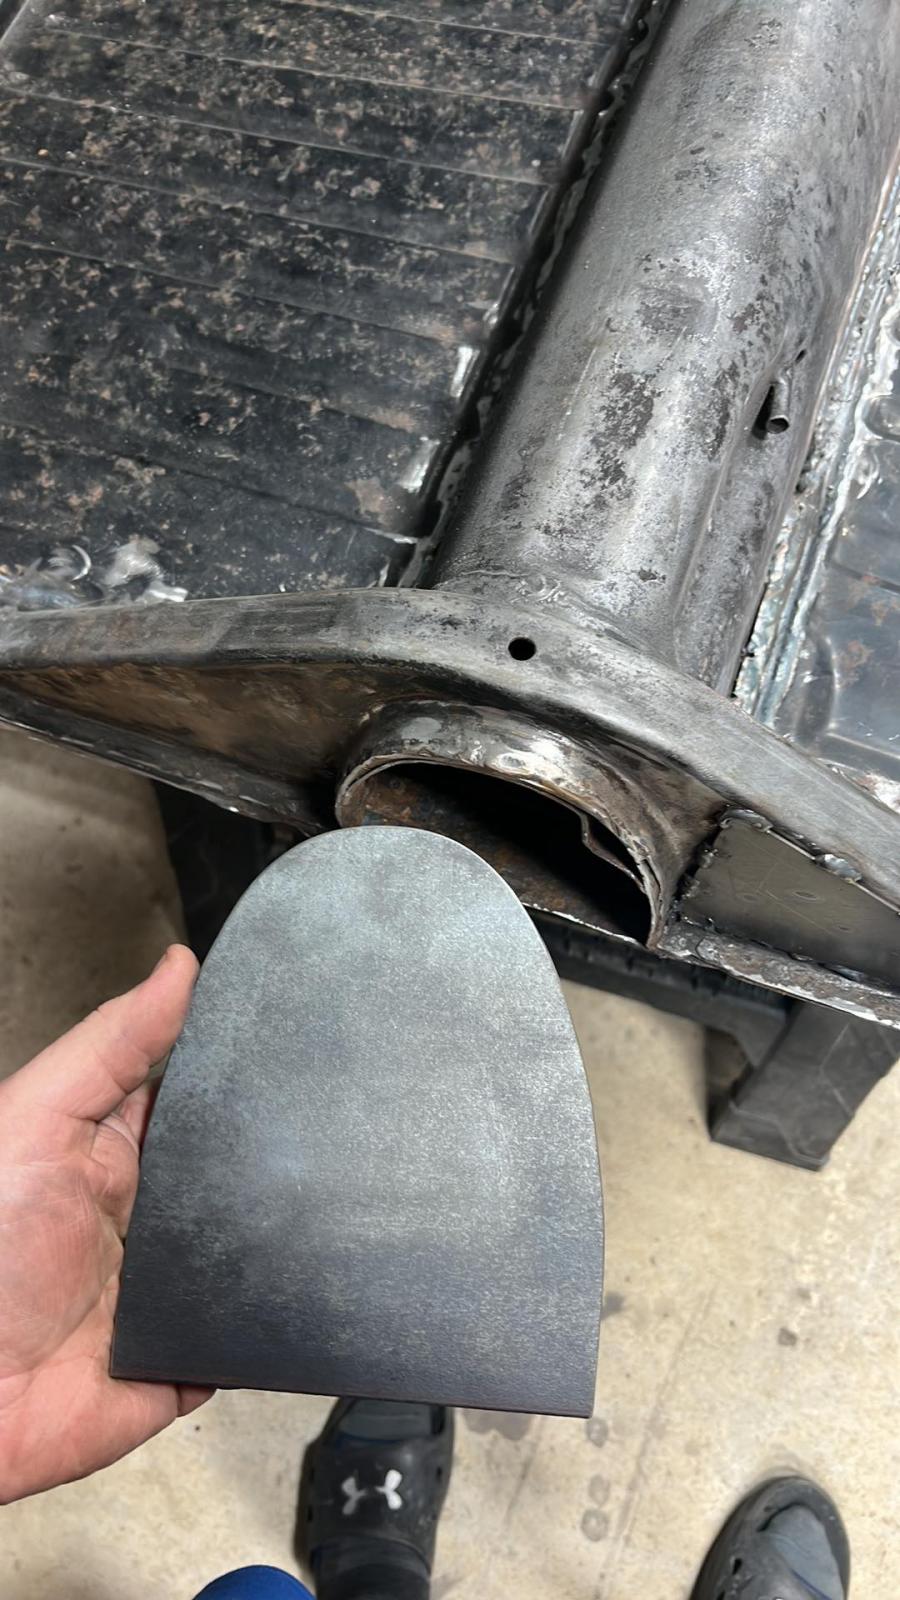
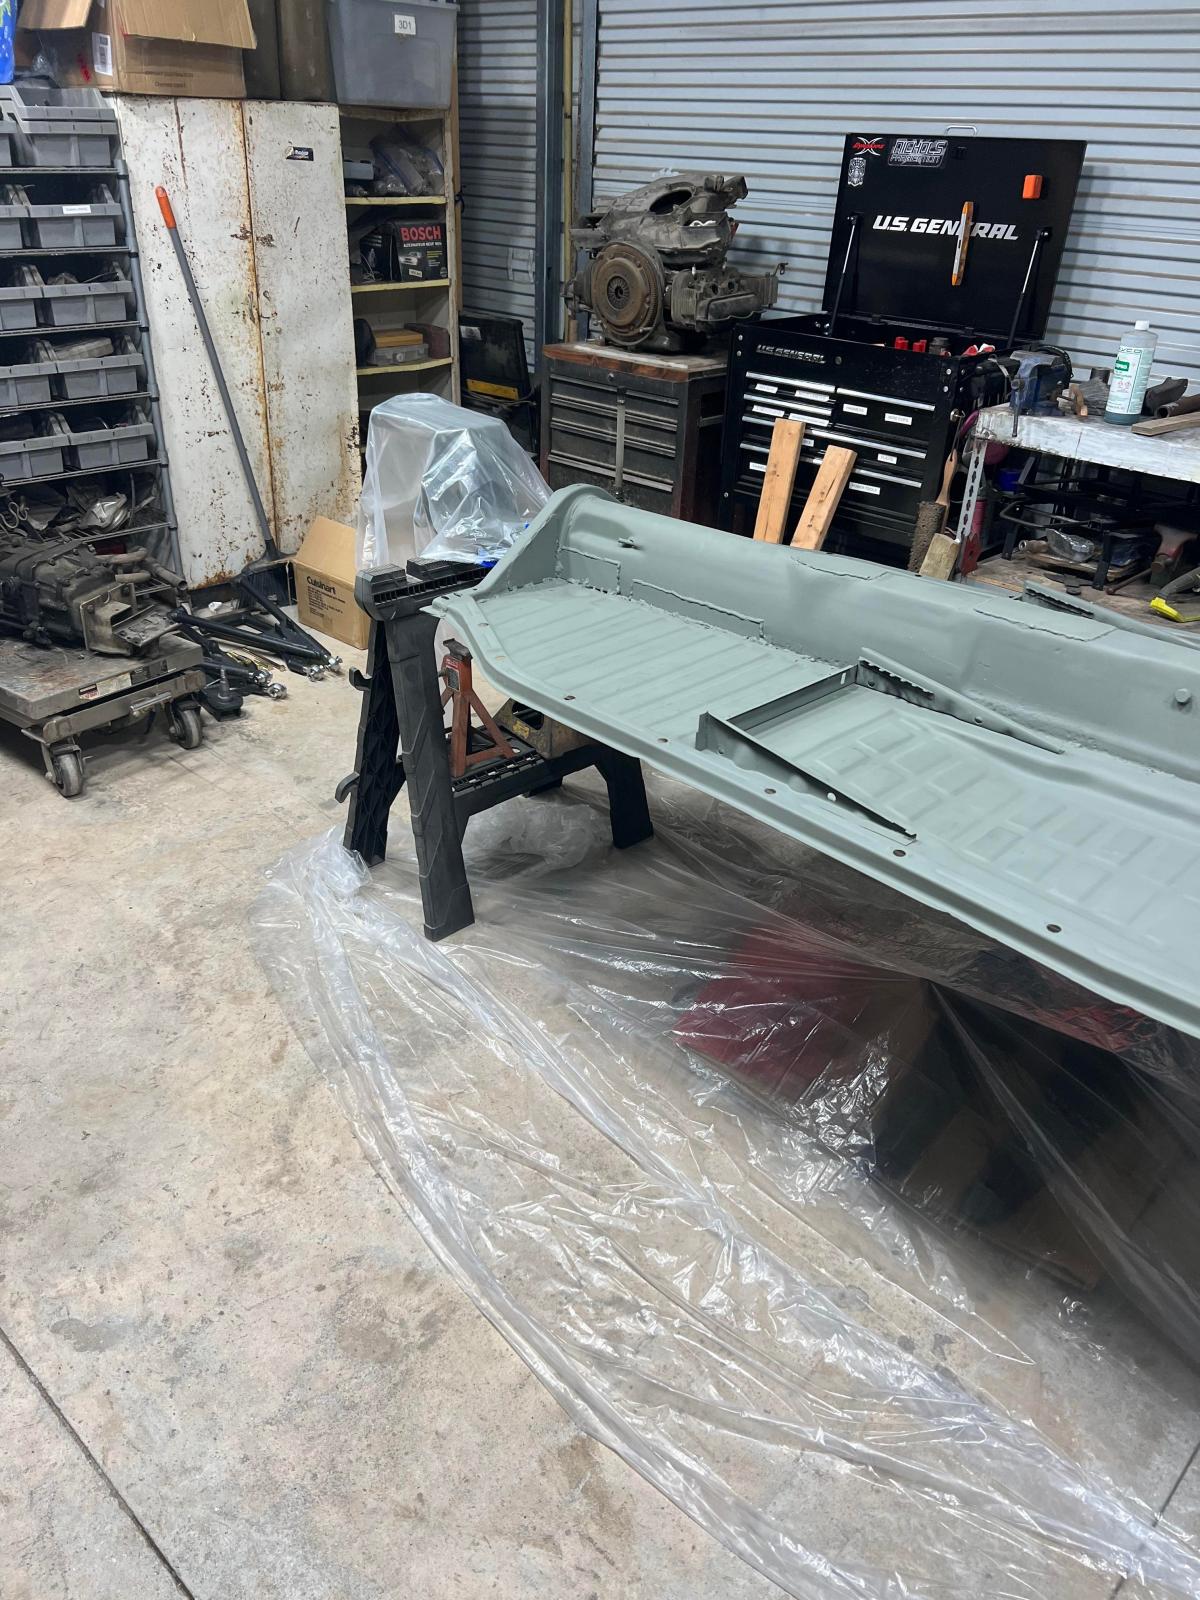
Now the body is off and the pans are coming out.

Image
Image
Image

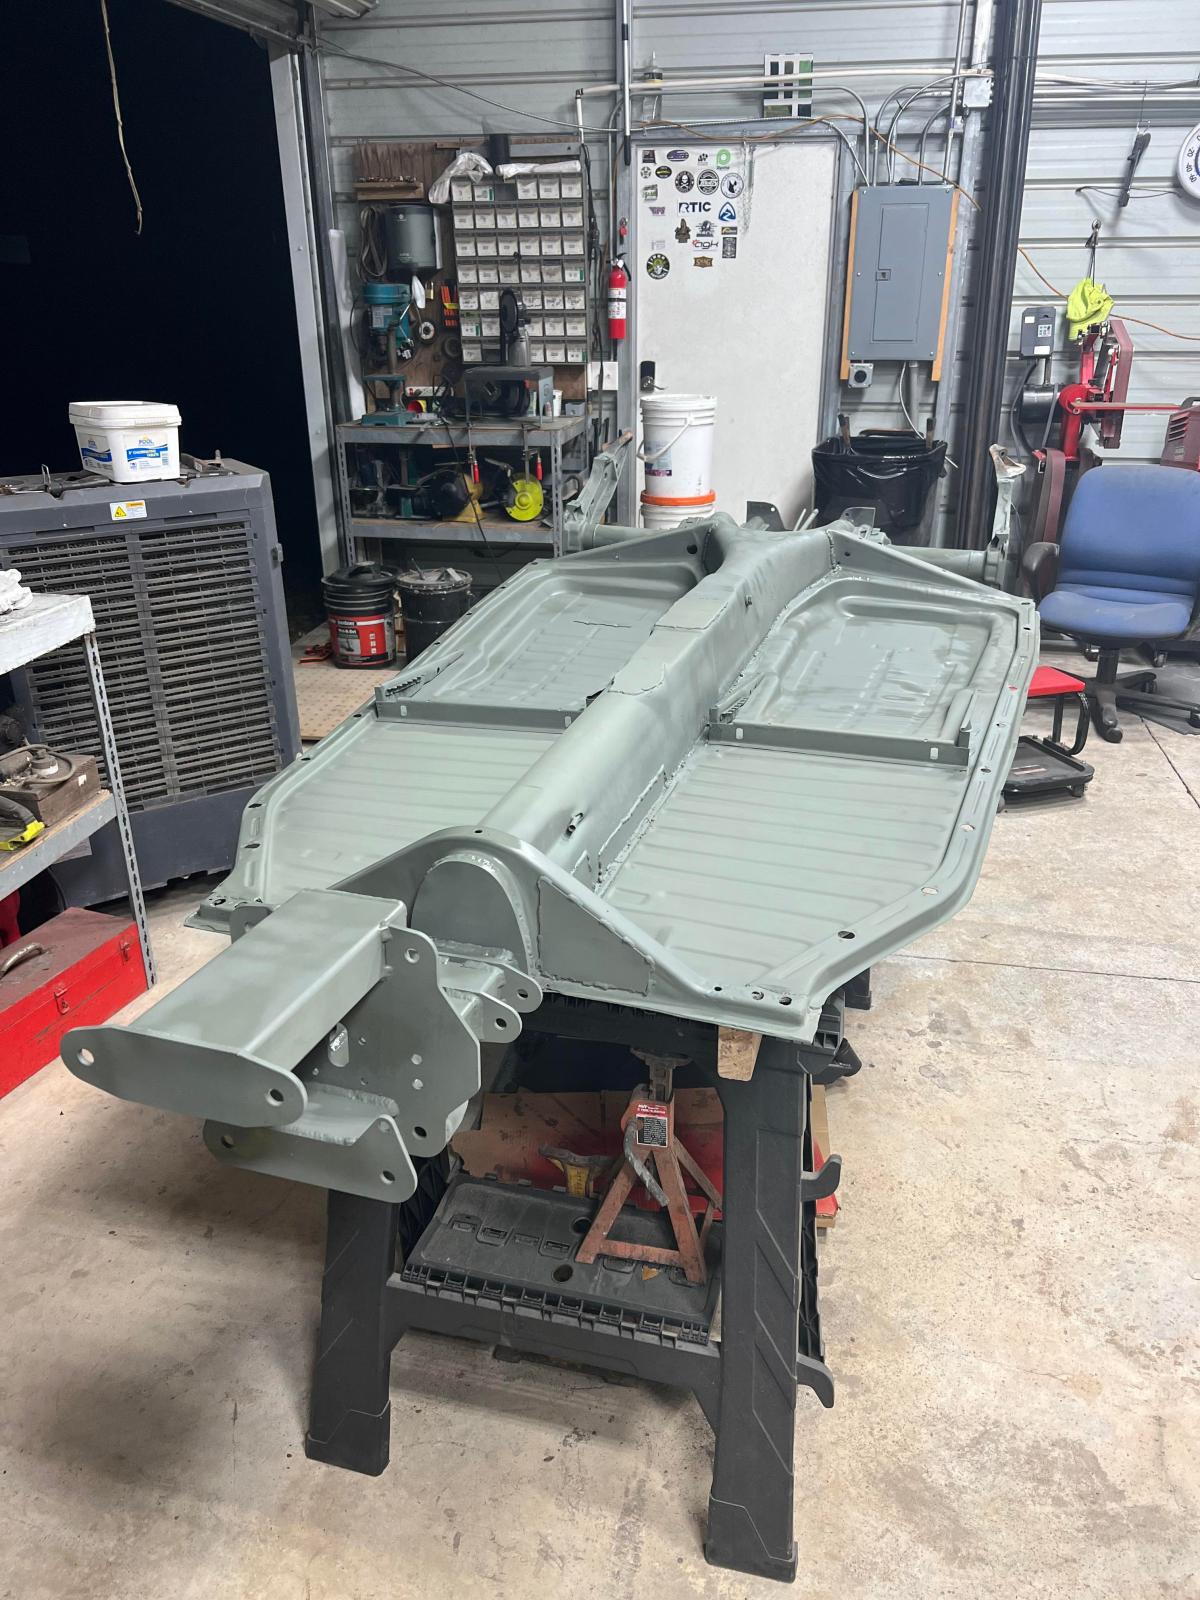
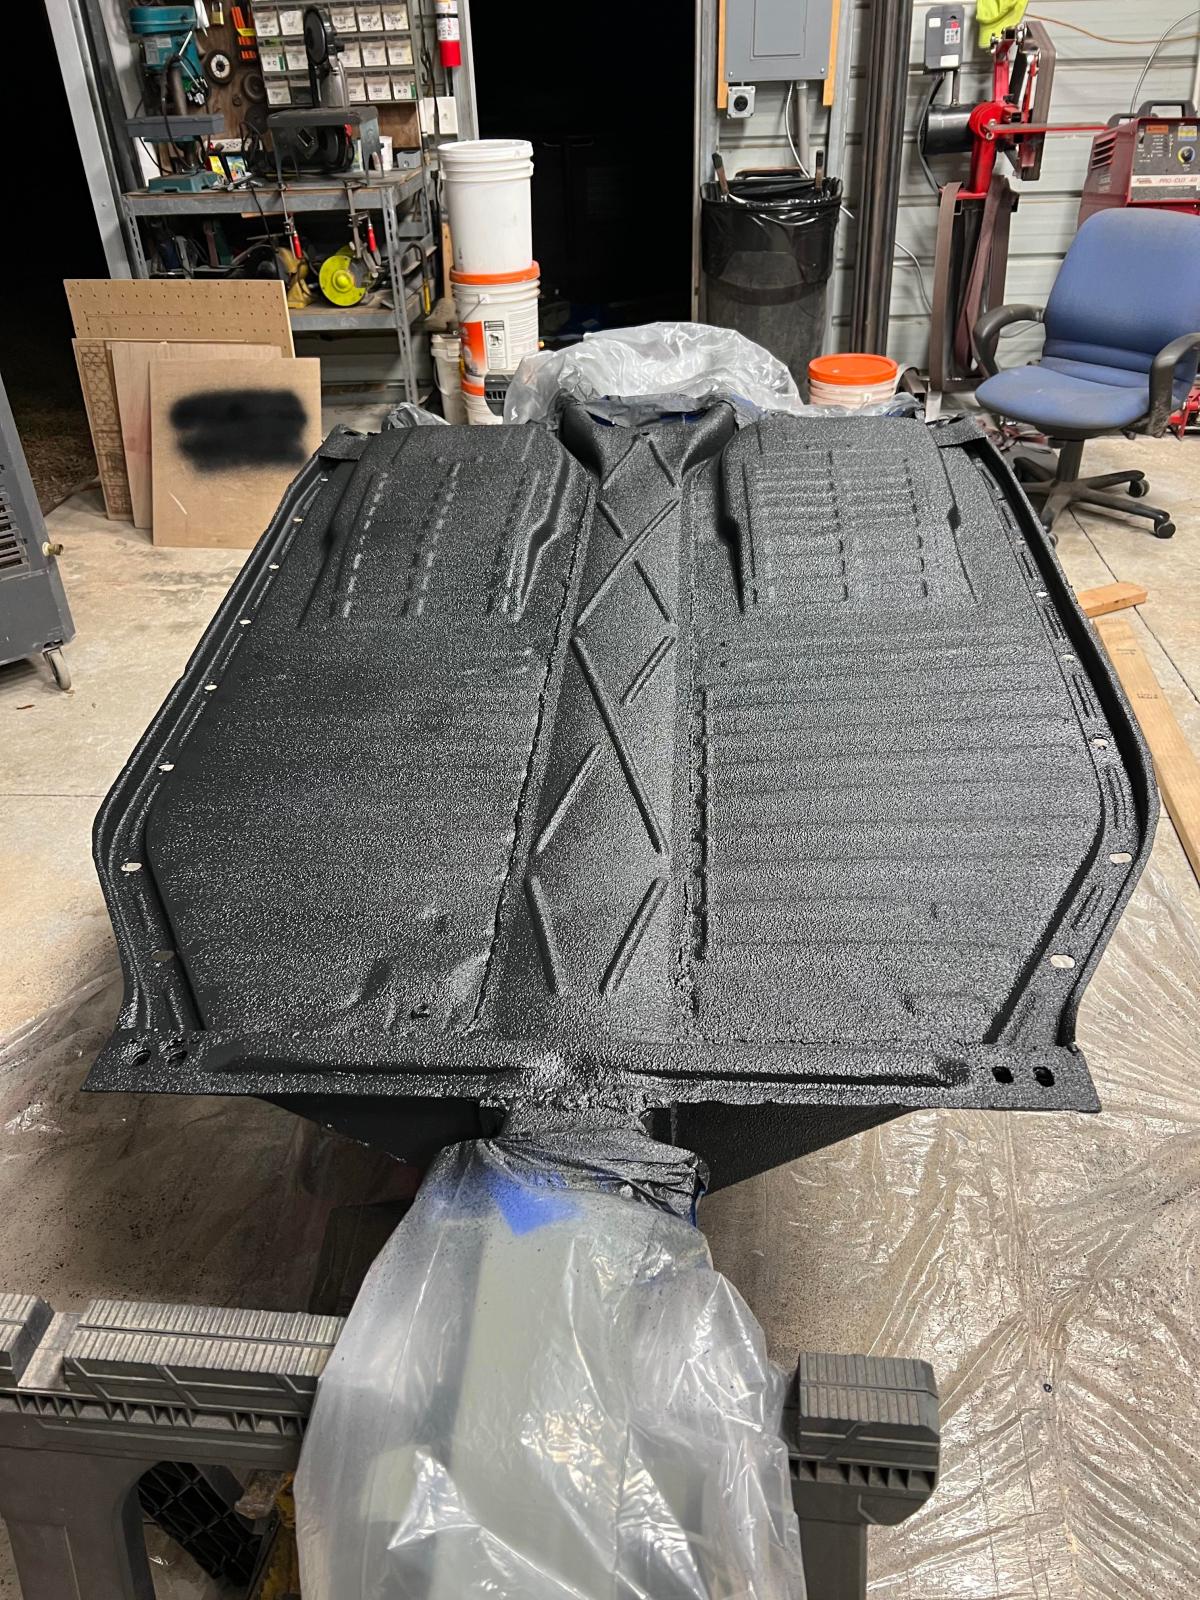
Dropped a new pan 1/2 in there. I bought these pans halves about 10 years ago.

Image
Image

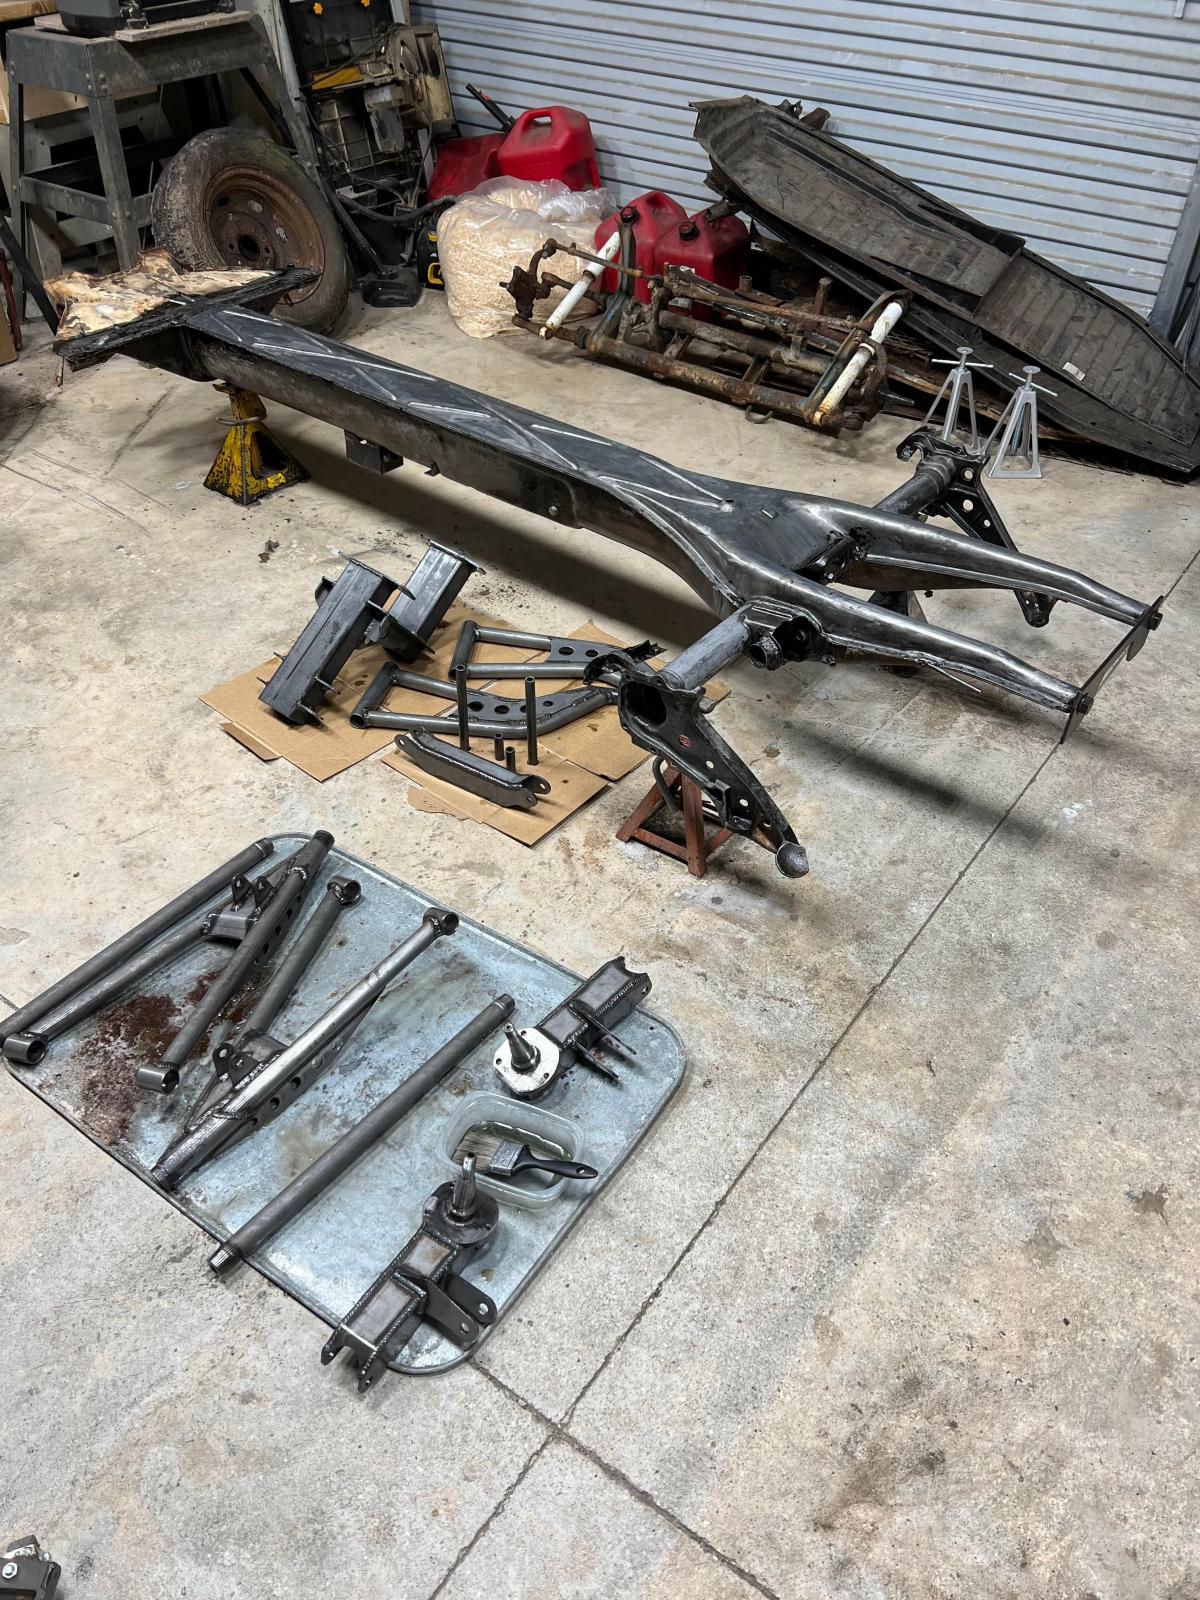
Now its on to stripping the entire frame to coat it in Ospho. Overall the frame is in really good shape.

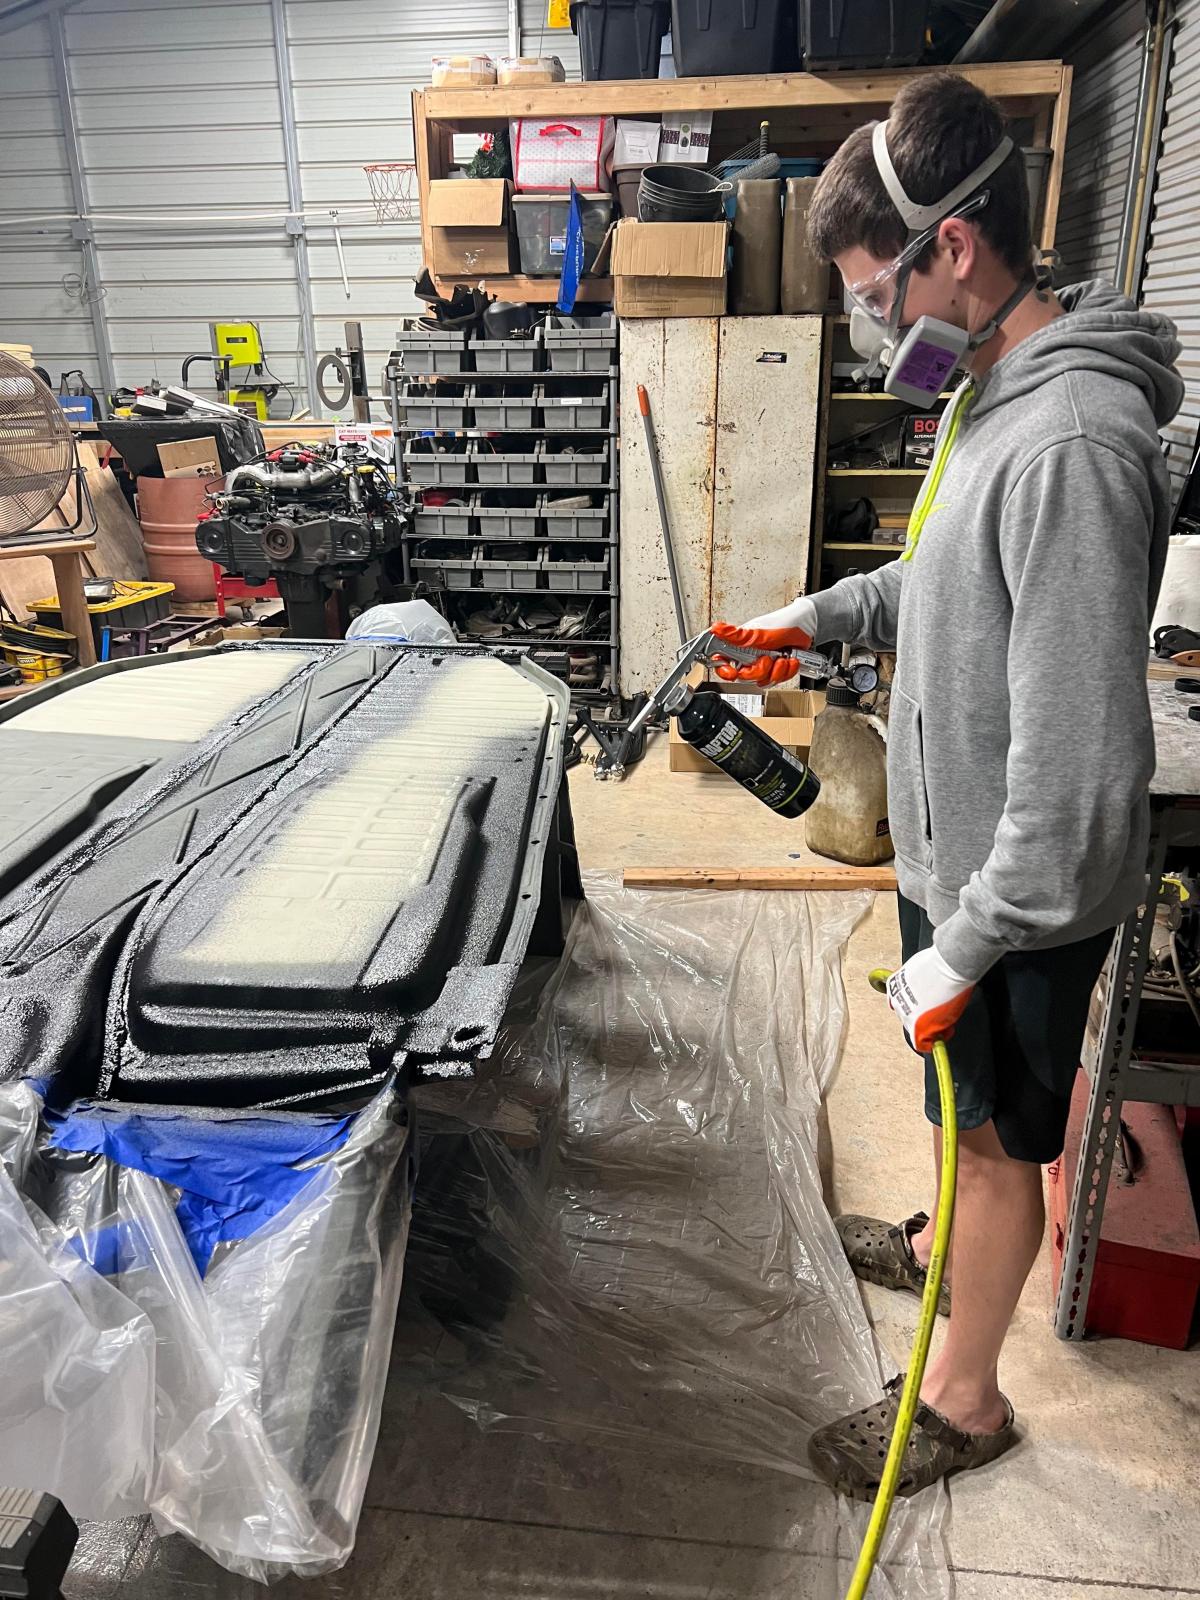
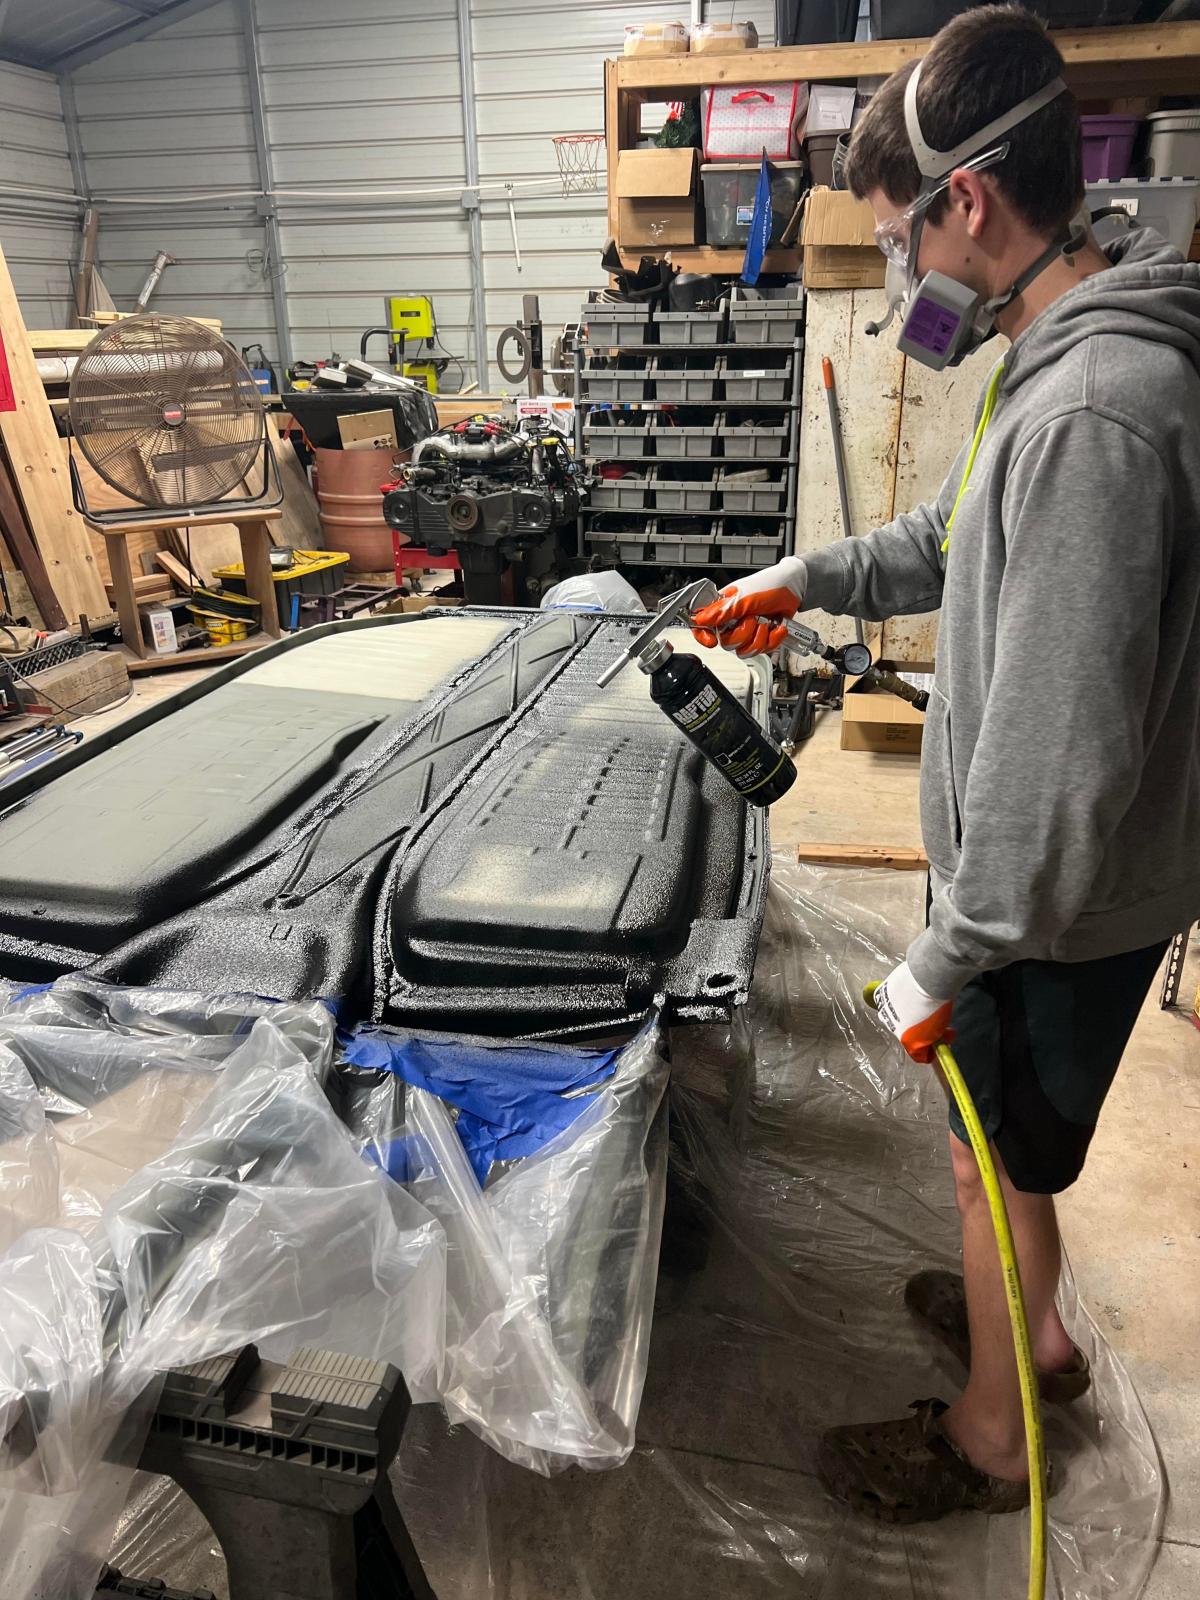
Here is my oldest son...who is now 20.
Image
Image
Image
Image

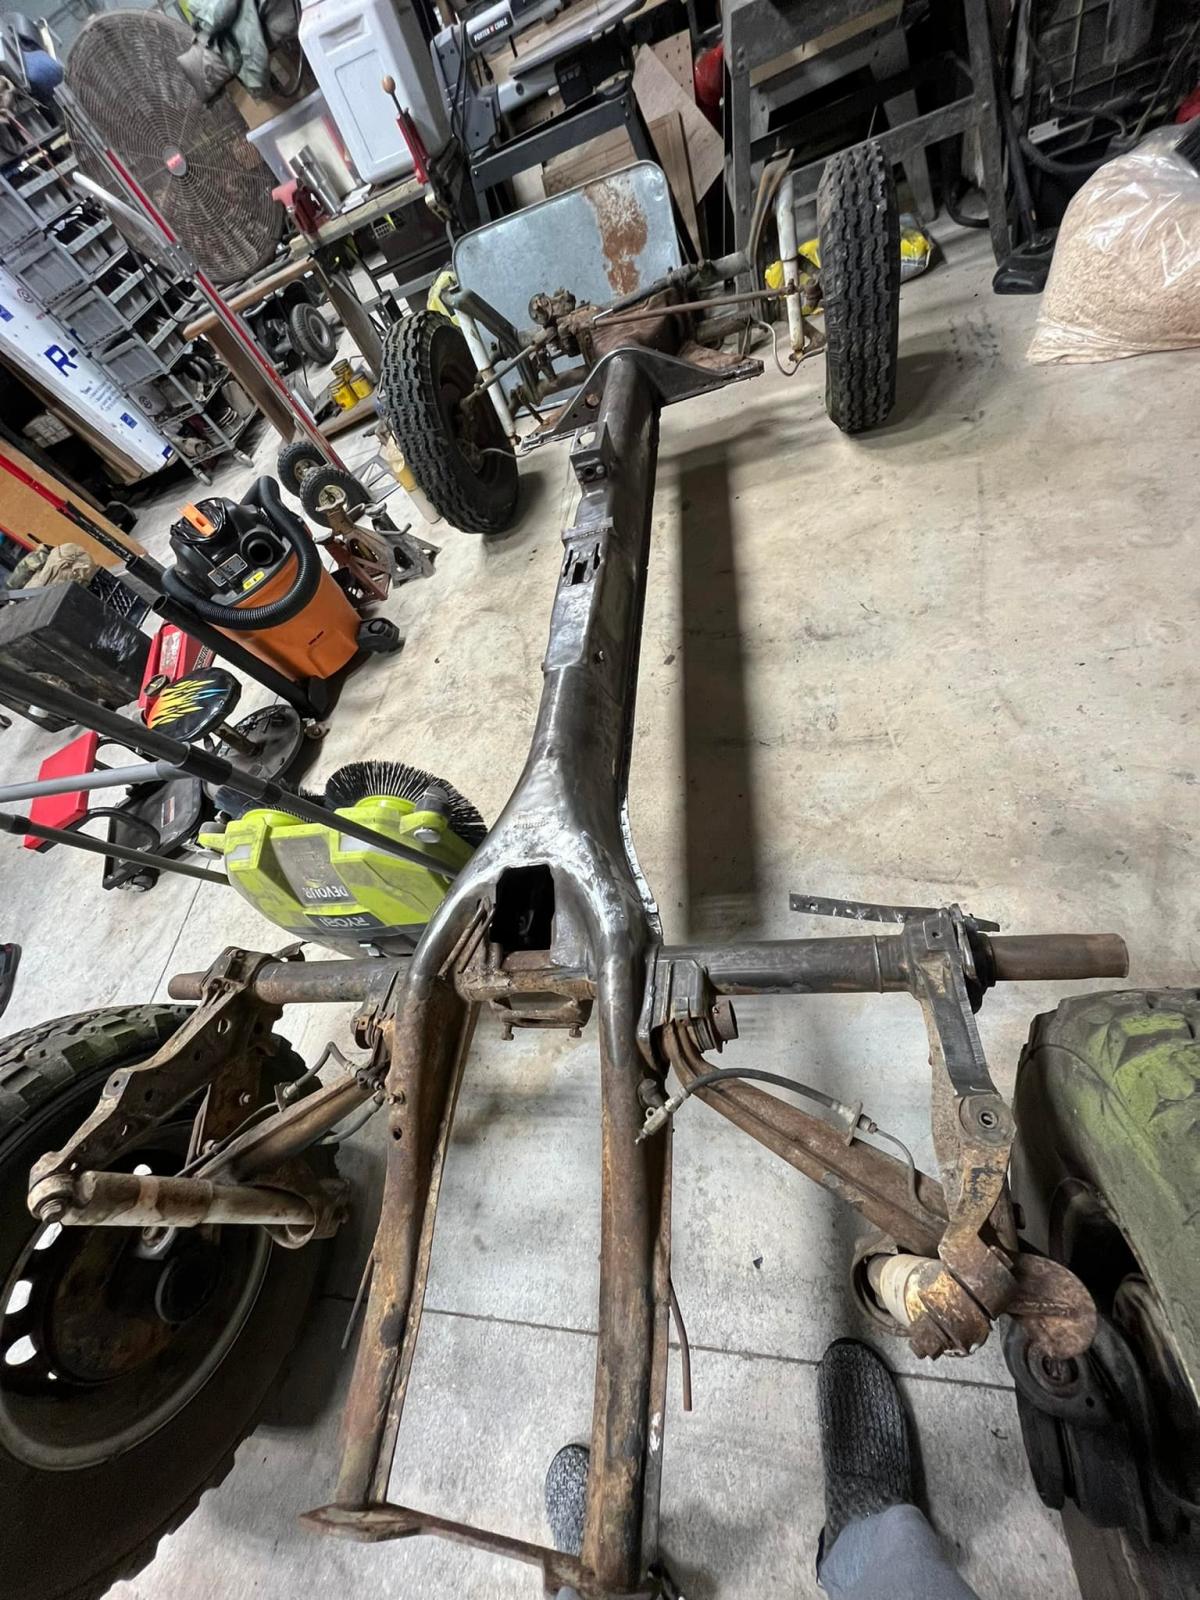
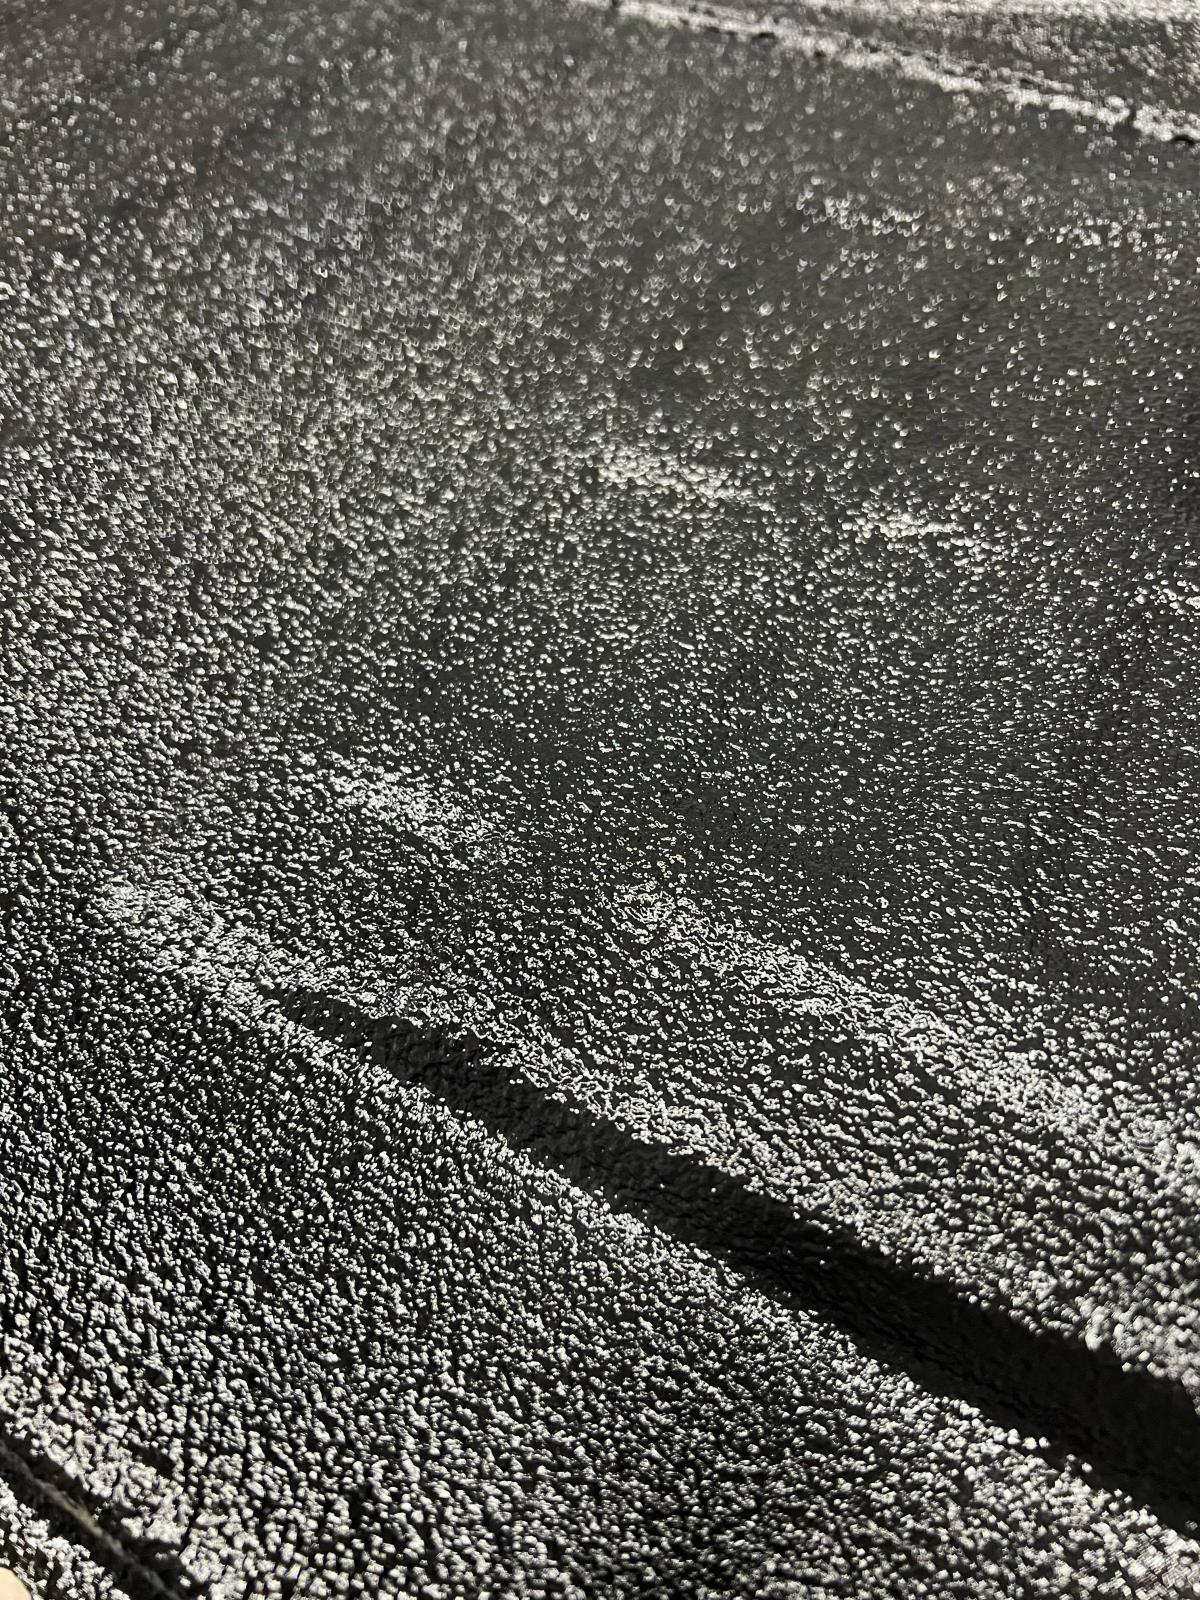
Ospho going on all the raw suspension parts and the bare frame.

Image

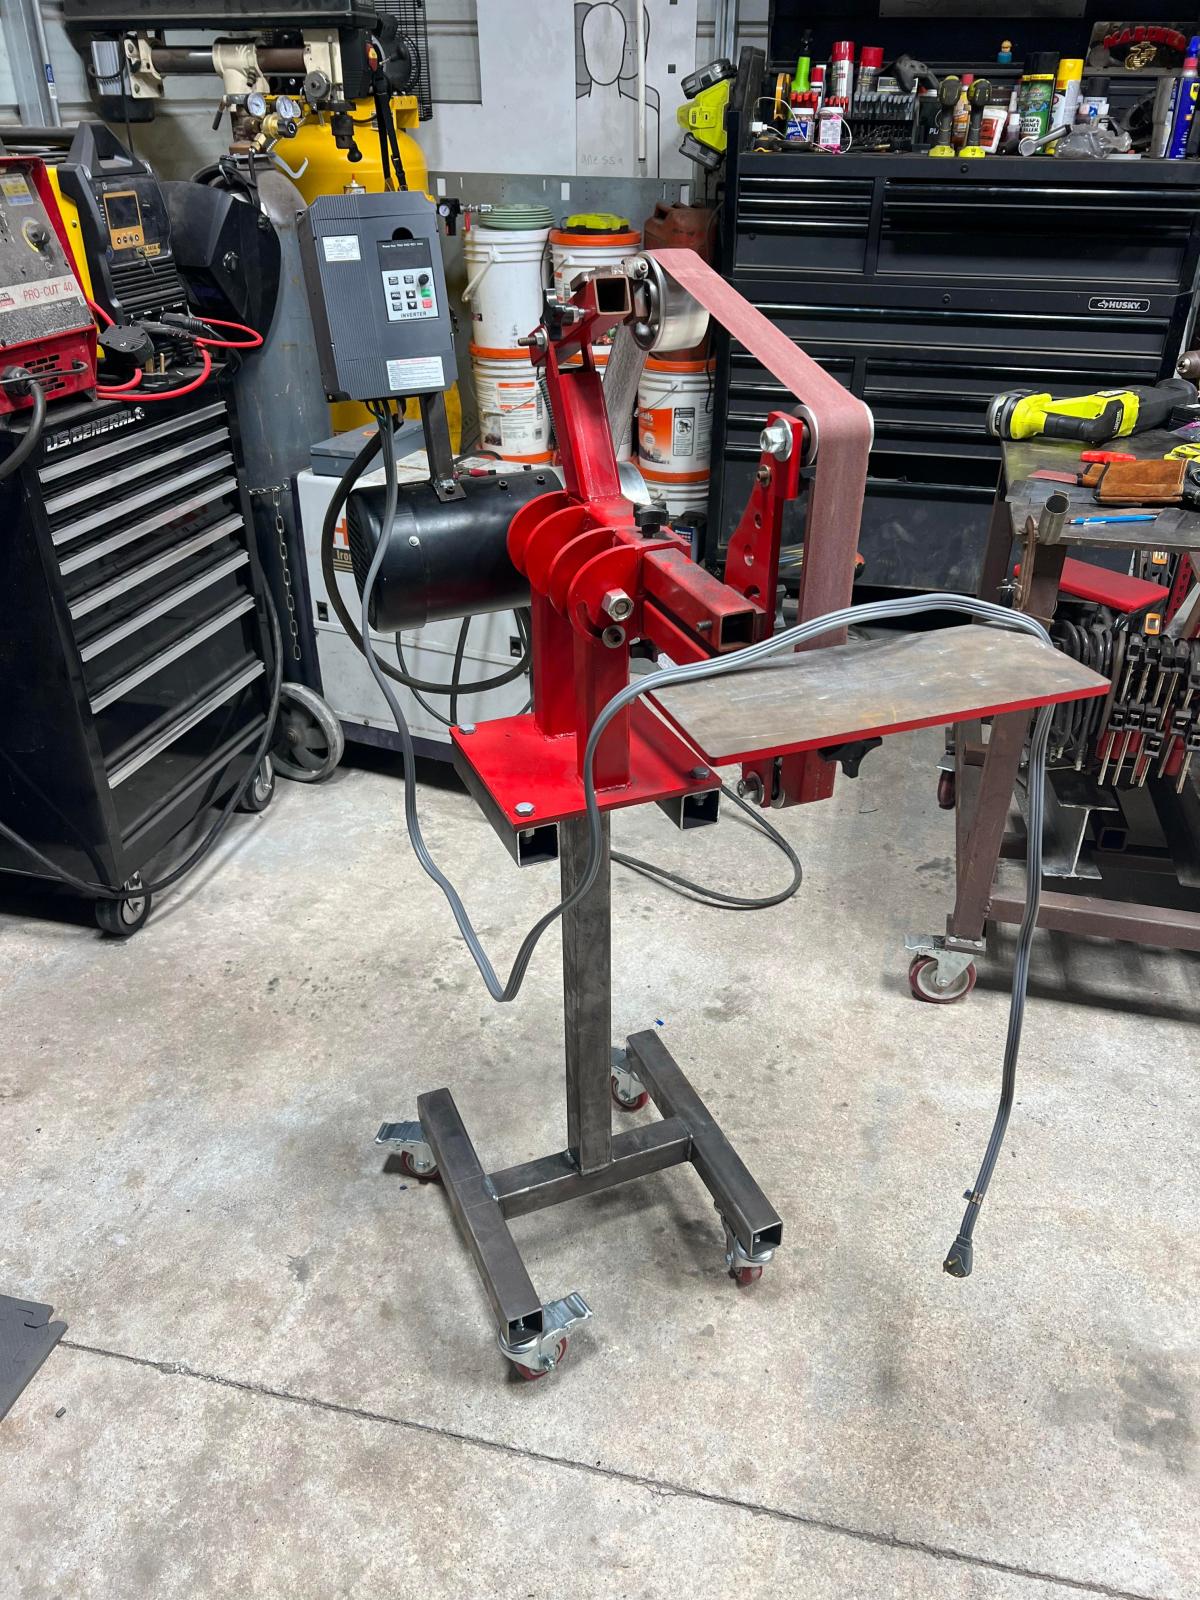
Finished building out my 2x72 belt grinder. Love this thing.
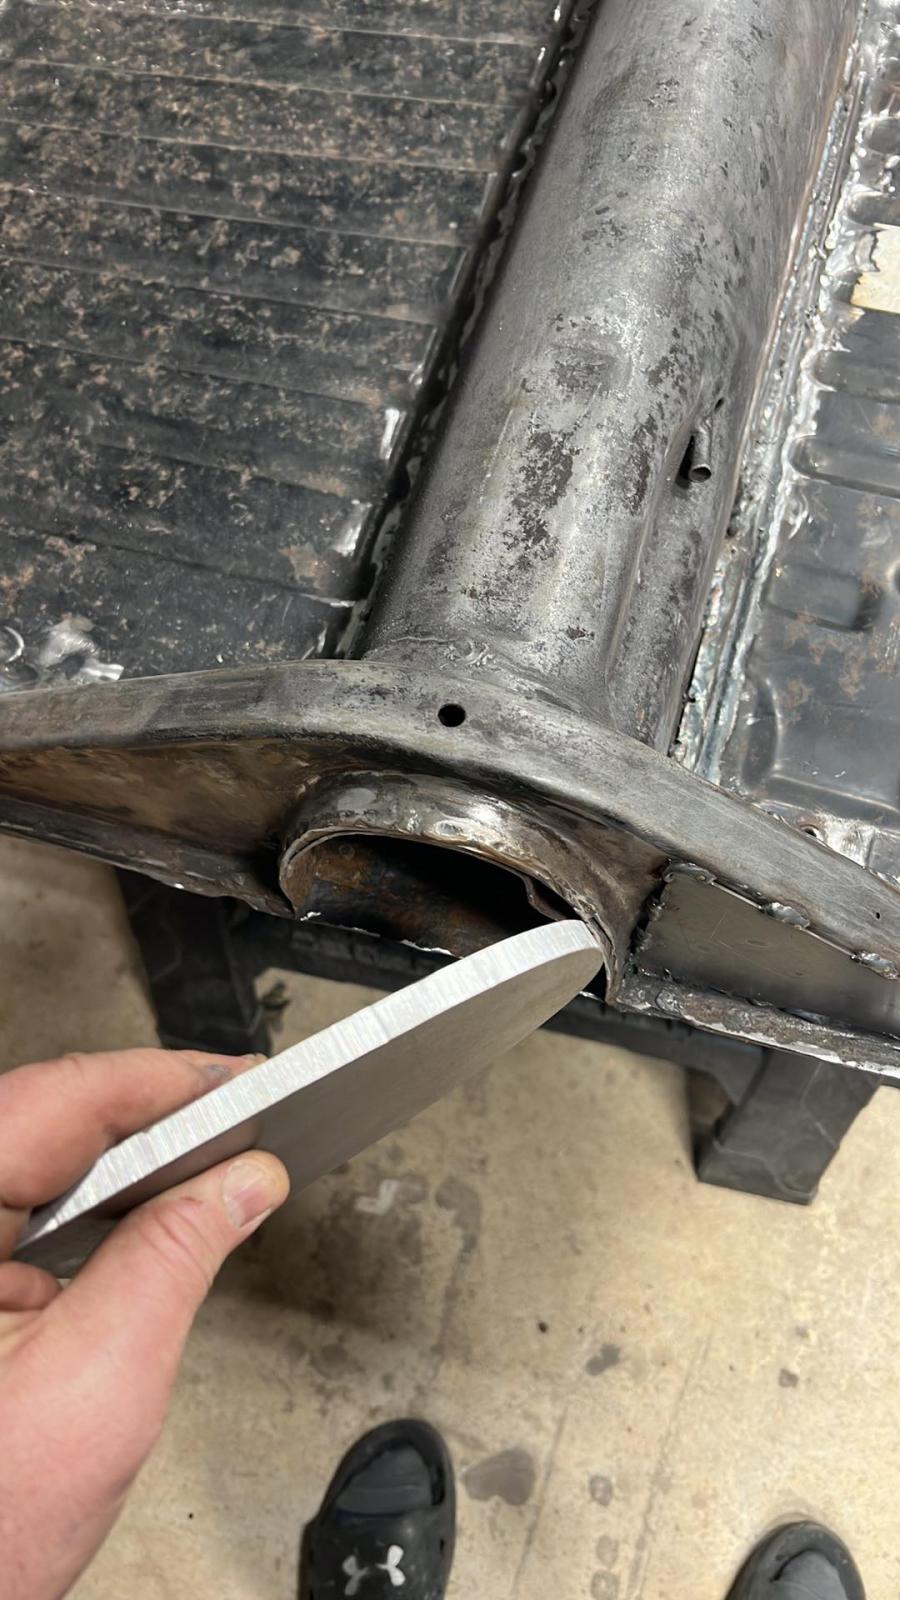
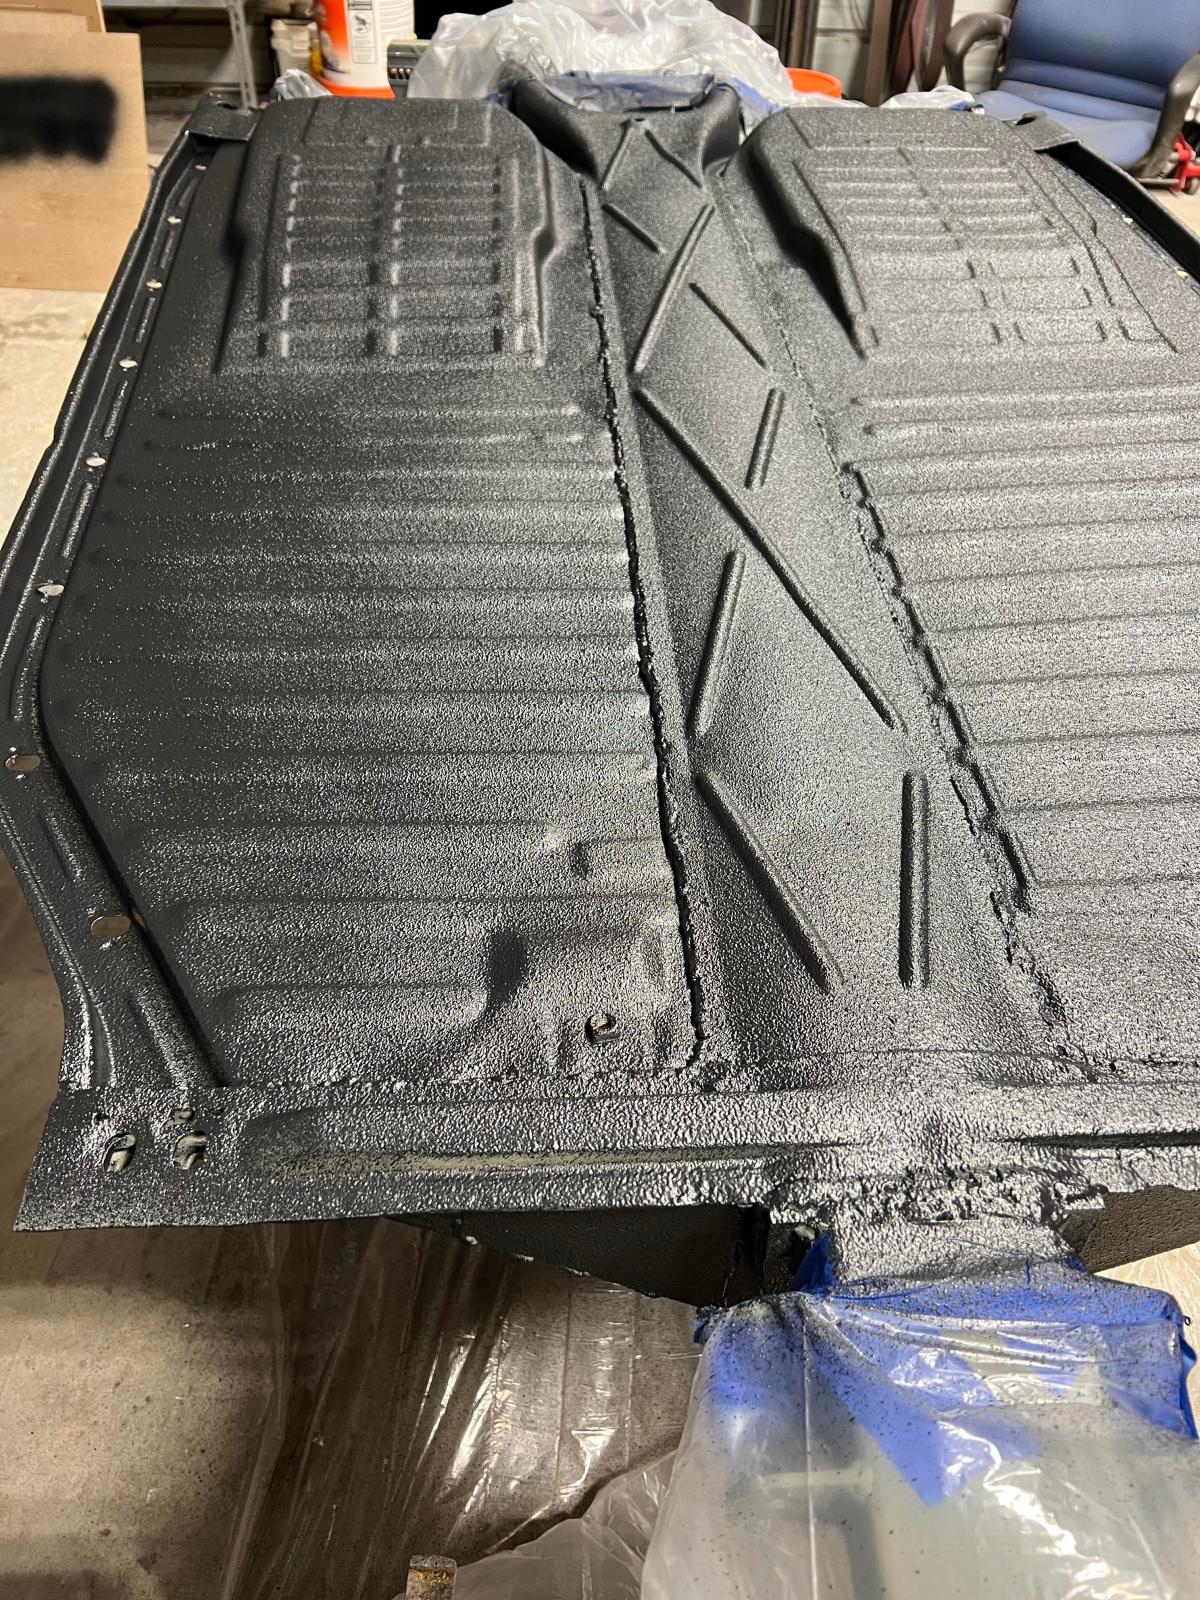
Image
Image

Pans are welded in.

Image

Pan head is coming off.

Image
Image
Image
Last edited by 72bajaben on Sun Jun 19, 2022 6:14 am, edited 4 times in total.
User avatar
72bajaben
Posts: 1360
Joined: Wed Aug 09, 2006 10:37 pm

Re: 72BajaBen Rebuild Thread

Post by 72bajaben »

Continued...

Some rot on the tunnel and the old shifter, brake lever holes and the old master hole welded up.

Image
Image
Image
Image

And now I'm capping off the tunnel so the new bulkhead can go on. I used some 3/8" steel plate and it went on pretty nice.

Image
Image
Image

We stripped all of the paint and rust off the pans. The plan is to coat the entire thing, top and bottom with Raptor bed liner.

Image
Image

Ive heard nothing but good things about the Raptor Bed Liner kits. But I have to say that the U-Pol Raptor Epoxy Primer SUCKS. The nozzle clogged like every 30 seconds and 1 can didnt even cover the entire bottom of the pans.

Image

Here is the EJ22, it was pulled from a good running 1996 Legacy Wagon Automatic. Pretty close to the same HP and torque and I think it weighs less and its for sure a smaller package.

I need to source an alternator, wiring harness, an ECU (maybe a stock ECU..or microsquirt). Not sure what I'm going to do about the computer yet. Any suggestions?

I think all the other accessories are there. I think an oil pan with a lower profile might be needed.

Image
Image

Here is the 094 side shift, which is looking in really good shape.
Image

I also got 6 "lightly" used Fox Air Shocks. I know there is a lot of opinion out there on the C/O vs air shock topic. Its what I have right now and the price is right. If they dont work out, then I know where I need to go from here.

I got 2 - 10" stroke for the front. Looks like 2 - 14" and 2 - 16" stroke for the rear. One of the 16" shocks needs to be rebuilt. Which is no big deal.
Image

Next on the agenda is to prep the rest of the pans and bed line it. While the bed liner is curing and doing its thing Im going to get the motor and trans cleaned up.
Last edited by 72bajaben on Sun Dec 12, 2021 7:36 am, edited 1 time in total.
User avatar
Leatherneck
Moderator
Posts: 17104
Joined: Sat Jul 01, 2006 6:47 pm

Re: 72BajaBen Rebuild Thread

Post by Leatherneck »

Outstanding. You know how to make an entrance. Are you going to be putting any gussets on the Tunnel cap area?
User avatar
doc
Site Admin
Posts: 3586
Joined: Thu Mar 31, 2005 2:38 pm

Re: 72BajaBen Rebuild Thread

Post by doc »

Nice pics!
User avatar
CentralWAbaja
Posts: 4287
Joined: Fri Feb 05, 2010 9:05 pm

Re: 72BajaBen Rebuild Thread

Post by CentralWAbaja »

Honey I'm home!!!

Way to knock the doors off the hinges as a long time member making a grand reentry.

Thank you for your service first off and second thanks for posting up what you are currently working on.

Looking forward to this.
It is not Mickey Moused.....It's Desert Engineered!
User avatar
72bajaben
Posts: 1360
Joined: Wed Aug 09, 2006 10:37 pm

Re: 72BajaBen Rebuild Thread

Post by 72bajaben »

Leatherneck wrote: Mon Dec 06, 2021 8:08 am Outstanding. You know how to make an entrance. Are you going to be putting any gussets on the Tunnel cap area?
The whole front suspension bulkhead will be tied back to the cage. I kicked around the idea of running a 1.5 x .120 tube down the tunnel and tying the front plate to the rear torsion...but ultimately decided it probably wasn't needed. Time will tell.

I can hang on it...should be strong enough. =]

But looking back at the pics...gussets might not be a bad idea. Once I get the suspension build I will see what I have room for in there.
Last edited by 72bajaben on Mon Dec 06, 2021 10:28 am, edited 1 time in total.
User avatar
72bajaben
Posts: 1360
Joined: Wed Aug 09, 2006 10:37 pm

Re: 72BajaBen Rebuild Thread

Post by 72bajaben »

CentralWAbaja wrote: Mon Dec 06, 2021 9:44 am Honey I'm home!!!

Way to knock the doors off the hinges as a long time member making a grand reentry.

Thank you for your service first off and second thanks for posting up what you are currently working on.

Looking forward to this.
Thanks! This project has been brewing for a LONG time. The wife told me to get moving or get rid of it. So here I am.
User avatar
Leatherneck
Moderator
Posts: 17104
Joined: Sat Jul 01, 2006 6:47 pm

Re: 72BajaBen Rebuild Thread

Post by Leatherneck »

72bajaben wrote: Mon Dec 06, 2021 10:27 am
CentralWAbaja wrote: Mon Dec 06, 2021 9:44 am Honey I'm home!!!

Way to knock the doors off the hinges as a long time member making a grand reentry.

Thank you for your service first off and second thanks for posting up what you are currently working on.

Looking forward to this.
She is a good motivator. Keep it going.

Thanks! This project has been brewing for a LONG time. The wife told me to get moving or get rid of it. So here I am.
User avatar
72bajaben
Posts: 1360
Joined: Wed Aug 09, 2006 10:37 pm

Re: 72BajaBen Rebuild Thread

Post by 72bajaben »

So I got the topside primer-ed. Its looking pretty good. Im going to give it at least 24 hours before I do anything else.

Image

So while that was drying I refurbed a vice I got on Sunday from a buddy. It was already in really good shape. It doesn't look like it was ever used. Some light surface rust. I just cleaned it up and painted it.

Image
Image

I got the engine on the stand. It looks like I have the complete engine side of the harness on the motor. Which is great. A few wiring diagrams and I can get the ECU wired up. Im probably going to go with a microsquirt. For future proofing.

Image
Image
Image
Image
Image

I think 95% of what the MS needs is already on the motor. It looks like I'm only missing the alternator and bracket.

Me and the boy (my oldest son) couldn't help ourselves.
Image
Image

It looks so good!!!
User avatar
chuckput
Posts: 441
Joined: Thu Sep 05, 2013 8:01 pm

Re: 72BajaBen Rebuild Thread

Post by chuckput »

Looking forward to watching your progress, especially with your introduction.
User avatar
bajaherbie
Posts: 9967
Joined: Sat Jul 15, 2006 7:07 pm

Re: 72BajaBen Rebuild Thread

Post by bajaherbie »

Ospho is the best...

Sent from my SM-A102U using Tapatalk

Of all the paths you take in life, make sure a few of them are dirt.
User avatar
72bajaben
Posts: 1360
Joined: Wed Aug 09, 2006 10:37 pm

Re: 72BajaBen Rebuild Thread

Post by 72bajaben »

bajaherbie wrote: Tue Dec 07, 2021 5:40 am Ospho is the best...
Yea...Ive been kinda going crazy coating all the things in my shop.
User avatar
72bajaben
Posts: 1360
Joined: Wed Aug 09, 2006 10:37 pm

Re: 72BajaBen Rebuild Thread

Post by 72bajaben »

Update time!

So if im being totally honest, doing this next bit had me nervous. I was worried about how the finish would come out and either being stuck with it or having a lot of work in removing it. Since the U-POL Epoxy Primer didn't go on so well.

But...just wait for it.

So I got all the parts I didnt want to paint yet masked off.
Image
Image

My kit came with 4 bottles of bed liner, I used a total of 3, 1 on the top and 2 on the bottom with 2 coats.
Image

Here I sprayed the top before my helper came out.
Image
Image

Close up of the top cot texture. I sprayed it at 40psi about 10-12" away.
Image
Image

Now the boy came out and wanted to try it.
Image
Image
Image

We did 2 coats on the bottom using 2 full jars of bed liner.

First coat
Image
Image

2nd coat
Image
Image

Texture after 2 coats
Image
Image

And then I ripped of all the masking
Image
Image

I think it turned awesome. Its way better than I expected. after about 12 hours the coating feels nice and hard. I'm going to let it sit for 5-7 days to fully cure before I do anymore work to it.

I have another project I need to work on and Im going to clean up the engine nd transaxle because they are pretty gross.
User avatar
doc
Site Admin
Posts: 3586
Joined: Thu Mar 31, 2005 2:38 pm

Re: 72BajaBen Rebuild Thread

Post by doc »

you'll wreck it before it rusts. Looks great!
User avatar
72bajaben
Posts: 1360
Joined: Wed Aug 09, 2006 10:37 pm

Re: 72BajaBen Rebuild Thread

Post by 72bajaben »

doc wrote: Thu Dec 09, 2021 9:05 am you'll wreck it before it rusts. Looks great!
I hope not. haha.
Post Reply