Page 1 of 2

2.0 liter Build, Finally Done!!!!

Posted: Sat Jan 02, 2010 8:27 am
by slowtwitch
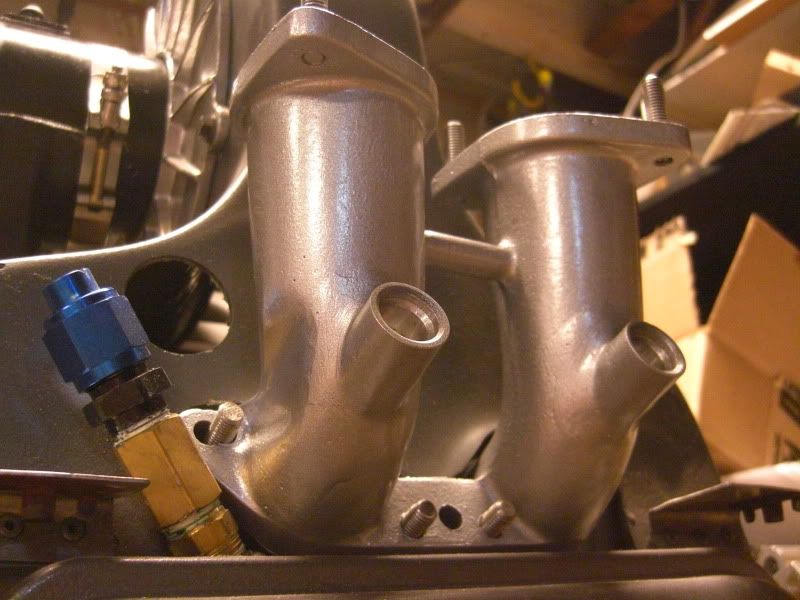
It's been along time coming, but, I am finally finished with my first VW/Porsche engine build. This past week, I made up a pre-luber and injected the engine with it's first dose of oil :D It had a small leak at the oil filter block off plate, but, that was quickly fixed.

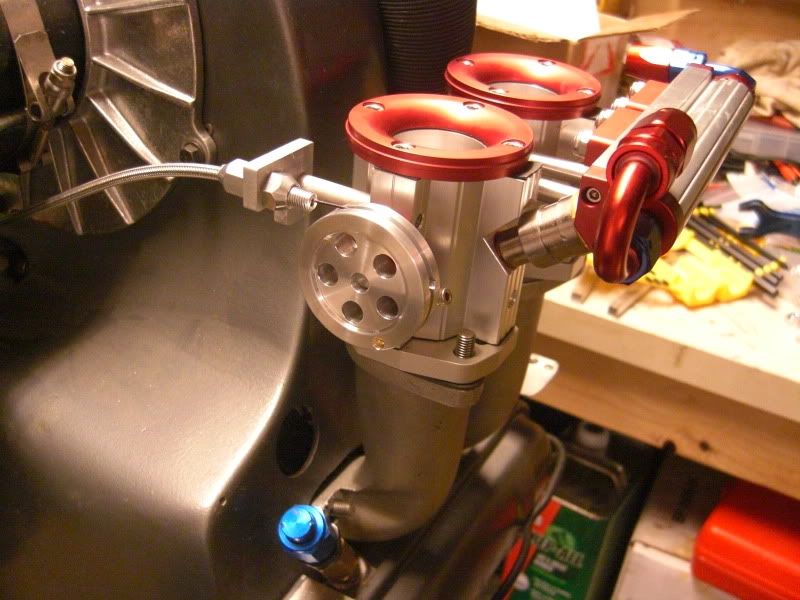
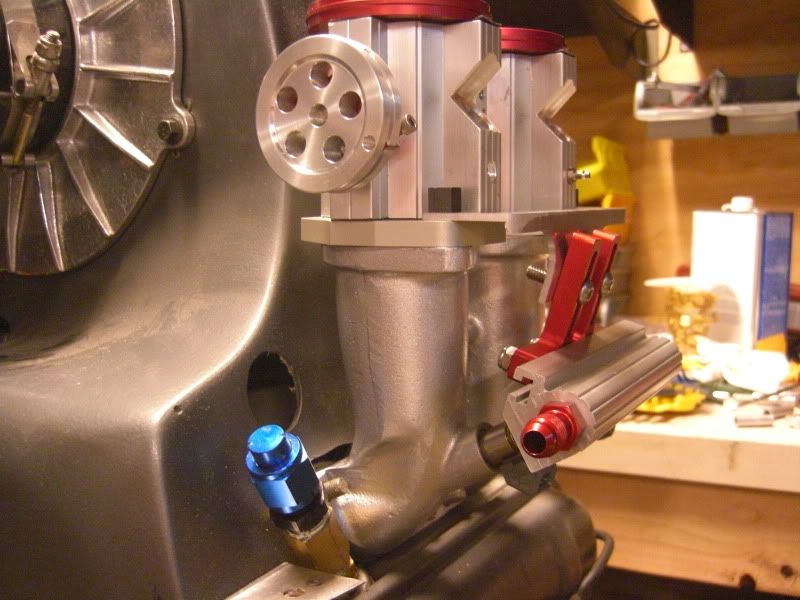
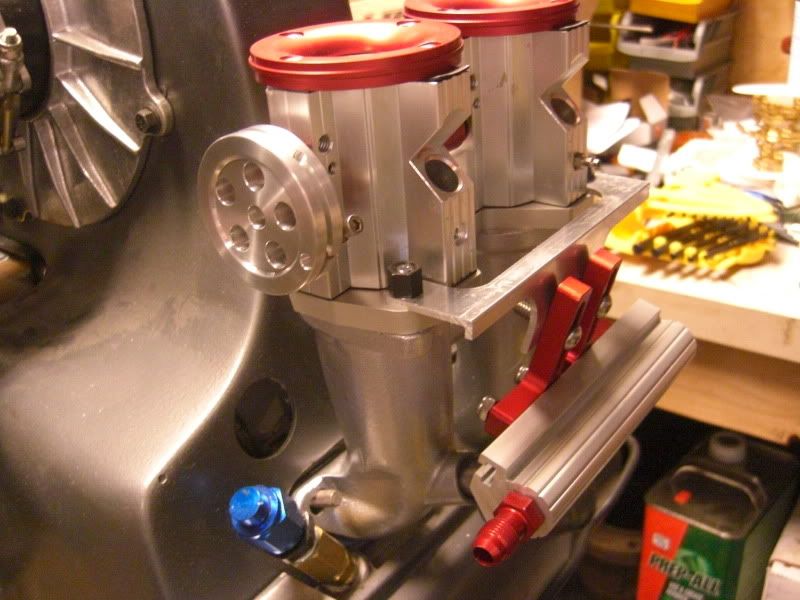
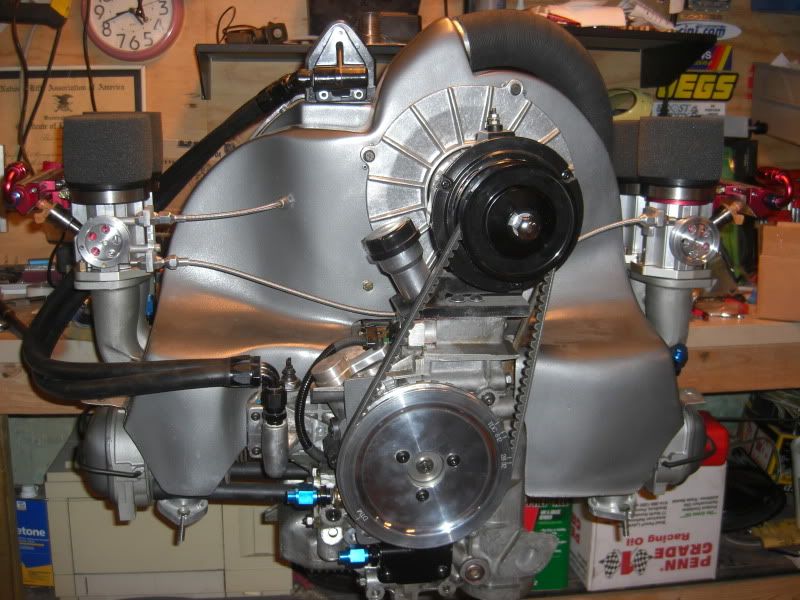
The building of the actual engine wasn't to bad, it was all the other stuff that was time consuming. Like setting up my old enco mill and figuring out how to clearance the case. designing the cable linkage, building all the jigs for the engine build, figuring out how to mount a vr sensor for edis, learning about Megasquirt and assembling the computer, etc, etc. Anyway, I finalized my cable setup, made some pretty wheels and such....here is the final result, that's it, no more tinkering, no more changing this or that, no more new ideas to try. no more what if................................................yea right :lol:

Image

Now , I just have to get my boys over and get this out of the basement and into the chassis. That's when the new adventure begins.....starting and tuning an engine with a computer, another first for me :lol:

pete

Re: 2.0 liter Build, Finally Done!!!!

Posted: Sat Jan 02, 2010 11:18 am
by jinx
very neat!

Re: 2.0 liter Build, Finally Done!!!!

Posted: Sat Jan 02, 2010 11:41 am
by Cevan
Betcha can't wait to light it off. Looks real nice. Did you make the wheels for a cable linkage yourself? Would you sell me a pair? How does it interface with the throttle cable?

Re: 2.0 liter Build, Finally Done!!!!

Posted: Sat Jan 02, 2010 3:03 pm
by Class 11 streeter
Congratulations! I am sure it feels good to see things comming together nicely.

Re: 2.0 liter Build, Finally Done!!!!

Posted: Sat Jan 02, 2010 4:24 pm
by NextGen
Hi Wow!!

Very high tech, excellent work. Can't wait to hear how it is after you get to drive it.

I hope you are not one of those guys that build a boat in the basement and can't get it out the door. Ha. After building that, using a Sawsall on some sheet rock is no big deal.

Joe Cali
Next Generation
www.nextgen-usa.com

Re: 2.0 liter Build, Finally Done!!!!

Posted: Mon Jan 18, 2010 11:07 am
by slowtwitch
Well, after taking my allowed one step forward. I'm now taking the required four steps backward :| I never really checked, but, it was in the back of my head, I checked the width of the oval's engine compartment. As I kinda suspected, the engine in it's current configuration, is a tad to wide :oops: With the current setup, I would have to do some cutting of the ovals deck lid/drip area, to squeeze in the engine..... this is not an option !!!
So I sat there looking at the empty engine compartment, for a bit. I then went to look at the engine for a bit...back to the engine compartment...etc, etc..then it happened :idea:

I decided to move the fuel rails. This isn't so easy with Type 4 setups. With type 1's, you can buy manifolds with the injector bungs already in place. This isn't so with the type 4's. So if they don't sell them, you have to make them :D Back into the basement I went and started up the old logan lathe and enco mill.

I made up a batch of injector bungs (found some specs using google). Drilled some holes into the manifolds and mounted the injector bungs, using JB Weld. This is only a test setup, hence the JB Weld, to see if things workout. But, then again, I've heard that it has been done with success. I also had to make up some new brackets to hold the fuel rails in place................................. it ain't easy :lol:

One other tidbit, due to the new location of the injectors, the injector holes on my original fuel rails were off. Fortunately for me, I had bought a fuel rail from Extrudabody (the folks that make the TB's) and when the package came, there were 4 extra pieces of fuel rail in the box :mrgreen: Kevin, the owner, sent me extras, in case I goofed :lol:

Time for some pics... here's the original setup....

Image

Here is a completed manifold...

Image

Here's the completed setup...

Image

Another shot..
Image

With this new location, I don't have to mess with the deck lid area. That doesn't mean there won't be some cutting...I will be installing access panals, similar to this.....To make installing parts easier
Image

Lastly, to maximize my space, I scored a set of Pico size injectors. These things gave me an additional 2" to play with... These things are small. Here's a comparison shot, of a regular sized injector and a Pico size one.
Image

Onward with the adventure :D

Re: 2.0 liter Build, Finally Done!!!!

Posted: Tue Jan 19, 2010 9:52 pm
by Class 11 streeter
Adapt........and overcome!

Re: 2.0 liter Build, Finally Done!!!!

Posted: Wed Jan 20, 2010 3:50 am
by slowtwitch
Class 11 streeter wrote:Adapt........and overcome!
I have to say, this project keeps the brains cells active :lol: :lol:

Re: 2.0 liter Build, Finally Done!!!!

Posted: Sat May 01, 2010 7:27 am
by slowtwitch
Yesterday, I attempted to start the engine and it didn't start. It backfired thru the carbs, so it kinda told me that I have valve timing issues...or so I thought.

I went to bed thinking of every aspect of this build....did I set the cam right??? Is my geometry correct???? On and on, I kept thinking of what I could have done wrong. Since this is the first time I ever played with Megajolt and EDIS, I went over everything. I had a problem with the spark plug wires (being to short). As I was going over the wires, I went over the coil pack.

As I mentioned , the engine seemed like it was 180 deg out of wack. That's when I thought that my plug wires are in the wrong spot. With the EDIS coil pack, you have an A coil and a B coil. I had the 2+4 wires on the A coil and the 1+3 wires on the B coil. I switched the wires and ........


I spotted a small oil leak at the oil cooler adapter, but, that was the only one....so far.

Since this is my first aircooled rebuild, I'm a happy puppy right now :D

Re: 2.0 liter Build, Finally Done!!!!

Posted: Sat May 01, 2010 1:25 pm
by fusername
stupid question, but when you move one throttle by hand, why does the other move? is your cable system really that stiff or is there a preload somewhere?

and more importantly what is that sweet quiet muffler called?

Re: 2.0 liter Build, Finally Done!!!!

Posted: Sat May 01, 2010 1:56 pm
by slowtwitch
Fusor, both carbs are suppose to open at the same time. The cable linkage has no pre load, just the right cables :D As for the muffler, I think it's an A1, can't be to sure. Both the headers and muffler are used.

Re: 2.0 liter Build, Finally Done!!!!

Posted: Sat May 01, 2010 2:57 pm
by trapnm
nice job.

Re: 2.0 liter Build, Finally Done!!!!

Posted: Sat May 01, 2010 3:55 pm
by The Fix
Looking great Pete. Sounds good too. I have the same exhaust on mine.

Re: 2.0 liter Build, Finally Done!!!!

Posted: Sat May 01, 2010 8:50 pm
by nextgenusa
You know, if that engine never ran it would not matter, the little mechanical things you did like the linkage is art.

The fact it actually runs is just bonus.

Re: 2.0 liter Build, Finally Done!!!!

Posted: Sun May 02, 2010 4:48 am
by slowtwitch
nextgenusa wrote:You know, if that engine never ran it would not matter, the little mechanical things you did like the linkage is art.

The fact it actually runs is just bonus.
I kinda of blame you for all this Joe. I started out buying your manual and it slowly progressed into this addiction....thanks Joe :evil:


:lol: :lol: :lol: :lol: :lol: