Page 1 of 9
Baja Bug Wiring (Complete Build Up)
Posted: Thu Aug 16, 2007 12:47 pm
by DesertGuy
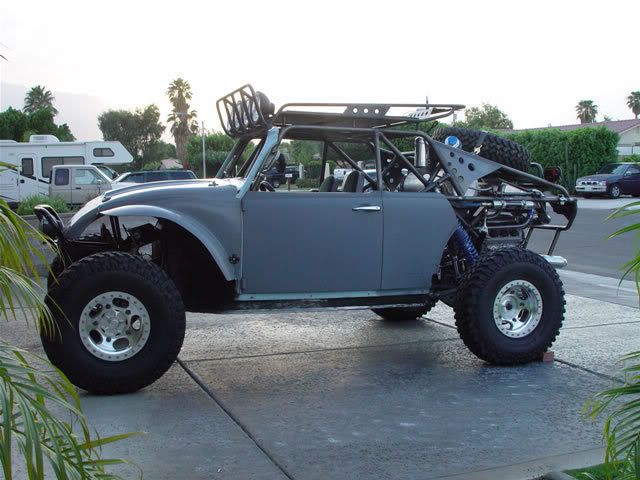
Finally... the time has come that I can start on the wiring of the baja bug. The baja will have many functions that are found in a street vehicle with the addition of off road components.
My intent on this wiring project is to "over-engineer" the system. Too many times I have seen cars wired to the bare minimum... only to be left "tapping" in here and there for an additional circuit. I am planning to intentionally leave "blank" circuits for later use, if needed.
I am going to break this down into manageable sections or harnesses, at least that is my hope. I have broken the areas into the following: (Please keep in mind that this is from scratch, so to speak. I am going to try to wire it without pre-made circuitry)
Charging/Ignition/Start
Engine Computer
Dash Components
Ancillary Components
With that being said, my first thought is to wire the Charging/Ignition/Start circuit and put power to the various fuse blocks that I need.
I will be posting the various schematics, diagrams, whatever... so if anyone sees any problems... please let me know. My order from DelCity should be arriving soon... (Unfortunately, they take forever)
Posted: Thu Aug 16, 2007 3:23 pm
by david58
DesertGuy that is well laid out great job.
Posted: Thu Aug 16, 2007 4:17 pm
by Ol'fogasaurus
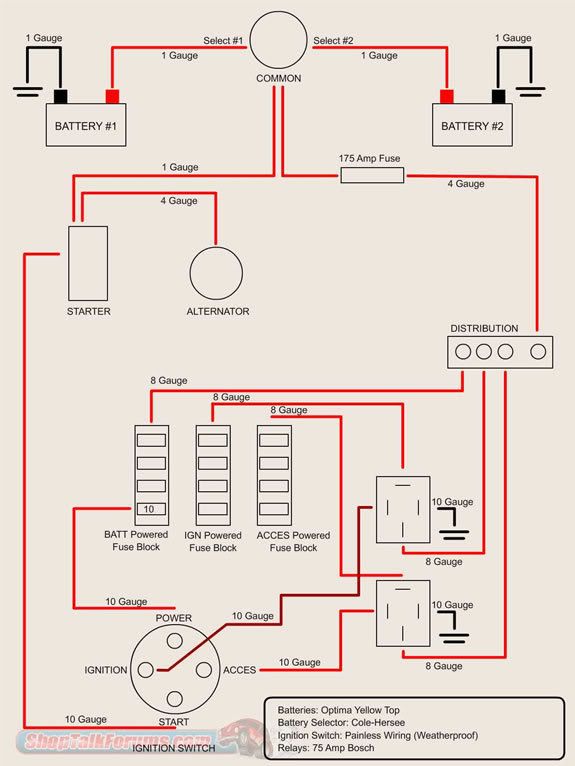
Whay the 175 "maxi" fuse? Why not closer to max the output of the alt? Just curious.
Posted: Thu Aug 16, 2007 5:29 pm
by DesertGuy
Ol'fogasaurus wrote:Why the 175 "maxi" fuse? Why not closer to the max output of the alt? Just curious.
Good question. I wish I was able to give you a detailed explanation as to why a 175 Amp fuse. However, all I can say is that was the size recommended when I was searching for one. I imagine I could simply wire the car without one, but some measure of safety is always good.
The run of 4 gauge should only be about 6 to 8 feet in length, and the carrying capacity of that should be able to exceed the 175 amp fuse... keeping the fuse as the weak link.
Also as a side, I will try to add how much things cost, in case anyone is interested in doing similar. To construct the above circuit as outlined will be around $700.00 to $800.00
Optima Yellow Top: $200.00 x 2
Cable
Terminals
Shrink Wrap
Rubber Boots
Solder Slugs
Maxi Fuse
Battery Selector
75 Amp Relays x 2
Around $300.00 for the above
Estimated total cost will be in the neighborhood of $2000.00, give or take
Posted: Thu Aug 16, 2007 7:12 pm
by Ol'fogasaurus
I recommend putting in a master fuse, but I stay closer to the output of the alt. The more amp they take the more they cost. I am sure what you are doing it good, just a question!
Posted: Sun Aug 19, 2007 2:53 pm
by MNAirHead
Wow.. nice work..
Check your PM.
Posted: Thu Aug 23, 2007 1:27 pm
by DesertGuy
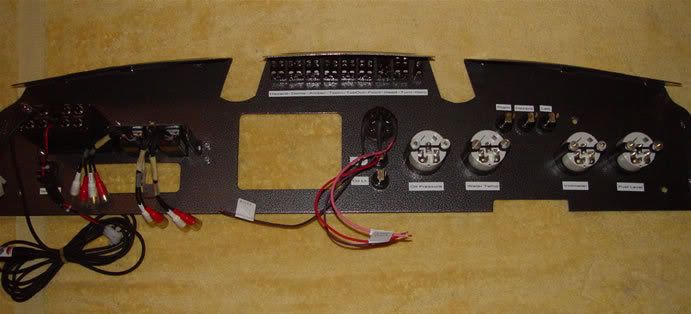
Momentary set back... DelCity botched a part of my order, so they will need to resend a few items. In the meantime I finished setting up the dash and started laying out the "Control Panel". The Control Panel will have an 1/8" rubber base so that if any wire happens to come loose that it will not immediately ground out the circuit (Thanks Bob). Also, I will be removing the relay mounting clips as seen in the pic once install starts.
This is how it is laying out so far...

And the back of the dash...
Posted: Thu Aug 23, 2007 2:58 pm
by CopperBaja
Wow. Looks nice!
Posted: Thu Aug 23, 2007 6:47 pm
by DesertGuy
Thanks Copper... hopefully, when all is done and said, it really does look nice.
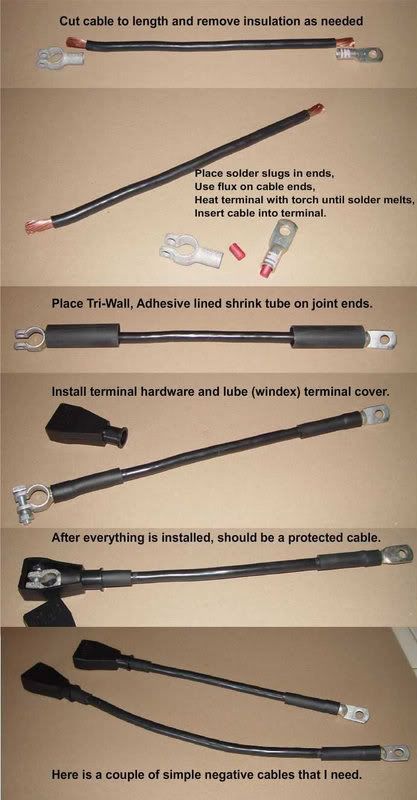
As far as "how I am making my cables". This is the process that I am using to make all of the cables that are in the above diagram. Hopefully, these will be stout enough...

Posted: Fri Aug 24, 2007 5:50 pm
by DesertGuy
Posted: Sun Aug 26, 2007 8:37 pm
by MNAirHead
Cool work.
Is your plan to completely wire it and then pull it out for paint?
Posted: Sun Aug 26, 2007 9:24 pm
by DesertGuy
The only thing that is going to be painted is the sheet metal of the body; the cage is going to remain "raw". So, "hopefully", with everything capable of being disconnected... it shouldn't be that difficult. (famous last words...again).
Waiting around for my items to show so I can continue up to the Control Panel. After the Charging Circuit is complete I will be wiring the Computer and Engine, so I wired up the dash cluster tonight so I can incorporate it into the Computer/Engine harness.
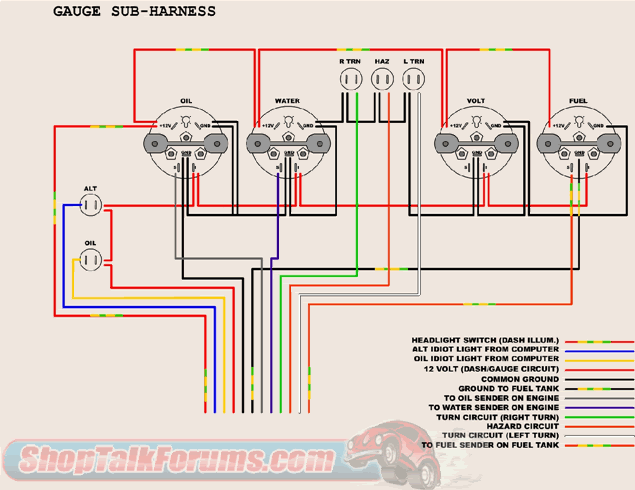
The first pic is the diagram that I wrote out to use. From everything that I have read, this is a pretty basic set-up and universal in nature.
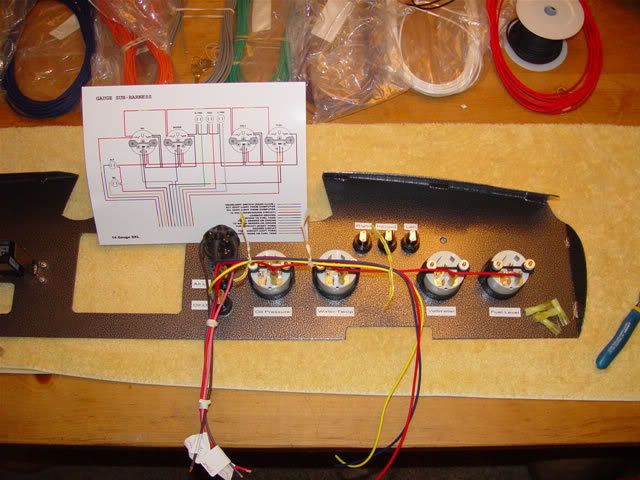
The second picture is the start of the wiring. Since all "sub-harnesses" with have Weatherpack connections, it makes it able to do wiring inside the house with the A/C. I used garbage bag twist ties to hold everything in place temporarily while I was making the connections.
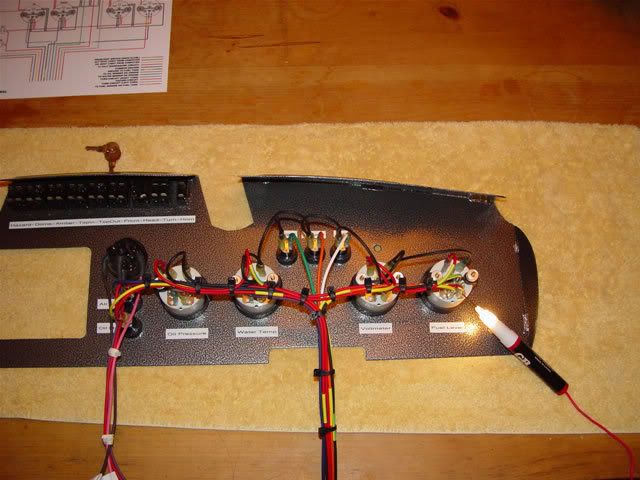
The third pic shows the final harness zip-tied up. After I made all of the connections I did a continuity test to each wire. After that I did a "cross-continuity" (probably not the term) to make sure no wires had continuity that should not. The Weatherpack connections will be added just prior to placing into the car.
Posted: Mon Aug 27, 2007 1:38 am
by 2088 bob
As usual steve very nice work ..What did you end up with using to mark the wires with?
Posted: Mon Aug 27, 2007 6:33 am
by MNAirHead
really digging the idea of labelling the back side of the panel.
Stealing this one.
Posted: Mon Aug 27, 2007 8:39 am
by DesertGuy
2088 bob wrote:What did you end up with using to mark the wires with?
I'm using a different color of wire for each circuit. Found a vendor that was low-priced and an even lower minimum buy.
Timbolaya:
I initially labeled the back so I didn't get corn-fused when I was wiring different stuff. Now it might even come in handy if I have any issues on the road.
Steve