The foam is called "Great Stuff". Most home improvement stores carry it in a couple varieties. Different amounts of expansion and more or less eco-friendly. It's a closed cell foam for filling and sealing gaps in homes. Doors, windows, little drafts, etc.
If you can find a local plastics or fiberglass supply joint, they'll usually have gallons of the stuff you can mix and poor into larger cavities, like boat floors. I lost count of how many spray cans of Great Stuff I used just to fill in where I claw-hammered out the factory foam to repair the stringers.
Here's a good place for fiberglass and foam and such.
http://tapplastics.com/
I've been planning on injecting this stuff into my rocker channels around the heater channels to see how it works. It's kinda like the factory stuff inside the C-pillars to seal off the engine compartment noises.
My ongoing Turbobaja build
-
turbobaja

- Posts: 2826
- Joined: Fri Sep 14, 2007 4:56 pm
http://www.g3skiboat.com/wp-content/the ... ges/82.jpg
I had to google Glasspar G3......... Those things look like little rockets! Looks like they have quite a following too. About a dozen guys locally registered on the G3 Owners association. I used to have an older bayliner with an outboard, I miss how they handle on the water vs. inboard direct drives.
Do you think you'll have it back together for this summer?
Feel free to slap up a pic of the project.
I had to google Glasspar G3.........
Those things look like little rockets! Looks like they have quite a following too. About a dozen guys locally registered on the G3 Owners association. I used to have an older bayliner with an outboard, I miss how they handle on the water vs. inboard direct drives.Do you think you'll have it back together for this summer?
Feel free to slap up a pic of the project.
Karl
DON'T QUIT
DON'T QUIT


-
turbobaja
- Posts: 2826
- Joined: Fri Sep 14, 2007 4:56 pm
Well it's been a few months again since an update on this build. The body has been upside down for almost a year now, and still not painted. Getting pretty close though. I half-assed the prep-work before painting the pan with some truck bed liner, so the stuff just pealed off after 3 days cure  . This time around I'm doing it right.
In the mean time I decided I should make some skid plates while it's easy to work on. Cardboard served as good template material, again, and I designed and built a press to make all the bends with.


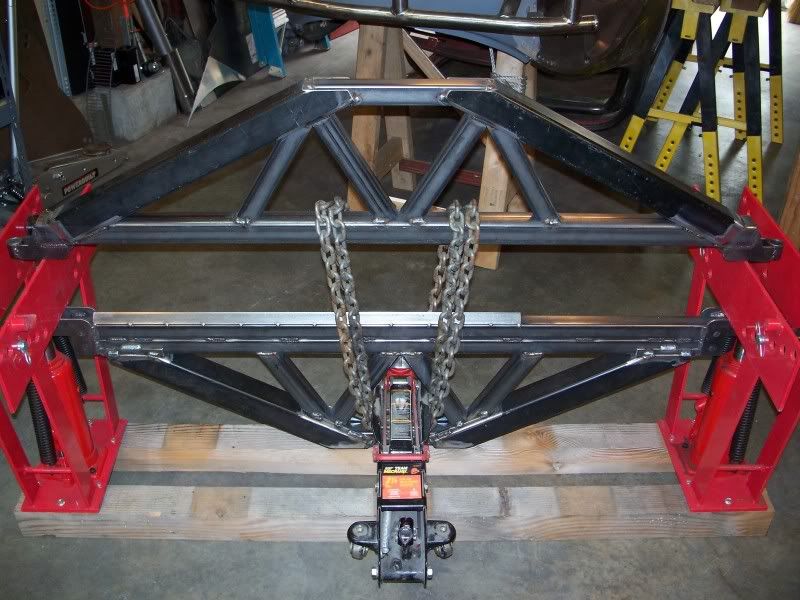


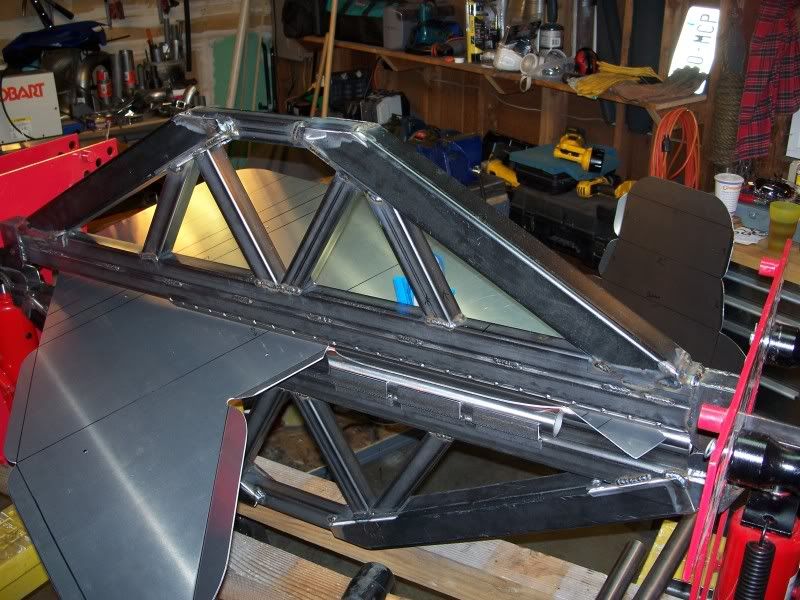


Once the skid plates were finished, I relocated the body a couple feet further into the garage. The body had to be hung from the ceiling by the rear frame horns in order to remove all the tube frame/bumper structures for easier access to all the areas that are such a pain to get clean and painted.


I built a pair of low-pro side bars to clean up the rocker panels a bit.

I decided to remove this louvered section before painting so I could actually get back there and clean it up good. It'll go back in once everythings painted.


I've also got a few parts powder coated.


My most recent excuse for not doing body work was to do some mods to my oil pump. I've been reading about problems with inlet hose sizes with remote oil sump systems. This is the rear (pressure) stage of my CB 4 gear pump. I opened up the inlet to 1/2" npt -10AN and upped the size of all the hose and connections from the tank to the pump to -10 from -8. Also added a 3rd port to the housing for true full-flow oil filtering. Still need to finish decking the surfaces flat and check a few tollerances inside the pump.


It's gettin' there.......
. This time around I'm doing it right.In the mean time I decided I should make some skid plates while it's easy to work on. Cardboard served as good template material, again, and I designed and built a press to make all the bends with.
Once the skid plates were finished, I relocated the body a couple feet further into the garage. The body had to be hung from the ceiling by the rear frame horns in order to remove all the tube frame/bumper structures for easier access to all the areas that are such a pain to get clean and painted.
I built a pair of low-pro side bars to clean up the rocker panels a bit.
I decided to remove this louvered section before painting so I could actually get back there and clean it up good. It'll go back in once everythings painted.
I've also got a few parts powder coated.
My most recent excuse for not doing body work was to do some mods to my oil pump. I've been reading about problems with inlet hose sizes with remote oil sump systems. This is the rear (pressure) stage of my CB 4 gear pump. I opened up the inlet to 1/2" npt -10AN and upped the size of all the hose and connections from the tank to the pump to -10 from -8. Also added a 3rd port to the housing for true full-flow oil filtering. Still need to finish decking the surfaces flat and check a few tollerances inside the pump.
It's gettin' there.......
Karl
DON'T QUIT
DON'T QUIT

-
turbobaja
- Posts: 2826
- Joined: Fri Sep 14, 2007 4:56 pm
Thanks guys.....  .
.
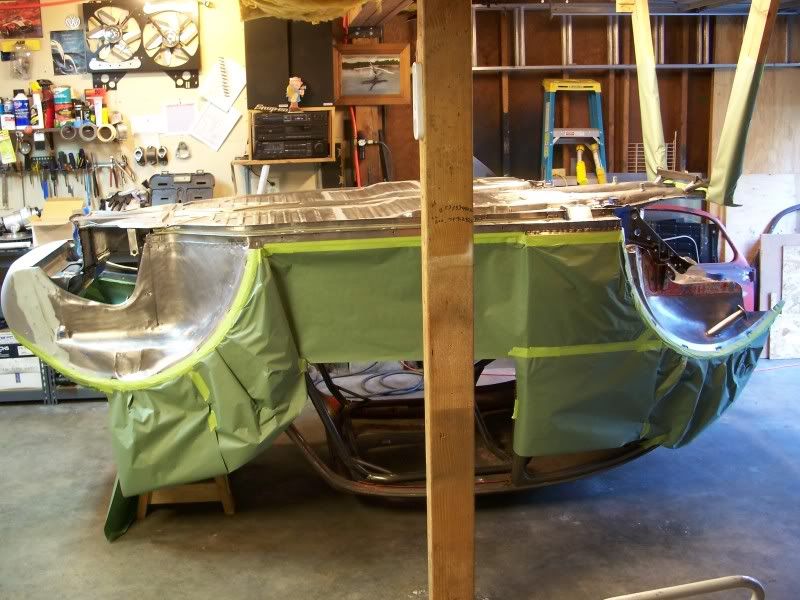
Getting real close to putting some paint on this thing. Well, the bottom of it at least. All the mating surfaces got masked off and coated with some Krylon Rust Tough enamel to keep from building up too much material where stuff has to mount.
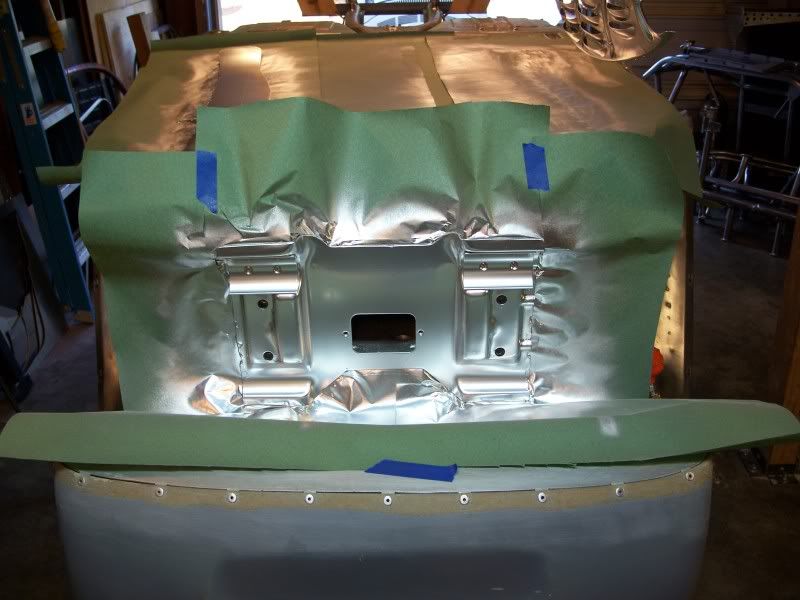
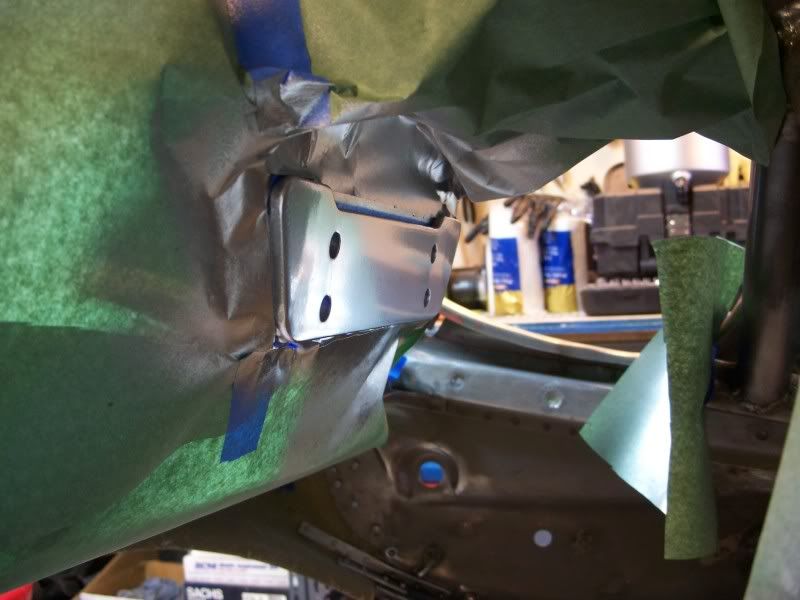
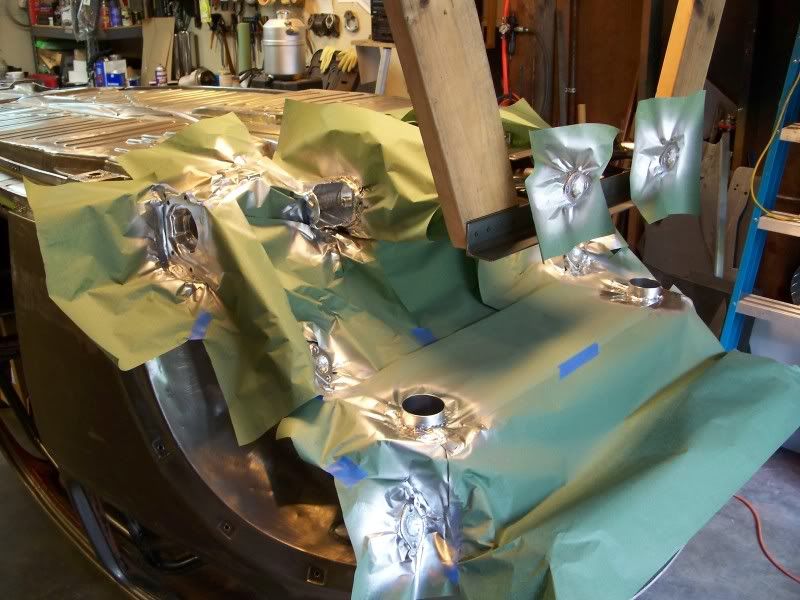
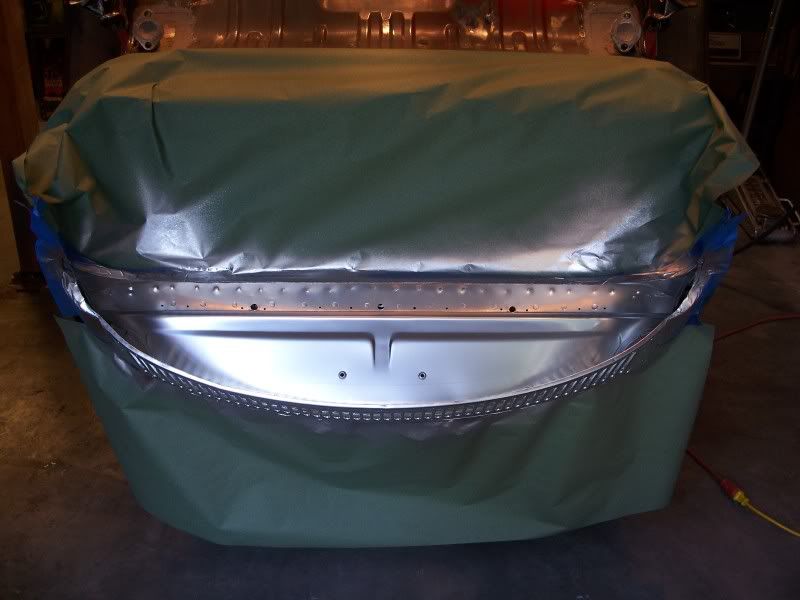

After a couple days cure, all the silver surfaces got masked off to prep the rest of the pan. Every surface got a good degreasing and scuffing and degreasing and masking.....and degreasing.
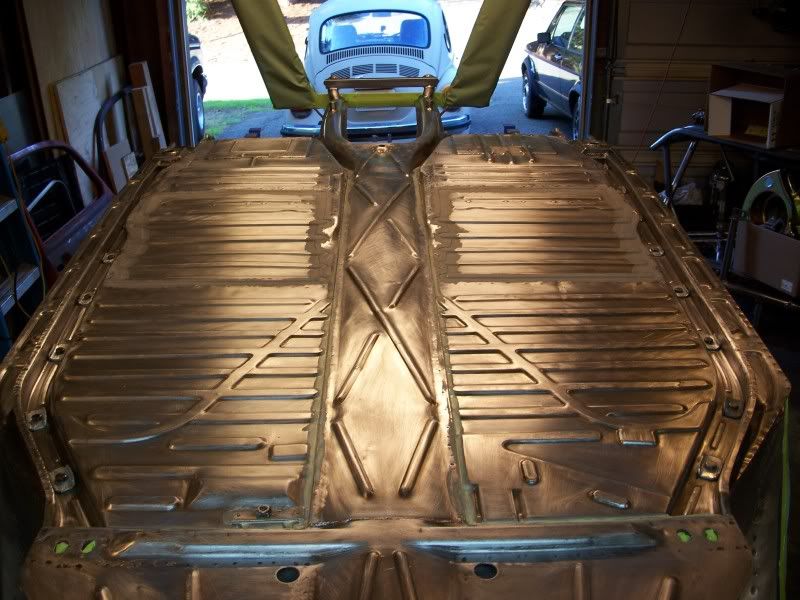
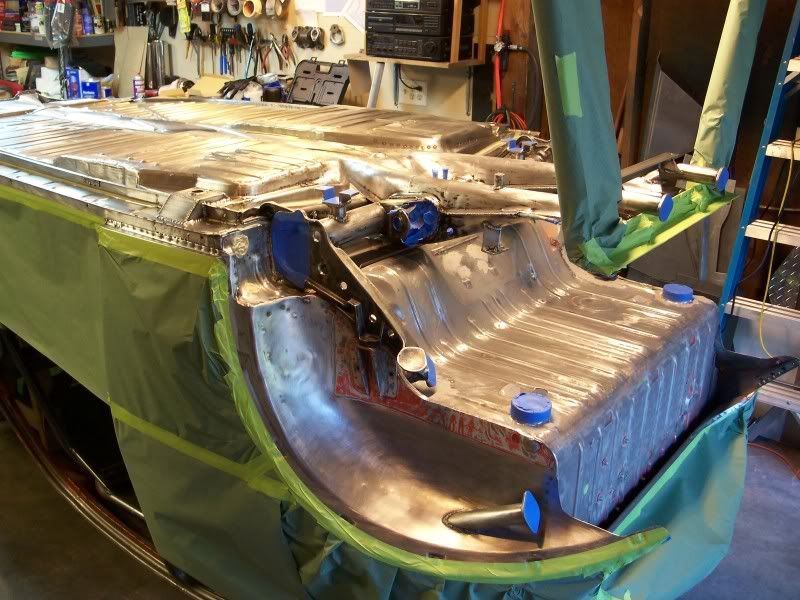
I've got all the goodies layed out. The pan is prepped and ready. I don't have any more excuses, so tomorrow morning I'm going to paint this thing........finally!
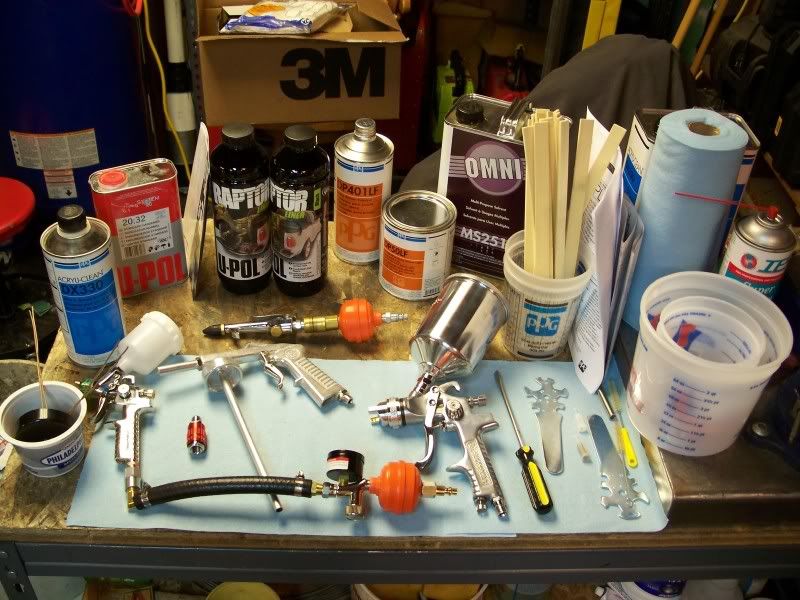
.Getting real close to putting some paint on this thing. Well, the bottom of it at least. All the mating surfaces got masked off and coated with some Krylon Rust Tough enamel to keep from building up too much material where stuff has to mount.
After a couple days cure, all the silver surfaces got masked off to prep the rest of the pan. Every surface got a good degreasing and scuffing and degreasing and masking.....and degreasing.
I've got all the goodies layed out. The pan is prepped and ready. I don't have any more excuses, so tomorrow morning I'm going to paint this thing........finally!
Karl
DON'T QUIT
DON'T QUIT
-
turbobaja
- Posts: 2826
- Joined: Fri Sep 14, 2007 4:56 pm
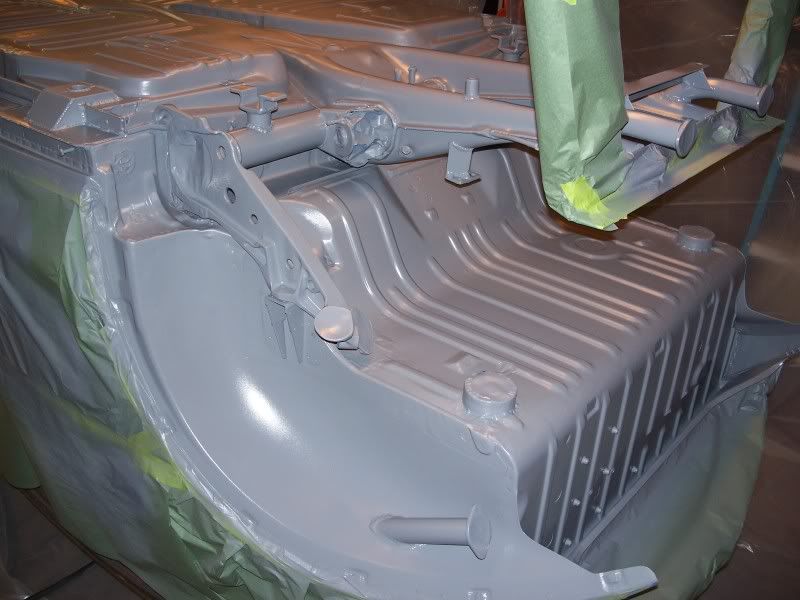
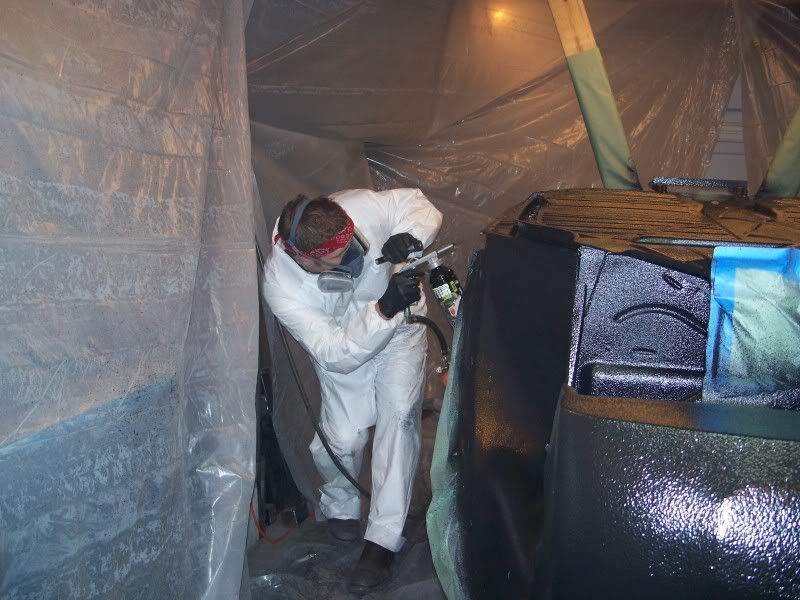
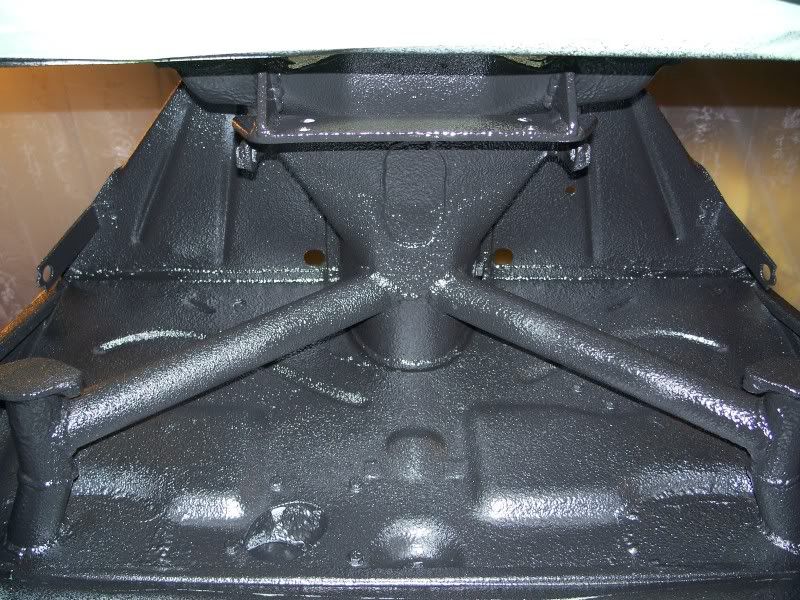
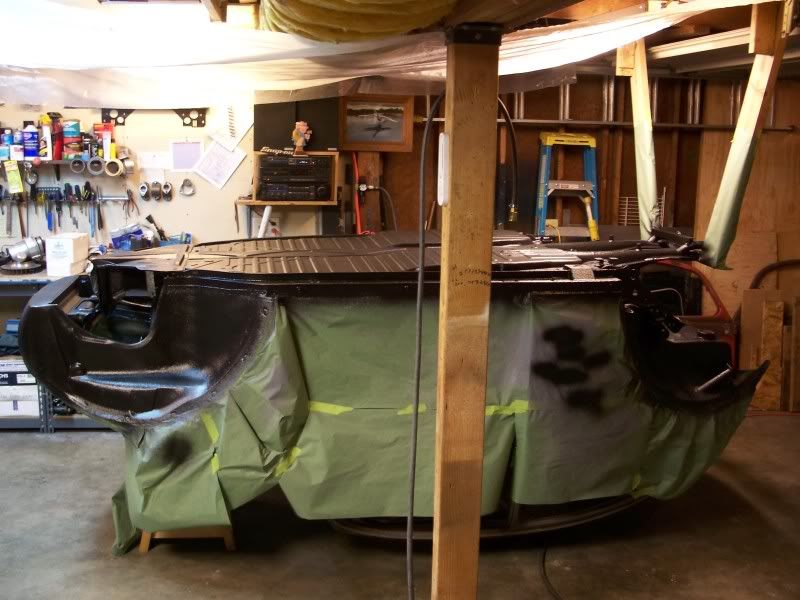
What a long day. This makes 6 days straight of working on this pan. Even took last week off to get it done and still didn't finish painting until almost 8:00 last night. Lots of work........
Here's a couple coats of epoxy primer/sealer.
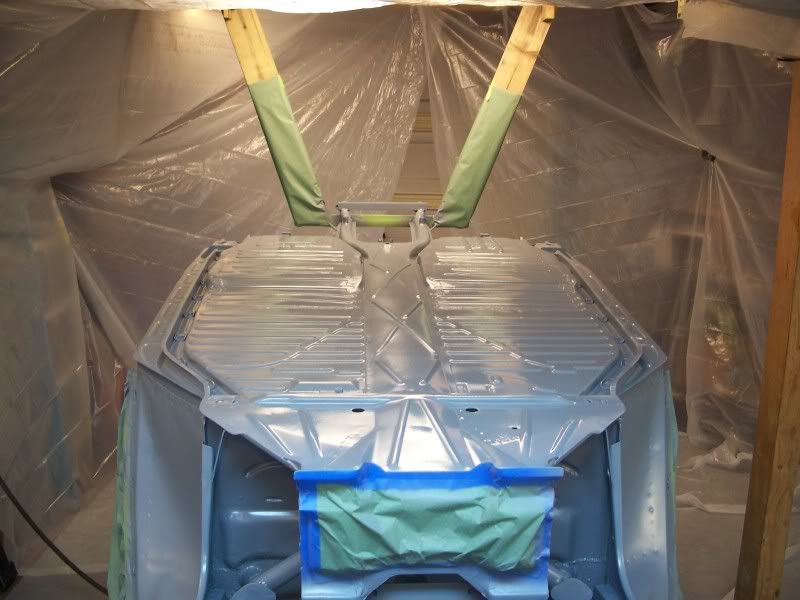
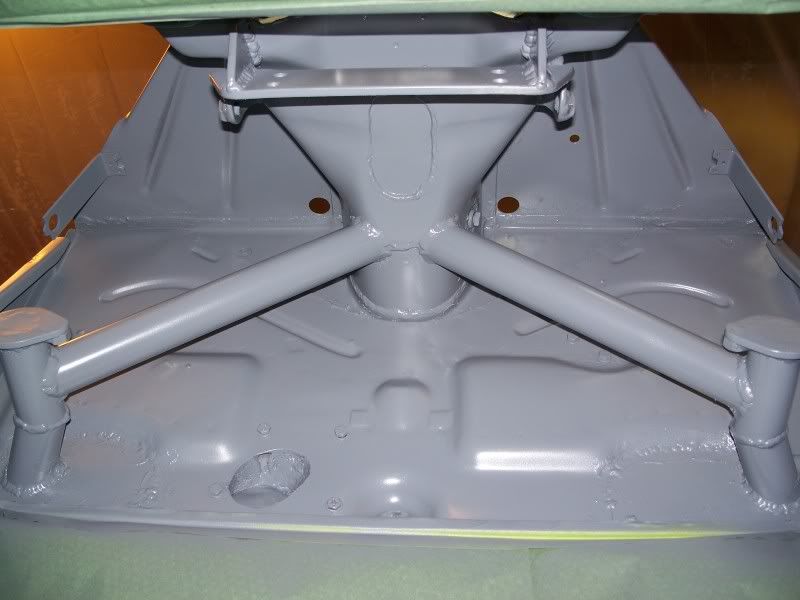
And finally the urethane Raptor bed liner.
With any luck, the next update will have the body sitting upright at least
Here's a couple coats of epoxy primer/sealer.
And finally the urethane Raptor bed liner.
With any luck, the next update will have the body sitting upright at least
Karl
DON'T QUIT
DON'T QUIT


-
MarioVelotta

- Posts: 4086
- Joined: Wed Mar 12, 2003 12:01 am
Woot Woot for sweet progress!!! Nice work!
The Dub Shop
[email protected]
1600 ITB NA - 18sec
1600 Supercharged - 13psi - 15.40 @ 84.66mph
1600 Turbo - 185hp 250tq!! Going for 200
2276 Turbo - 15psi - 11.537 @ 115.74mph
Facebook-Tech-Store
[email protected]
1600 ITB NA - 18sec
1600 Supercharged - 13psi - 15.40 @ 84.66mph
1600 Turbo - 185hp 250tq!! Going for 200
2276 Turbo - 15psi - 11.537 @ 115.74mph
Facebook-Tech-Store
-
Turbo_Manx_Maniac

- Posts: 3308
- Joined: Wed Oct 22, 2003 1:32 pm
Simply WOW, you have amazing fab skills. Love the attention to detail on this build, can't wait to see it right side up.
Question on that Krylon, looks like a wrinkle finish? Care to explain the application process and how if looks/feels when dry? Looks like it comes in a dispenser that hooks to a compressor, or is that your rig?
Question on that Krylon, looks like a wrinkle finish? Care to explain the application process and how if looks/feels when dry? Looks like it comes in a dispenser that hooks to a compressor, or is that your rig?
I accidentally Googled my Twitter. (And I liked it)
-
turbobaja
- Posts: 2826
- Joined: Fri Sep 14, 2007 4:56 pm
Thanks guys! I really appreciate your kind, encouraging words.
The Krylon (silver enamel) isn't anything special. Just some rattle can stuff I had on the shelf that works good on bare metal and lightly rusted surfaces. It came out as smooth as the surface it's applied to, so no wrinkle or texture at all for the most part. I just wanted to paint the mating surfaces with something other than the high-build, non-sandable epoxy primer (grey stuff), followed by the black, textured urethan bed liner. I took all the masking tape and thread plugs out yesterday evening to reveal the silver Krylon surfaces again. It looks like most of the second coat of silver enamel came off with the tape . The surfaces are still covered well with the paint, but the shiny silver finish has been dulled in most places. No big deal, since most of the silver surfaces will have something bolted to it once everthing is assembled anyway.
The bed liner is a Raptor brand urethane product that gives the final textured finish on the surfaces NOT painted with the Krylon. Similar to Rhino liner, I would imagine. It comes in a kit to do one full sized truck bed. The kit includes 4 bottles of bed liner and 1 can of activator. They get mixed 3:1 by volume. Each bottle has 750ml of bed liner, you add 250ml of activator to the bottle and screw the cap back on. Shake it for 2 minutes and it's ready to apply. The applicator is the long tubed gun in the middle of the table in the pic above. It's got about a 2" barrel with 3/16" hole in it, simple suction orifice method of fluid despensing. I set my regulator @ 45psi with trigger pulled and started spraying. Compared to the HVLP process with the epoxy primer I'd just sprayed, that bed liner really came out heavy and fast. I went through 3 bottles and still had blank spots. The 4th bottle was used up making last minute shots here and there, mostly from my knees, so I wouldn't have any bare spots. The finished product ended up having overspray speckles over a lot of the surface, which kinda looks like sh!t. The right way to do it would have been to shoot all the upside down BS first and finish with the large/flat areas across the bottom to avoid the overspray look. Oh well. Next time I guess.......
Nice thing about the bed liner is it can be repaired or over-coated at any time after simply degreasing the surface, no scuffing. The cured bed liner has a tough rubbery texture to it. But the coolest thing is how much quieter the body is now. It used to be like beating on a tin drum, now it's really muffled.
~$130 for Raptor kit and gun from local Wesco paint supply
Turbo_Manx_Maniac wrote: Question on that Krylon, looks like a wrinkle finish? Care to explain the application process and how if looks/feels when dry? Looks like it comes in a dispenser that hooks to a compressor, or is that your rig?
The Krylon (silver enamel) isn't anything special. Just some rattle can stuff I had on the shelf that works good on bare metal and lightly rusted surfaces. It came out as smooth as the surface it's applied to, so no wrinkle or texture at all for the most part. I just wanted to paint the mating surfaces with something other than the high-build, non-sandable epoxy primer (grey stuff), followed by the black, textured urethan bed liner. I took all the masking tape and thread plugs out yesterday evening to reveal the silver Krylon surfaces again. It looks like most of the second coat of silver enamel came off with the tape
. The surfaces are still covered well with the paint, but the shiny silver finish has been dulled in most places. No big deal, since most of the silver surfaces will have something bolted to it once everthing is assembled anyway.The bed liner is a Raptor brand urethane product that gives the final textured finish on the surfaces NOT painted with the Krylon. Similar to Rhino liner, I would imagine. It comes in a kit to do one full sized truck bed. The kit includes 4 bottles of bed liner and 1 can of activator. They get mixed 3:1 by volume. Each bottle has 750ml of bed liner, you add 250ml of activator to the bottle and screw the cap back on. Shake it for 2 minutes and it's ready to apply. The applicator is the long tubed gun in the middle of the table in the pic above. It's got about a 2" barrel with 3/16" hole in it, simple suction orifice method of fluid despensing. I set my regulator @ 45psi with trigger pulled and started spraying. Compared to the HVLP process with the epoxy primer I'd just sprayed, that bed liner really came out heavy and fast. I went through 3 bottles and still had blank spots. The 4th bottle was used up making last minute shots here and there, mostly from my knees, so I wouldn't have any bare spots. The finished product ended up having overspray speckles over a lot of the surface, which kinda looks like sh!t. The right way to do it would have been to shoot all the upside down BS first and finish with the large/flat areas across the bottom to avoid the overspray look. Oh well. Next time I guess.......
Nice thing about the bed liner is it can be repaired or over-coated at any time after simply degreasing the surface, no scuffing. The cured bed liner has a tough rubbery texture to it. But the coolest thing is how much quieter the body is now. It used to be like beating on a tin drum, now it's really muffled.
~$130 for Raptor kit and gun from local Wesco paint supply
Karl
DON'T QUIT
DON'T QUIT
-
dave t

- Posts: 428
- Joined: Sat Nov 25, 2006 5:43 pm