Page 6 of 16
Posted: Sat Apr 19, 2008 7:36 pm
by seabeebuggy
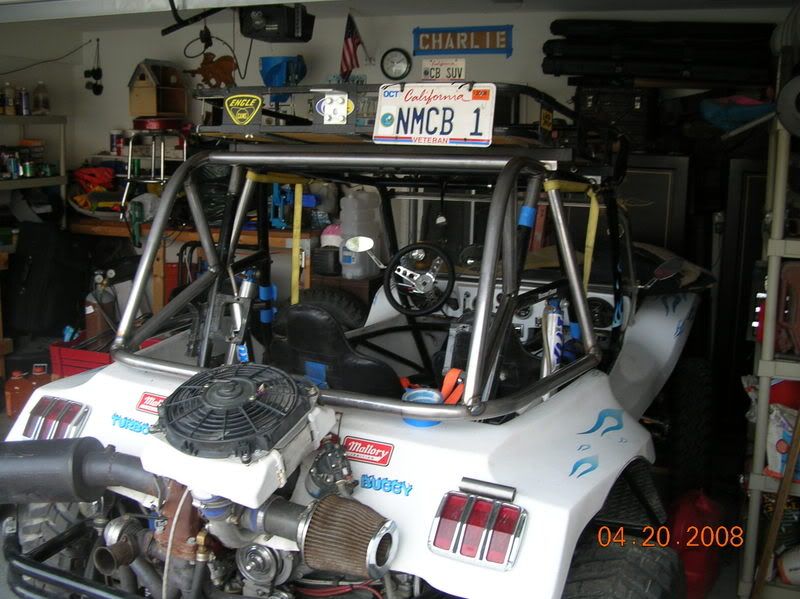
Almost done. Sort of. I built the other side it came out great. I still need to weld the other side , it is only tacked. I need to plug a few sleeves and then start the cross members to connect the top and the fuel tank mount. I hope I have enough tubing left. I have less than 1' of waste tubing. I was lucky so far. I don't think i will have enough for everything i wish to make but we will see.
Posted: Sun Apr 20, 2008 10:54 am
by seabeebuggy
Still working on the last hoop and 6 supports 2 45's on the top for side to side , 2 support under the rear hoop to frame and 2 small bits for the tank mount the last hoop will be about 8'' above the other hoop (flat part over glass).

Posted: Sun Apr 20, 2008 2:44 pm
by CopperBaja
Nice looking work!
Posted: Sun Apr 27, 2008 10:50 am
by seabeebuggy
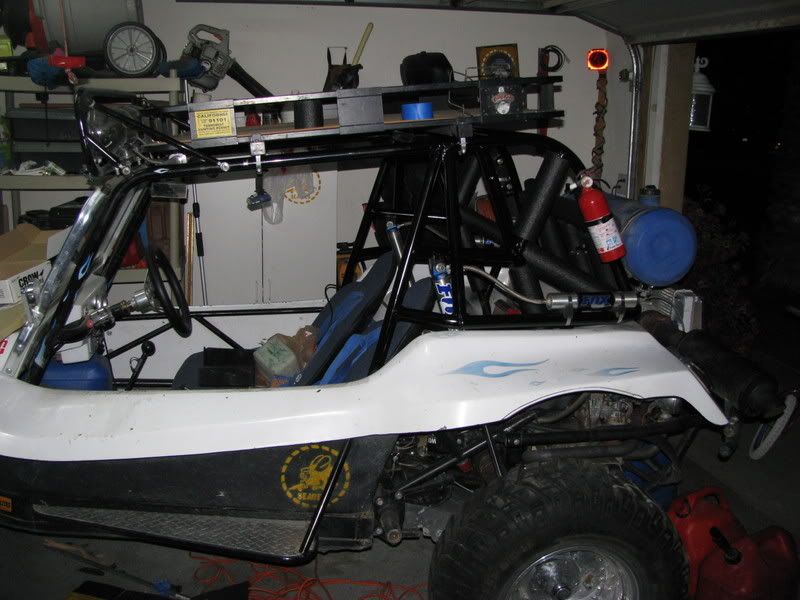
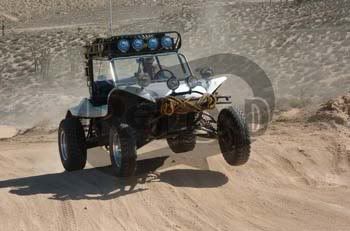
Here is a great shot from a pro. I will get his name to give him the credit. as you can see it is labled to keep people from using it freely. I need to get a copy.
Posted: Sun Apr 27, 2008 12:04 pm
by Leatherneck
Nice shot, where did you move your intercooler to? Did you find out about UPS?
Posted: Sun Apr 27, 2008 12:59 pm
by david58
It is under the fan, it looks like to me.
Posted: Sun Apr 27, 2008 1:04 pm
by seabeebuggy
I rotated the turbo to the rear and flipped the cooler to the right. So it is on the rear to the right side. Not on top now. I still need to pipe it.

I will get some photos as soon as i can find a working camera.

I don't know about the cable yet. I cant find my copy of tracking info I need to call Monday.
Posted: Sat May 03, 2008 8:30 pm
by seabeebuggy
Posted: Sun May 04, 2008 6:56 am
by Leatherneck
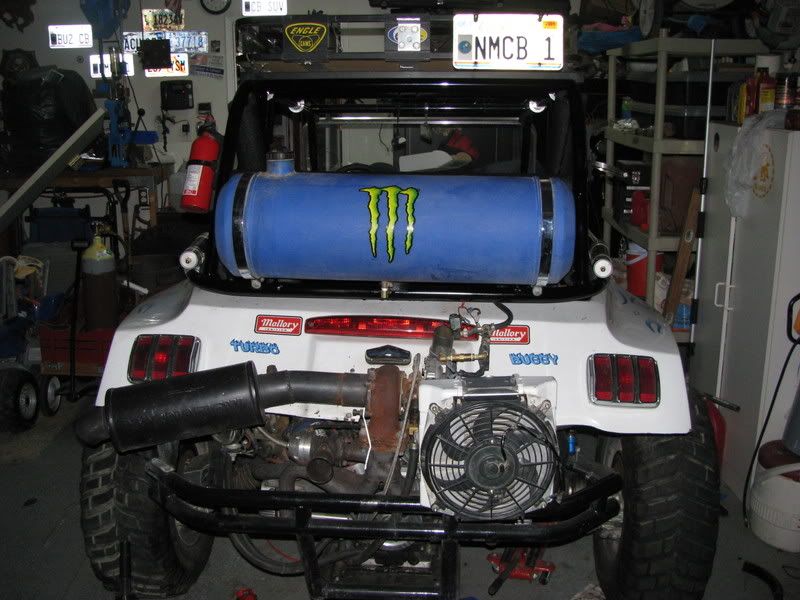
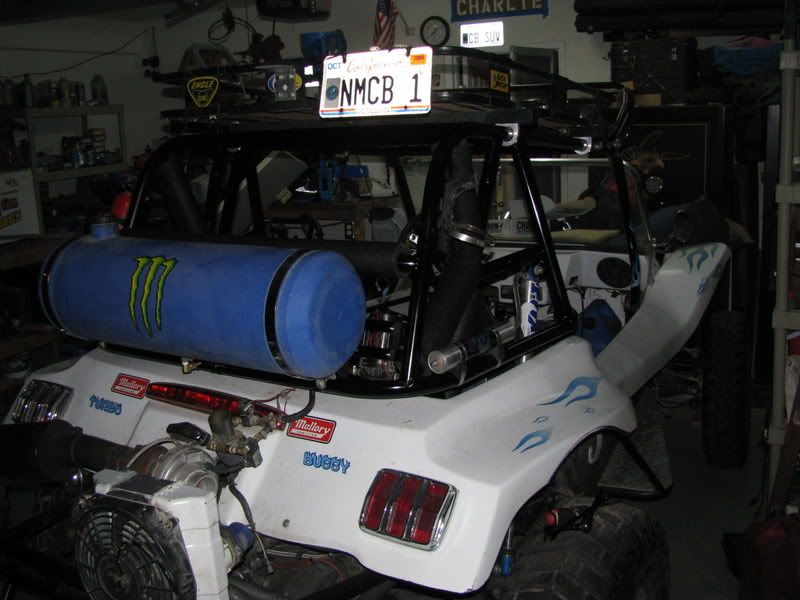
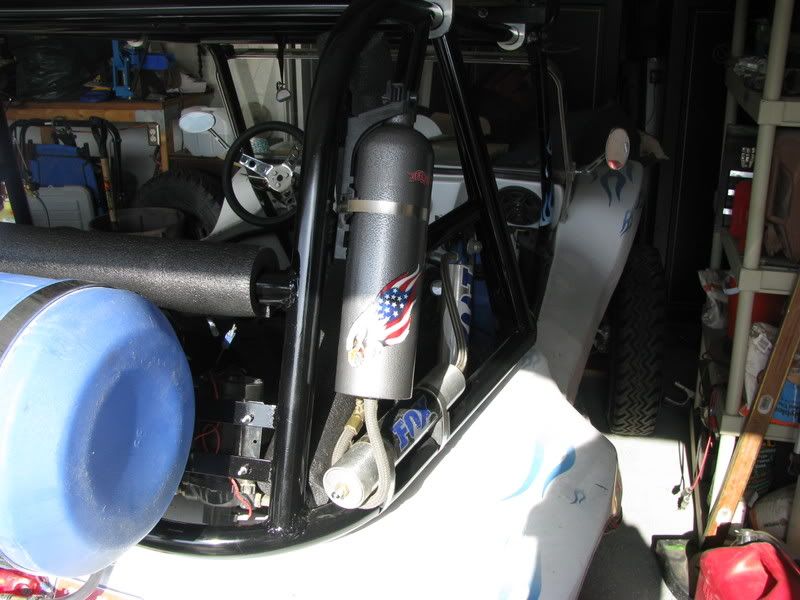
Seabee, cage looks outstanding, interested in seeing the finished alki system. Only downside is fuel tank location, but not that you have alot of options.
Posted: Sun May 04, 2008 9:37 am
by seabeebuggy
I will do a photos display of the Alki parts . I wish the tank was not there. but the 6 gallons up front will not cut it. I am sure this extra weight will affect the ride some how. It is more to the rear now.
Posted: Sun May 18, 2008 6:51 pm
by seabeebuggy
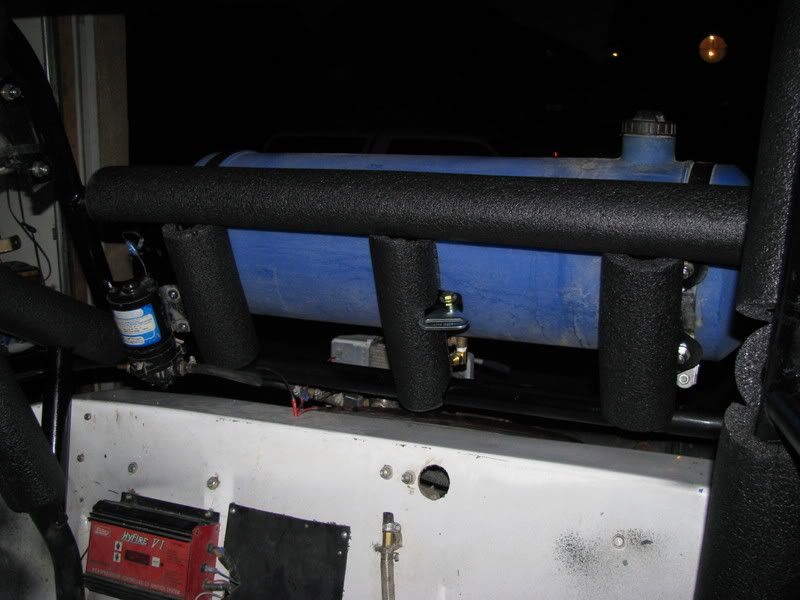
I never did get photos of the completed job. but here is another photo. The is the alki tank. I call it a 15$ fire extinguisher. aluminum tanks are like 100$ so this was a easy set up. mounted like a FE but i used a hose clamp to mount it where it can not be pulled off and used some how. the handle and nose were removed. striped and repainted hammer paint. Added some stickers.
Posted: Sun May 18, 2008 6:55 pm
by Leatherneck
Seabee looks good, nice use of a existing tank, how long will that last ya?
Posted: Sun May 18, 2008 6:58 pm
by seabeebuggy
I believe it will last about 15 hours to 40 hours depending how hard it is driven.
That is a project I still need to do and with all the guidence you have given, very doable. Yours looks good.
Posted: Sun Jun 08, 2008 9:22 pm
by seabeebuggy
Going through buggy withdraw ..

Posted: Mon Jun 09, 2008 4:56 am
by kcnaz
Going through buggy withdraw ..
keep coming back, its a good fix here.