My 79 Westy Bus to Ford 2.3 Conversion Log
-
fastmc25

- Posts: 290
- Joined: Fri Jan 04, 2002 12:01 am
Re: back in the Saddle ( for a bit here and there )
[quote="metropoj"]
Paul, if you are reading this, You ended up using the 1.5" Galv fence pipe right ? You also mentioned getting a bead welded around the ends to keep hoses tight. How far did you run the pipe to ? I assumed through most of the body then you used long hoses to connect the rad and water pumps to the pipe ? Where did you get your long rad hoses from again ? I looked but didn't seem to find what I was looking for information wise.
quote]
Hey, Glad you're active again.... The pipe i used was top rail pipe from a chain link fence......It's probably more like 1-3/8" galvanized pipe..... I ran it from just in front of torsion housing through all the crossmembers on the passenger side ( retaining the original heat tube in the center) to under the front floorboard............. I welded a bead around the tube ends so the hoses would seal and not pull off...............
I used Heavy duty hose from the torsion housing area to the engine....( This can be purchased from any place that makes Hydraulic lines, A/C lines,industrial high pressure water hoses ..ETC.... I just figured out what ID i needed for the pipe and the engine........which was about the same as the fence pipe diameter..... worked out great.... It was about a $1 a foot.... I used about 20 foot to reach the engine.......
Up front i went to a local autoparts store and dug through their hoses until i found a couple that would fit the pipe and reach the radiator.......
I hope this helps...... I can email you some pics if you need.....
Peace,
Paul, if you are reading this, You ended up using the 1.5" Galv fence pipe right ? You also mentioned getting a bead welded around the ends to keep hoses tight. How far did you run the pipe to ? I assumed through most of the body then you used long hoses to connect the rad and water pumps to the pipe ? Where did you get your long rad hoses from again ? I looked but didn't seem to find what I was looking for information wise.
quote]
Hey, Glad you're active again.... The pipe i used was top rail pipe from a chain link fence......It's probably more like 1-3/8" galvanized pipe..... I ran it from just in front of torsion housing through all the crossmembers on the passenger side ( retaining the original heat tube in the center) to under the front floorboard............. I welded a bead around the tube ends so the hoses would seal and not pull off...............
I used Heavy duty hose from the torsion housing area to the engine....( This can be purchased from any place that makes Hydraulic lines, A/C lines,industrial high pressure water hoses ..ETC.... I just figured out what ID i needed for the pipe and the engine........which was about the same as the fence pipe diameter..... worked out great.... It was about a $1 a foot.... I used about 20 foot to reach the engine.......
Up front i went to a local autoparts store and dug through their hoses until i found a couple that would fit the pipe and reach the radiator.......
I hope this helps...... I can email you some pics if you need.....
Peace,
Peace,
Paul
1973 Adventurewagen (AKA Clyde) V6 powered
1961 Deluxe Beetle (Christine)
www.fullmoonbusclub.com
www.arklatexvwclub.com
www.lovemybus.com
Paul
1973 Adventurewagen (AKA Clyde) V6 powered
1961 Deluxe Beetle (Christine)
www.fullmoonbusclub.com
www.arklatexvwclub.com
www.lovemybus.com
-
metropoj
- Posts: 997
- Joined: Thu Sep 05, 2002 12:01 am
Thanks Paul for the help ... if you could email a couple pics of the rad and engine sides, I'd like to see that for reference.
once I get the shop cleaned up a bit, I'll start torqueing the motor adapter to tranny and get it stuffed up inside and getting some motor mounts fabbed up before i start running pipe ....
[email protected]
once I get the shop cleaned up a bit, I'll start torqueing the motor adapter to tranny and get it stuffed up inside and getting some motor mounts fabbed up before i start running pipe ....
[email protected]
-
fastmc25
- Posts: 290
- Joined: Fri Jan 04, 2002 12:01 am
I just sent you an email with my photobucket link....
http://s71.photobucket.com/albums/i160/ ... en%20Baja/
Hope that helps.....
Peace,
http://s71.photobucket.com/albums/i160/ ... en%20Baja/
Hope that helps.....
Peace,
Peace,
Paul
1973 Adventurewagen (AKA Clyde) V6 powered
1961 Deluxe Beetle (Christine)
www.fullmoonbusclub.com
www.arklatexvwclub.com
www.lovemybus.com
Paul
1973 Adventurewagen (AKA Clyde) V6 powered
1961 Deluxe Beetle (Christine)
www.fullmoonbusclub.com
www.arklatexvwclub.com
www.lovemybus.com
-
fastmc25
- Posts: 290
- Joined: Fri Jan 04, 2002 12:01 am
Hey metropoj,
Any Progress.................Just a friendly nudge.........
Any Progress.................Just a friendly nudge.........
Peace,
Paul
1973 Adventurewagen (AKA Clyde) V6 powered
1961 Deluxe Beetle (Christine)
www.fullmoonbusclub.com
www.arklatexvwclub.com
www.lovemybus.com
Paul
1973 Adventurewagen (AKA Clyde) V6 powered
1961 Deluxe Beetle (Christine)
www.fullmoonbusclub.com
www.arklatexvwclub.com
www.lovemybus.com
-
metropoj
- Posts: 997
- Joined: Thu Sep 05, 2002 12:01 am
Thanks for the nudge ....  Much appreciated ...
Well, I got a second set of dollies now under the front wheels .. now I can spin this baby anyway I want !
Oh, and I've also got my towbar mounted into the front bumper frame material. I actually thought the bumper mounts that stick out on the fronts of the late bays were stronger metal. I am thinking for safety reasons to slide a big piece of angle iron into the inner support and bolt it in to increase the strength a little.... I don't know, it seems like the tow bar brackets flex a bit but it may be my imagination.
I just finished building up my new air compressor and trying to clean up the garage so I got some room to wheel this thing around.
Tongiht is clean up night once again. I am going to get the motor set up with the Tranny and everything and get it all torqued up properly. Once things are running, i will replace the motor with a rebuilt core. this one showed low compression in one cylinder that did eventually come up but I think perhaps a bad head gasket or valve train, time will tell .... ...
Much appreciated ...Well, I got a second set of dollies now under the front wheels
.. now I can spin this baby anyway I want ! Oh, and I've also got my towbar mounted into the front bumper frame material. I actually thought the bumper mounts that stick out on the fronts of the late bays were stronger metal. I am thinking for safety reasons to slide a big piece of angle iron into the inner support and bolt it in to increase the strength a little.... I don't know, it seems like the tow bar brackets flex a bit but it may be my imagination.
I just finished building up my new air compressor and trying to clean up the garage so I got some room to wheel this thing around.
Tongiht is clean up night once again. I am going to get the motor set up with the Tranny and everything and get it all torqued up properly. Once things are running, i will replace the motor with a rebuilt core. this one showed low compression in one cylinder that did eventually come up but I think perhaps a bad head gasket or valve train, time will tell ....
...-
metropoj
- Posts: 997
- Joined: Thu Sep 05, 2002 12:01 am
Finally, in the past 2 weeks I have managed to get about 4 hours of time.
Torqued down the adapter plate, new T/O bearing, Clutch and P/P, all mated to tranny.
Put the motor in last night, it is currently resting on the front tranny mount and new tranny hangers. I have the old T IV bar installed and will og and pick up some new Engine mounts for the 2.3l and start fabbing up the brackets with some heavy duty angle iron I got around.
I'll have to pull the motor yet to install the gas tank as I cannot paint up inside the tank area until the weather stays warm enough.
Lots of room side to side and will clear the carb so that's good.
One problem ... LOL, Oil Filler cap is right under the deck. I'll either have to cut a small access door in the deck or I was thinking of drilling an access hole with a plug that I can use to fill with oil. The filler cap is unscrewable under the deck and removeable but no easy way to get oil in the beast ...
I'll start running lines soon too I guess. I'll have to try and run the lines so that they are not on the exhaust side of the motor. The less chance of heat the better ....

Torqued down the adapter plate, new T/O bearing, Clutch and P/P, all mated to tranny.
Put the motor in last night, it is currently resting on the front tranny mount and new tranny hangers. I have the old T IV bar installed and will og and pick up some new Engine mounts for the 2.3l and start fabbing up the brackets with some heavy duty angle iron I got around.
I'll have to pull the motor yet to install the gas tank as I cannot paint up inside the tank area until the weather stays warm enough.
Lots of room side to side and will clear the carb so that's good.
One problem ... LOL, Oil Filler cap is right under the deck. I'll either have to cut a small access door in the deck or I was thinking of drilling an access hole with a plug that I can use to fill with oil. The filler cap is unscrewable under the deck and removeable but no easy way to get oil in the beast
...I'll start running lines soon too I guess. I'll have to try and run the lines so that they are not on the exhaust side of the motor. The less chance of heat the better ....
-
fastmc25
- Posts: 290
- Joined: Fri Jan 04, 2002 12:01 am
Great !!!!! Glad you got some time for your project............metropoj wrote:
One problem ... LOL, Oil Filler cap is right under the deck. I'll either have to cut a small access door in the deck or I was thinking of drilling an access hole with a plug that I can use to fill with oil. The filler cap is unscrewable under the deck and removeable but no easy way to get oil in the beast

The oil filler isn't a big problem.....
.......... Just get another steel valve cover and remove the filler neck..... Then weld it on the side of the valve cover near the top.... Plenty of clearance and will still be functional....... ....You can then just weld a piece where the filler was...... Just make sure you go between the cam towers so there's no chance of interference....
Just an Idea......... Good luck and keep busy.............. Send us more pics of your progress......... I'll be posting more soon of the Adventurewagen.....
Peace,
Paul
1973 Adventurewagen (AKA Clyde) V6 powered
1961 Deluxe Beetle (Christine)
www.fullmoonbusclub.com
www.arklatexvwclub.com
www.lovemybus.com
Paul
1973 Adventurewagen (AKA Clyde) V6 powered
1961 Deluxe Beetle (Christine)
www.fullmoonbusclub.com
www.arklatexvwclub.com
www.lovemybus.com
-
GfunkBus76

- Posts: 36
- Joined: Wed Nov 24, 2004 3:45 pm
-
metropoj
- Posts: 997
- Joined: Thu Sep 05, 2002 12:01 am
Sadly, I must bow out for personal reasons on finishing the project  All the parts are there and thanks to "Clyde" I know it would have worked and worked well too !
And, just as the bus is really starting to appreciate in value too. I am seeing more and more of these little workhorses on the roads these days and I live in a "GM" town !
Clyde is getting a new "Face" from my bus ( it ships today ! ) and I have the conversion stuff up for sale if anyone is interested .....
This project is like a total thorn in my side by not being able to complete it .... The past few years I had to abandon 2 squareback complete restos ( after i did all the hard work of completely replacing the heater channels !! ) and now this. I look forward to seeing more projects . Keep at it Gfunk....
Thanks Fastmc for showing us "How it's done! " ...
Over and out ....
All the parts are there and thanks to "Clyde" I know it would have worked and worked well too !And, just as the bus is really starting to appreciate in value too. I am seeing more and more of these little workhorses on the roads these days and I live in a "GM" town !
Clyde is getting a new "Face" from my bus ( it ships today ! ) and I have the conversion stuff up for sale if anyone is interested .....
This project is like a total thorn in my side by not being able to complete it
.... The past few years I had to abandon 2 squareback complete restos ( after i did all the hard work of completely replacing the heater channels !! ) and now this. I look forward to seeing more projects . Keep at it Gfunk....Thanks Fastmc for showing us "How it's done! "
... Over and out ....
-
chazz79
- Posts: 27
- Joined: Wed Sep 30, 2009 4:57 pm
This bus was never finished, at least as far as the web is concerned. I figured I'd park my pics here so as not to polute the samba with my non-vw leanings.
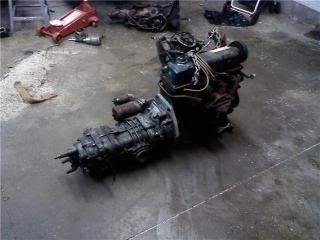
Getting the beast hoisted up the but. I slid it under the bus and then winched the mess up in from the hatch access hole-as shown here-

Since starting my conversion last week I've arrived at the point metropoj ended at. My engine came from a 1978 mustang 2 and was a better candidate IMO because the oil filler is accessable from the hatch and it's a front sump engine. This orientation places the sump at the rear so upon taking off from a light the oil is slung towards the pick-up screen. The rear valance cut is not necessary either.
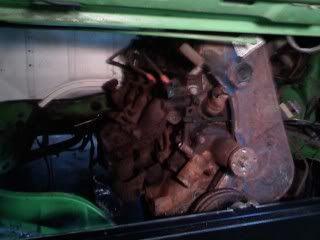
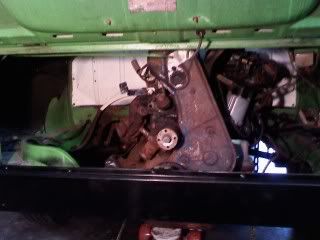
There's not a great deal of room above the carb for an air filter so a custom deal might have to be made.
Getting the beast hoisted up the but. I slid it under the bus and then winched the mess up in from the hatch access hole-as shown here-
Since starting my conversion last week I've arrived at the point metropoj ended at. My engine came from a 1978 mustang 2 and was a better candidate IMO because the oil filler is accessable from the hatch and it's a front sump engine. This orientation places the sump at the rear so upon taking off from a light the oil is slung towards the pick-up screen. The rear valance cut is not necessary either.
There's not a great deal of room above the carb for an air filter so a custom deal might have to be made.
-
metropoj
- Posts: 997
- Joined: Thu Sep 05, 2002 12:01 am
For the carb I used a colection of Mustang 86 carb pieces and a manifold off of a Pinto. The progrssive sits nice under the deck with some room to spare ....
I'll have some conversion stuff available if anyone needs some, spare front grille and matching fresh air intake, ranger shorty exhaust manifold, 2.3 to VW adapter, Carb setup and new rebuild kit ,electronic ignition new computer modules, rebuilt distributor, etc ... etc ...
Good luck with your project ! Mine is still sitting here but will probably be gone soon ...
I'll have some conversion stuff available if anyone needs some, spare front grille and matching fresh air intake, ranger shorty exhaust manifold, 2.3 to VW adapter, Carb setup and new rebuild kit ,electronic ignition new computer modules, rebuilt distributor, etc ... etc ...
Good luck with your project ! Mine is still sitting here but will probably be gone soon ...
-
WestyPop
- Posts: 123
- Joined: Mon May 02, 2005 11:26 am
Hi metropoj, you sound like you're in the same mode I'm in... too many other things happening. Doubled population of household due to more extended family members living here now (not VW enthusiasts; bummer)! Less time than ever. Challenging.
I am determined to get the 2.8L V6 power into the Westy, though I think I'll go for an 'external' radiator up front, enclosed in a fake 'spare tire' look affair. There was someone on the Samba looking for a Brazilian/Mexican radiator grille recently IIRC, and another baywindow owner I directed over to here to get more info on w.c. conversions.
Guess you're putting your bus back together more or less stock. At least you'll have it back in operation.
Hang in there.
I am determined to get the 2.8L V6 power into the Westy, though I think I'll go for an 'external' radiator up front, enclosed in a fake 'spare tire' look affair. There was someone on the Samba looking for a Brazilian/Mexican radiator grille recently IIRC, and another baywindow owner I directed over to here to get more info on w.c. conversions.
Guess you're putting your bus back together more or less stock. At least you'll have it back in operation.
Hang in there.
-
chazz79
- Posts: 27
- Joined: Wed Sep 30, 2009 4:57 pm