Page 20 of 21
Re: An engine run cart build
Posted: Sat May 04, 2013 4:14 pm
by Ol'fogasaurus
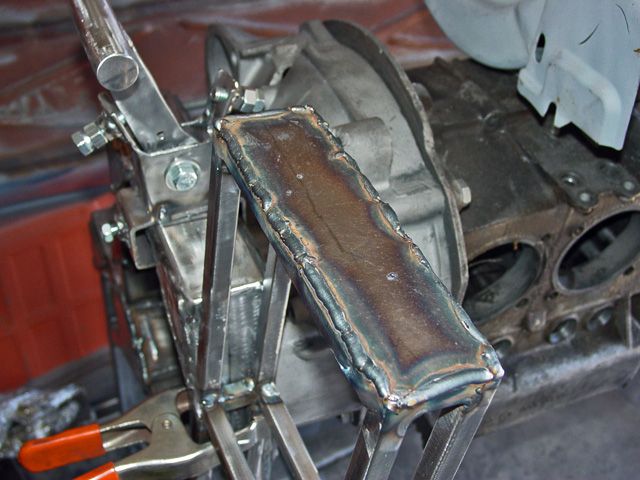
Yesterday I some garage time so I made a mounting plate for the tower; it is welded in and the welds need to be flattened out.
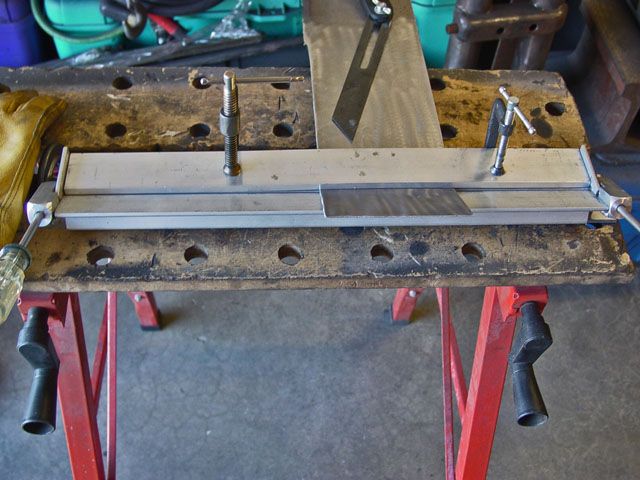
I decided to bend the mount today so I looked for my bender that I bought from JC Whitney maybe close to 50 years ago. I finally found the box but the handles were lost but I found two Phillips head screwdrivers that worked OK.
This thing was not intended to handle this thick of material (14 ga that I had laying around) so I had to work slow and keep an even pressure going and allow for larger minimum bend radii. The picture shows the clamps in the wrong place, they should be on the part also. I used a angle duplicator that was set to the wire mockup I made.
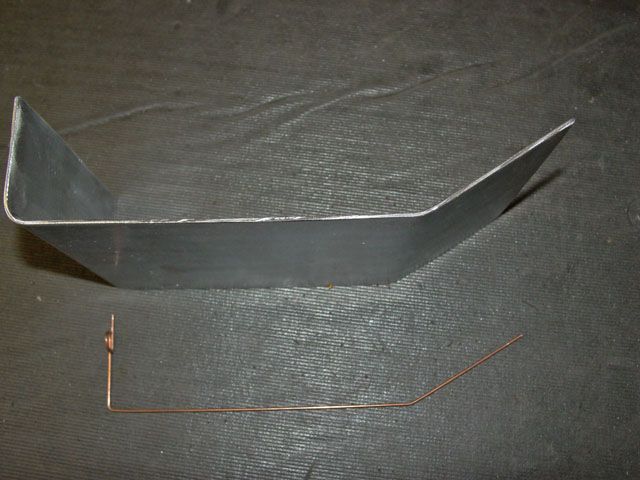
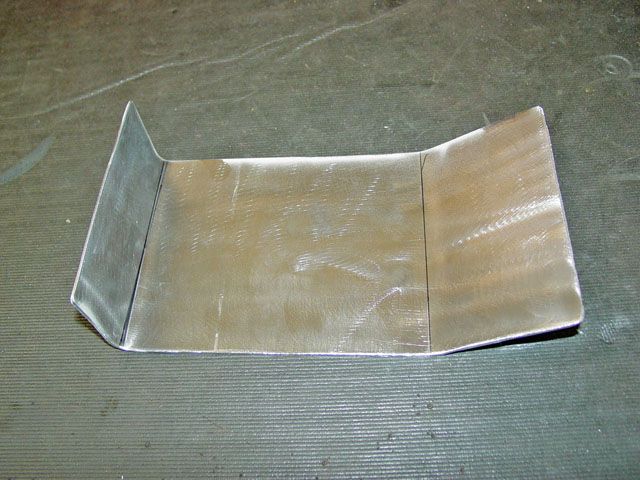
This shows the bent part vs. the wire mockup.
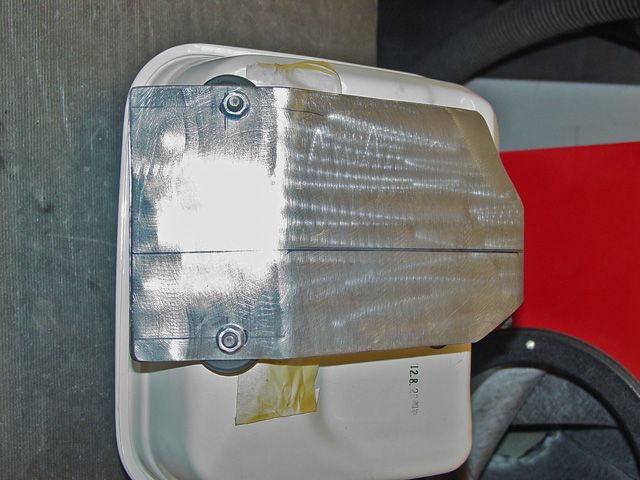
This shows both ends of the mount. I found some shock isolators that I used as spacers/mounts; bit thick so they will have to be cut in half or there about. I also need to put a flat piece of rubber under the single mount on the other end.
I ended up slotting the two holes and the slot may have to be lengthened a bit after the spacers are thinned out. The flange where the two studs come though will be shortened one inch in length.
It sits almost flat on all four corners and with the flattening of the welded-in plate on the tower (grinding the part of the weld that sits high) and the adjustment of the spacers I can bolt it in and almost call this part done. I still have to add the shut-off valve to the tower.
Re: An engine run cart build
Posted: Tue Jul 23, 2013 1:19 pm
by Ol'fogasaurus
I am still working on the stand and have gotten down towards the end. There were two suggestions of color: white and yellow. White shows grease staining too easy and Eee-yowler, although one of the colors I like, I wasn't sure of. No other colors were suggested as I remember so yellow it was.
Damn! It has been quite a while since I have painted and even longer since I laid yellow; I forgot how hard it is to paint. For white and yellow you need black underneath... a good thick non-flawed black. Since white is fully reflective of color it does require the black base but Yellow is translucent as all get out which makes it a bigger problem in my opinion. Yellow paint also thin and runs easy (which I got some of

). Part way through the painting I found the non welded spot I had forgot about which needs to be done so I will have to strip the area and repaint that spot after I weld it up.
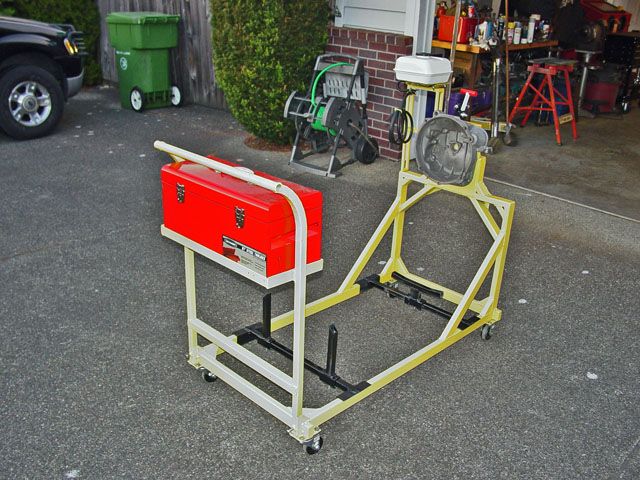
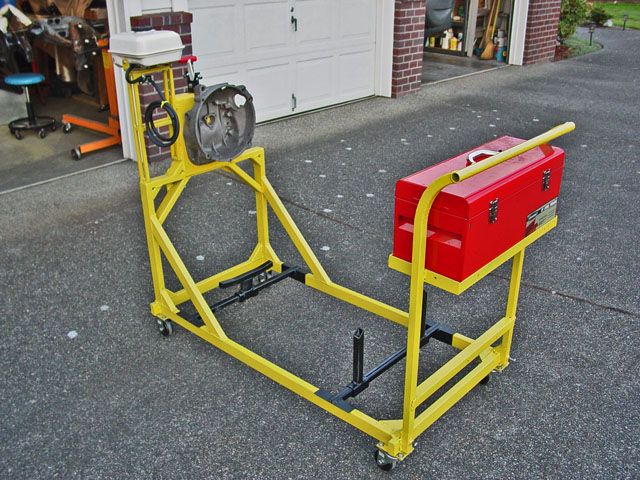
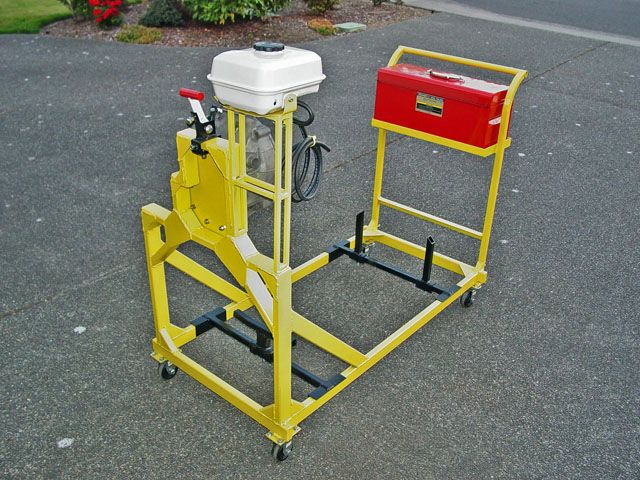
Remember, this is more of a storage cart with the capabilities of running an engine than an engine run cart.
The battery tray and maybe the drip tray will be a one piece clamp on affair depending on how the engine will set in there. I did check and I think I can install either the v6 w/transaxle I have or two ACVW engines; one sideways and one 90° to it.
I am back to the control panel and have stopped there. I have figured out how I want to do it (not much of a change but it is the generator vs. alternator wiring that is slowing me down. When talking to DaleM about it he said I could run the engine without hooking up either the generator or alternator w/o wiring them. I was always told not to do it but checking around I guess you can but it is not recommended incase you come into contact with it when reaching over or something like that. Turbo, do you or any of you other guys who have run stands leave them unhooked?
Lee
Re: An engine run cart build
Posted: Wed Jul 24, 2013 8:34 am
by turboblue
We never wire up either generators or alternators when we run them in Lee.
Getting ready to fire off my sand drag engine in a few days.
2276 turbo.
I'll try to put up some video............

Re: An engine run cart build
Posted: Wed Jul 24, 2013 9:02 am
by Ol'fogasaurus
Thank you sir!

I'm still anxious over (50+ years of being told not to run the charging system w/o it being hooked up properly and going through the early Alt years and all the troubles during that time period) this. I got thinking about it again after Turbo's post and had an epiphany; maybe gutting an old generator or alternator thus allowing the hook up of the fan and pulley w/o stray electronics being involved may solve my concerns.
Lee
Re: An engine run cart build
Posted: Wed Jul 24, 2013 3:18 pm
by fusername
Lee, I pulled a similar bender out of a dumpster when I bought my TIG welder, guy was scrapping EVERYTHING, I dove in looking for a camber compensator, found that instead. Is it worth setting up? it is missing flat stock to clamp w/ and a easy way of hooking it to the table, but I think I will clamp it to my press which I bought based on ur experience! about time I wrapped up that other thread.

You are a usefull set of footprints to follow it seems, even when by accident!
Re: An engine run cart build
Posted: Wed Jul 24, 2013 4:00 pm
by Ol'fogasaurus
Subject: An engine run cart build
fusername wrote:Lee, I pulled a similar bender out of a dumpster when I bought my TIG welder, guy was scrapping EVERYTHING, I dove in looking for a camber compensator, found that instead. Is it worth setting up? it is missing flat stock to clamp w/ and a easy way of hooking it to the table, but I think I will clamp it to my press which I bought based on ur experience! about time I wrapped up that other thread.
You are a usefull set of footprints to follow it seems, even when by accident!
Fuser, I am confused on what you said. I am sure it was a complement but I am not sure what I did right.

...
Unless... you are you talking about the cheap break press I used earlier in the build to make the fuel tank adapter? If so, the flat stock used for clamping doesn't have to be chamfered but it does help especially when going over 90° of bend. The chamfer (usually) determines the maximum bend of the part
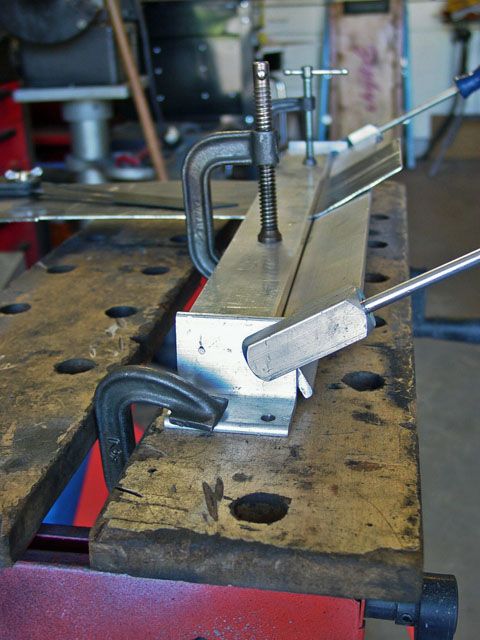
The bender I used is supposed to be bolted down as there were two holes on each end at the pivots but being lazy and not completely sure about it, I used C-clamps to hold everything together. I was bending stock thicker than I should have been but it worked out OK. Look on line for the material, thickness and minimum bend radius.
An example of a lighter weight hand bending brake press:
http://www.harborfreight.com/18-inch-be ... 39103.html
For heavier stuff a press brake (notice the word order) using your shop press is an easier way to go. Boxes are going to be harder as they take different lengths of clamps but it can be done.
http://www.swagoffroad.com/20-TON-Press ... _p_40.html http://www.youtube.com/watch?v=-vwacbaOXjU There are other people making them and other U-tube ideas on how to do it.
When you get really rich there are other more fun things you can spend you $$$ to do these things.
http://www.harborfreight.com/30-inch-sh ... -5907.html I am still contemplating this of the Grizzleyunit (
http://www.grizzly.com/products/Sheet-M ... -30-/G4011 They even make a 12" unit)which will give me a chance to drop by Art/Clonebug to see him. Grizzley is in/by Bellingham WA.
Re: An engine run cart build
Posted: Sat Jul 27, 2013 10:30 am
by Ol'fogasaurus
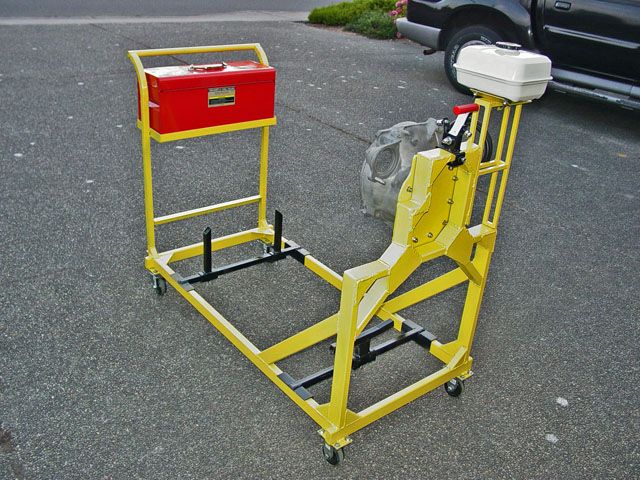
Got out to the garage a couple of times yesterday and this is where I am. I still have the fuel shut-off valve to locate and the control panel to build. It is not going to be as detailed as I had originally planned it; things have changed here and it is looking like I won't have to worry about the other guys in the group using it so I will wire it simply. Pictures later.
Lee
Re: An engine run cart build
Posted: Sat Jul 27, 2013 11:30 am
by Leatherneck
Looks good Lee.. Crank it up.
Re: An engine run cart build
Posted: Sun Aug 04, 2013 2:49 pm
by Ol'fogasaurus
I’m supposed to be taking it kind of easy for a few days but I did get out into the garage to do some simple things.
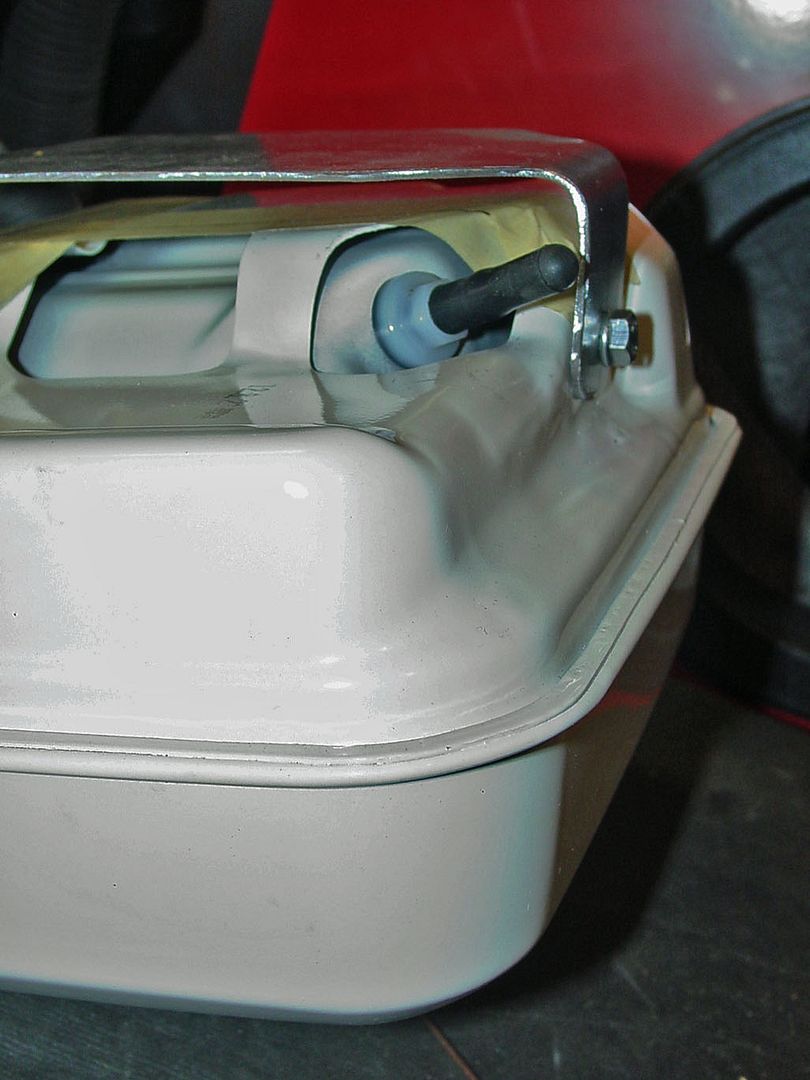
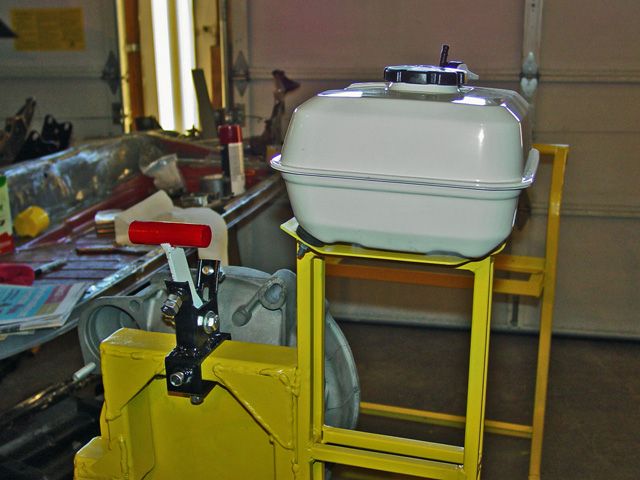
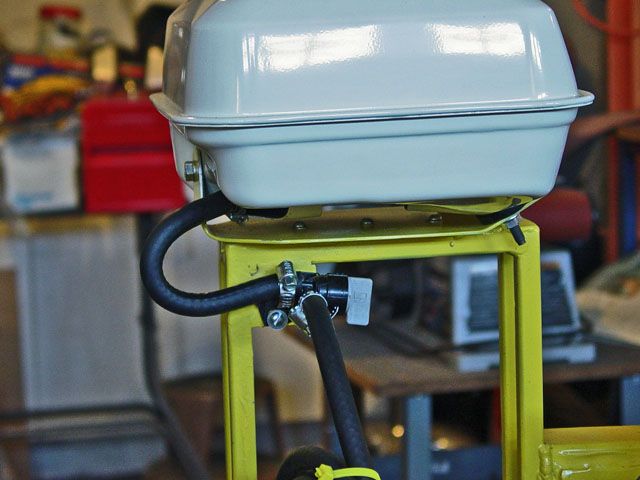
It was time to mount the shut-off valve for the fuel tank. I did find out that the outlets for the tank and the on/off valve were ¼” although they didn’t look like it neo it was easy to get fuel line to fit.
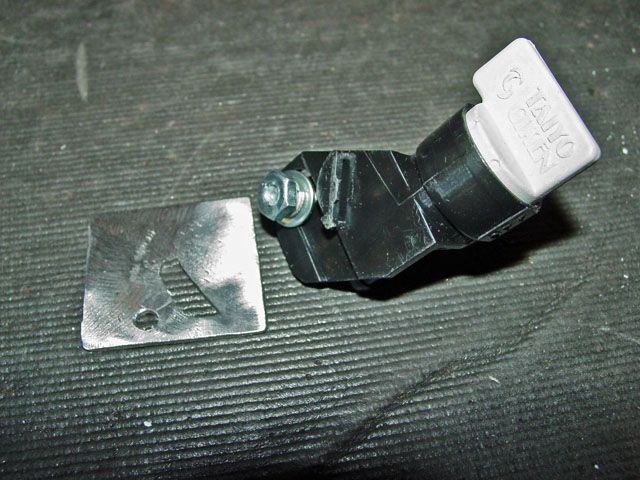
If you notice, on the back of the valve there is an indexing boss. I have cut a piece of flat stock I had laying around to an approximate size and phony’d in a rough approximation of the boss then started to work on opening up the hole using a pneumatic file and needle files from a hole I drilled into the tab.
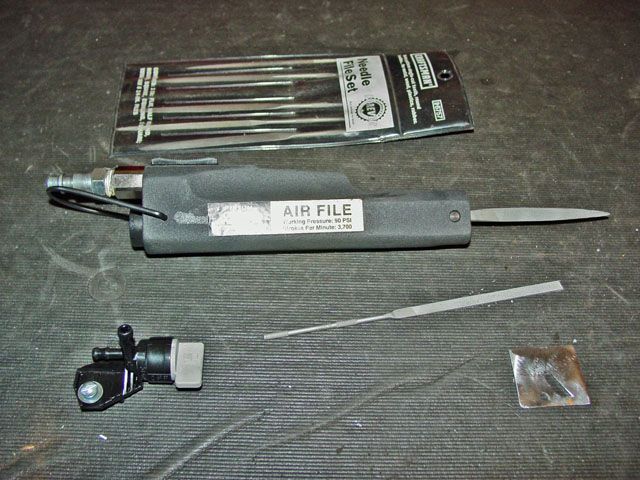
These are the tools I used; if you have never used a pneumatic file they are fun to use but you cannot force them as they will bind down on you and work slower. The needle files did most of the fine and finish work. The pneumatic files were good for when I had to slightly change the angle of the indexing boss when I could get the valve in place to check the angle the valve sat at.
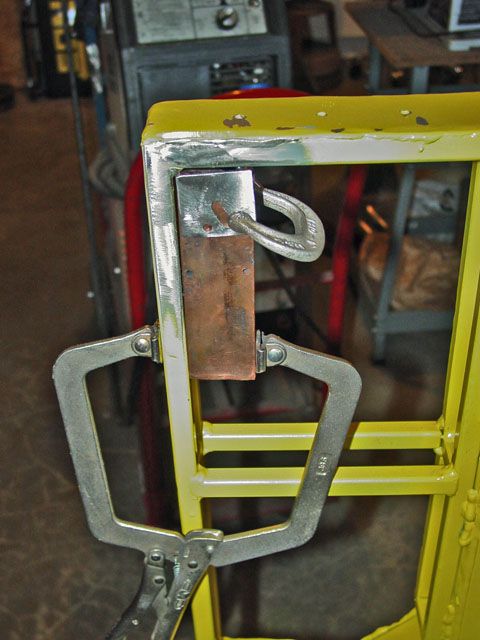
The finished valve mount tab sitting in place. Believe it or not, the head sink is a piece of copper stock.
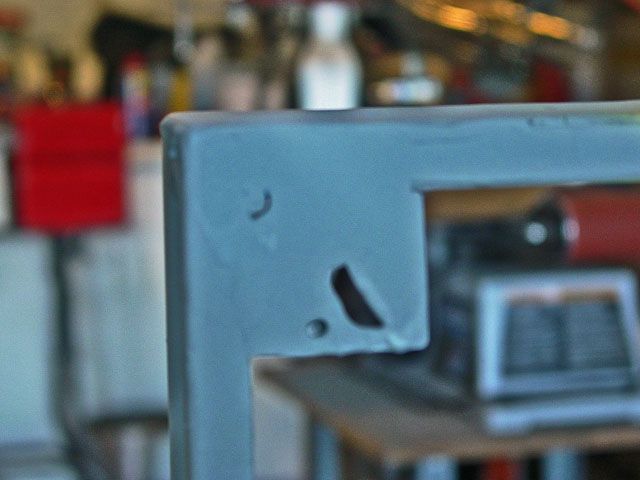
Sorry about the picture quality but this is the tab in place. I wonder if the flat color confused the auto focus on the camera as I thought I was being careful when taking the picture but even then it did not want to focus on the object.
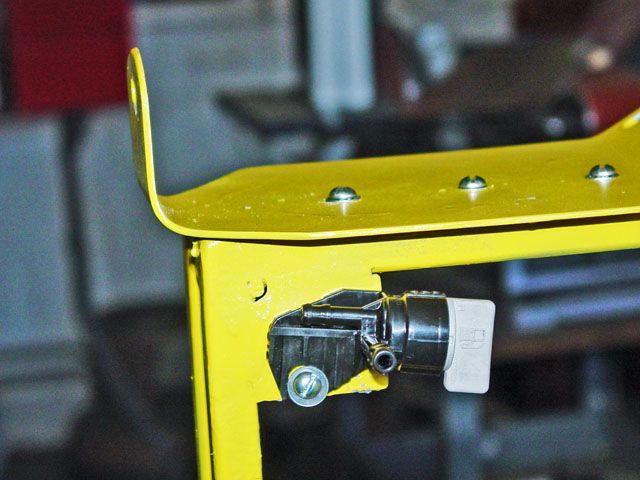
The area painted and the valve in place.
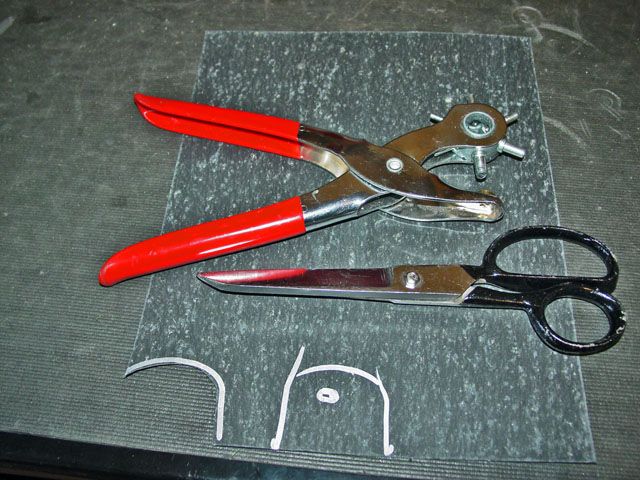
I had cut a shock rubber in half for the two tank studs in the other side but I did not have a gasket for the other side. I found some old gasket material I had laying around and, using a silver Sharpie I marked the shape of the mount and the hole in the gasket material. Scissors cut the stock and the hold punch was made to make a slot to match the slot in the mounting bracket.
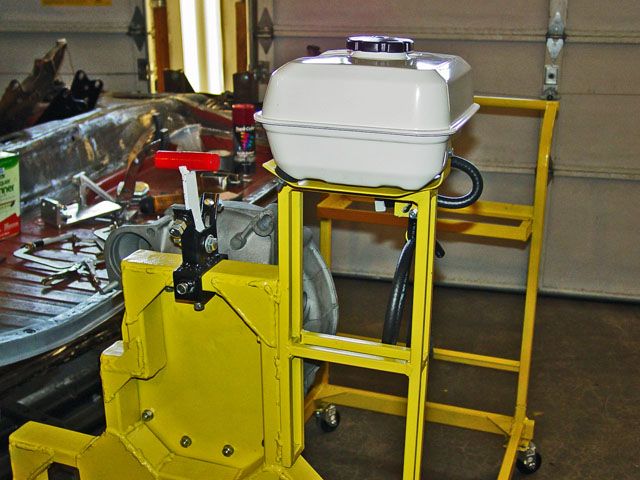
This is where I am now.
I have started the control panel; the lower mounts are made and the panel material is rough cut but I don’t think I will post anything until it is done. Because of some changes around here I am not going to make the wiring as all-consuming as I had planned on.
Lee
Re: An engine run cart build
Posted: Wed Aug 07, 2013 8:10 pm
by Big Dave
I like the KISS method of wiring....especially on something like this that will only see occasional use.
Re: An engine run cart build
Posted: Wed Aug 07, 2013 8:26 pm
by Ol'fogasaurus
KISS is good though, just not always thorough enough. Not doing it right is still rankling me a lot; just not the way I was brought up I guess.
Started to get the engine mounts ready for paint.
Lee
Re: An engine run cart build
Posted: Fri Aug 09, 2013 8:48 pm
by Ol'fogasaurus
Almost done
This should be the next to the last post here. I will try to load the engine to be stored tomorrow... if I get a chance then a pix or two of it and that will be it for a while. I may take some pictures of the dash when done but that is going to be put off for a while I think.
Lee
Re: An engine run cart build
Posted: Sat Aug 10, 2013 10:49 am
by Ol'fogasaurus
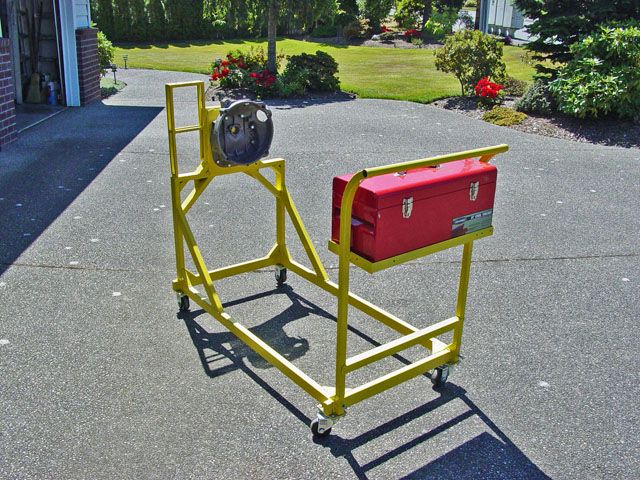
Well, it’s done at least as far as I am going to go for the near future. I have some other things to complete first.
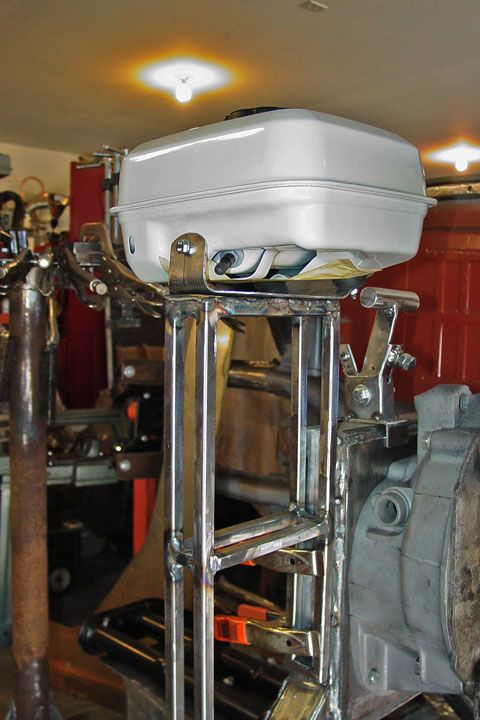
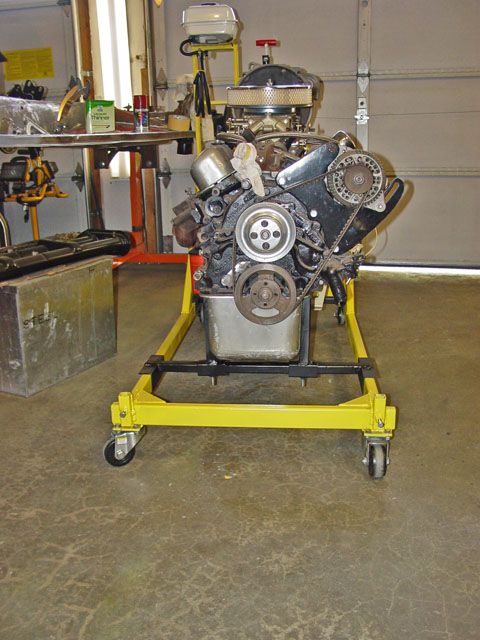
I got out to the garage early this morning and started to put the engine in place. It took about 2 hours as I was working by myself as usual.
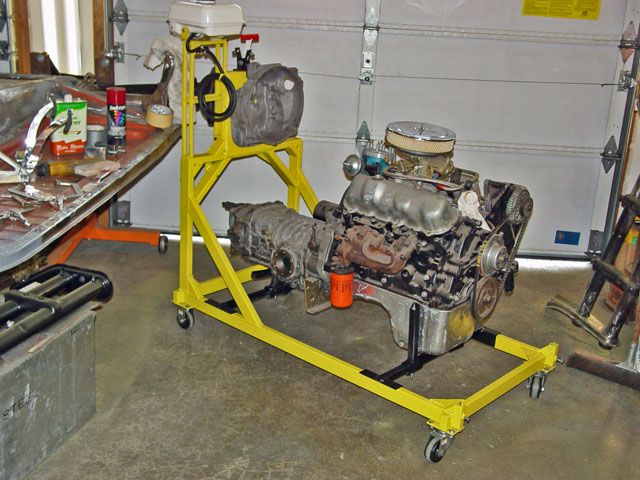
Having the handle assembly removable sure made it easier. It could have been done with the handle on I guess but then it probably would have taken longer or took more hands than I have.
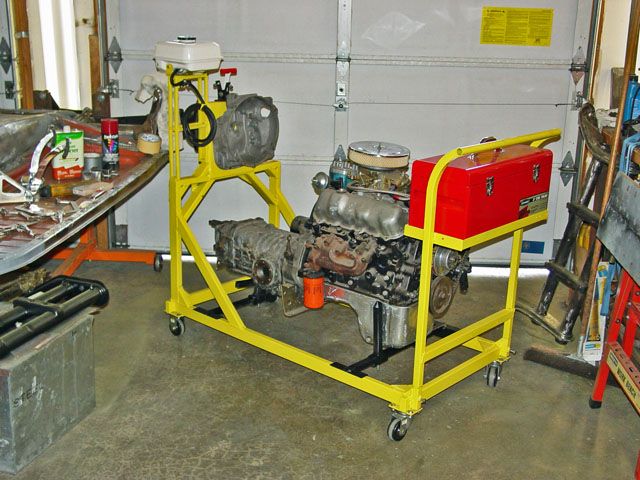
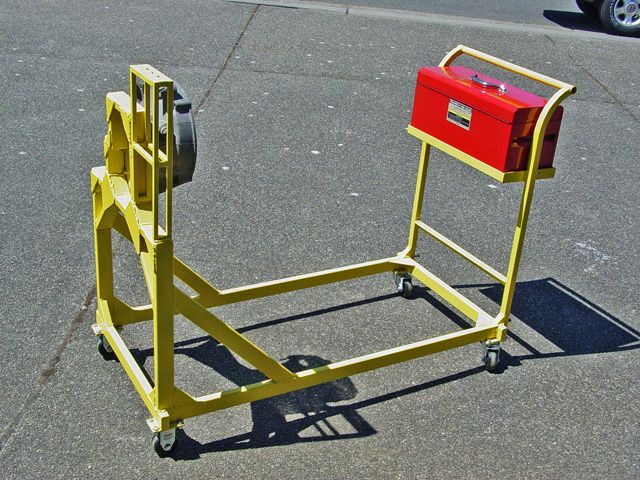
All back together and ready for storage.
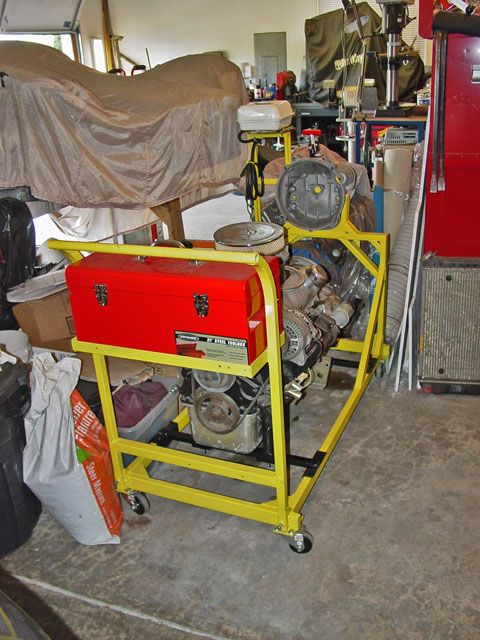
Back to where the engine was stored and it fit in w/o too much trouble.
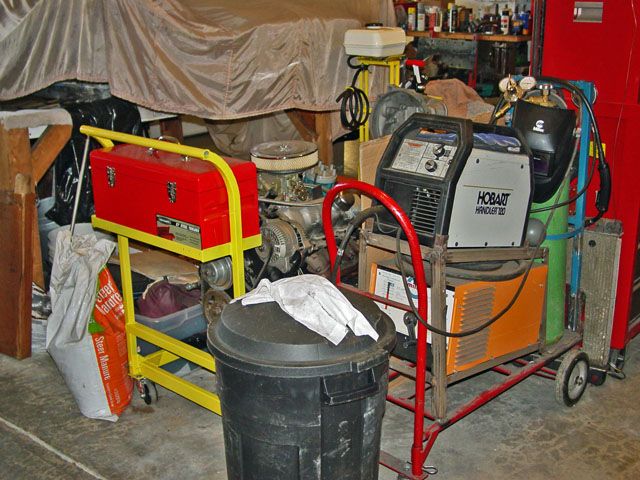
Everything back around it. I need to put a cover it now and the dash panel will come along later. Since I decided not to go whole hog on the wiring I am going to use some of the room for a clip board for notes and readings.
All on this for now!
Lee
Re: An engine run cart build
Posted: Sat Aug 10, 2013 11:16 am
by Steve Arndt
Looking good Lee!
Re: An engine run cart build
Posted: Sat Aug 10, 2013 1:51 pm
by bajaherbie
X 2


