TriMil makes an offroad "Bobcat" header for the Type 4. It uses the same collector as the type 1 header does. I have one here (not for sale, but it exists). Many offroad racers over the past few decades have used Type 4 engines in their race cars.Future work includes making an exhaust (nobody makes an offroad exhaust for a T4 pancake engine)
New member baja buildup
-
dustymojave
- Posts: 2314
- Joined: Mon Dec 01, 2008 9:08 pm
Richard
Lake LA, Mojave Desert, SoCal
Speed Kills! but then...So does OLD AGE!!
Tech Inspection: SCCA / SCORE / HDRA / ARVRA / A.R.T.S. OffRoad Race Tech - MDR, MORE, Glen Helen BajaCup
Retired Fabricator
'58 Baja with 955K Miles and counting
Lake LA, Mojave Desert, SoCal
Speed Kills! but then...So does OLD AGE!!
Tech Inspection: SCCA / SCORE / HDRA / ARVRA / A.R.T.S. OffRoad Race Tech - MDR, MORE, Glen Helen BajaCup
Retired Fabricator
'58 Baja with 955K Miles and counting
-
TCoville
- Posts: 469
- Joined: Tue Jul 11, 2006 2:27 pm
I think he means most of them are designed to work with upright converted t4 and he is using the stock pancake tin.dustymojave wrote:TriMil makes an offroad "Bobcat" header for the Type 4. It uses the same collector as the type 1 header does. I have one here (not for sale, but it exists). Many offroad racers over the past few decades have used Type 4 engines in their race cars.Future work includes making an exhaust (nobody makes an offroad exhaust for a T4 pancake engine)
-
flaircraft
- Posts: 114
- Joined: Thu Jun 18, 2009 10:10 am
Just for curiousity, I had my Baja weighed yesterday. 1790 lbs w/o me, and with a quarter tank of gas and some misc. equipment. I expect to add another 50lbs or so with rear cage/skidplate. It's no wonder that 4 average guys were able to pick up the front end of my car! If it had a type 1 engine and tranny it'd weigh even less.
-
flaircraft
- Posts: 114
- Joined: Thu Jun 18, 2009 10:10 am
I figured I'd try and post some pics of the car directly. Sorry a couple of them are so wide  Next time I'll make sure to resize them before uploading to Photobucket.
Here's a pic of the inverted Vanagon shifter lever, along with the stock Vanagon shift rod now routed above the rear torsion housing. Also you can see the modded front tranny mount and the shift rod locator that I had to fabricate, by using the stock shift rod locater pin and welding up a new mount for it:

Here's a pic of the Vanagon shifter box and shifter, welded on top of the transmission tunnel:

The pedal cluster, showing the Vanagon clutch pedal assy modified to fit into the bug:

Engine with my air intake assembly:

Interior picture showing where the Vanagon EFI controller is located, and shifter rod and hydraulic clutch line routing:

Next time I'll make sure to resize them before uploading to Photobucket.Here's a pic of the inverted Vanagon shifter lever, along with the stock Vanagon shift rod now routed above the rear torsion housing. Also you can see the modded front tranny mount and the shift rod locator that I had to fabricate, by using the stock shift rod locater pin and welding up a new mount for it:
Here's a pic of the Vanagon shifter box and shifter, welded on top of the transmission tunnel:
The pedal cluster, showing the Vanagon clutch pedal assy modified to fit into the bug:
Engine with my air intake assembly:
Interior picture showing where the Vanagon EFI controller is located, and shifter rod and hydraulic clutch line routing:
Last edited by flaircraft on Tue Aug 04, 2009 8:34 pm, edited 1 time in total.

-
flaircraft
- Posts: 114
- Joined: Thu Jun 18, 2009 10:10 am
I actually did manage to figure out how to downsize most of the photos this evening, although the one of the clutch pedal is staying big for some reason even though the pic in the album is small...
I finally got my front skidplate done!

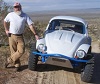
Also here's a couple of pics to prove that it doesn't just sit in the driveway all the time:


I finally got my front skidplate done!
Also here's a couple of pics to prove that it doesn't just sit in the driveway all the time:
-
david58

- Moderator
- Posts: 14100
- Joined: Sun Oct 23, 2005 6:14 pm
I like the ole skool look. Skid plate looks like a real biter.flaircraft wrote:I actually did manage to figure out how to downsize most of the photos this evening, although the one of the clutch pedal is staying big for some reason even though the pic in the album is small...
I finally got my front skidplate done!
Also here's a couple of pics to prove that it doesn't just sit in the driveway all the time:

Hot, humid air is less dense than cooler, drier air. This can allow a golf ball to fly through the air with greater ease, as there won't be as much resistance on the ball.
-
flaircraft
- Posts: 114
- Joined: Thu Jun 18, 2009 10:10 am
I finally have a name for my Baja. Henceforth it shall be known as the Goblin, due to its bright eyes, sharp teeth, diminutive size, and grumbling nature. I finally managed to take some video of it last week, and seeing it in action it reminded me of a Goblin so the name has stuck.
Edit by Leatherneck: added
Edit by Leatherneck: added


-
flaircraft
- Posts: 114
- Joined: Thu Jun 18, 2009 10:10 am
-
flaircraft
- Posts: 114
- Joined: Thu Jun 18, 2009 10:10 am
Re: New member baja buildup
Finally did some more updates to the Goblin, got a rear cage/bumper placed on a few months ago and just this week managed to add a spare tire carrier to the cage, pics as requested!
Spare tire carrier, on rear bumper/cage:

It's on a hinge so that I can show the cop the license plate when he pulls me over, er I mean so I can open the hood...

Just gotta do some bracing of the cage to its mounts and put one more crossbeam in it, and it's good to go... then I can figure out where to route the exhaust!
Spare tire carrier, on rear bumper/cage:
It's on a hinge so that I can show the cop the license plate when he pulls me over, er I mean so I can open the hood...
Just gotta do some bracing of the cage to its mounts and put one more crossbeam in it, and it's good to go... then I can figure out where to route the exhaust!
member of the Bajas That Run Club
'72 Baja, "The Goblin" (old-skool, cut Baja)
'81 Vanagon aircooled (sold), was used as drivetrain donor for the Goblin
'71 Standard beetle with 500 inch Caddy engine and TH425 tranny "The Caddywagen"
'72 Baja, "The Goblin" (old-skool, cut Baja)
'81 Vanagon aircooled (sold), was used as drivetrain donor for the Goblin
'71 Standard beetle with 500 inch Caddy engine and TH425 tranny "The Caddywagen"
-
Lotrat

- Posts: 4975
- Joined: Sat Mar 29, 2008 11:43 pm
Re: New member baja buildup
I don't think I ever notice the 710 cap hanging out back of other type IVs. Can it be relocated?
-
bajaherbie

- Posts: 9967
- Joined: Sat Jul 15, 2006 7:07 pm
Re: New member baja buildup

i thought it was the wheelie bar.....
Of all the paths you take in life, make sure a few of them are dirt.
-
flaircraft
- Posts: 114
- Joined: Thu Jun 18, 2009 10:10 am
Re: New member baja buildup
Yeah, I wouldn't want my 710 getting hurt... might turn it into a 709 or even a 708 
I actually bent the cage to closely match the position of the neck, here's a good photo to show this:

The bumper is going to get a skidplate and 2 more crossmembers that reinforce the bumper and will protect the neck. I wanted the rear bumper to be as close to the oil filler as possible to reduce overhang, for best possible angle of departure. There will be about 1.5 inches of clearance between the neck and the crossmembers, I figure if something hits the bumper hard enough to bend it that much I probably have worse problems to worry about than just breaking the filler
I actually bent the cage to closely match the position of the neck, here's a good photo to show this:
The bumper is going to get a skidplate and 2 more crossmembers that reinforce the bumper and will protect the neck. I wanted the rear bumper to be as close to the oil filler as possible to reduce overhang, for best possible angle of departure. There will be about 1.5 inches of clearance between the neck and the crossmembers, I figure if something hits the bumper hard enough to bend it that much I probably have worse problems to worry about than just breaking the filler
member of the Bajas That Run Club
'72 Baja, "The Goblin" (old-skool, cut Baja)
'81 Vanagon aircooled (sold), was used as drivetrain donor for the Goblin
'71 Standard beetle with 500 inch Caddy engine and TH425 tranny "The Caddywagen"
'72 Baja, "The Goblin" (old-skool, cut Baja)
'81 Vanagon aircooled (sold), was used as drivetrain donor for the Goblin
'71 Standard beetle with 500 inch Caddy engine and TH425 tranny "The Caddywagen"
-
flaircraft
- Posts: 114
- Joined: Thu Jun 18, 2009 10:10 am
Re: New member baja buildup
When I originally put the Goblin together, I was running out of time due to an upcoming move so I had to kind of throw the halfshafts together to get the car drivable by the deadline. Both the Vanagon halfshafts and the Bug halfshafts were the wrong length, so I decided to shorten the Vanagon halfshafts to the correct length for the car. Besides which, I didn't (still don't) have the money to get custom-length halfshafts...
I suspected back when I shortened the halfshafts that they weren't the strongest, and had been babying them somewhat ever since I put them together. After 2 years of combined street and offroad use, they did start to show some signs of failure so I decided not to do any offroading with them any more (this being about 2 months ago, June 2011). But, of course not long after I made that decision I had to prove to my friend that my Baja could go up a hill that his Jeep couldn't... so long story short I won the bet, but lost a halfshaft. I managed to limp it home and then ordered some new Vanagon halfshafts to shorten, this time vowing to do the job right. I know the motto of STF is "pics or it didn't happen" so I took some nice juicy shots of the new and improved halfshafts going together.
When I shortened the original halfshafts, I built them similarly to a driveshaft on a typical RWD vehicle (I.E. the majority of the length between the joints was a hollow tube) and worried mostly about the strength of the welds on the tube that connected the two joints. I even went through the trouble of calculating the necessary weld area to withstand the torque and power that would be put into the halfshaft. I am happy to say that at least my welds didn't fail! Unfortunately I just assumed that the tubing that I spliced into the halfshafts would be strong enough. As it turns out, it wasn't. Imagine taking a wet towel and wringing it out, what does the towel look like when you've twisted it?; that's what the outside of the halfshaft tubing looked like after 2 years of use. A few weeks after seeing that, I then made the (wise? unwise?) decision to show up my friend in his Jeep. Here's the result...

A closer up shot:

Note that the halfshaft is supposed to be straight! Not only is it twisted but it's also bent. I had been fearful of this exact thing happening after seeing the initial twisting a couple months ago, but what can I say, I just had to prove that my Baja was better than his Jeep!
After the replacement halfshafts showed up in the mail, the first thing was to shorten them to the correct length. My chopsaw had a hard time of this, as the halfshafts are roughly 1" diameter steel bars (and decent quality steel at that), here's a pic of the halfshaft being shortened:

After removing a roughly 6" section from the middle of the halfshaft, I then beveled the ends of the halfshaft and butted them up to each other in a jig (piece of angle iron) so that I would be assured that they would be aligned perfectly (I hadn't done either of these the previous time I shortened the halfshafts):

I tack welded them together in 4 places to assure they'd remain aligned, then took the jig off and welded them up. I put my 240v Miller welder on the hottest setting to ensure adequate penetration (the same setting that I'd used 2 years ago, note that the old halfshaft welds haven't broken!)
After welding the 2 halves back together, I took the grinder and smoothed them up as best I could, then did a fair amount of further smoothing with a fine file. I didn't want any stress risers on the halfshafts. Here's a pic after grinding, but before filing.

During the cutting and welding operations, I was very careful not to overheat the halfshafts, as I was afraid that I could either burn up the CV boots or at least mess up the grease in the CV joints. I had wetted towels wrapped around the far ends of the halfshafts, up against the CV boots, for pretty much all the work that I did.
After smoothing up the weld, I then welded a piece of the same steel tubing I had used last time around the outside of the halfshaft. I figure what happened on the original halfshafts I shortened is that while the welds didn't break, the hollow tubing didn't have enough strength and rigidity for the power I was putting through it. What I've done on rev 2 is to basically take the original design and beef it up by butt-welding the solid halfshaft bars to each other inside the "driveshaft" tube. Plus, I made sure to weld the tube to the halfshaft lengthwise to add extra torsional rigidity:

Sorry for the poor pic, but it should be apparent that I split the tubing into 2 halves and welded each half onto the halfshaft, both at the ends of the tubing (around the halfshaft) and also along the split line of each tubing half (lengthwise down the halfshaft).
The increase in strength from doing this should be significant. I took the Goblin on a hillclimb today and didn't cringe much (I do still have to re-do the other halfshaft though). I wouldn't trust this on the Baja 1000 but don't have any problem with running trails here locally
I suspected back when I shortened the halfshafts that they weren't the strongest, and had been babying them somewhat ever since I put them together. After 2 years of combined street and offroad use, they did start to show some signs of failure so I decided not to do any offroading with them any more (this being about 2 months ago, June 2011). But, of course not long after I made that decision I had to prove to my friend that my Baja could go up a hill that his Jeep couldn't... so long story short I won the bet, but lost a halfshaft. I managed to limp it home and then ordered some new Vanagon halfshafts to shorten, this time vowing to do the job right. I know the motto of STF is "pics or it didn't happen"
so I took some nice juicy shots of the new and improved halfshafts going together.When I shortened the original halfshafts, I built them similarly to a driveshaft on a typical RWD vehicle (I.E. the majority of the length between the joints was a hollow tube) and worried mostly about the strength of the welds on the tube that connected the two joints. I even went through the trouble of calculating the necessary weld area to withstand the torque and power that would be put into the halfshaft. I am happy to say that at least my welds didn't fail! Unfortunately I just assumed that the tubing that I spliced into the halfshafts would be strong enough. As it turns out, it wasn't. Imagine taking a wet towel and wringing it out, what does the towel look like when you've twisted it?; that's what the outside of the halfshaft tubing looked like after 2 years of use. A few weeks after seeing that, I then made the (wise? unwise?) decision to show up my friend in his Jeep. Here's the result...
A closer up shot:
Note that the halfshaft is supposed to be straight! Not only is it twisted but it's also bent. I had been fearful of this exact thing happening after seeing the initial twisting a couple months ago, but what can I say, I just had to prove that my Baja was better than his Jeep!
After the replacement halfshafts showed up in the mail, the first thing was to shorten them to the correct length. My chopsaw had a hard time of this, as the halfshafts are roughly 1" diameter steel bars (and decent quality steel at that), here's a pic of the halfshaft being shortened:
After removing a roughly 6" section from the middle of the halfshaft, I then beveled the ends of the halfshaft and butted them up to each other in a jig (piece of angle iron) so that I would be assured that they would be aligned perfectly (I hadn't done either of these the previous time I shortened the halfshafts):
I tack welded them together in 4 places to assure they'd remain aligned, then took the jig off and welded them up. I put my 240v Miller welder on the hottest setting to ensure adequate penetration (the same setting that I'd used 2 years ago, note that the old halfshaft welds haven't broken!)
After welding the 2 halves back together, I took the grinder and smoothed them up as best I could, then did a fair amount of further smoothing with a fine file. I didn't want any stress risers on the halfshafts. Here's a pic after grinding, but before filing.
During the cutting and welding operations, I was very careful not to overheat the halfshafts, as I was afraid that I could either burn up the CV boots or at least mess up the grease in the CV joints. I had wetted towels wrapped around the far ends of the halfshafts, up against the CV boots, for pretty much all the work that I did.
After smoothing up the weld, I then welded a piece of the same steel tubing I had used last time around the outside of the halfshaft. I figure what happened on the original halfshafts I shortened is that while the welds didn't break, the hollow tubing didn't have enough strength and rigidity for the power I was putting through it. What I've done on rev 2 is to basically take the original design and beef it up by butt-welding the solid halfshaft bars to each other inside the "driveshaft" tube. Plus, I made sure to weld the tube to the halfshaft lengthwise to add extra torsional rigidity:
Sorry for the poor pic, but it should be apparent that I split the tubing into 2 halves and welded each half onto the halfshaft, both at the ends of the tubing (around the halfshaft) and also along the split line of each tubing half (lengthwise down the halfshaft).
The increase in strength from doing this should be significant. I took the Goblin on a hillclimb today and didn't cringe much (I do still have to re-do the other halfshaft though). I wouldn't trust this on the Baja 1000 but don't have any problem with running trails here locally