CopperBaja's Baja
-
Leatherneck

- Moderator
- Posts: 17104
- Joined: Sat Jul 01, 2006 6:47 pm
-
CopperBaja

- Posts: 5329
- Joined: Mon Oct 02, 2006 3:04 pm
No, but the screws that hold the radio on have rubber gaskets.
That's why I'm concerned about the facing...
Rick had a good idea about using silicone, then I'm considering some sort of aluminum trim or something that I can attach to the face to give it a clean look. (just have to find something that will fit.... )
)
That's why I'm concerned about the facing...
Rick had a good idea about using silicone, then I'm considering some sort of aluminum trim or something that I can attach to the face to give it a clean look. (just have to find something that will fit....
96 Pathfinder 4x4 - Family Offroader - 6" "Lift" (2" coil lift + 4" Sub-Frame Drop)
-
Leatherneck
- Moderator
- Posts: 17104
- Joined: Sat Jul 01, 2006 6:47 pm
-
CopperBaja
- Posts: 5329
- Joined: Mon Oct 02, 2006 3:04 pm
No closets here....well everyone has a pet skeleton or two, right?Leatherneck wrote:For the Face trim, to me you would need somebody with a mill to do it up for you, unless you have one or your just a closet machinist.
I have a few connections, but nothing major like that.....we could always use a few friends in that business.
I'm hoping I can scrounge up something.....
96 Pathfinder 4x4 - Family Offroader - 6" "Lift" (2" coil lift + 4" Sub-Frame Drop)
-
bajaherbie

- Posts: 9967
- Joined: Sat Jul 15, 2006 7:07 pm
-
CopperBaja
- Posts: 5329
- Joined: Mon Oct 02, 2006 3:04 pm
Tell that to my wife....bajaherbie wrote:i'm diggin' the BUD LIGHT light......it belongs in the living room and not the garage.
Thanks Ben! I'm teaching him motor noises now... Now I'm not the only one that sits in the seat and says "brrrrmmmm...brrrrrrmmmm"
96 Pathfinder 4x4 - Family Offroader - 6" "Lift" (2" coil lift + 4" Sub-Frame Drop)
-
mike@crosbys
- Posts: 1178
- Joined: Wed Apr 07, 2004 8:31 pm
-
Skidmark

- Posts: 3506
- Joined: Mon Aug 28, 2006 7:19 pm
-
CopperBaja
- Posts: 5329
- Joined: Mon Oct 02, 2006 3:04 pm
Bit more work done today...
Pulled the seats...
I filled in some holes that were in the rear of the parcel area. Since they were behind the cage, I didn't grind them, so I made sure to put some Rustoleum on them.
Here's a pic of the holes that I had to fill in.

After I painted...I'm not sure about the holes in the parcel area...are they factory???

I cleaned up the seat mounts and painted them as well.
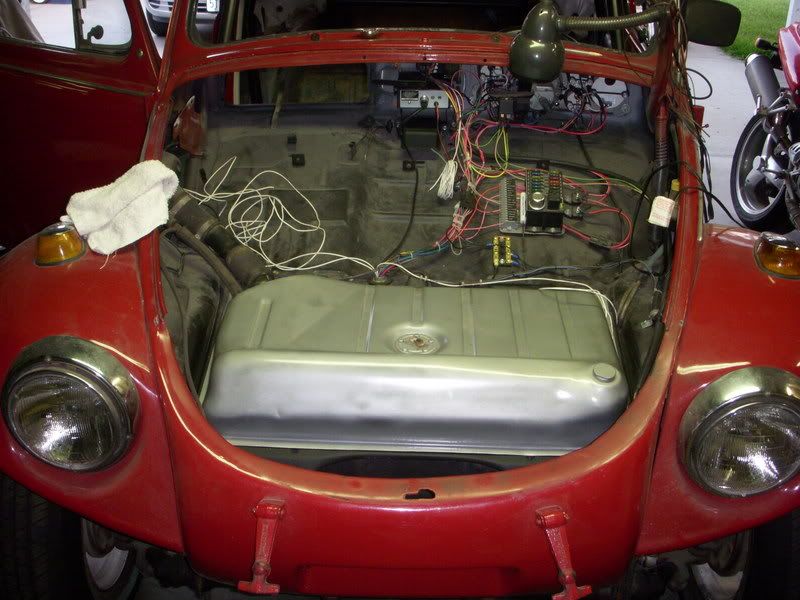
And I fit the tank...then I learned that there is a 'anti-squeak' gasket that goes under it, so I haven't hooked it up. I think the Silver & Black look great!!! (yes, I'm a Raiders Fan!!!)
***QUESTION: Is there an alternative to the current gas filler lines I have??? I was thinking some 3" clear tube that would span the length of the gap, rather than the 3 parts that I currently have.
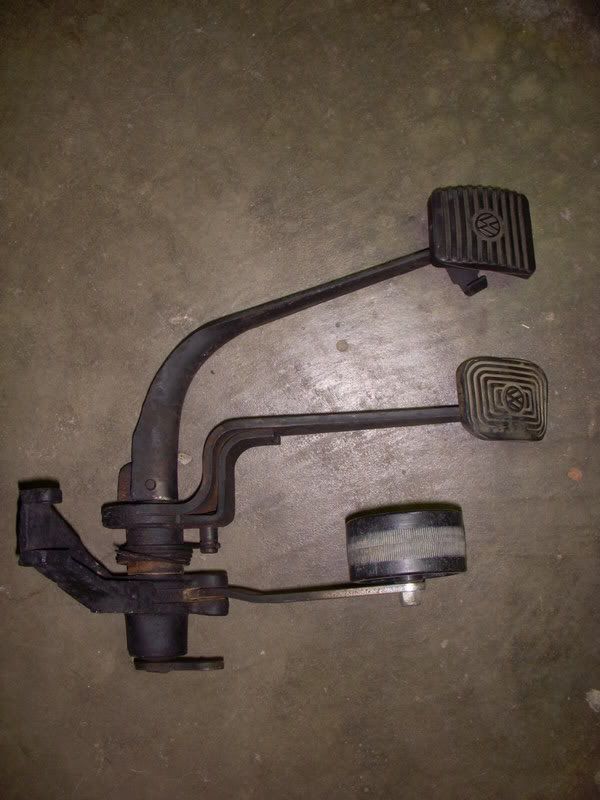
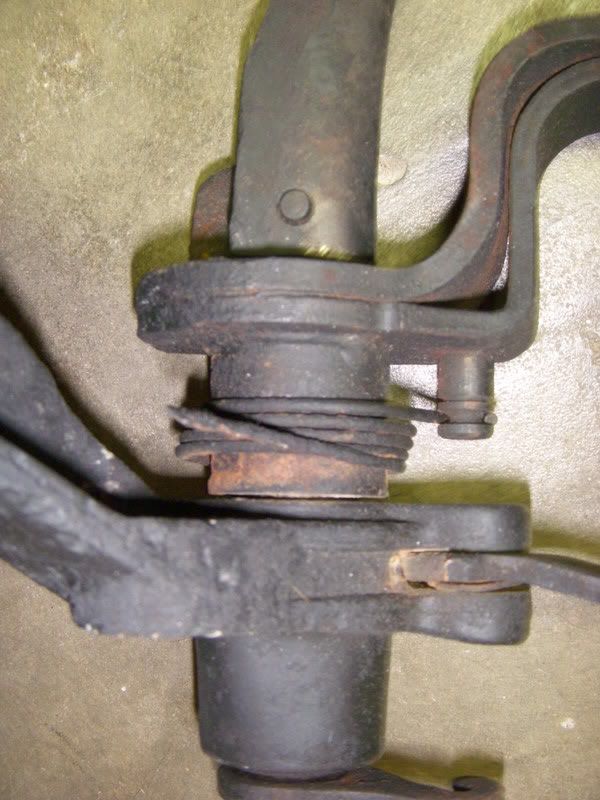
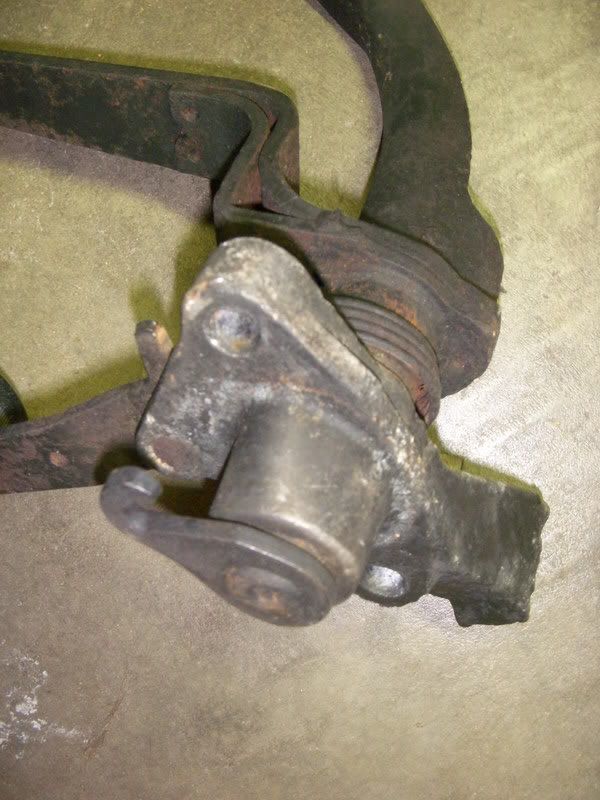
Here's the pedal assy that I bought. I think it needs a new spring and I figure while I'm at it, I'll put a new hook on it. Next is to find out what parts I need to rebuild it....
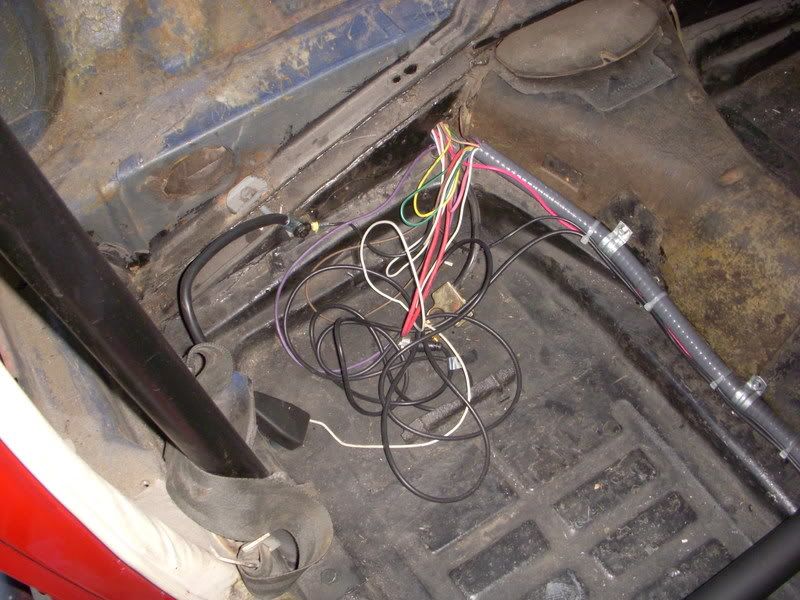
I didn't take a pic...got too late, but I also put a rubber gasket on where the wires go through the body...and drilled another hole for the cb antenna line....destroyed my HF 1" hole saw... It was a 3/4 hole gasket, so I have a bit of room left for extra future wire add-ons, but for now I figure I will just fill it with silicone. The wires are the slack that I pulled from the front and the rear...I think I'll leave it for future use...I plan to change some of the connections when I pull the motor before desert season, so I'll just bundle it up. I plan to make a battery box, so will stash it all behind it.
Pulled the seats...
I filled in some holes that were in the rear of the parcel area. Since they were behind the cage, I didn't grind them, so I made sure to put some Rustoleum on them.
Here's a pic of the holes that I had to fill in.
After I painted...I'm not sure about the holes in the parcel area...are they factory???
I cleaned up the seat mounts and painted them as well.
And I fit the tank...then I learned that there is a 'anti-squeak' gasket that goes under it, so I haven't hooked it up. I think the Silver & Black look great!!! (yes, I'm a Raiders Fan!!!)
***QUESTION: Is there an alternative to the current gas filler lines I have??? I was thinking some 3" clear tube that would span the length of the gap, rather than the 3 parts that I currently have.
Here's the pedal assy that I bought. I think it needs a new spring and I figure while I'm at it, I'll put a new hook on it. Next is to find out what parts I need to rebuild it....
I didn't take a pic...got too late, but I also put a rubber gasket on where the wires go through the body...and drilled another hole for the cb antenna line....destroyed my HF 1" hole saw... It was a 3/4 hole gasket, so I have a bit of room left for extra future wire add-ons, but for now I figure I will just fill it with silicone. The wires are the slack that I pulled from the front and the rear...I think I'll leave it for future use...I plan to change some of the connections when I pull the motor before desert season, so I'll just bundle it up. I plan to make a battery box, so will stash it all behind it.
96 Pathfinder 4x4 - Family Offroader - 6" "Lift" (2" coil lift + 4" Sub-Frame Drop)
-
DesertGuy
- Posts: 2303
- Joined: Sun Aug 27, 2006 7:45 pm
***QUESTION: Is there an alternative to the current gas filler lines I have??? I was thinking some 3" clear tube that would span the length of the gap, rather than the 3 parts that I currently have.
You could get one or two 180 degree mandrel bends of 3 inch, cut and dice it up, weld it together... then just use 2 inch pieces of fuel resistant tubing to connect. Still would be three pieces but a cleaner look...
(my 2 pennies)
You could get one or two 180 degree mandrel bends of 3 inch, cut and dice it up, weld it together... then just use 2 inch pieces of fuel resistant tubing to connect. Still would be three pieces but a cleaner look...
(my 2 pennies)
-
CopperBaja
- Posts: 5329
- Joined: Mon Oct 02, 2006 3:04 pm
Thanks DG, but I was wondering if they made fuel tubing that would span the gap...that way I would just have a possible one piece to fail, rather than tripling my chances of something failing.DesertGuy wrote:You could get one or two 180 degree mandrel bends of 3 inch, cut and dice it up, weld it together... then just use 2 inch pieces of fuel resistant tubing to connect. Still would be three pieces but a cleaner look...
Thanks Tim. Rebuild kit will be ordered...
96 Pathfinder 4x4 - Family Offroader - 6" "Lift" (2" coil lift + 4" Sub-Frame Drop)
-
72bajaben

- Posts: 1360
- Joined: Wed Aug 09, 2006 10:37 pm
I dont know if this is what your looking for, or if it is even to big, but you never know.
http://wescoperformance.stores.yahoo.ne ... lexel.html
http://wescoperformance.stores.yahoo.ne ... lexel.html
-
CopperBaja
- Posts: 5329
- Joined: Mon Oct 02, 2006 3:04 pm
Thanks Ben, but that's a bit pricey for me...72bajaben wrote:I dont know if this is what your looking for, or if it is even to big, but you never know.
http://wescoperformance.stores.yahoo.ne ... lexel.html
Another question: In this pic, where does the hose that Ts off the fuel filler neck supposed to go to??? (just beneath the towel on its right side)
I figure it's just ventilation...right?
96 Pathfinder 4x4 - Family Offroader - 6" "Lift" (2" coil lift + 4" Sub-Frame Drop)