Lifted 77 Westy with 4.3l Vortec

Are you one of those confused people who can't make up their mind?
User avatar
superwrench73
Posts: 38
Joined: Wed Dec 27, 2006 11:14 am

Lifted 77 Westy with 4.3l Vortec

Post by superwrench73 »

Image

Image

Here's my 77 Westy I've been working on for a while now. Installing a '98 GM 4.3l Vortec. 200 HP sounds alot better than 65 HP!
Last edited by superwrench73 on Mon Oct 20, 2008 7:55 pm, edited 2 times in total.
regis101
Posts: 1070
Joined: Wed Oct 10, 2001 1:01 am

Post by regis101 »

You're on top of it, no doubt.

Great way to make a first post.

If ya want to bake the noodle about radiators/brushguard, source yourself a rad from a jeep. 11" tall and 35" wide. I've been going over in my head how to incorporate that size into a front bumper/radiator/brush guard combo thing. With your ground clearance, you may be able to tuck such a radiator under the front bumper at a slight angle.

Does the top of the engine stick up past the deck hatch? What is the height from the center of the crank to the top of the air cleaner?
User avatar
petew
Posts: 3927
Joined: Sat Oct 07, 2006 4:05 pm

Post by petew »

with all that power intake restriction is no drama, so a short snorkel and a pod filter might help keep the engine height down a bit.

BTW, great looking bus. really top stuff. 8)
User avatar
Daniel G
Moderator
Posts: 646
Joined: Thu Apr 22, 2004 8:38 pm

Post by Daniel G »

How did you go about lifting it??
User avatar
superwrench73
Posts: 38
Joined: Wed Dec 27, 2006 11:14 am

Post by superwrench73 »

It's about 18" from the center of the crank to the top lip of the throttle body. I made a low rise air intake that measures 1 3/8" from the throttle body lip to the top of the air box. The engine access lid is very close to this, but does close. I also cut out the compartment opening larger for better engine access and welded two lids together to make a larger one.

I lifted it by welding plates to the front end and basically bolted it back on 5" lower. Did the back by making plates as well, but they are just bolted in and not welded. Pictures would help. I'll try to post some in a bit.

I've also put 930 cv's and torsion racing axles under it to help handle the additional HP. Am getting very close to my first test drive. Hopefully all works out.
User avatar
superwrench73
Posts: 38
Joined: Wed Dec 27, 2006 11:14 am

Post by superwrench73 »

Image

Rear Lift Plates Installed

Image

Rear Lift Plates

Image

Front end with lift plates welded
Last edited by superwrench73 on Mon Oct 20, 2008 7:57 pm, edited 1 time in total.
User avatar
Daniel G
Moderator
Posts: 646
Joined: Thu Apr 22, 2004 8:38 pm

Post by Daniel G »

Cool...Can you also post some more details and pics of the engine setup? I really like you bus, and it has certainly given me some ideas for mine...I might even decide to convert on to a watercooled engine one day...
User avatar
fastmc25
Posts: 290
Joined: Fri Jan 04, 2002 12:01 am

Post by fastmc25 »

I'm interested in your reciever hitch....... 8) .... I have class 1 that came with the bus but i want to step closer to a class 2 or 3 if possible............ Not planning on heavy tongue weight but draw weight is what i need..... the original class 1 leaves much to be desired......... Plus with a 2" reciever it opens me up to accessories such as rear winch, cargo hauler, etc.... :D

I know i can come up with something but i'd like to see other ideas..... 8)

BTW, Nice trail 70 in the background................. I've had some great memories on one of those.................. when they were new...... :shock: :lol:
Peace,

Paul

1973 Adventurewagen (AKA Clyde) V6 powered
1961 Deluxe Beetle (Christine)

www.fullmoonbusclub.com
www.arklatexvwclub.com
www.lovemybus.com
User avatar
superwrench73
Posts: 38
Joined: Wed Dec 27, 2006 11:14 am

Post by superwrench73 »

Image

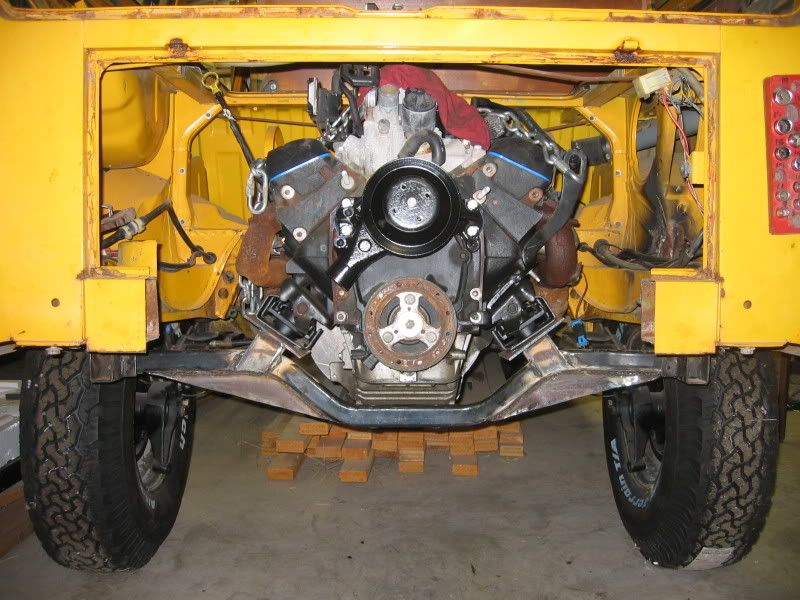
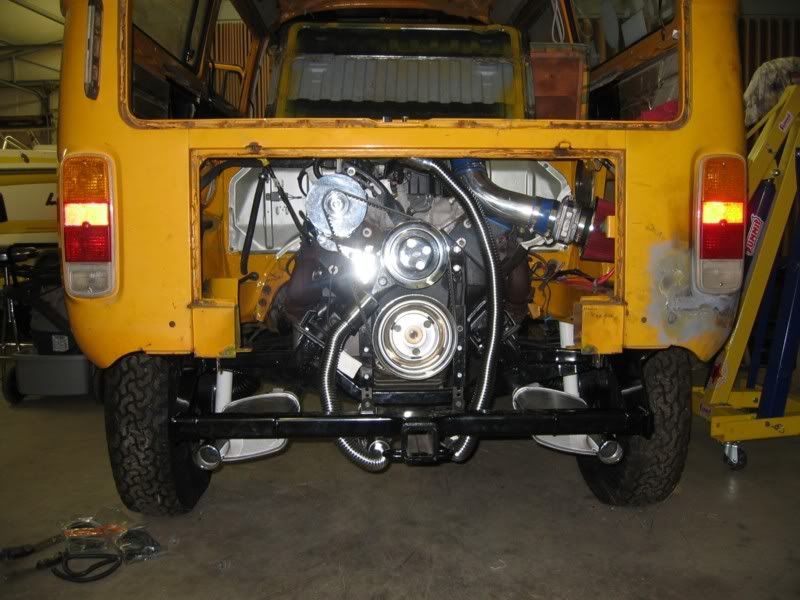
Latest pic of engine setup. I used a Kennedy Engineered Products engine adapter plate along with their modified flywheel and heavy duty clutch and pressure plate.

The radiator is a universal aluminum radiator from Summit Racing mounted on a roo bar that I made out of 1 1/2" steel tubing.

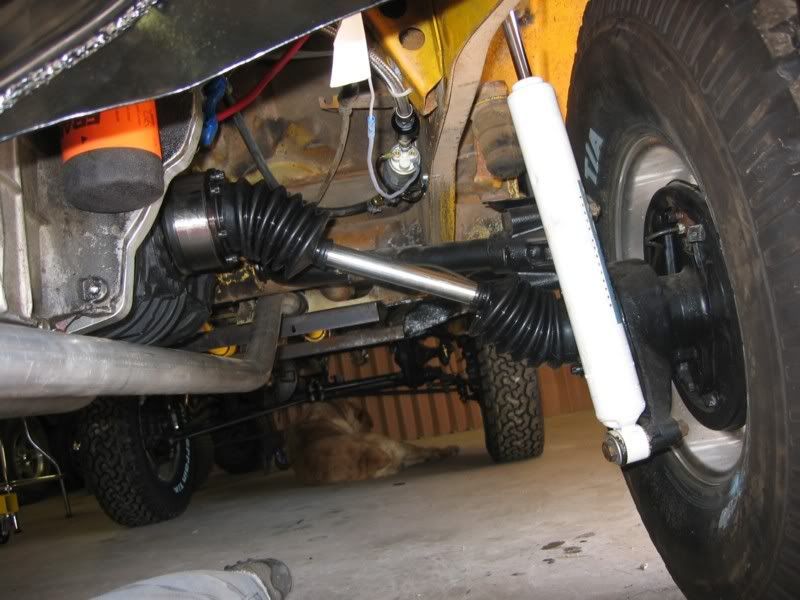
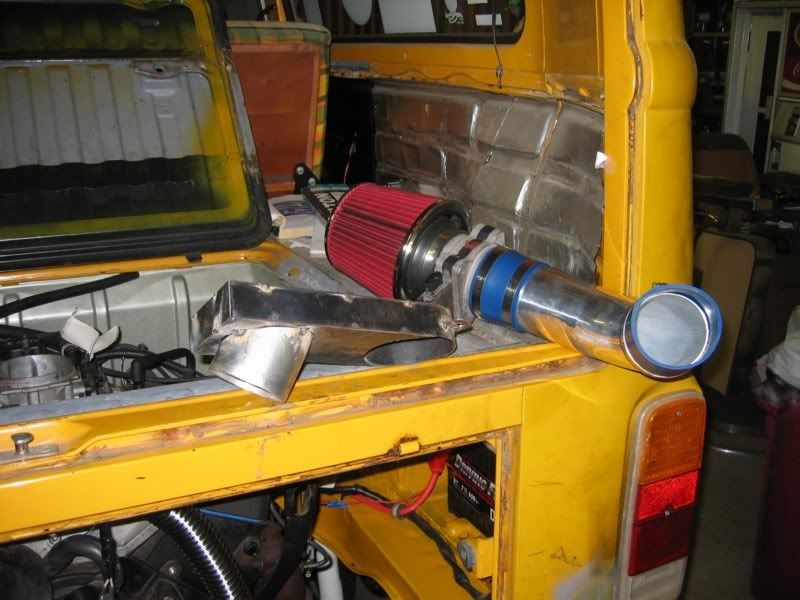
Cooling lines are 1 3/4" aluminum tubing running front to back with flexible stainless steel radiator hoses coupling up the radiator and engine.

The receiver hitch is from some other unknown vehicle. I bought it at the local steel supplier and had to cut it, decrease the width and weld it back together. Also had to open up the mounting holes a bit, but it bolted up to the bus nicely using the 6 threaded holes at the rear.

The roo bar, engine crossmember, and receiver hitch are all powder coated gloss black.

Image

Air intake box

Image

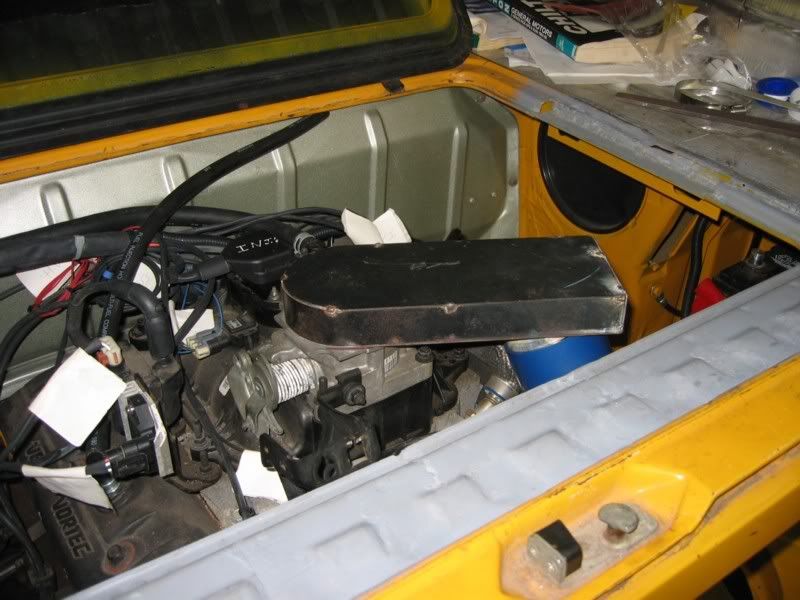
Just clears the engine lid

Image

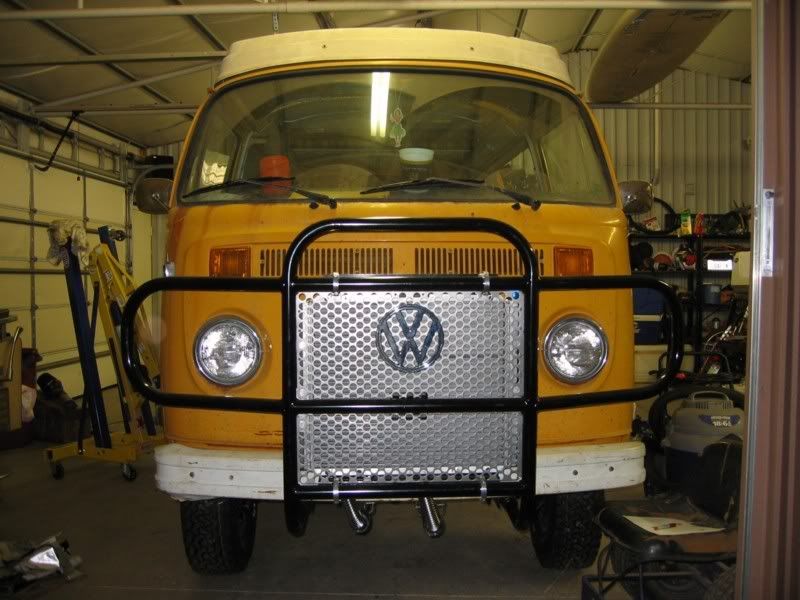
Stainless grill with Denali style punched pattern
Last edited by superwrench73 on Mon Oct 20, 2008 7:59 pm, edited 1 time in total.
User avatar
Daniel G
Moderator
Posts: 646
Joined: Thu Apr 22, 2004 8:38 pm

Post by Daniel G »

Looks good!! Did you use a pattern from somewhere to make the rear lift plates, or did you make them yourself?
User avatar
superwrench73
Posts: 38
Joined: Wed Dec 27, 2006 11:14 am

Post by superwrench73 »

Looks good!! Did you use a pattern from somewhere to make the rear lift plates, or did you make them yourself?
Made them myself. Just used the spring plates and and bearing housings for patterns.
Living Large
Posts: 3
Joined: Wed Nov 07, 2007 5:00 pm

Post by Living Large »

Please post more info. and pictures. This is a great build and I am now considering a very similar setup. Have you thought about building some of the brackets in your previous posts for others? Thanks again.
User avatar
Dutch VeeRod
Posts: 287
Joined: Fri Jan 03, 2003 12:01 am

Post by Dutch VeeRod »

Looks great!!!! Keep the pictures comming

Bart
Bart

http://www.asgardur.nl/
"De Konjel" Beetle BAJA V6 4X4 Syncro project
PEUGEOT 107 XS 2007
VW T3 DOKA Syncro '85
DAF 44 '70
User avatar
fastmc25
Posts: 290
Joined: Fri Jan 04, 2002 12:01 am

Post by fastmc25 »

Hey Superwrench73,

Thought i'd pass this on.........

I just had to do some modifying to my lift plates...........mine are identical to yours except the plate i had were not as wide............ My right rear plate started flexing and finally bent enough to give me a lot of negative camber on that side...........This was on a 60 mile round trip on pavement while being towed with a towbar... :shock: .......... I noticed it getting progressively worse when i returned home..........

I ended up removing the plates and noticed the one had bent by about a 1/4"....... :shock: I straightened them and built a gusset that should stop this........ It utilizes the lower front bolt so it's removable with the plates..... It is welded to the plates.... I hope this helps prevent a possible problem in the future....
Image
Image

Don't look at the welding here.... Not pretty this time... :oops:..... . But it is strong....... I'll pretty them up when they come off next time....

I hope this helps prevent a possible problem in the future....especially going offroad..... :)
Peace,

Paul

1973 Adventurewagen (AKA Clyde) V6 powered
1961 Deluxe Beetle (Christine)

www.fullmoonbusclub.com
www.arklatexvwclub.com
www.lovemybus.com
User avatar
superwrench73
Posts: 38
Joined: Wed Dec 27, 2006 11:14 am

Post by superwrench73 »

The gusset looks like a good idea. I may do something similar. What shocks did you use on the rear? I'm using a set that's made for a late model GM truck that's been lifted. I had to search around to find a set that had the correct compressed and extended length.

Image

What angle did you end up with on your rear axles? Mine are at about 26 degrees. That's why I went with race clearanced 930 CVs. They're supposed to be good up to 28 degrees. You can also see the aluminum tubing I used for my cooling lines and the placement of the inline fuel pump in the photo above.

Image

Here's a pic of the rear showing how the exhaust is situated under the receiver hitch. Still need to build a rear bumper to finish it off though.
Last edited by superwrench73 on Mon Oct 20, 2008 8:01 pm, edited 1 time in total.
Post Reply