I found the missing photos so I am going to post them incase they might help someone with bending thicker sheet metal.
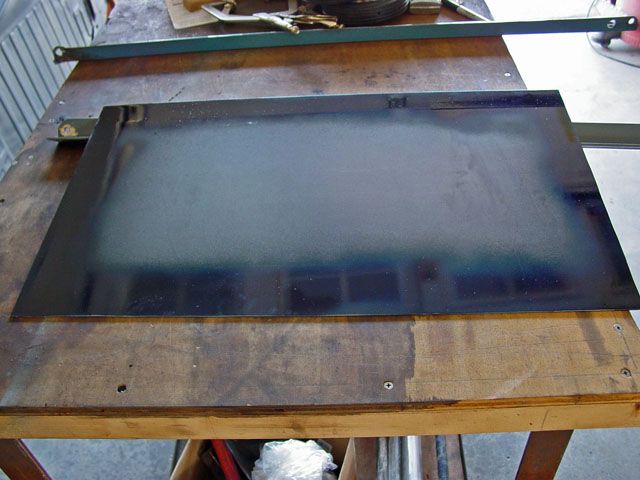
This is what the pan started as after trimming a quarter sheet of 14ga down to size. I sprayed bluing around the sides to mark out the centerline of the bend, the corner notches and the corner relief
that must be added. The plans do not talk about this but it is common for flat pattern work to have them.
This shows the centerline of bend. I did not show the mold lines (this is the start and end of the bends/the point of transition where the bend starts from the flat sheet as they were not necessary to be used on this bend because of the relief cut.
Also note that I added a center punch at the intersection of the two centerlines of bend. This is to stop a condition in the bend where a stress riser is created when the two corners meet and want to jam together during bending. If the relief is not there the compressed material on the inside of the bend will not compress anymore and starts to push the outside material up causing a lift and this is where a stress fracture will start. As I remember the hole should be 2Xs the material thickness. Since 14ga is 0.0781. I kind of cheated and drilled a 1/8"(edit) hole which worked satisfactory and was easy to weld shut.
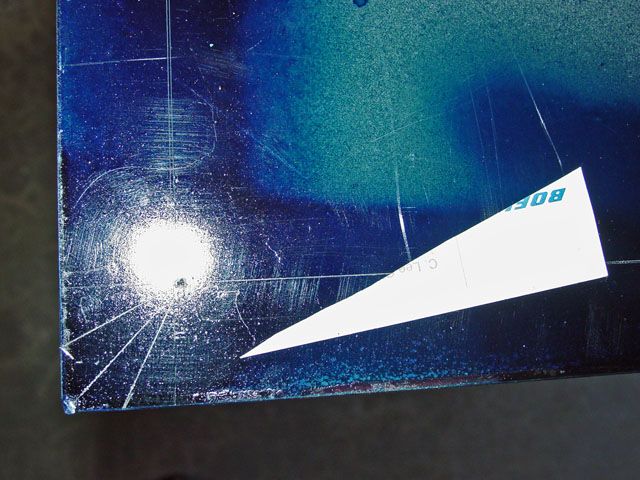
This shows the notch for bending. Since I don't have tool that I can lay flat and get the angle I made a template and used it. Unless is used the wrong dimension on the plans (totally possible) I thought the angle was too steep and was wrong which it was.
Since it has been too long since I have drawn any parts I goofed and made the angle to the intersection rather than the radius of the relief hole. I kept a cutting thin disc handy and did some relief work as I made the bends (getting old is a bitch).
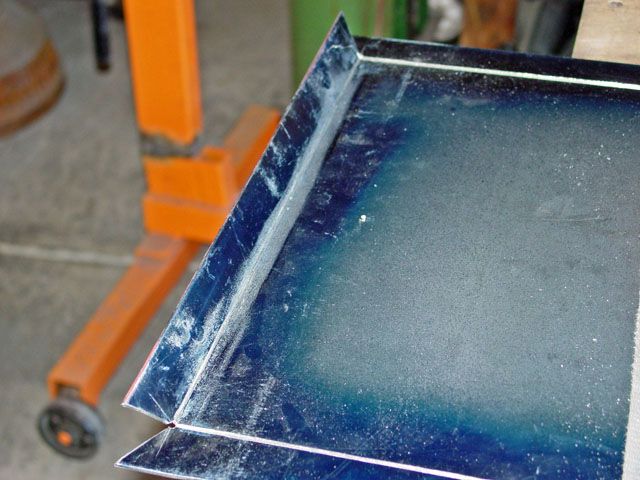
(I've already started bending here but you can see the idea of the relief cut)
This is the interesting part of the job. He does talk about the two different ways to make the bend: one is done by cutting then the welding of the separate sides; this version being the harder one do in my opinion. The bend radius of 14ga hot (?) rolled steel is going to be quite large so the inside material was relieved allowing it to be bend at a tighter radius than normal.
As I have said before: old Hollywood bed frame material is a god send for a lot of things; it can be cheap to get at "garbage" sales. I cut some material I had laying around to the length of the flange (it takes two, one for the 2 long flanges and 2 for the shorter flanges.
I laid one leg of the angle iron (always use the same leg for relieving as you will need the other leg later on) just back, about the width of a sharp pencil line along the centerline of the bend but to the inside of the line. I then used a cut off tool with a thin blade to score the centerline of bend being careful not to do anymore damage to the angle iron's face than I could. Then using the other leg of the angle iron I laid it along the cutting line and clamped it in place and used it as a bending form.
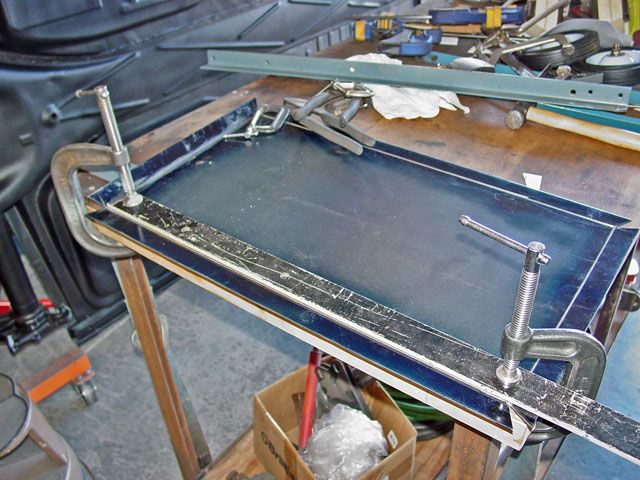
Before I ended up using the angle iron I tried using a thick piece of bar stock but the thickness of the stock ended up getting in the way so the piece of bed frame in the back ground was used. For the same reason: the strong back of the angle was not used as it too got in the way.
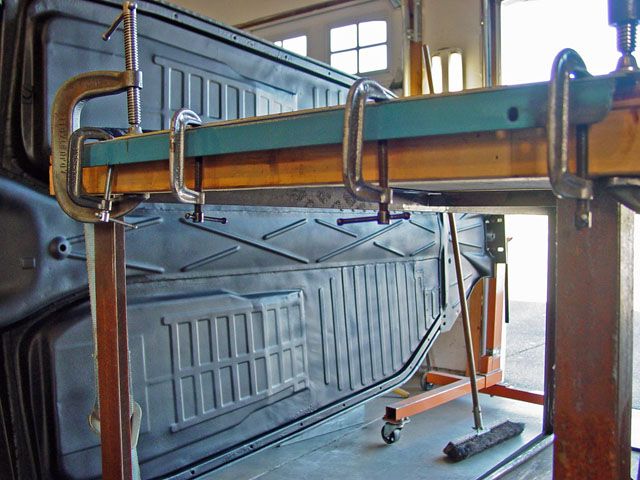
I tried several ways of bending the material with the angle on top and using two channel locks as handles to bend the flanges but it didn't work well and wanted to put lumps in the flanges which I had to body hammer and dolly out. Also the channel lock pliers wanted to open up as I lifted. Turning the pliers so that they faced the other way did not work at all so I ended up using this under the flange method and for handles I use two same sized crescent wrenches with them open to the thickness of the material of the bed frame. The combination of the flange where is was and the crescent wrenches worked so much better than I though it would.
After a couple of bends I found that it took three movements, make a bend then remove everything and measure the angle, then reinstall and bend again, etc. I was to get the angle I wanted w/o too much work or over bending.
The comic thing about this was the table I was working on I had made several years ago and I had forgotten that the top is only laying on the frame so when I lifted on the handles the top lifted too. So, brought in a tie down strap and cinched the top to the bottom legs of the table... worked good but then the whole end of the table lifted. Silly me!
I then put a foot on the lower cross-piece of the table and pivoted off that and things, including the bend, went much easier. Again, I bent first with the "handles" towards the end of the flange then moved them towards the center and pulled again. The flanges came out straight and even.
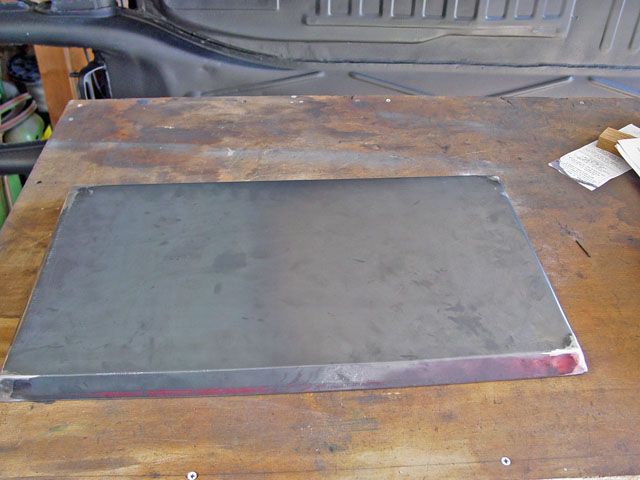
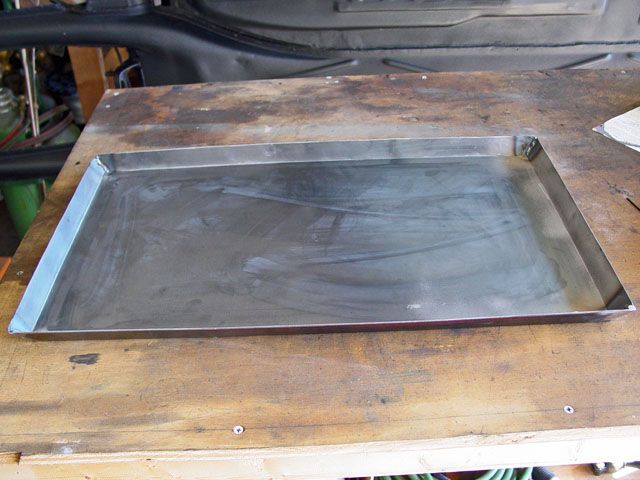
By-the-way, the relief cuts almost closed competently shut by them selves; it you want to... or need to you can weld the cutout closed with no problems. The depth of the cut was not half way through but fairly close. This you will find will be a trial and error thing so cut lite and you can always go back over it if you need to.
I hope this helps someone.
Lee


 . One of the objections to doing that is that it now is getting away from the small storable unit to: why not be done with it and get a dedicated vertical unit. With the larger platen you still have to change back to the smaller platen if you want to cut horizontal... OMG, it just came to me: with the cheaper cost of some I have seen on Craig's List I could get a second one and make one dedicated vertical and one horizontal.... NOT!
 ]) finally got to him in a negative way. I think he felt good after his TT and he did end up with a pretty nice band saw afterwards (I think it was the TV show that may have purchased it in order to complete the episode. Oh well... "That's entertainment" [sing the jingle as you read this last sentence])!


 . There is a bend in the H but not enough to worry about as long as I gusset G and D uprights which I was going to do anyway. When you lift up on the chassis to move the cart you shift the weight to the rear which is one of the reason's I traded E and F in the first place. It may have been a good idea to box C and D like E was but that might be too late now.