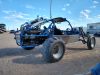
Devastator's upgrade

Offroad VW based vehicles have problems/insights all their own. Not to mention the knowledge gained in VW durability.
User avatar
Devastator
Posts: 3493
Joined: Tue Nov 06, 2007 6:51 am

Re: Devastator's upgrade

Post by Devastator »

TMI page 2.
I only have a little bit of time available today for this, so no pics yet, but they're coming.
Earlier I mentioned that I had leveled the frame and found center so I could continue my trailing arm upgrade. Here is how I did it. First I had to decide what I wanted everything to be straight to. For this, I chose the torsion housing. In machining, we have these things called 1-2-3 blocks. They are steel blocks, with or without holes in them, that have been ground to 1 inch x 2 inches x 3 inches, straight, perpendicular, and parallel on all sides. I used 2 of these 1-2-3 blocks and a level to level the torsion housing. I simply zip tied the level to the bottom of the torsion tube with the 1-2-3 blocks between them, and moved my jack stands forward and backwards, (since they are on a slightly angled frame rail), until the level indicated that it was level. Cut the zip ties off an put everything away. To level from front to back, (not as important for a rear trailing arm build), I set the level on the longest bar that goes to the front end and leveled from there.
Next, I had to find the center of the transaxle. At first I considered using the center of the frame, (torsion housing), for the centerline, but changed my mind because I am building trailing arms that must be equidistant from the trans and not the frame, so that the axles will be the same length. To find the transaxle centerline, I bolted up 2 CV joints and suspended plumb bobs from them. I marked these locations on the floor, attached the strings to the CV's and taped them to the floor at the marked points. Now, I simply measured the distance between them and divided by 2. Marked this location on the transaxle. Then I moved to the front end and found the center of it with a similar method. Next, I attached a bar to the rear engine cage and hooked a string line to it. Stretch this to the mark on the front end, making sure I intersected the c/l of the transaxle, and viola, a centerline string. I marked this c/l with a sharpie in several locations for future reference and moved on to the trailing arm end plate fixture.
I'll go into more detail about this fixture when I have the pics for clarity. 8)
Dev
Devastator's Build Thread

Sandrail

2.4 liter, supercharged Chevy Ecotec

"If everything seems under control, you're just not
going fast enough."
Mario Andretti
Ol'fogasaurus
Posts: 17881
Joined: Mon Nov 13, 2006 10:17 pm

Re: Devastator's upgrade

Post by Ol'fogasaurus »

Thank you very much. :) Very good descriptions and reasons. The use of the 1, 2, 3 blocks was very interesting to me.

Lee
User avatar
Qurtys Lyn
Posts: 1558
Joined: Mon Nov 10, 2008 2:22 pm

Re: Devastator's upgrade

Post by Qurtys Lyn »

Hedrock wrote:
Lotrat wrote:
Devastator wrote:
kyle_pc_75 wrote:we need a pic of the actual project!
Would you like pics of it before starting the upgrade or as it sits on the jack stands?
Yes.
Most definitely
Indeed. :lol:
Fusername's evil twin

'72 Std Beetle - 1641 CC
BRAT Motorsports #936
User avatar
Devastator
Posts: 3493
Joined: Tue Nov 06, 2007 6:51 am

Re: Devastator's upgrade

Post by Devastator »

Ol'fogasaurus wrote:Thank you very much. :) Very good descriptions and reasons. The use of the 1, 2, 3 blocks was very interesting to me.

Lee
I could have probably used some square tubing that I have lying around, but I know that these are parallel and I own about 5 sets of them. 8)
Devastator's Build Thread

Sandrail

2.4 liter, supercharged Chevy Ecotec

"If everything seems under control, you're just not
going fast enough."
Mario Andretti
User avatar
Devastator
Posts: 3493
Joined: Tue Nov 06, 2007 6:51 am

Re: Devastator's upgrade

Post by Devastator »

Last night I was able to take some more pictures as well as find a very few of my sandrail before I took it apart, and in it's current condition up on jack stands. Here ya go:
You do not have the required permissions to view the files attached to this post.
Devastator's Build Thread

Sandrail

2.4 liter, supercharged Chevy Ecotec

"If everything seems under control, you're just not
going fast enough."
Mario Andretti
User avatar
Devastator
Posts: 3493
Joined: Tue Nov 06, 2007 6:51 am

Re: Devastator's upgrade

Post by Devastator »

Here's a pic of the 1-2-3 blocks I mentioned earlier. Also some shots of the trailing arm fixture in place.
You do not have the required permissions to view the files attached to this post.
Devastator's Build Thread

Sandrail

2.4 liter, supercharged Chevy Ecotec

"If everything seems under control, you're just not
going fast enough."
Mario Andretti
User avatar
Devastator
Posts: 3493
Joined: Tue Nov 06, 2007 6:51 am

Re: Devastator's upgrade

Post by Devastator »

The new shoulder bolts I ordered for the spring plate replacement pivot, (I think I've changed the name of this part a few times), came in yesterday too, so here's a shot of the bolt and parts all welded up.
My dad asked me why I used a shoulder bolt instead of a standard 5/8 grade 8 bolt. I'll explain here the same way I did to him. First, I like the fit of a ground bolt in a ground housing over a threaded bolt banging around inside the bore. More importantly, the shoulder bolt is also grade 8 and is stronger than a threaded bolt because the smallest diameter on a threaded bolt is .547 while the shoulder bolt is .625 throughout. The trade off is at the thread, where the shoulder bolt is considerably weaker. This is not an issue for me, however, because the bolt should only see shear forces and it is located in a bore that is only .001 larger than it's diameter. He grabbed his beer, rolled his eyes, and took a drink. :P
You do not have the required permissions to view the files attached to this post.
Devastator's Build Thread

Sandrail

2.4 liter, supercharged Chevy Ecotec

"If everything seems under control, you're just not
going fast enough."
Mario Andretti
User avatar
Devastator
Posts: 3493
Joined: Tue Nov 06, 2007 6:51 am

Re: Devastator's upgrade

Post by Devastator »

Here's the original trailing arm, still in place for reference and measuring purposes. I'll remove it after I've built the other side. Sorry about the poor quality picture.
You do not have the required permissions to view the files attached to this post.
Devastator's Build Thread

Sandrail

2.4 liter, supercharged Chevy Ecotec

"If everything seems under control, you're just not
going fast enough."
Mario Andretti
User avatar
Devastator
Posts: 3493
Joined: Tue Nov 06, 2007 6:51 am

Re: Devastator's upgrade

Post by Devastator »

I have some pictures of the process I use to cut my trailing arms bars to the correct angle. I want to mention that I do not claim that this is the BEST way to do this sort of thing, only that this is how I did it. I'm also aware that most people reading this do not have a milling machine nearby, but the same plan could be use with a bandsaw, coldsaw, or abrasive disk chopsaw.
The first thing I do is to measure, (with a measuring tape), the length of the bar I'll need, always adding extra stock for "thinking" errors. Then, I take a piece of angle iron and mark a line down the length of the bar. This is my reference line for all of my cuts. Next, I clamp my, homemade, magnetic level holding clamp, (I made that name up right now). I'll use this clamp and angle meter to cut all my angles straight to the bar. Now I put the bar in place, (although sometimes I use a piece of angle iron to measure the first cut), and check the angle with a protractor. Now I take the bar and clamp it in the milling machine vise with the angle meter clocked to 0. Rotate the bar, (using a rotating table in my case), and make the first cut. Check the fit back at the trailing arm, and measure the next angle and length using a measuring tape and protractor, always with the bar reading 0 on the angle meter. Sometimes I have to rotate the bar so that the cut would line up with it's mating part. No problem. Just write down the angle it was rotated to, and duplicate it at the vise when clamping it. In a few instances I had to tip the bar up at an angle no order to get the cut I wanted. I did this with 2 angle meters set perpendicular to each other. 1 for the rotation and the other for the tip angle.
Using this method, the bars I cut fit well enough that you can't stick a playing card in the gap of the 2 mating parts. FWIW, I only tack welded the middle bar and fit the others, otherwise I can't get the tip of the MIG welder in there close enough to weld it. I'll add the other bars after I weld the first one.
Here's some pictures of this whole process and the result thus far.
You do not have the required permissions to view the files attached to this post.
Devastator's Build Thread

Sandrail

2.4 liter, supercharged Chevy Ecotec

"If everything seems under control, you're just not
going fast enough."
Mario Andretti
User avatar
Devastator
Posts: 3493
Joined: Tue Nov 06, 2007 6:51 am

Re: Devastator's upgrade

Post by Devastator »

More pics.
You do not have the required permissions to view the files attached to this post.
Devastator's Build Thread

Sandrail

2.4 liter, supercharged Chevy Ecotec

"If everything seems under control, you're just not
going fast enough."
Mario Andretti
User avatar
Devastator
Posts: 3493
Joined: Tue Nov 06, 2007 6:51 am

Re: Devastator's upgrade

Post by Devastator »

Poor quality picture of the current progress.
You do not have the required permissions to view the files attached to this post.
Devastator's Build Thread

Sandrail

2.4 liter, supercharged Chevy Ecotec

"If everything seems under control, you're just not
going fast enough."
Mario Andretti
User avatar
Devastator
Posts: 3493
Joined: Tue Nov 06, 2007 6:51 am

Re: Devastator's upgrade

Post by Devastator »

Tonight's result:
You do not have the required permissions to view the files attached to this post.
Devastator's Build Thread

Sandrail

2.4 liter, supercharged Chevy Ecotec

"If everything seems under control, you're just not
going fast enough."
Mario Andretti
grogthegreat
Posts: 77
Joined: Thu Oct 08, 2009 9:32 pm

Re: Devastator's upgrade

Post by grogthegreat »

I am completely jealous of your high quality work and the equipment you have on hand.

Very nice work! This is looking like a great build thread so far.

Cheers,
-Greg
User avatar
Devastator
Posts: 3493
Joined: Tue Nov 06, 2007 6:51 am

Re: Devastator's upgrade

Post by Devastator »

Thanks. I've had a lot of practice at building things, although this is the first set of trailing arms I've built. Between me, my brother, and dad, we have a LOT of useful stuff. The milling machine, BTW, I bought for 400 bucks! It's not in fantastic condition, but it works well enough for home usage. I can always make stuff at work if needed. I'm so stoked. :)
Here's a video of my sandrail, shot by my daughterstator on her quad, for your enjoyment.

Devastator's Build Thread

Sandrail

2.4 liter, supercharged Chevy Ecotec

"If everything seems under control, you're just not
going fast enough."
Mario Andretti
User avatar
Getrdone
Posts: 2978
Joined: Tue Jan 02, 2007 5:38 pm

Re: Devastator's upgrade

Post by Getrdone »

Yeah, what they said. It is best to know where a project came from and watch it materialize. The progress pics are our porn! iPod typing sometimes chaps my hems!
Post Reply