Ben, an interesting build.
Question: on the front suspension conversion do you think that the pan's tunnel (top and bottom together and only using a panel on the front of the tunnel (does the new mount go into the tunnel for more support) is strong enough to handle any large twisting and/or side to side loads or hits (not so much up and down travel but the type that can give suspension racking) without something like the old front suspension's V shaped piece with flanging and beading for strength had to take hard hit loads from one front front suspension or the other or maybe both?
I run buggies that do not have a roof like most Bajas still have but talking to the owner of a VW scrap yard (this was over 20 years ago and is now gone) who said that with off-roading (especially with dune buggies) he was finding that the pan's tunnel was slightly bending in a small arc from the Napoleon's hat area to where the shifter would be.
Also, hard to be sure of in the pix so far, but I don't see the end mount from the torsion tube to the pan being there like the stock pan had. It might be important to continue having that or improving on it.
This is just a curiosity as I am sure that you are not finished with what I see.
Lee
72BajaBen Baja Rebuild Thread
-
72bajaben

- Posts: 1359
- Joined: Wed Aug 09, 2006 10:37 pm
Re: 72BajaBen Rebuild Thread
LeeOl'fogasaurus wrote: ↑Mon Dec 13, 2021 9:44 pm Ben, an interesting build.
Question: on the front suspension conversion do you think that the pan's tunnel (top and bottom together and only using a panel on the front of the tunnel (does the new mount go into the tunnel for more support) is strong enough to handle any large twisting and/or side to side loads or hits (not so much up and down travel but the type that can give suspension racking) without something like the old front suspension's V shaped piece with flanging and beading for strength had to take hard hit loads from one front front suspension or the other or maybe both?
I run buggies that do not have a roof like most Bajas still have but talking to the owner of a VW scrap yard (this was over 20 years ago and is now gone) who said that with off-roading (especially with dune buggies) he was finding that the pan's tunnel was slightly bending in a small arc from the Napoleon's hat area to where the shifter would be.
Also, hard to be sure of in the pix so far, but I don't see the end mount from the torsion tube to the pan being there like the stock pan had. It might be important to continue having that or improving on it.
This is just a curiosity as I am sure that you are not finished with what I see.
Lee
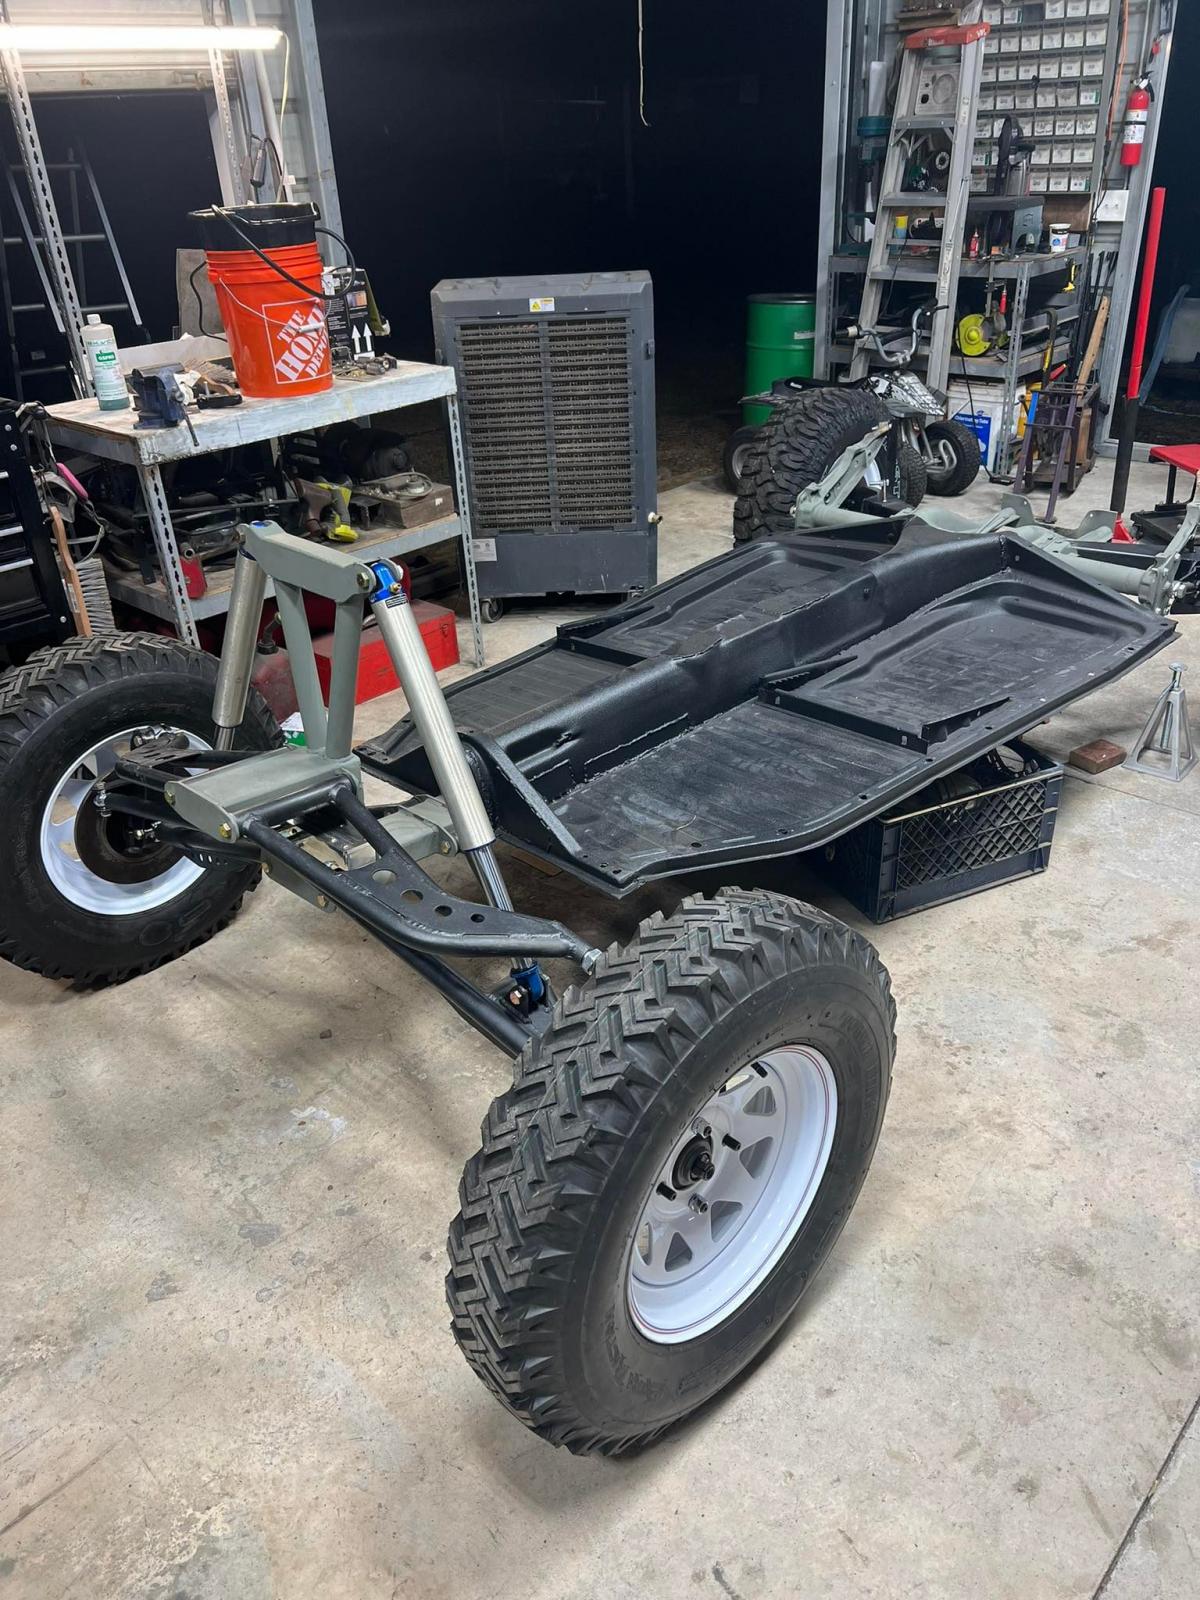
Thanks for the questions. I don’t know of the front would be fine on it’s own. I suspect it would be good for normal driving. But not off-roading. The top shock tower will be tied back to the roll cage. The flat spot above the steering box will also be tied back in. Nichols Fab actually says to do this in his instructions. I just haven’t gotten that far in the build.
Not sure what you are talking about with the end mount. Are you talking about the stock trans mount? My rear torsion housing is…or should be…100% stock. I’ve made no mods to it.
-Ben
-
Ol'fogasaurus
- Posts: 17773
- Joined: Mon Nov 13, 2006 10:17 pm
Re: 72BajaBen Rebuild Thread
I suspected that there was more to be done... just checking to be sure.
This is the bottom side of the torsion bar mount showing the torsion housing's erzat's connection to the pan. It isn't the greatest of things and they have been known to brake off the torsion housing leaving the rear of the pan floppy. If you are going to play hard then I would recommend adding some strength updates also.
This is some of the things I did to stiffen up my pan. I have a glass body which needs more strength than a full bug body. The commercial body lifts are not that strong... more for looks.
Lee
You do not have the required permissions to view the files attached to this post.
-
72bajaben
- Posts: 1359
- Joined: Wed Aug 09, 2006 10:37 pm
Re: 72BajaBen Rebuild Thread
Lee
Yup, Those little horns are still there. I made sure not to cut them off when I did the pan swap.
I'm going to be doing a body lift as well. I agree that the commercial lifts don't appear to be super strong but they don't appear to be too weak either. My son wants to practice TIG welding. So boxing in the body lift seems like a prefect place to practice. I plan on running some floor bars for the roll cage. So that should help stiffen everything up too. I will see what I think when I get that far. Right now, I plan on using the parts I have.
-Ben
-
Ol'fogasaurus
- Posts: 17773
- Joined: Mon Nov 13, 2006 10:17 pm
Re: 72BajaBen Rebuild Thread
As I said, they do break off and from what I have been told... fairly easily.72bajaben wrote: ↑Tue Dec 14, 2021 8:23 am Lee
Yup, Those little horns are still there. I made sure not to cut them off when I did the pan swap.
I'm going to be doing a body lift as well. I agree that the commercial lifts don't appear to be super strong but they don't appear to be too weak either. My son wants to practice TIG welding. So boxing in the body lift seems like a prefect place to practice. I plan on running some floor bars for the roll cage. So that should help stiffen everything up too. I will see what I think when I get that far. Right now, I plan on using the parts I have.
-Ben
Because of how I did the pedal assy the Napoleon's hat on my pan had to be changed which affected the body lift kits you can buy. There are two ways to do it, one is to make a lift to match the hat area on the top and bottom of the lift and another is to make the body lift hat piece more of a slip over style similar to what the lighter weigh commercial units do.
This is an in-process pix of when I was making my body lift. The shape of the lift was made from the actual Napoleon's hat then strengthen and supported. I can post the location of this on my build if you want.
There was a guy who moved here from Australia who had scanned the shape then made the face pieces so all you had to do was the strapping but I haven't seen this for quite a long time.
Lee
You do not have the required permissions to view the files attached to this post.
-
72bajaben
- Posts: 1359
- Joined: Wed Aug 09, 2006 10:37 pm
Re: 72BajaBen Rebuild Thread
You should put that jig up on a tool rental site.
There is this site...http://upyerbug.com/?product=front-yoke-weld-on-diy-kit
They make a kit for like $60 for a 3" lift.
There is this site...http://upyerbug.com/?product=front-yoke-weld-on-diy-kit
They make a kit for like $60 for a 3" lift.
-
Ol'fogasaurus
- Posts: 17773
- Joined: Mon Nov 13, 2006 10:17 pm
Re: 72BajaBen Rebuild Thread
That casting should be OK assuming it is wide enough or two would then be needed  .
.
Lee
Lee
-
72bajaben
- Posts: 1359
- Joined: Wed Aug 09, 2006 10:37 pm
Re: 72BajaBen Rebuild Thread
It’s not a casting it’s 2 flat plates that you weld straping on top of.
-
Ol'fogasaurus
- Posts: 17773
- Joined: Mon Nov 13, 2006 10:17 pm
Re: 72BajaBen Rebuild Thread
I did see it but it was the big letters that distracted me
I had the same option as making the piece the same way but for a couple of other reasons I chose not go that way.
On the stock pan, in the front are two slots per side where the body bolted to the pan. The bolts came from the underside of the pan.
In order to use the commercial lower beam stiffeners I built this double bolt setup in the slots I made in the Napoleon's hat area, put the bolts in place then covered up the end of the body lift, again for rust prevention. To keep the bolts from getting pushed up in the body lift I put a cross-piece above the bolts and welded it to both sides of the body lift. This, again, keeps the bolts in place but also free to move in the slots.
Lee
You do not have the required permissions to view the files attached to this post.
-
72bajaben
- Posts: 1359
- Joined: Wed Aug 09, 2006 10:37 pm
Re: 72BajaBen Rebuild Thread
So here we are.
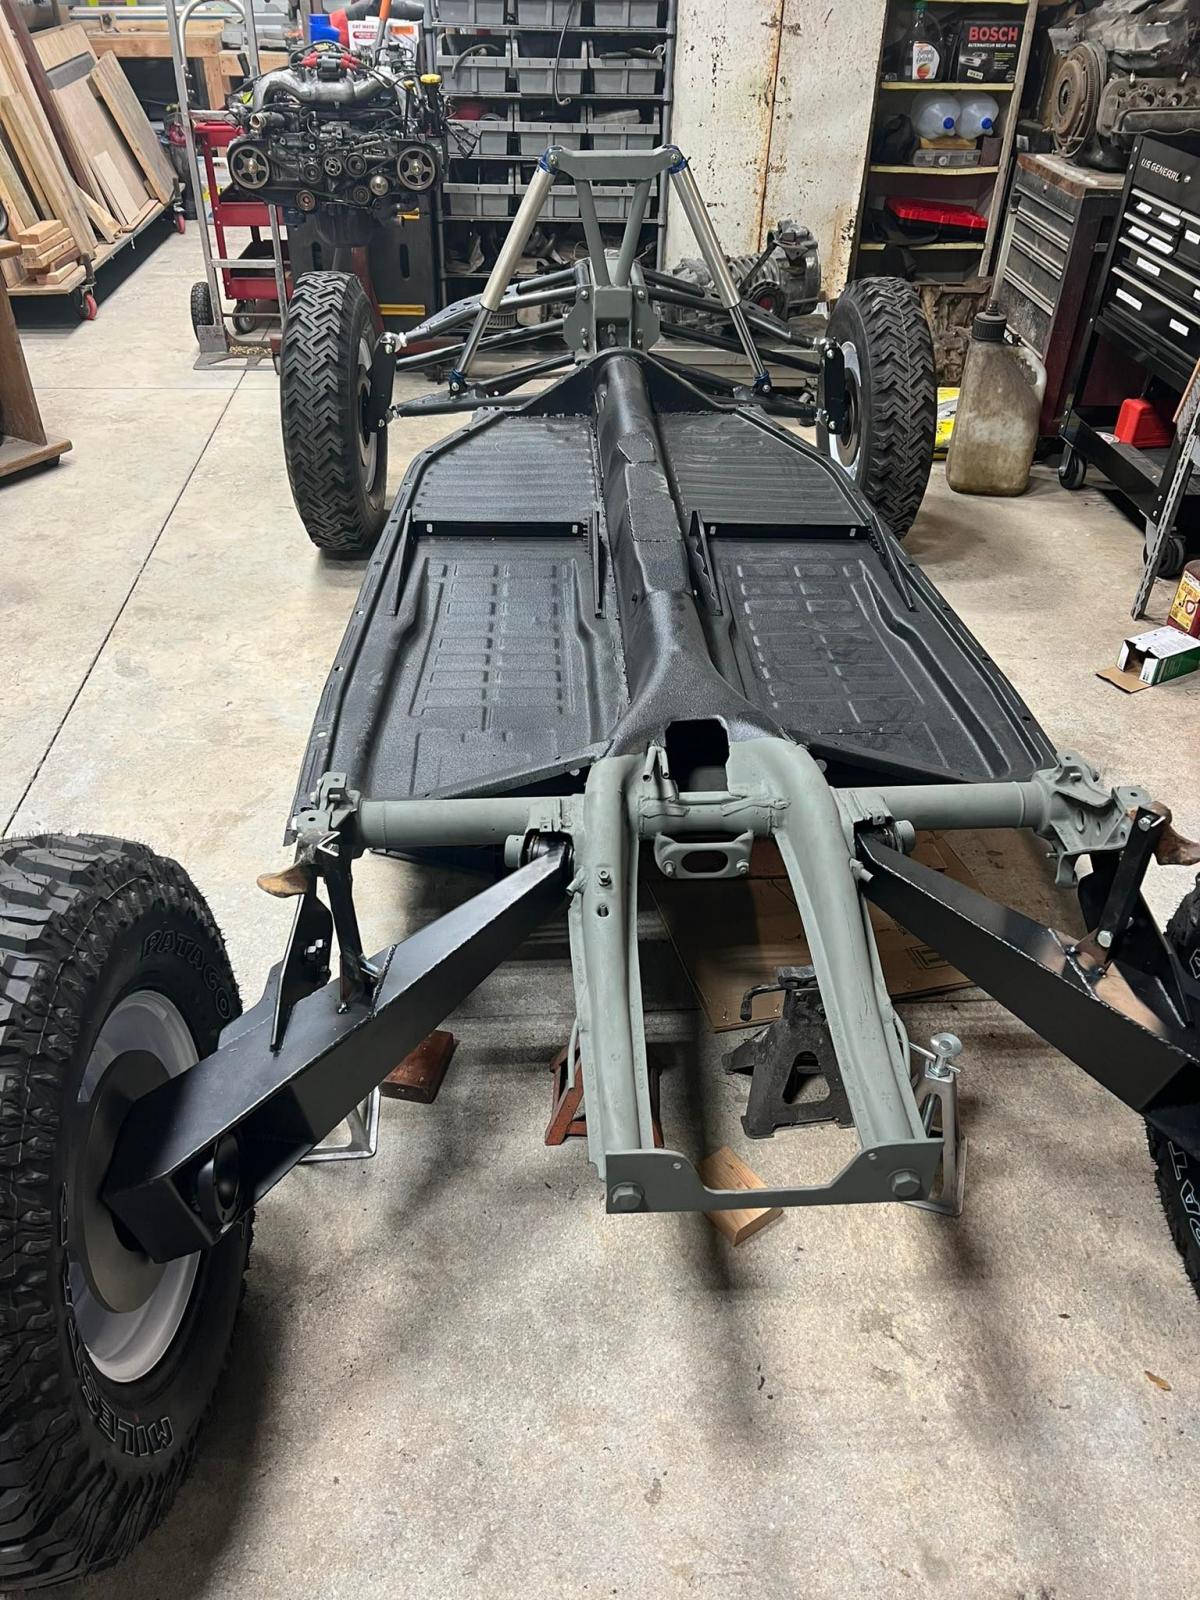
Its a roller again. I discovered one of the outer front bearings was missing a roller. So that will need to be replaced. Nothing is fully torqued yet.
Next the body will probably go on.
Its a roller again. I discovered one of the outer front bearings was missing a roller. So that will need to be replaced. Nothing is fully torqued yet.
Next the body will probably go on.
-
Ol'fogasaurus
- Posts: 17773
- Joined: Mon Nov 13, 2006 10:17 pm
Re: 72BajaBen Rebuild Thread
What are you going to do with/about the pedal assy?
Lee
Lee
-
72bajaben
- Posts: 1359
- Joined: Wed Aug 09, 2006 10:37 pm
Re: 72BajaBen Rebuild Thread
Hanging Wilwood pedals and some sort of throttle.Ol'fogasaurus wrote: ↑Sat Dec 18, 2021 9:21 am What are you going to do with/about the pedal assy?
Lee
-
Ol'fogasaurus
- Posts: 17773
- Joined: Mon Nov 13, 2006 10:17 pm
Re: 72BajaBen Rebuild Thread
For what it is worth, hanging pedals in a glass buggy.72bajaben wrote: ↑Sat Dec 18, 2021 9:29 amHanging Wilwood pedals and some sort of throttle.Ol'fogasaurus wrote: ↑Sat Dec 18, 2021 9:21 am What are you going to do with/about the pedal assy?
Lee
Access in the buggy was difficult so the reservoirs were made to face towards the rear. On the glass buggy the hood came off and the dash was part of the hood.
In a Baja, not sure about access so... again, the pictures are for what it is worth.
Lee
You do not have the required permissions to view the files attached to this post.
-
72bajaben
- Posts: 1359
- Joined: Wed Aug 09, 2006 10:37 pm
Re: 72BajaBen Rebuild Thread
Thanks man. I think they will be way easier than standard style pedals.
-
72bajaben
- Posts: 1359
- Joined: Wed Aug 09, 2006 10:37 pm
Re: 72BajaBen Rebuild Thread
I have no idea how many miles are on this motor. It came from a 1996 mom wagon with an auto trans. So hopefully it was babied. But I have it on the stand and I have time to kill.
Here's what I plan on doing.
1 - Washing the motor
2 - Head Gaskets
3 - Timing Assembly
3b. - 36 tooth crank gear upgrade
4 - Water pump
5 - EGR Delete
So I started to tear the motor down.
Isnt it so cute...


Here's what I plan on doing.
1 - Washing the motor
2 - Head Gaskets
3 - Timing Assembly
3b. - 36 tooth crank gear upgrade
4 - Water pump
5 - EGR Delete
So I started to tear the motor down.
Isnt it so cute...