How To Build a water-cooled Chargecooler/intercooler

With Turbo and Super charging you can create massive horsepower with vw motors.
Matt Keene
Posts: 406
Joined: Wed Apr 25, 2001 1:01 am

How To Build a water-cooled Chargecooler/intercooler

Post by Matt Keene »

Hi guys... Here’s a little info and pix regarding building your own chargecooler based on an air to air style core.

F.Y.I. cheap intercooler cores can be bought from the likes of Ebay and are normally from modern passenger cars. I normally go for brand new intercoolers as they are nice and clean. They can be bought very cheaply: normally less than one fifth of the factory price if it’s a stock clearout! A good line of intercoolers to go for come from the V.A.G. Group such as VW and Audi as their cores tend to be of a good size. Audi TDI motors are normally a good source.

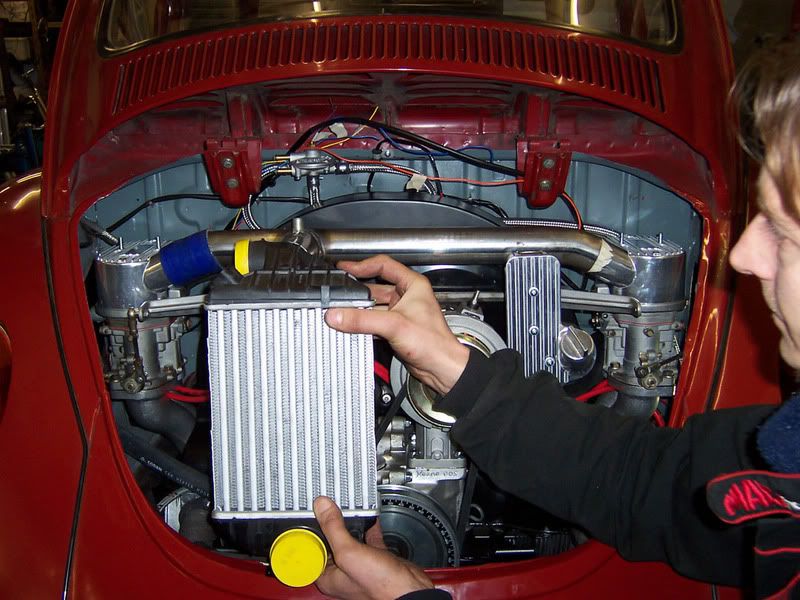
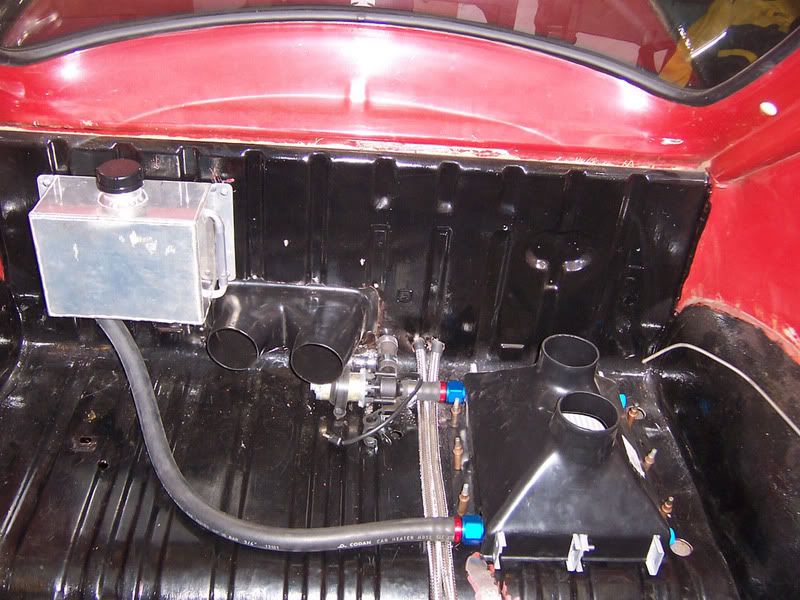
Here’s a shot of a finished chargecooler installation done a couple of years ago. I used an Audi TDI core and, a home made header tank, an oil cooler (for cooling the water) and a Golf VR6 electric water pump. Total cost not much more than $200 or £100.
The beauty of this system is that it fits under the stock decklid of a stock Bug without stand-offs.
All water connections were 19mm (3/4 inch). Pump flow was 12 litres a minute.

Image

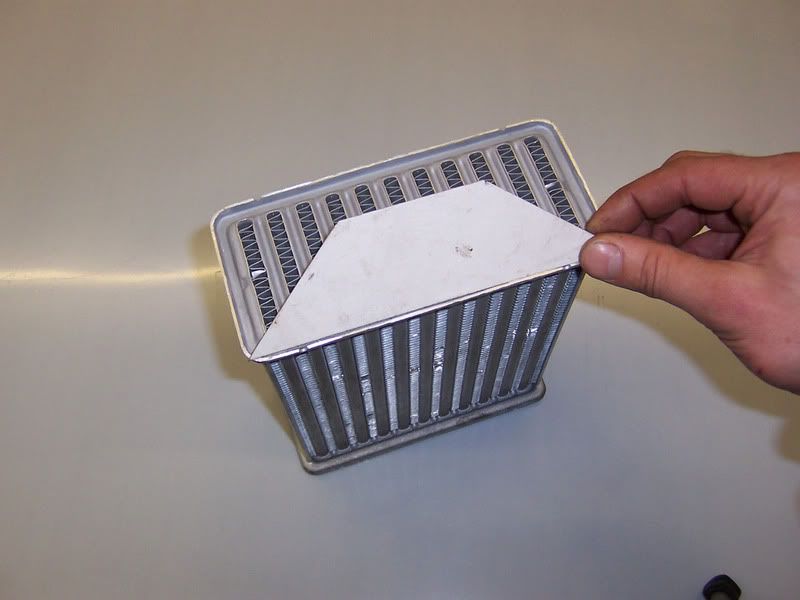
The first task is to work out how much space you have and find a suitable core. You need to have a good air flow through the core. The one pictured above easily handled 250 hp on the rolling road. Most VAG intercoolers come with plastic end tanks crimped on to the core. These are very simple to work with.

Image

To remove the end tanks it is simply a case of loosening off the crimped over tags with a screwdriver

Image

mark a nice straight datum line

Image

Next I cut a straight line using tinsnips. You need a good straight edge here.

Image

File the edge flat to make absolutely sure

Image

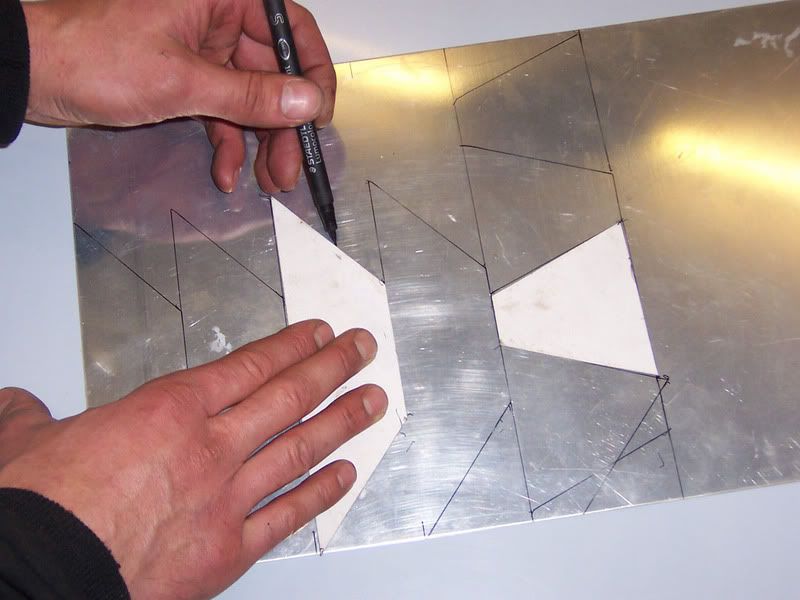
Next I start working with pattern development seeing what will work beneath the decklid. I aim for good flow paths to minimise friction.

Image
Image
Image
Image
Image

I then Tig Weld up the aluminium to form the end tanks and drill a hole through for straight tubing.

Image
Image

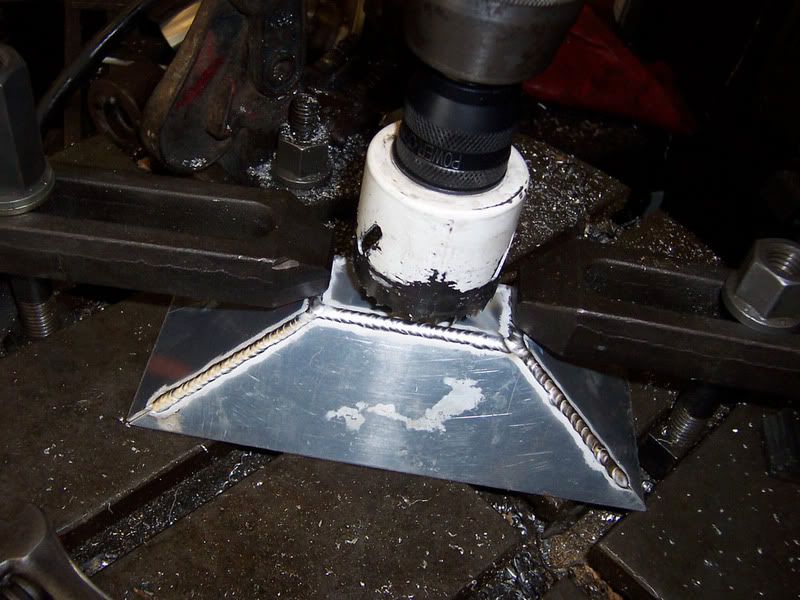
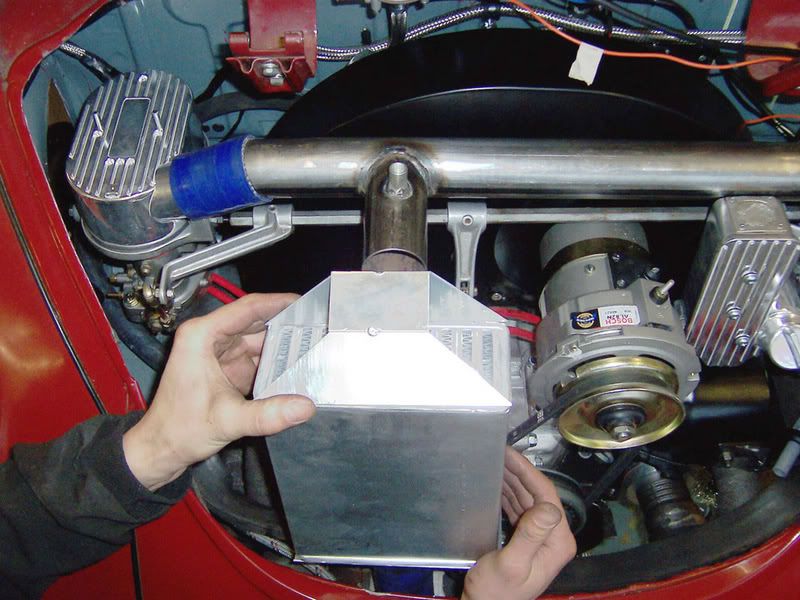
I then tack weld the end tanks to the intercooler core and check all still fits under the decklid.

Image

When I am fully happy the shapes work and there are no clearance issues I then fully weld up the intercooler end tanks.

Image

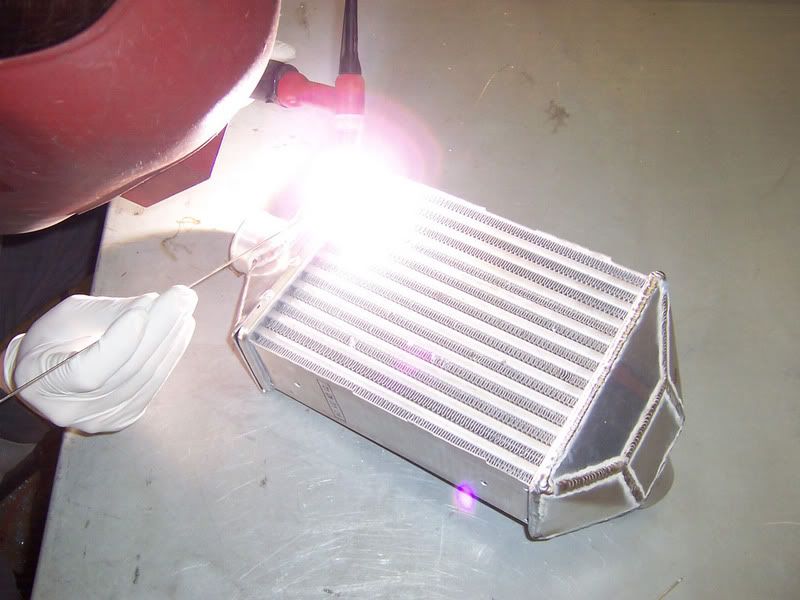
Time to make the water jacket using ali sheet metal. Simply fold up a U-section and cut one flat piece of sheet metal.

Image

Fully weld the sheet metal to your intercooler end tanks and then pressure test to at least 20 psi with a tyre pressure gauge. Submerse the intercooler in water and check for any leaks. Any leaks must be dealt with or it will all end in tears...

Image

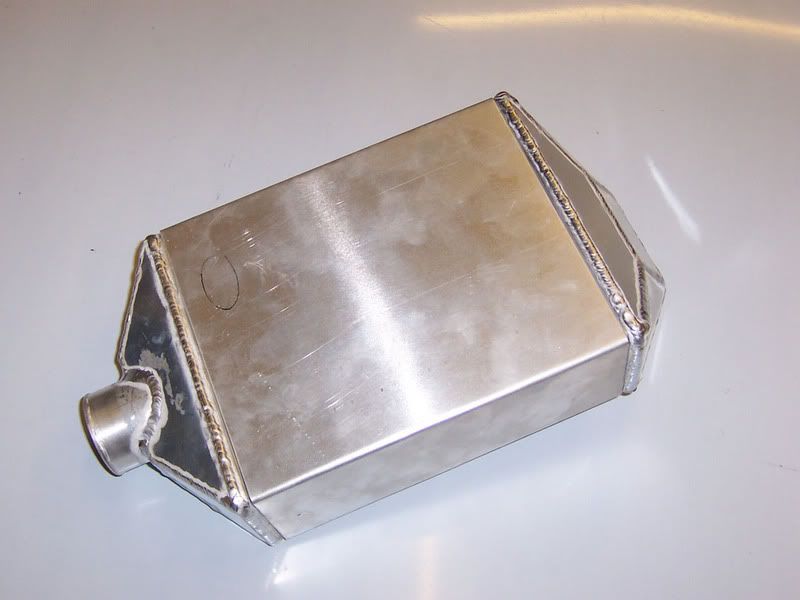
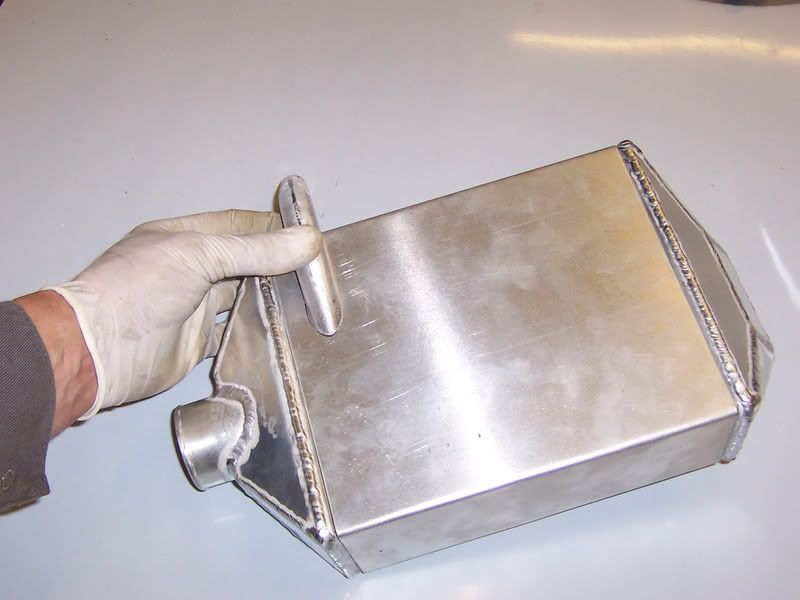
I then work out where I want my water connections. The water IN needs to be at the BOTTOM of the core and the water OUT needs to be at the TOP on the OPPOSITE side of the cooler to help expell any trapped air and ensure water flow through the cooling fins. The system needs to bleed fully for proper operation. Any air in the chargecooler will render the system inoperative in terms of water flow. The pump will sit there humming all day long cavitating!

Image
Image

Finally a shot of the home made header tank, VR6 electric water pump (thanks to Marco Mansi for the tip ;)) and the water rad. Fresh air ducting is yet to be put on in this shot!

Image

For your information... this chargecooler setup was tested on the rolling road and the car made 239 hp @ 15 psi of boost. Motor was a 2007cc unit with TCS 20 cam, 48 Turbo Dells and 42x37.5 044s.
During the power runs the intercooler outlet temps were monitored and using a 15C cooling water the outlet air temps stabilised at 28C. Not bad considering the inlet temps into the intercooler were 100C! It works :D
User avatar
david58
Moderator
Posts: 14101
Joined: Sun Oct 23, 2005 6:14 pm

Post by david58 »

Great post this should be a sticky. :wink:
User avatar
sparkieben
Posts: 26
Joined: Tue Feb 13, 2007 4:19 pm

Post by sparkieben »

hi matt Im also in the uk and have been looking for one of these for my turbo set up its the same as the one in your photos using a speedshop header etc how much would you charge for one of these kits as im unable to tig so cant make my own please let me know thanks ben
fastbus
Posts: 73
Joined: Mon Nov 06, 2006 12:52 pm

Post by fastbus »

Hi ya Matt, do you duct the cooling air through the engines fan system?

Wouldn't it be better to duct cool air from the under side of the car?
Matt Keene
Posts: 406
Joined: Wed Apr 25, 2001 1:01 am

Post by Matt Keene »

Re. ducting: Cooling air for the chargecooler water radiator on this car came through a NACA duct on the window. The duct to the engine air fan is also linked to a NACA duct on the opposite window. This ensured extra air flow to the engine's fan. It worked really well. 8)
User avatar
panel
Posts: 4227
Joined: Sun Sep 24, 2000 12:01 am

Post by panel »

Hi Matt.

Couple of things......Why didn't you drill the holes before hand for the water in/out. Wouldn't you get shavings in there (drilling) after you've welded her up? And you posted it twice :wink:
'65 Bus with a JDM Subaru EJ20 Turbo
Built by Germans powered by Japanese and brought together by Canadians
User avatar
seabeebuggy
Posts: 3581
Joined: Sun Mar 12, 2006 11:25 am

Post by seabeebuggy »

panel, if you look closly you can see it is not welded on yet..

How much for a completed unit? about the same size . I can make a card bord model and mail it to you.. yes?
Last edited by seabeebuggy on Sun Sep 23, 2007 9:37 pm, edited 1 time in total.
www.BigMikesGuns.com oe https://www.BMGAA.com
Thomas Jefferson said It may be necessary for a country to have a revolution every 200 years to right the wrongs of a Government.
Got Lead?
User avatar
panel
Posts: 4227
Joined: Sun Sep 24, 2000 12:01 am

Post by panel »

seabeebuggy wrote:panel, if you look closly you can see it is not welded on yet..
Ahh... :roll:
'65 Bus with a JDM Subaru EJ20 Turbo
Built by Germans powered by Japanese and brought together by Canadians
Matt Keene
Posts: 406
Joined: Wed Apr 25, 2001 1:01 am

Post by Matt Keene »

panel wrote:
seabeebuggy wrote:panel, if you look closly you can see it is not welded on yet..
Ahh... :roll:
Yep Seabuggy is right. I welded them on before welding the outer casing on. Maybe I should have made it a bit more clear in my text and pix.

Yep I posted it twice... I am not great with computers :oops: :oops: :oops:
Ron Perkins
Posts: 748
Joined: Wed Apr 12, 2000 12:01 am

Post by Ron Perkins »

"Im not great with computers" maybe...but you are great with turbos and intercoolers and fabricating. hey matt.
Matt Keene
Posts: 406
Joined: Wed Apr 25, 2001 1:01 am

Post by Matt Keene »

Thanks Ron... you are a gentleman 8)

How's things with the new setup? Hope all is well :wink:
Ron Perkins
Posts: 748
Joined: Wed Apr 12, 2000 12:01 am

Post by Ron Perkins »

Matt,
Motor was running great...until I had to pull it cause I grenaded the pinion gear on my second run. My wife says "you need a better trans" yah, but then follow up that statement with $$$$. I'll probably rebuild this trans, put things back together, keep the boost low and practice soft launches with a milder clutch set up. In the mean time, I'll search for a scrubby ride that I don't mind hacking, go with a suitable drivetrain setup...adda a much needed cage and this motor and race that. My 67 I'll then build my own smaller turbo motor that will be a driver...probably blothru. At least that's what i'm thinking now. In the mean time...there is sits again, staring at me everytime I open the polebuilding door. The last few weeks since I broke it the weather has been exceptional for this time of year. Things will change soon and then I'll have to get going on fixing the snowmobile my 13 year old son trashed last season...like father like son. Later my friend. Keep those articles coming.
Matt Keene
Posts: 406
Joined: Wed Apr 25, 2001 1:01 am

Post by Matt Keene »

Hey Ron. Sorry to hear you blew the motor! Bad news dude!
I am sure you will build a nice little motor to replace it :wink:

I've been busy on the race car recently. Things are taking shape - finished the cage and am working on the ali paneling. Hope to get the shell off to the blasters soon and then it's time for some paint 8)
User avatar
fastback
Posts: 1670
Joined: Wed Sep 12, 2001 12:01 am

Post by fastback »

very very nice!!
User avatar
Marty
Posts: 5802
Joined: Fri Nov 16, 2001 12:01 am

Post by Marty »

Matt Keene wrote:Hey Ron. Sorry to hear you blew the motor! Bad news dude!
)
He did'nt blow the motor, he keeps braking the transmission.
Post Reply