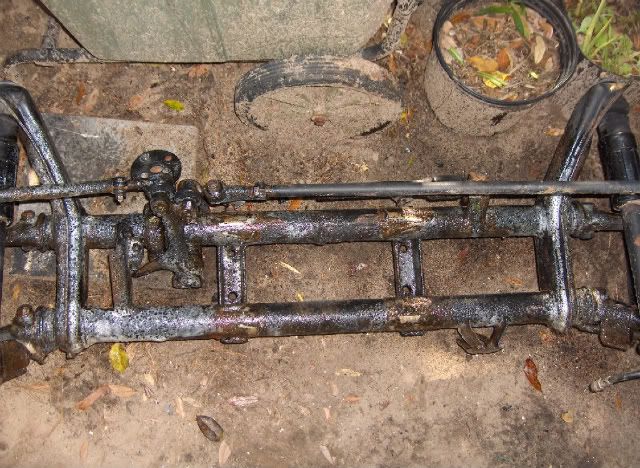
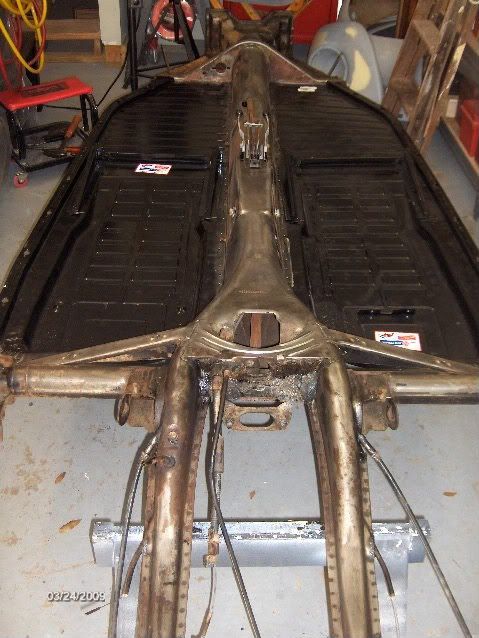
I looked at the bushings, and they look OK, however they are quite old....I will get new ones. When I disconnected the torsion swing arms. I used a C clamp to hold them in place so I could remove the bolts. I was not sure what to expect by removing the bolts.....I did notice after I looked closely the arm can only drop down so far, maybe 1/4" or so....I did scrib the location of the rear end on the swings arms so when it goes back in place, it will be exactly where it was before removing.....The holes in the torsion swing arm plates are slotted.... If one side is in to far and the other side is back it will throw the rear end out of place and wear out the rear tires. Make sense!
It's an alignment thing.
Next, on my agenda, I am going to remove the front hubs and backing plates, so I can start replacing the Ball Joints and tie rod ends....Any advise anybody?
My 72 Bug
-
Lew

- Posts: 529
- Joined: Tue Feb 24, 2009 6:42 am
It's still in the Restoration Booth!
You can take a peek!
VW Help
VW Technial
Track Gas Mileage
The Class I Teach
You can take a peek!
VW Help
VW Technial
Track Gas Mileage
The Class I Teach
-
Lew
- Posts: 529
- Joined: Tue Feb 24, 2009 6:42 am
Before removing the Easy Off oven cleaner. Nasty! Even removed some of the paint......
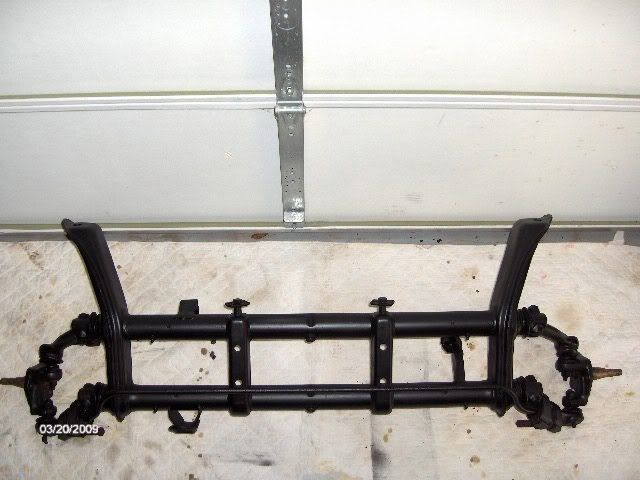
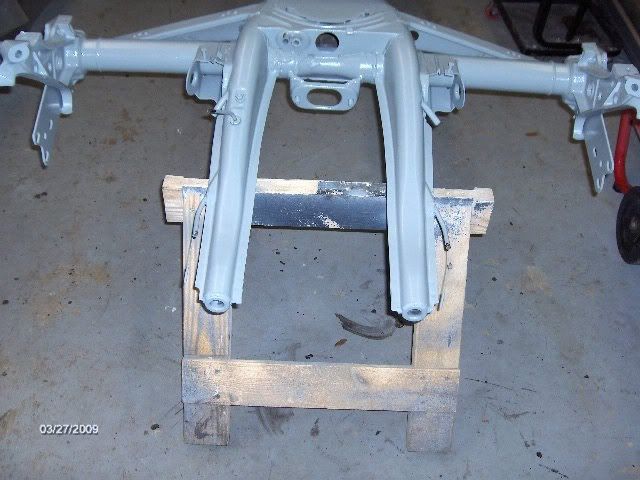
After cleaning, priming and painting with Duplicolor Low Gloss Engine Enamel. Removed all tie rod linkage and steering Box.....Next, new ball joints, tie rod ends and dropped Spindles and Disc Brakes.
That's me drilling 1/4" holes in the pan for the spot welds later
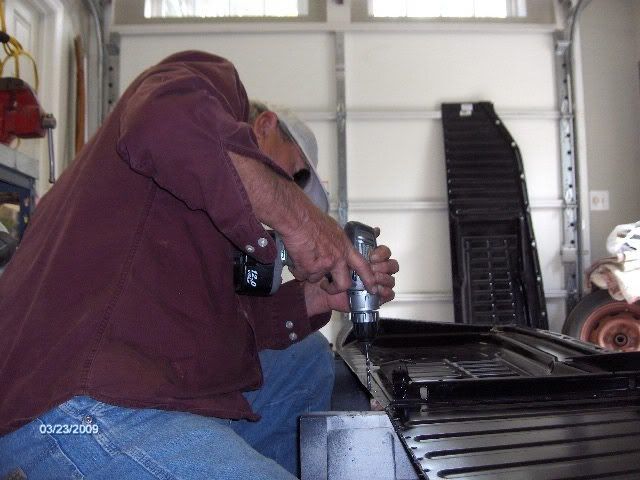
A easy to work on both sides.
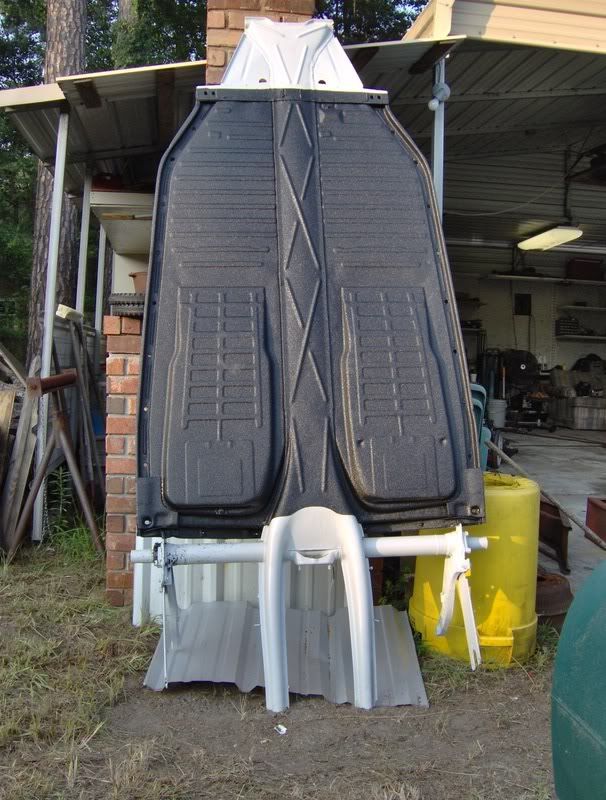
Pans fit well. Next to the sandblaster to do the chassis before welding in the pans.
After cleaning, priming and painting with Duplicolor Low Gloss Engine Enamel. Removed all tie rod linkage and steering Box.....Next, new ball joints, tie rod ends and dropped Spindles and Disc Brakes.
That's me drilling 1/4" holes in the pan for the spot welds later
A easy to work on both sides.
Pans fit well. Next to the sandblaster to do the chassis before welding in the pans.
Last edited by Lew on Tue Mar 24, 2009 5:05 pm, edited 2 times in total.
It's still in the Restoration Booth!
You can take a peek!
VW Help
VW Technial
Track Gas Mileage
The Class I Teach
You can take a peek!
VW Help
VW Technial
Track Gas Mileage
The Class I Teach

-
Lew
- Posts: 529
- Joined: Tue Feb 24, 2009 6:42 am
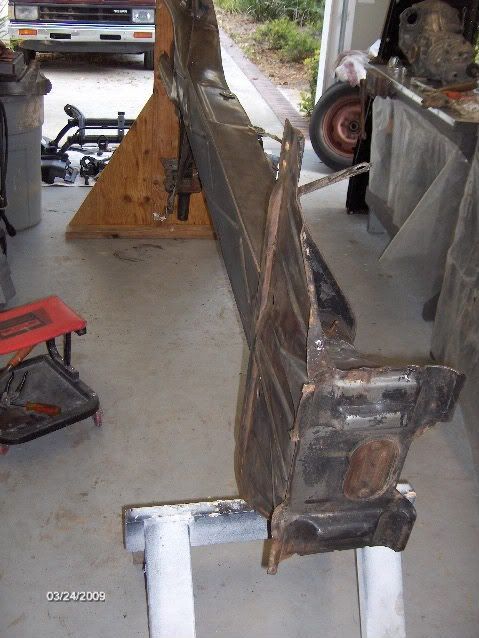
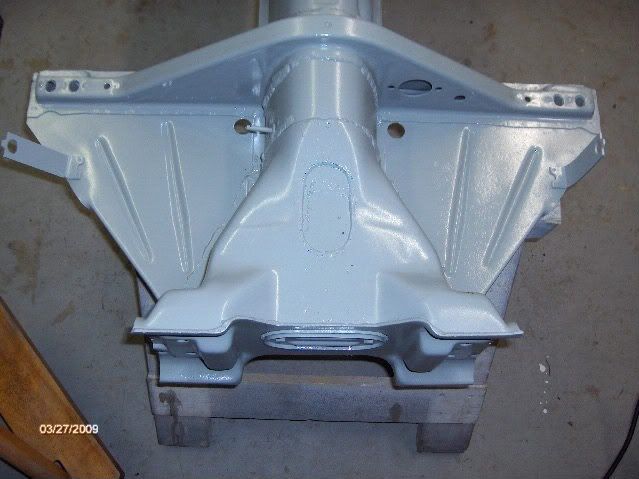
Frame getting closer to being Finished.
Sandblasted and sprayed with Industrail Primer with hardner....Looking good! Next plan is to have Line X spray the bottom of the pans once they are welded in place.....
It's still in the Restoration Booth!
You can take a peek!
VW Help
VW Technial
Track Gas Mileage
The Class I Teach
You can take a peek!
VW Help
VW Technial
Track Gas Mileage
The Class I Teach
-
david58

- Moderator
- Posts: 14096
- Joined: Sun Oct 23, 2005 6:14 pm
-
Lew
- Posts: 529
- Joined: Tue Feb 24, 2009 6:42 am
That's the ticket!
David, that's what the pans need......If I can get a job like that, I will be happy.......Doug's the man! 
It's still in the Restoration Booth!
You can take a peek!
VW Help
VW Technial
Track Gas Mileage
The Class I Teach
You can take a peek!
VW Help
VW Technial
Track Gas Mileage
The Class I Teach
-
Lew
- Posts: 529
- Joined: Tue Feb 24, 2009 6:42 am
Those that have done off body restorations and other body work know that you have a body seal that has to be put down in order for the body to seal to the floor pans and the chassis cross members....Well I have been thinking about the rubber seal from time to time, and would have ordered one when time comes. The only problem with the rubber seal I saw was, you have to fasten it down, and have perfectly cut joints. I have seen the flat rubber seal material screwed down using a large galvanized washer under sheet metal screws. That would be lot of work.
Well, today I was looking for something in my shop, and you know how you say I need to throw this away, and then think, I better keep this I might need it one day....Well take a look at what I have kept for sometime. A box of what is called DENTITE. It's a peel and press material and is used to seal out moisture, air, and is used for weather stripping as well. It will compress and stay in place without a problem.....The original material used by VW on the body to seal around the pans and across the frame members was a real sticky mess....I plan to use this rope caulk for my body seal. It's not sticky, and is pliable enough to fill any joint, etc....If you are familiar with the clay bar, it's almost like that, except a little firmer. I know it will work just fine.....The old box still has the price sticker where it came from Lowe's....You can see on the left side the light edge of the piece where I pulled off two strips for it to be the right width....
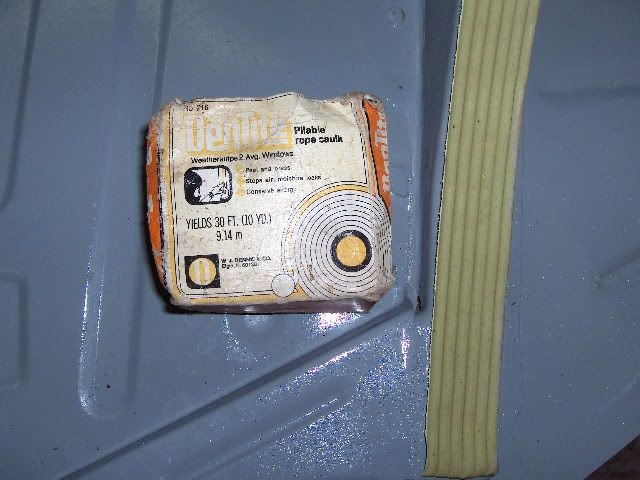
Well, today I was looking for something in my shop, and you know how you say I need to throw this away, and then think, I better keep this I might need it one day....Well take a look at what I have kept for sometime. A box of what is called DENTITE. It's a peel and press material and is used to seal out moisture, air, and is used for weather stripping as well. It will compress and stay in place without a problem.....The original material used by VW on the body to seal around the pans and across the frame members was a real sticky mess....I plan to use this rope caulk for my body seal. It's not sticky, and is pliable enough to fill any joint, etc....If you are familiar with the clay bar, it's almost like that, except a little firmer. I know it will work just fine.....The old box still has the price sticker where it came from Lowe's....You can see on the left side the light edge of the piece where I pulled off two strips for it to be the right width....
It's still in the Restoration Booth!
You can take a peek!
VW Help
VW Technial
Track Gas Mileage
The Class I Teach
You can take a peek!
VW Help
VW Technial
Track Gas Mileage
The Class I Teach
-
Lew
- Posts: 529
- Joined: Tue Feb 24, 2009 6:42 am
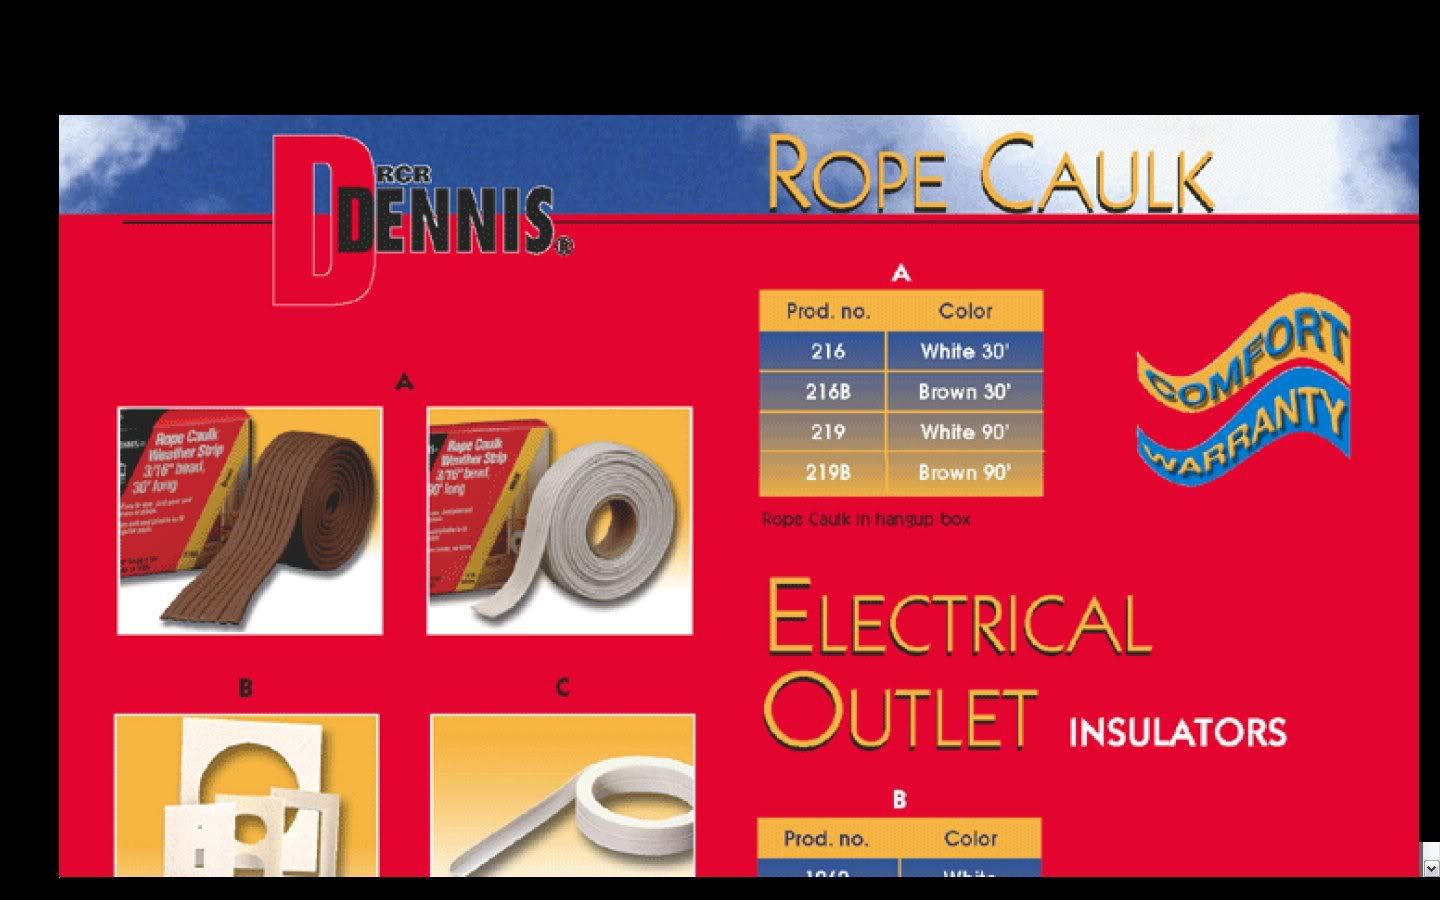
This product (A) is now only sold a Ace Hardware....It's packaged by the same company, W T Dennis, but under a ACE Label.....
It's still in the Restoration Booth!
You can take a peek!
VW Help
VW Technial
Track Gas Mileage
The Class I Teach
You can take a peek!
VW Help
VW Technial
Track Gas Mileage
The Class I Teach
-
Lew
- Posts: 529
- Joined: Tue Feb 24, 2009 6:42 am
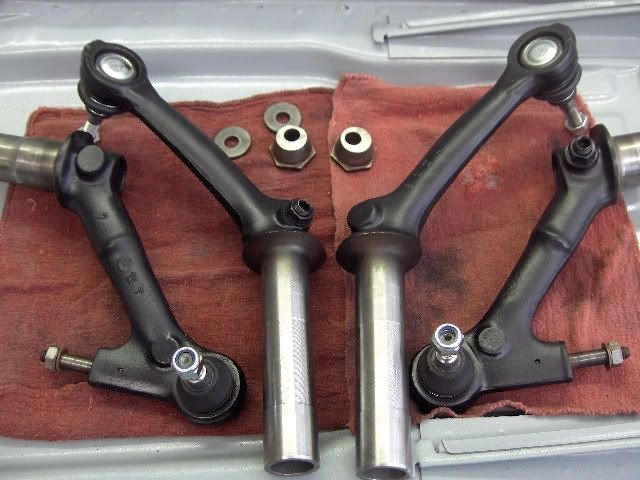
Ball Joints!
I finished up on installing the new Ball Joints from CPI1. They were all marked Audi parts on the Boxes, and the Ball Joints are stamped with the name "Germany" on cap.....
Uppers $27.12 and the Lowers 27.12...for a total of $54.24, with Free Shipping. As Doc says, you gotta be careful on what, and who you order from.
Anyone know about Front Lowered Type Ball Joint Shocks! Type, Brand, Etc. I am installing dropped Spindles. I might go with these for now.
http://www2.cip1.com/ProductDetails.asp ... C13%2D9653
Uppers $27.12 and the Lowers 27.12...for a total of $54.24, with Free Shipping.
Anyone know about Front Lowered Type Ball Joint Shocks! Type, Brand, Etc. I am installing dropped Spindles. I might go with these for now.
http://www2.cip1.com/ProductDetails.asp ... C13%2D9653
It's still in the Restoration Booth!
You can take a peek!
VW Help
VW Technial
Track Gas Mileage
The Class I Teach
You can take a peek!
VW Help
VW Technial
Track Gas Mileage
The Class I Teach

-
Lew
- Posts: 529
- Joined: Tue Feb 24, 2009 6:42 am
There was no rubber gasket on my car, it was some type of rubbery adhesive.....Hard to get off. Very sticky, like hot chewing gum on pavement.....Anyway this stuff is really a good product. I plan on using it. It's cheap and I believe it will do a good job sealing off the body....You have to have some in your hand to appreciate how it feels and the weight of it.....It will compress some, I might do two layers, but we will see when time comes to set the body back on the chassis. If I use two layers, the second one won't be as wide and will lay between the ropes of the bottom layer....Make sense! I was planning on laying a single bead between the pans and tunnel, right where the new pans were spot welded in, but I decided that won't be needed since I am having the bottom of my pans done in the Line X material next week....No leaks with that stuff.
It's still in the Restoration Booth!
You can take a peek!
VW Help
VW Technial
Track Gas Mileage
The Class I Teach
You can take a peek!
VW Help
VW Technial
Track Gas Mileage
The Class I Teach
-
Lew
- Posts: 529
- Joined: Tue Feb 24, 2009 6:42 am
As for the Lowered Shocks earilier mentioned in my thread. Those shocks are for cars where the geometry of the front end has changed....I will be using stock Shocks. When shopping online at CPI1 I saw they listed a FRONT SHOCK LOWERED BALL JOINT TYPE. So, I was thinking sense I was lowering the car with dropped spindles, I needed the lowered Ball Joint type Shocks. I was wrong again! 
It's still in the Restoration Booth!
You can take a peek!
VW Help
VW Technial
Track Gas Mileage
The Class I Teach
You can take a peek!
VW Help
VW Technial
Track Gas Mileage
The Class I Teach