Until I can work out how to embed decent quality images into this thread I'll put in this link direct to the images
http://s41.photobucket.com/user/gtmdriv ... Conversion
Porsche Brake Thread
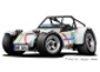
My car is a UVA Fugitive 2 sand rail which I built purely for road use.
A known problem with these cars is that, with very little weight over the front axle, they tend to lock the front wheels very easily under even moderate braking. Being aware of this I fitted an adjustable bias pedal box during the build along with standard Beetle front discs and larger VW Type 3 rear brake drums. Once the car was up and running though it was obvious that even with the brake bias moved as far towards the rear brakes as possible the front wheels were still locking under hard use and the overall stopping power of the car was poor compared to other traffic on the road. A chance meeting with another UVA owner led to the usual discussion of the braking problem and he suggested that Porsche 924/944 rear ventilated disc brakes could be fitted onto the IRS arms that I have on my car. When I got home I started looking into this possibility and it turned out that he was correct. Apparently the 924 and the early non-turbo 944 cars (1983 -85) used the same pressed steel trailing arms as the IRS Beetle and the brake parts are a straight swap. It is also possible to use some of the components from the later turbo cars but some modifications are needed. Obviously better rear brakes would not prevent the front wheels from locking but would at least increase the overall stopping power of the car and there would plenty of bias adjustment left to dial out any rear wheel locking should that become a problem. To keep the conversion as simple as possible I started looking around for a used set of the early 944 rear disc brake parts. After a couple of weeks I located a set at a reasonable price and got them posted across.
1.
On first inspection the brake parts didn’t look too promising but I decided to clean everything up anyway just to see what was salvageable.
2.
I use electrolysis to remove rust from steel components. It is not quick but it is very effective and cheap. The liquid electrolyte is a weak solution of sodium carbonate (washing soda), the anodes (+) are steel or stainless steel bars and the power source is a small trickle battery charger. I got the tank from IKEA. Stainless steel anodes last longer but care is needed with the disposal of the used electrolyte as it will contain chromium which is toxic.
3.
After a few days of electrolysis with light wire brushing each day to remove loose rust the discs came out like this. They looked to be in serviceable condition with no scoring or wear at all so I decided to use them.
4.
I left the calipers assembled during the electrolysis process and they cleaned up very well. Disassembly was very easy with the corrosion removed.
5.
I also treated the brake shoes. Not because I intended to re-use them but because re-lining the old shoes is much cheaper than buying new ones.
If your car has 5 stud wheels on a 5 x 130 PCD you can skip the next section and pick up the conversion at photo 18.
6.
At this point the easy ‘bolt-on’ conversion came off the rails in a big way. The Porsche hub/disc/wheel combination has a 5 x 130 PCD whereas my car uses the 4 x 130 PCD set up. The Porsche hub does not have enough material thickness to re-drill it to the correct PCD and the convertors available would increase the track too much to fit on my car particularly as the Porsche set up is already wider than the standard VW assembly. To do the job properly I bought a new pair of Type 3 VW hubs.
7.
The next problem was that the offset of the mounting face on the Porsche hub is much further out than that of the Type 3 hub. This is to allow clearance for the handbrake shoes and operating mechanism behind the brake disc. The Porsche wheel studs are also extended as the 944 comes with 21mm spacers fitted as standard. If you keep these spacers this conversion will increase the rear track by 43.5mm each side. If you remove them the track increase will be 22.5mm each side which is perfect for me as I was using 22mm wheel spacers on the Type 3 drums. These will no longer be needed.
8.
After consulting a local transmission specialist (CPS Drivelink) on the best course of action they machined 18mm off the front of the hubs and made up an 18mm spacer for the rear. This will reduced the engaged length of the splines on the driveshaft slightly but the car only has a 1600 TP Beetle engine so it should be OK.
9.
The offset of the machined VW hubs with the spacers now matches up exactly with the Porsche hubs.
10.
The next step was to re-drill the disc bells to match the 4 x 130 hubs. There was a suitable position where one hole matched up perfectly and the others were into solid metal so this alignment was chosen.
11.
The hub and disc were bolted together using an old VW wheel bolt.
12.
I didn’t want to damage the wheel bolt threads by using them to align a large drill bit so instead I made a drill guide by drilling an M14 x 1.5 wheel bolt down the centre on my small lathe……
13.
………I then cut off a small section and screwed it into one of the stud holes.
14.
I used this stud section as a guide to drill a 6mm pilot hole for each new stud location then removed the hub and opened the holes out to 15mm.
15.
The disc material is cast iron and it drills very easily.
16.
I also drilled a new access hole in the VW hub to allow for handbrake shoe adjustment. The Porsche uses the same toothed wheel adjuster system as the Beetle but access is from the front of the disc with the wheel removed.
17.
This photo shows the new wheel stud holes (3) the new access hole (1) and the new drilled and tapped disc securing screw holes (2).
If you are using the 5 x 130 Porsche hub then continue reading from this point.
18.
The dust shield were in a poor state through corrosion and vibration.
19.
I tried to repair the broken lugs using Lumiweld rods but once I started to heat the metal it was obvious that it was elektron (magnesium alloy) rather than aluminium so I took the blowtorch away very quickly.
20.
I know that some people run their cars without the dust shields but I reasoned that if Porsche bothered to fit them then they must be doing something so I decided to see if I could make them in GRP. I have a lot of experience with this material (and have written a book). First I tacked the better of the two dust shields together with epoxy and took a mould from it.
21.
This photo shows the trimmed mould ready for use.
22.
The finished shield was not bad considering I was not looking for cosmetic appearance. I put Kevlar reinforcement in the mounting lugs during the lamination.
23.
Two GRP shields alongside the Porsche original.
24.
I used Hycote caliper paint in aerosol form to paint the caliper components. Aftermarket spares are easily available so I fitted new seals, pistons and stainless bleed nipples. I was not familiar with the ATE caliper so I stripped and painted them one at a time so that I could use the assembled one as a reference.
25.
I also made some new stainless steel caliper retaining pins on my lathe although the originals were still serviceable. New pins with the pad retaining clips for around £40 the set.
26.
The assembled caliper with EBC Ultimax OEM quality pads.
27.
Apparently the red coating on the pads is supposed to speed up the bedding in process. That might be handy with the cleaned up discs I am using.
28.
The sliding section of the caliper slides against a pair of Teflon pads and one of these broke on the second caliper.
29.
Fortunately I had planned for this and I cut and filed a replacement from a sheet of 3mm thick Teflon.
30.
The alloy brake back plates were corroded beyond my ability to clean them up. You can’t use electrolysis on aluminium as it dissolves. Fortunately I found a local classic vehicle restorer who media blasted them and primed them with epoxy etch primer for £20. I kept the old oil seals in to mask off the machined surfaces during the blasting process.
31.
When I got the parts back I noticed that the caliper mounting points all had Helicoil type thread inserts fitted. I suspect that this was probably done at the factory but either way I’m glad they’re there as it will prevent damage to the threads in the future.
32.
I painted the back plates with a wheel silver aerosol then fitted replacement oil seals.
33.
The iron and steel parts were painted with POR15 rust preventative paint. Ultimately, having checked them out thoroughly, I decided to use the original handbrake shoes as they were barely worn. They are only used for handbrake operation and make no contribution to braking when the car is in motion.
34.
New handbrake cables would be needed as the Porsche fittings are different from the Type 3 ones. Fortunately whoever removed the Porsche parts in the first place had simply cut the handbrake cables leaving about 300mm attached to the back plates. This meant that I had all the Porsche clevises and ferrules. I bought the cable materials from Venhill. This photo shows the 3mm galvanised steel inner cable.
35.
The matching outer cable comes with a separate Teflon lining.
36.
The Porsche clevises were crimped onto the cables in the usual fashion. I un-crimped them using my vice and a big hammer then ran a 3mm drill down the centre to clean them up.
37.
I re-crimped them onto the new inner cable then ran silver solder down into the ferrule to make doubly sure.
38.
The new cables should do the job.
39.
At the handbrake end (which on my car is from an MGZF) I made my own ferrules. The cables are secured to the lever using modified EMPI cable shortening clamps.
40.
At the wheel end all the Porsche parts are used. Clevises, return springs and ferrules with O rings. Never throw anything away. You never know. The ferrules are sealed to the outer cable using self-adhesive heat shrink tubing.
41.
Obviously the strip down begins by removing the rear wheel. The 22mm spacer can be seen now. This will not be re-used as the 944 brake assembly is 22.3mm wider that the Type 3 system.
42.
The spacer just slips on and off over the extended wheel studs.
43.
The Type 3 rear drum is held on by two button head screws rather than the usual countersunk items. This means that the spacer (or the wheel if not using spacers) had to have two recesses drilled to accommodate the screw heads.
44.
Unlike the Beetle the Type 3 drum can be removed without having to undo the large central nut. The internal components are in excellent condition as they have only covered 2000 dry miles since a full rebuild.
45.
I have never had a problem with special tools. If I need them then I buy them. The Tourquemaster in particular has been worth its weight in gold.
46.
The hexagon used to turn the Torquemaster pinion is only 11mm AF but since the maximum torque you will ever need to apply is only 30lbft it is not a problem. The hub nut was tight but came off easily with the special tools.
47.
The hub has been removed here. As previously mentioned the Type 3 brakes were renewed very recently.
48.
The flexible brake hose needs to be removed next.
49.
I save all the blanking plugs that come with new brake parts. This one was useful to minimise fluid loss while the hydraulic line was disconnected.
50.
I left the handbrake cable attached till the brake back plate was removed from the trailing arm. It is held in place by this small bolt and clip.
51.
I use wheel studs rather than wheel bolts and they needed shortening by 18mm (remember the Porsche hub is 18mm further out than the Type 3 hub). The nuts prevent thread damage from the vice and, after shortening and dressing the end of the stud with a file, unscrewing the nut removes any remaining burr on the end of the stud.
52.
The hub locking tool came in handy to hold the hub as I removed and refitted the wheel studs. I did this by locking two M14 x 1.5 nuts against each other on the studs then unscrewing them. They were re-fitted with Loctite high strength retaining compound after shortening.
53.
The rear of the studs protruded through the hub and could foul on the handbrake mechanism to I trimmed off the excess length.
54.
With the hubs ready to fit reassembly could begin but first I did a trial fit of the major parts to check clearances.
55.
My wheels are period Wolfrace Slot Mags and there was about 3mm clearance between the caliper and the inner wheel rim. This was the last step before starting the rebuild.
56.
This O ring seals the bearing grease into the hub. It was replaced by a new one.
57.
I pre-assembled the handbrake shoes, handbrake cable and dust shield before fitting the assembly to the car.
58.
The bearing cover bolts on the Porsche hub are longer than the ones fitted to the VW bearing cover. They need to be 50mm long. They are also high tensile. I used 12.9 grade bolts.
59.
These bolts need to be torqued to 42lbft.
60.
There is an OEM spacer sitting in the oil seal and my own hub spacer has just been slid into place. If you are using the original 5 x 130 Porsche hub then this additional spacer is not needed.
61
The hub (or drive flange as it is sometimes known) is fitted over the drive splines and the large nut is screwed into place.
62.
With the Torquemaster and the hub locking tool in position the central nut is torqued down. The IRS axle requires a torque of 253lbft. The Torquemaster has a 9:1 ratio so a torque of 28lbft applied to the pinion will produce a torque of 252lbft on the central nut. That’s close enough…………
63.
…………….especially since, if the split pin holes do not line up, you need to keep tightening until they do.
64.
A new split pin was fitted although with a tightening torque of 253lbft I can’t help feeling that it’s a bit of overkill.
65.
Before fitting the wheel the handbrake shoes were adjusted using a screwdriver in the usual VW fashion.
66.
On my car I needed to cut away a small section of the mudguard inner wall but this will not be necessary on a standard Beetle.
67.
The caliper is fitted next. The bolts are M12 x 35mm x 1.5mm pitch. The need to be at least 8.8 grade and are tightened to 30lbft.
68.
The flexible brake hoses on my car were too short to reach the calipers and new ones were produced which were 80mm longer. Depending on their orientation you may or may not need to do this. The brakes are bled in the usual way. I have an air powered vacuum bleeding tool which works very well. Finally the handbrake cables were then connected up to the operating lever and adjusted.
One aspect of this conversion which I had not considered is the weight difference between the two braking systems. The disc brake assembly with the cast iron ATE caliper is 2.5kg heavier each side than the Type 3 drum brakes. This is particularly significant as the extra 2.5kg is all unsprung weight. An increase in unsprung weight makes it more difficult for the wheel and tyre to follow undulations in the road ultimately reducing tyre grip. The early 944 Turbo cars (1985-86) used a fixed 4 pot Brembo aluminium caliper and apparently this will fit (with a little shimming) in place of the ATE sliding caliper.
This may be a way to minimise the weight increase with the disc brake system.
Converting to Porsche 924/944 Rear Disc Brakes
-
gtmdriver
- Posts: 108
- Joined: Mon May 21, 2012 1:38 am
Converting to Porsche 924/944 Rear Disc Brakes
Last edited by gtmdriver on Mon Mar 27, 2017 4:36 pm, edited 2 times in total.
-
gtmdriver
- Posts: 108
- Joined: Mon May 21, 2012 1:38 am
Re: Converting to Porsche 924/944 Rear Disc Brakes
2
next section
next section
-
gtmdriver
- Posts: 108
- Joined: Mon May 21, 2012 1:38 am
Re: Converting to Porsche 924/944 Rear Disc Brakes
3
another will fit here
another will fit here
-
gtmdriver
- Posts: 108
- Joined: Mon May 21, 2012 1:38 am
Re: Converting to Porsche 924/944 Rear Disc Brakes
4
there will be 7 altigether
there will be 7 altigether
-
gtmdriver
- Posts: 108
- Joined: Mon May 21, 2012 1:38 am
Re: Converting to Porsche 924/944 Rear Disc Brakes
5
not many to go now
not many to go now
-
gtmdriver
- Posts: 108
- Joined: Mon May 21, 2012 1:38 am
Re: Converting to Porsche 924/944 Rear Disc Brakes
6
only 2 left
only 2 left
-
gtmdriver
- Posts: 108
- Joined: Mon May 21, 2012 1:38 am
-
Marc
- Moderator
- Posts: 23741
- Joined: Thu May 23, 2002 12:01 am
Re: Converting to Porsche 924/944 Rear Disc Brakes
This forum is set so that posts cannot be deleted (except by its moderator or Doc) - don't ask me why, IMO it's asinine but that's how it is. I was expecting you to complete this work at the Type 1 forum where that's possible, at least until someone posts a reply.
I started this post before realizing which forum it was in, so now we'll have to wait for the moderator to clean it up.
What I wanted to tell you was that we previously determined over in the Type 1 forum (where you started this project) that there is no 125Kb limit for photos uploaded to STF as attachments - they just must not exceed 600 pixels vertical or 800 pixels horizontal.
Last edited by Marc on Tue Mar 28, 2017 12:08 am, edited 1 time in total.
-
gtmdriver
- Posts: 108
- Joined: Mon May 21, 2012 1:38 am
Re: Converting to Porsche 924/944 Rear Disc Brakes
Not sure what you mean by 600kb x 800 kb.
Do you mean pixels? In which case do you mean 800 x 600 pixels or 800,000 x 600,000?
Do you mean pixels? In which case do you mean 800 x 600 pixels or 800,000 x 600,000?
-
Piledriver

- Moderator
- Posts: 22520
- Joined: Sat Feb 16, 2002 12:01 am
Re: Converting to Porsche 924/944 Rear Disc Brakes
KB=kilobyte=file size
pixels=dimensions of picture must be equal to or under 800x600
With lossy compression like jpeg, the pictures dimensions have little relationship with the file size.
pixels=dimensions of picture must be equal to or under 800x600
With lossy compression like jpeg, the pictures dimensions have little relationship with the file size.
Addendum to Newtons first law:
zero vehicles on jackstands, square gets a fresh 090 and 1911, cabby gets a blower.
EZ3.6 Vanagon after that.(mounted, needs everything finished) then Creamsicle.
zero vehicles on jackstands, square gets a fresh 090 and 1911, cabby gets a blower.
EZ3.6 Vanagon after that.(mounted, needs everything finished) then Creamsicle.
-
gtmdriver
- Posts: 108
- Joined: Mon May 21, 2012 1:38 am
Re: Converting to Porsche 924/944 Rear Disc Brakes
I understand that but in his post Mark said pictures 'just must not exceed 600Kb vertical or 800Kb horizontal'.Piledriver wrote: ↑Mon Mar 27, 2017 11:17 am KB=kilobyte=file size
pixels=dimensions of picture must be equal to or under 800x600
With lossy compression like jpeg, the pictures dimensions have little relationship with the file size.
Is that a mixture of units or what?
I need to embed 69 images into this post.
What is the maximum image size allowable in terms of kB and pixels?
What's the maximum number of photos I can embed into a posting?
-
Piledriver
- Moderator
- Posts: 22520
- Joined: Sat Feb 16, 2002 12:01 am
Re: Converting to Porsche 924/944 Rear Disc Brakes
There is a picture size limit AND a file size limit, although we are not sure at this point what the max. numbers are, 800x600 works for certain, and 256KB file size seems to work, 125KB works for certain.
Sometimes you can only find the limits of anything by trying to push them.
Sometimes you can only find the limits of anything by trying to push them.
Addendum to Newtons first law:
zero vehicles on jackstands, square gets a fresh 090 and 1911, cabby gets a blower.
EZ3.6 Vanagon after that.(mounted, needs everything finished) then Creamsicle.
zero vehicles on jackstands, square gets a fresh 090 and 1911, cabby gets a blower.
EZ3.6 Vanagon after that.(mounted, needs everything finished) then Creamsicle.
-
Marc
- Moderator
- Posts: 23741
- Joined: Thu May 23, 2002 12:01 am
Re: Converting to Porsche 924/944 Rear Disc Brakes
My bad, I was typing faster than I was thinking - I meant pixels, not Kb, as you surmised. Sorry for creating confusion.
I went back and edited my remarks - not that it matters much, since once you're all done we're going to need this forum's moderator (or Doc) to delete all the B.S. posts following your work and make it into a sticky.
-
Marc
- Moderator
- Posts: 23741
- Joined: Thu May 23, 2002 12:01 am
Re: Converting to Porsche 924/944 Rear Disc Brakes
Doc has got the remotely-hosted pic problem solved. Don't know what the maximum size is but I just successfully displayed a pic hosted at Photobucket that's 3629x1541 and 1.7Mb
Probably still wise to keep the size moderate (800x600 or less) so it doesn't overwhelm the screen on mobile devices.
Probably still wise to keep the size moderate (800x600 or less) so it doesn't overwhelm the screen on mobile devices.
-
Ol'fogasaurus
- Posts: 17761
- Joined: Mon Nov 13, 2006 10:17 pm
Re: Converting to Porsche 924/944 Rear Disc Brakes
Also, for those of us who have limited gig use (in my case an air card), it makes looking at large info/data posts not worth it (it get expensive if you exceed the data limit you pay for). I still use the 640 X 480 standard size myself; data can be see well and if specifics are needed then close ups can be done. This is what I try to do anyway.
Lee
My opinion is worth slightly less than what you paid for it.
My opinion is worth slightly less than what you paid for it.