Picked up a Vanagon housing awhile back (Thanks, Don!) finally mounted it this weekend (my weekend is now Wed-Fri, every other Sat)
Also had the bright idea to install a new GM alternator on it, this one's a CS130D 105A for a 98 C/K pickup with a 5.7L.
Used a late Vanagon pulley, although the spacers etc are in a different order, it worked fine.
I'll probably redo the upper mount eventually, I built it for the late vanagon alt, the GM setup needs to be set back a tiny bit further.
The alternator has a 12V stud that sticks out the back, nice setup. Unfortunately it hits the tin. There is supposedly a "side post" version of this alt but it seems to be a custom thing.
I ended up making a CS130D "no-post" conversion, hooking 3X 10ga 8mm sealed crimps directly to the heatsink, 8mmx1.25 bolt ans a couple lockwashers for spacers (had to thin one down to clear a diode), the wires snake out through the snap-on cover. There's room for 2X~8ga, but I couldn't find any on short notice.
Here's the modified bus moustache bar I made up for my T4>T3 swap, added the outer Vanagon mounts using modified Bus mount brackets.
(Not needed for shroud, needed to prevent engine rocking)
Had the fan off to find an annoying oil leak, figured I'd take a pic.
Vanagon housing + CS130D alternator install
-
Piledriver

- Moderator
- Posts: 22520
- Joined: Sat Feb 16, 2002 12:01 am
Vanagon housing + CS130D alternator install
You do not have the required permissions to view the files attached to this post.
Last edited by Piledriver on Wed Jun 15, 2016 10:33 am, edited 2 times in total.
Addendum to Newtons first law:
zero vehicles on jackstands, square gets a fresh 090 and 1911, cabby gets a blower.
EZ3.6 Vanagon after that.(mounted, needs everything finished) then Creamsicle.
zero vehicles on jackstands, square gets a fresh 090 and 1911, cabby gets a blower.
EZ3.6 Vanagon after that.(mounted, needs everything finished) then Creamsicle.
-
Steve Arndt
- Posts: 7404
- Joined: Sat Mar 10, 2001 12:01 am
Re: Vanagon housing + CS130D alternator install
Point us to the oil leak in this pic
-
Piledriver
- Moderator
- Posts: 22520
- Joined: Sat Feb 16, 2002 12:01 am
Re: Vanagon housing + CS130D alternator install
Steve Arndt wrote:Point us to the oil leak in this pic
Good detail pic In the separate thread on the leak... nut just above the oil pump has ooze, perhaps I need to blow it up?
http://www.shoptalkforums.com/viewtopic ... 1&t=136214
I'm thinking the oringed oil pump is a contributor, normally there isn't any pressure there (and my engine case runs at a 3-5" hg vacuum under most conditions, so it has to be pressure fed)
Addendum to Newtons first law:
zero vehicles on jackstands, square gets a fresh 090 and 1911, cabby gets a blower.
EZ3.6 Vanagon after that.(mounted, needs everything finished) then Creamsicle.
zero vehicles on jackstands, square gets a fresh 090 and 1911, cabby gets a blower.
EZ3.6 Vanagon after that.(mounted, needs everything finished) then Creamsicle.
-
Piledriver
- Moderator
- Posts: 22520
- Joined: Sat Feb 16, 2002 12:01 am
Re: Vanagon housing + CS130D alternator install
Follow up, alt works great, kicks in <500 RPM, even at 800RPM idle holds 13.2V with lights/wipers/brake lights/lighter/flashers all engaged.
Idiot light is wired up, (and verified working as I wired it up) but doesn't work right...
Doesn't come on at key on/not running. Will have to verify the alt pinout, as it should.
Alt doesn't kick in at low RPM without it, just like the stocker, I verified manually the lamp/wire IS good, I put a new bulb in for good measure.
Addendum to Newtons first law:
zero vehicles on jackstands, square gets a fresh 090 and 1911, cabby gets a blower.
EZ3.6 Vanagon after that.(mounted, needs everything finished) then Creamsicle.
zero vehicles on jackstands, square gets a fresh 090 and 1911, cabby gets a blower.
EZ3.6 Vanagon after that.(mounted, needs everything finished) then Creamsicle.
-
dstar5000

- Posts: 4555
- Joined: Tue Feb 12, 2002 12:01 am
Re: Vanagon housing + CS130D alternator install
It doesn't come on cause your battery still gots over 12V on it, thanks to a good alt!?

Congrats, nice setup!

DOn
Congrats, nice setup!
DOn
"Let me say it as simply as I can: transparency and the rule of law will be the touchstones
of this presidency,".. Barack Obama January 21, 2009, 30 minutes before he signed the law
sealing all his personal information....
of this presidency,".. Barack Obama January 21, 2009, 30 minutes before he signed the law
sealing all his personal information....
-
Piledriver
- Moderator
- Posts: 22520
- Joined: Sat Feb 16, 2002 12:01 am
Re: Vanagon housing + CS130D alternator install
Another follow up:
Yanked the alt back out and reworked the mounts to remove the remaining suck, moved alt toward flywheel a ~6 mm so the belt alignment was right.
(bracket I made was for the OG Vanagon alt, just mounted in the std T4 location/std belt, the GM alt was different offset)
The idiot light issue was really idiot related, alt AND idiot light works fine wired to "L" terminal.
(Never trust wiring diagrams, look at the part)
I get 14.3--14.5v at anything off idle, and 13.7 at 800RPM idle with everything I have turned on.
(I usually idle it at ~1K, turned down to test alt. It still kicks in at <500 crank RPM)
Still need to add a ~560ohm resistor across the idiot light in the gauge head as a blown-bulb fail safe, may just put LEDs in while I'm in there.
Also redesigned the tensioner bracket, it is on the backside of the alt now and very simple to make/adjust.
(pics will follow---insert here)
The way the setup is designed, I can drop/replace the alt simply by pulling the collector bolts, swinging the muffler down on its hanger, and removing 2 bolts, ez-in/out no issues access for my fat fingers, actually far easier than the factory T4 alt R&R.
As to the Vanagon shroud cooling effectiveness... #3 CHT dropped ~30-50F at cruise with NO other changes, and CHT actually drops some when ... matching speed with Dallas traffic for extended periods at well above a T1s design cruise speed
Unless I accidentally fixed something with the flaps (they looked fine, reused same flaps) that's significantly better.
...Temp compensated meter setup, cal checked recently, same TC/meter before and after, same OAT and drive/speed.
I currently only have a TC on #3, so I cannot comment on balance ATM, working that.
Lets just say I'm on the lookout for more Vanagon housings...
The only "complaint" I have with the alt is GM installs a single 12ga fusible link to this sucker according to the manual...
WTF how does that go with a 100+A alternator? (12Ga COPPER is good for ~20A, and a fusible link isn't as good a conductor)
I'll probably wire in a high amp fuse at some point, still running 3X12ga to the starter.
Addendum to Newtons first law:
zero vehicles on jackstands, square gets a fresh 090 and 1911, cabby gets a blower.
EZ3.6 Vanagon after that.(mounted, needs everything finished) then Creamsicle.
zero vehicles on jackstands, square gets a fresh 090 and 1911, cabby gets a blower.
EZ3.6 Vanagon after that.(mounted, needs everything finished) then Creamsicle.
-
Stufenheck
- Posts: 227
- Joined: Thu Sep 20, 2001 12:01 am
Re: Vanagon housing + CS130D alternator install
I also found that the Vanagon fan shroud #3 CHT dropped ~30-40Deg F over stock Type 4 fan shroud with heater outlets.As to the Vanagon shroud cooling effectiveness... #3 CHT dropped ~30-50F at cruise with NO other changes, and CHT actually drops some when ... matching speed with Dallas traffic for extended periods at well above a T1s design cruise speed
-
mrblyoung
- Posts: 332
- Joined: Sat Jan 24, 2009 10:33 am
Re: Vanagon housing + CS130D alternator install
So the Vanagon shroud eliminates the heater outlets. Is that the only difference?
-
Piledriver
- Moderator
- Posts: 22520
- Joined: Sat Feb 16, 2002 12:01 am
Re: Vanagon housing + CS130D alternator install
You have to use a matching Vanagon alternator or another with the mounting ears clocked similarly like the 130D.
It also provides no cooling forced air for alternator cooling.
(The 130D has dual internal cooling fans)
The alternator and A/C compressor mount points are very different than the std T4 shroud, but you probably only need a bit of 1/4" mild steel and 1/8" mild steel and some patience to make brackets to mount the alt in the std T4 location.
The 130D is physically smaller than the stock T4 alternator, and has ~3X the current output, and a higher voltage output, internally regulated.
The Vanagon shroud takes the same cooling flaps and bolts on the motor/fits the tins the same.
The timing viewport on top needs drilled out with a holesaw and a bolt on cover made is using in a T3/914 app..
The T4 bus timing arc bolts on if using in a bus app where you can see it.
Addendum to Newtons first law:
zero vehicles on jackstands, square gets a fresh 090 and 1911, cabby gets a blower.
EZ3.6 Vanagon after that.(mounted, needs everything finished) then Creamsicle.
zero vehicles on jackstands, square gets a fresh 090 and 1911, cabby gets a blower.
EZ3.6 Vanagon after that.(mounted, needs everything finished) then Creamsicle.
-
Stufenheck
- Posts: 227
- Joined: Thu Sep 20, 2001 12:01 am
Re: Vanagon housing + CS130D alternator install
No, engine sheet metal and alternator/brackets are completely different than std T4 fan shroud. There is no threaded hole for timing mark as on the 412/914 fan shrouds. I drilled a timing mark access hole and are using a rubber plug to seal hole.So the Vanagon shroud eliminates the heater outlets. Is that the only difference?
-
Piledriver
- Moderator
- Posts: 22520
- Joined: Sat Feb 16, 2002 12:01 am
Re: Vanagon housing + CS130D alternator install
On a T3 the fan sucks through a big rubber bellows, so the remainder of the engine compartment is unsealed.Stufenheck wrote:No, engine sheet metal and alternator/brackets are completely different than std T4 fan shroud. There is no threaded hole for timing mark as on the 412/914 fan shrouds. I drilled a timing mark access hole and are using a rubber plug to seal hole.So the Vanagon shroud eliminates the heater outlets. Is that the only difference?
You will need to do some sheetmetal fabrication/trimming around the alternator for a bus or 914 application, but it looks reasonably doable and well worth the effort to ME for some significant CHT headroom. (It's going to be >30+ F hotter here RSN, and I want to stay well under 400F CHT for obvious reasons)
If you can use the Vanagon alt, it has a blower on it for heating air.
I couldn't use it on the T3 (no heater boxes anyway) but it might be viable on a Bay.
.
Addendum to Newtons first law:
zero vehicles on jackstands, square gets a fresh 090 and 1911, cabby gets a blower.
EZ3.6 Vanagon after that.(mounted, needs everything finished) then Creamsicle.
zero vehicles on jackstands, square gets a fresh 090 and 1911, cabby gets a blower.
EZ3.6 Vanagon after that.(mounted, needs everything finished) then Creamsicle.
-
Stufenheck
- Posts: 227
- Joined: Thu Sep 20, 2001 12:01 am
Re: Vanagon housing + CS130D alternator install
On the Vanagon alternator that I got had no blower attachment, it had already been removed.If you can use the Vanagon alt, it has a blower on it for heating air.
Had to use a small sleeve on the tensioner bracket alternator bolt hole.
There are a lot of large diameter holes which need to welded up.
If you have 914 2L heads the spark plug holes are in the wrong location.
Locating the spark plug holes for the 914 2L heads can be a bit of a pain.
If anyone needs a paper templates on where to located new spark plug access holes just send me a PM.
-
CobraJet
- Posts: 430
- Joined: Sun Oct 31, 2010 11:12 pm
Re: Vanagon housing + CS130D alternator install
Anything new on modifying the tin to fit the vanagon shroud?
-
Stufenheck
- Posts: 227
- Joined: Thu Sep 20, 2001 12:01 am
Re: Vanagon housing + CS130D alternator install
Depends on vehicle and T4 engine that you considering using the Vanagon shroud.Anything new on modifying the tin to fit the Vanagon shroud?
Do you have all the Vanagon engine tins and alternator?
-
CobraJet
- Posts: 430
- Joined: Sun Oct 31, 2010 11:12 pm
Re: Vanagon housing + CS130D alternator install
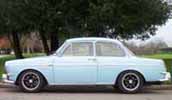
Right now I have a T4 1700 bus engine on the building stand. It has no tin but it does have the stock fan shroud. This will be my "Get By" engine while I do an all out build on a Turbo EFI/IC 2.0 T4.
After reading how this shroud helped to keep things even cooler than the stock shroud I figured that I may as well start from scratch and do this before it is bolted into the car to help a bit in longevity. Here is what this is going into...

After reading how this shroud helped to keep things even cooler than the stock shroud I figured that I may as well start from scratch and do this before it is bolted into the car to help a bit in longevity. Here is what this is going into...