Chris/Marc's project
-
Chris V
- Posts: 3391
- Joined: Tue Sep 03, 2002 12:01 am
Re: Chris/Marc's project
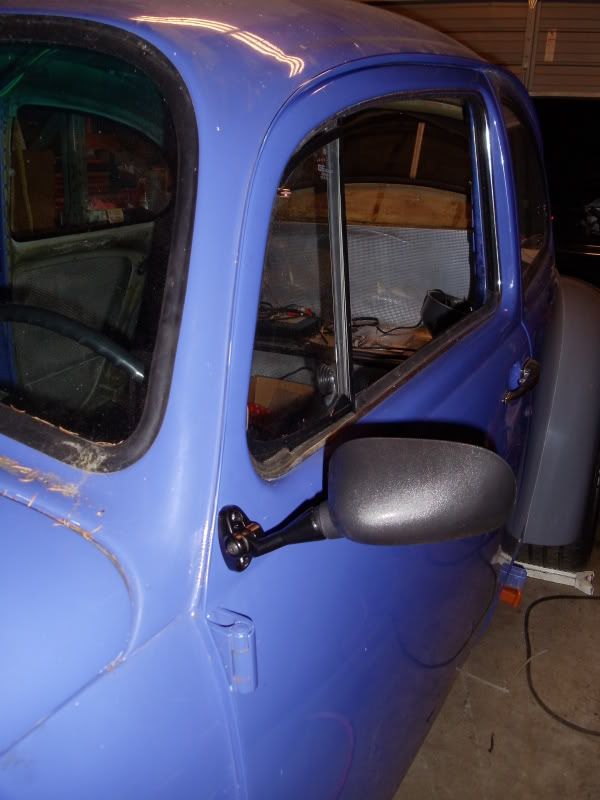
Took me over an hour I think to mount that mirror - but I like it...From my custom paint thinner can @ plywood bucket seat it seems to provide great adjustment, it doesn't foul on the vent wing window, and it looks the right shape for the car (the round billet ones I had intended to use were too small). I ended up having to drill right into the sheetmetal perpendicular to the door skin where the seal sits...Had to drill a big/deep hole effectively spot-facing an area big enough for a washer and nyloc, and then weld the door skins back together...almost hidden by the seal, perhaps I'll but a dap of RTV in there.
-
Chris V
- Posts: 3391
- Joined: Tue Sep 03, 2002 12:01 am
Re: Chris/Marc's project
<deleted>
Last edited by Chris V on Sat Jan 28, 2012 10:01 am, edited 1 time in total.
-
Chris V
- Posts: 3391
- Joined: Tue Sep 03, 2002 12:01 am
Re: Chris/Marc's project
Driver's mirror finished:
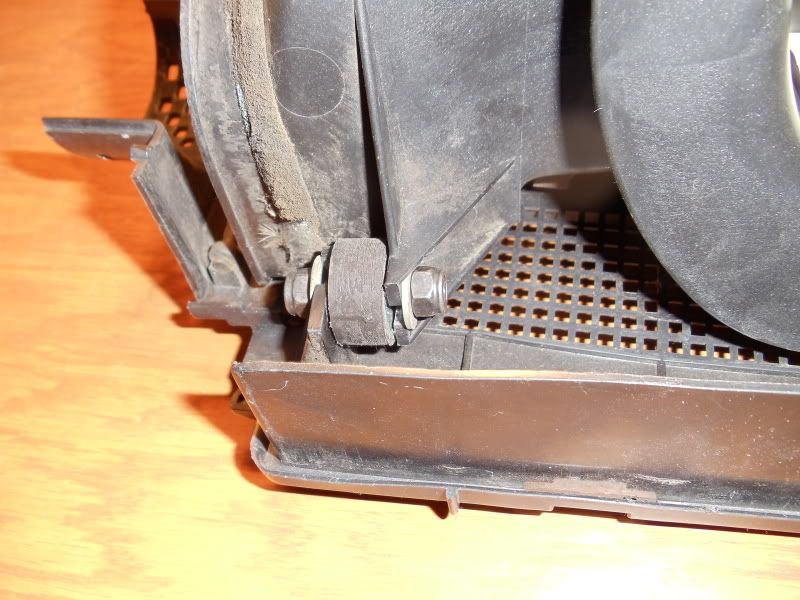
New fan assembly rubber mounts came from McMaster-Carr, a little thicker than stock, but I think they'll do the job:
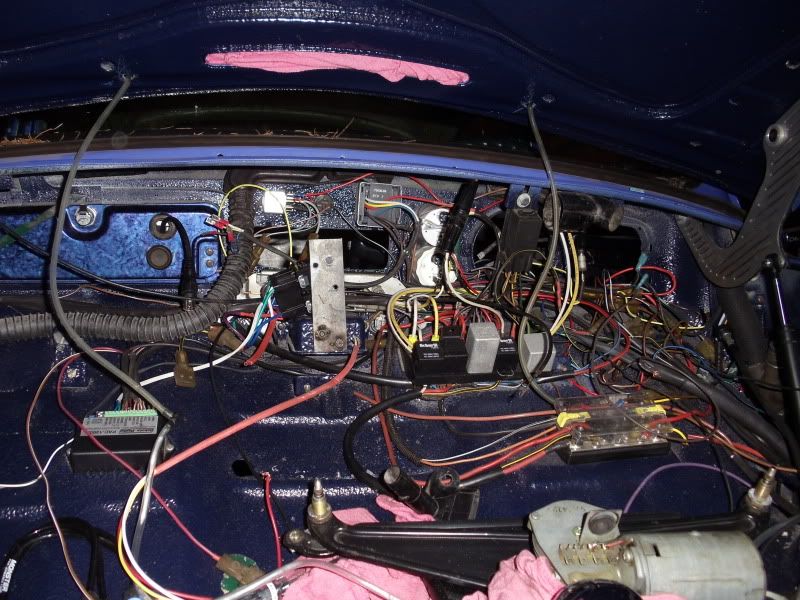
Current state of disassembly, note the large electronic washer-switch - I had to cut the duct work off to clear it, but it seemed ideal to run the automatic headlight photocell through the now-open duct :
:
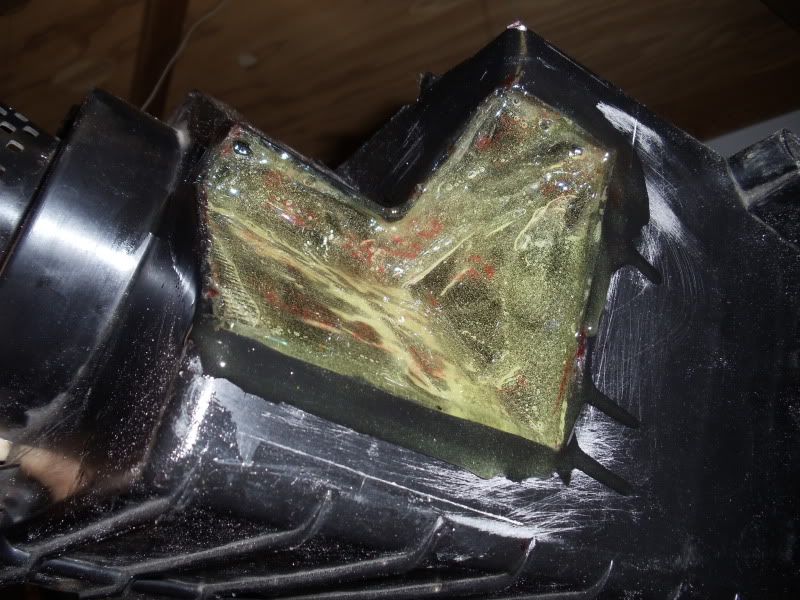
Chunk and repair work I had to make to the fresh-air box to clear the upside-down modular fuse panel:
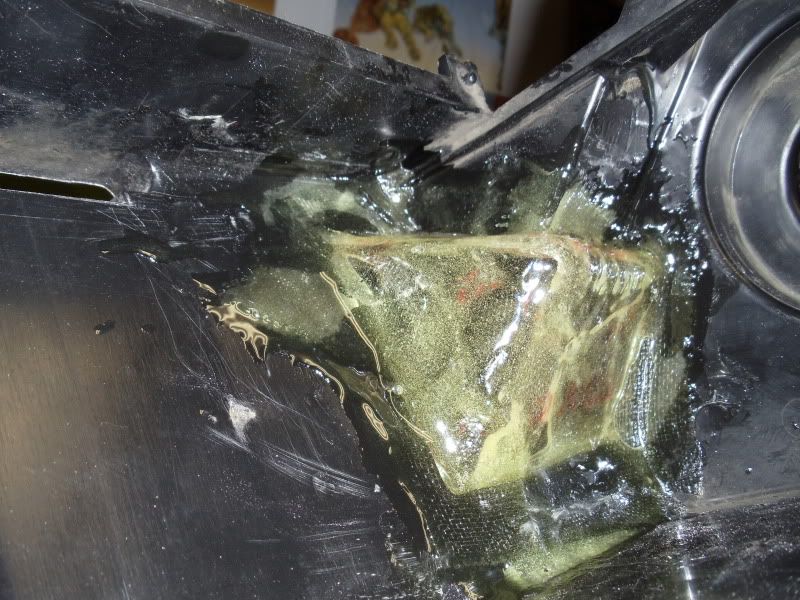
Inside view:
New fan assembly rubber mounts came from McMaster-Carr, a little thicker than stock, but I think they'll do the job:
Current state of disassembly, note the large electronic washer-switch - I had to cut the duct work off to clear it, but it seemed ideal to run the automatic headlight photocell through the now-open duct
Chunk and repair work I had to make to the fresh-air box to clear the upside-down modular fuse panel:
Inside view:
-
Chris V
- Posts: 3391
- Joined: Tue Sep 03, 2002 12:01 am
Re: Chris/Marc's project
Well, had a real productive night last night. Changed the headlight switch to a Type III unit with a Term 57 for a park lamp indicator on the speedo, terminated the 58b connects for the dash lights, crimped the last headlight wires, installed the `70/71 wiper motor w/the grommets on the shafts (had to cut them in half for the `69 cowl), grounded the bus bar with a heavy duty cable Mario made me, applied a second coat of glass and expoxy resin to the modified fresh-air box, then painted it with Rustoleum undercoat. I also mounted the plastic glovebox and wired the fuel-pump relay bypass switch.
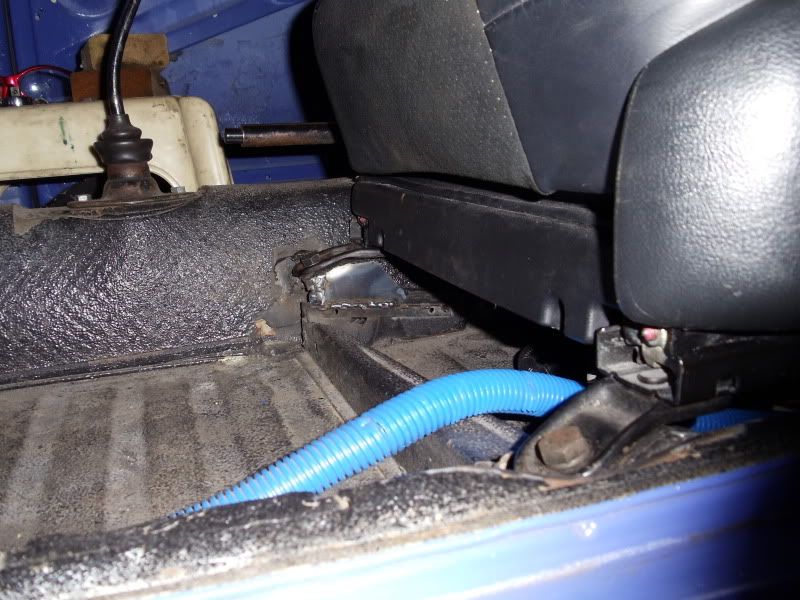
Today I re-assembled the fresh-air box and ran to NAPA and got VHT wrinkle finish paint to paint the tachometer grill...Also started mounting the driver's side Lexus seat - I hadn't realized with the electric motors beneath how high the seats are, that with the extra width meant that the mount was sitting on top of the heaterchannel, so I took a pie cut out of the heaterchannel and recessed a M10x1.5 nut into the heaterchannel welded to a 12 gauge piece of steel - dropping the front of the seat maybe 1½". They are power, and have about 1½" of lift and 9" of travel forward to back...the one thing that limits the rearward travel is the factory seatbelt inertia reel.
Today I re-assembled the fresh-air box and ran to NAPA and got VHT wrinkle finish paint to paint the tachometer grill...Also started mounting the driver's side Lexus seat - I hadn't realized with the electric motors beneath how high the seats are, that with the extra width meant that the mount was sitting on top of the heaterchannel, so I took a pie cut out of the heaterchannel and recessed a M10x1.5 nut into the heaterchannel welded to a 12 gauge piece of steel - dropping the front of the seat maybe 1½". They are power, and have about 1½" of lift and 9" of travel forward to back...the one thing that limits the rearward travel is the factory seatbelt inertia reel.
-
Chris V
- Posts: 3391
- Joined: Tue Sep 03, 2002 12:01 am
Re: Chris/Marc's project
Driver's seat mounted, 8-way power and I added heated seats (hi/low):
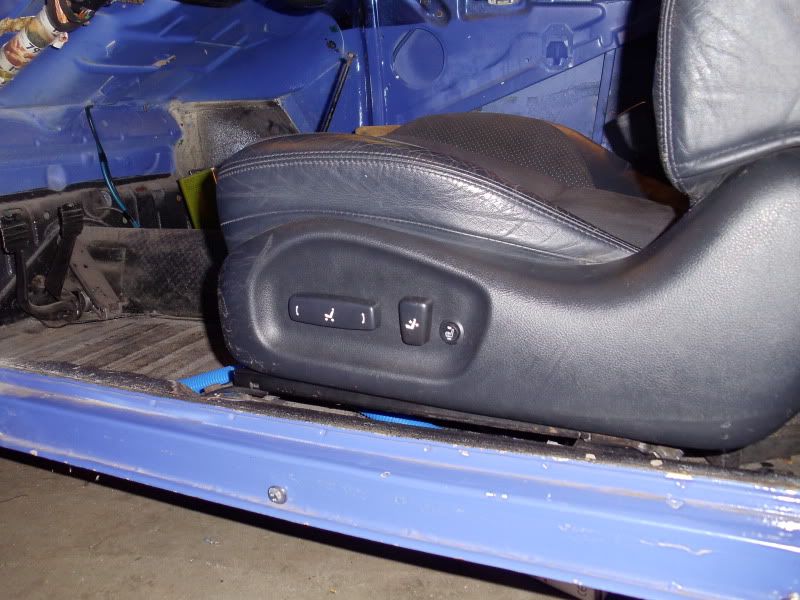
I'll need to do something about the wire-loom, just happy I didn't catch it on fire :
:
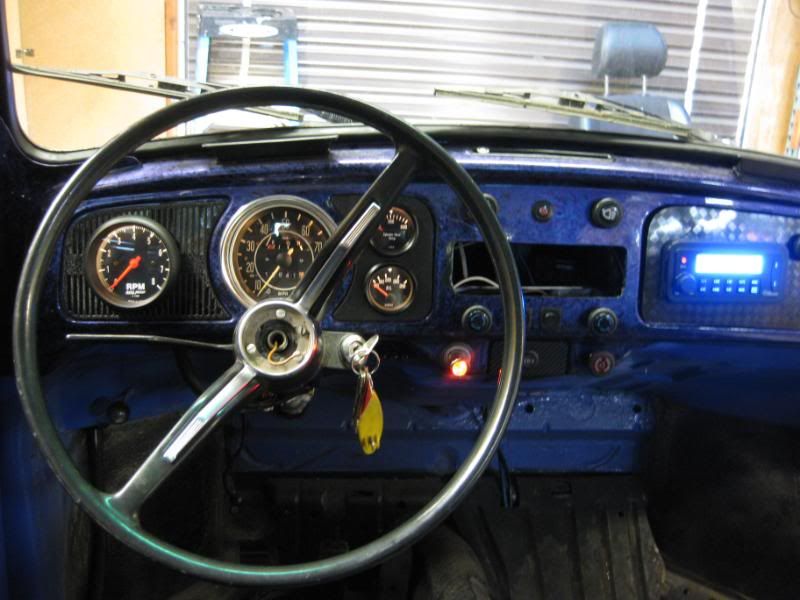
Gauges & switches all in:
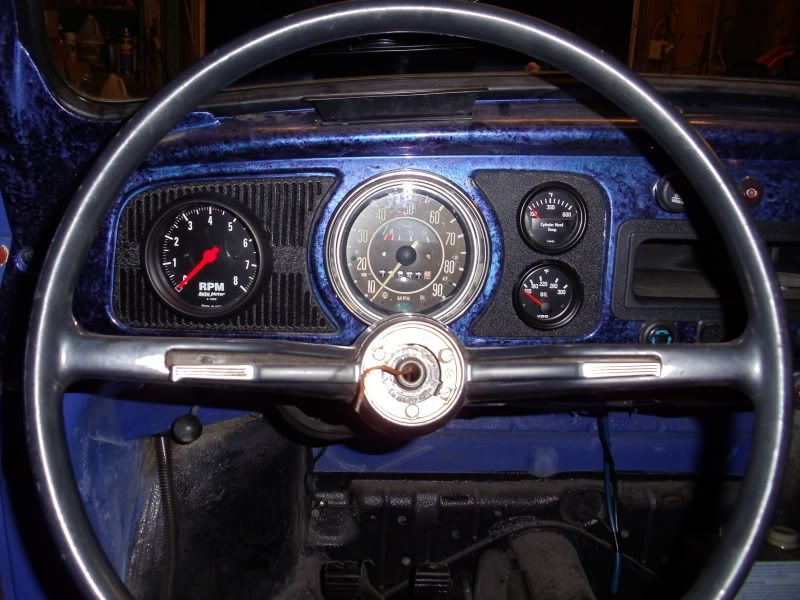
I'll need to do something about the wire-loom, just happy I didn't catch it on fire
Gauges & switches all in:
-
turbobaja

- Posts: 2826
- Joined: Fri Sep 14, 2007 4:56 pm
Re: Chris/Marc's project
Dude you are on a Roll! Daily updates  ...starting to come together nice though
Karl
DON'T QUIT
DON'T QUIT
-
Chris V
- Posts: 3391
- Joined: Tue Sep 03, 2002 12:01 am
Re: Chris/Marc's project
Being laid-off has advantages...So whenever the GF isn't complaining about spending time with her and the kids (dog, cats, aquariums) and Mom doesn't want me to remodel the house (just gome back from Home Depot) I sneak out and assemble all the pieces I've packed away like a squirrel does nuts.
Dad sat in it for the first time today and liked the seating position and the range of movement, so other than some simple connections that's one thing off the checklist.
Bumpers are coming up, want to do something that can take a shot, hopefully not too ugly. I also have the Briz alumimum 'show' bumpers if they're an eye sore.
-
Chris V
- Posts: 3391
- Joined: Tue Sep 03, 2002 12:01 am
Re: Chris/Marc's project
I tackled the Type IV blower fan - decided to do it a little different than Dad has done in his other `69. So I got a call in the middle of this project this morning, I get to work in the morning, pleasant change.
I used a corrugated steel heat-exchanger-to-body duct welded to some spare 2.5" exhaust tubing and an adapter at the housing made from a plastic HE-to-body duct end-piece and a hose-clamp. I found some other exhaust tubing that fit inside the forked outlet - capped one off and made a short nipple that was perfect for Beetle fanshroud-to-HE hose for the other:
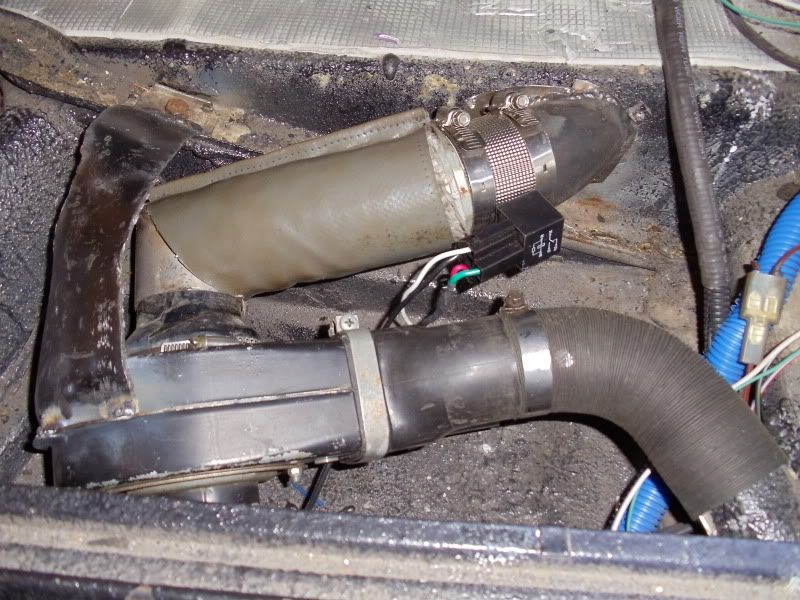
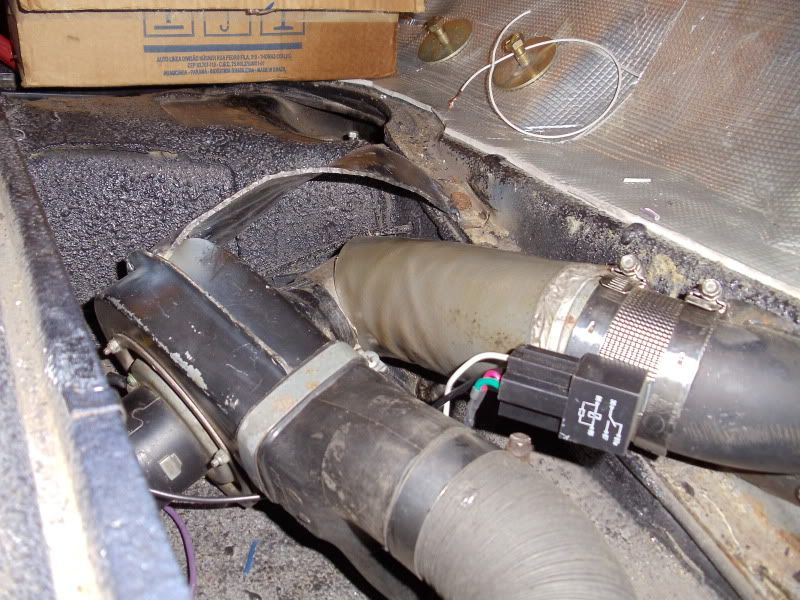
I used a corrugated steel heat-exchanger-to-body duct welded to some spare 2.5" exhaust tubing and an adapter at the housing made from a plastic HE-to-body duct end-piece and a hose-clamp. I found some other exhaust tubing that fit inside the forked outlet - capped one off and made a short nipple that was perfect for Beetle fanshroud-to-HE hose for the other:
-
Chris V
- Posts: 3391
- Joined: Tue Sep 03, 2002 12:01 am
Re: Chris/Marc's project
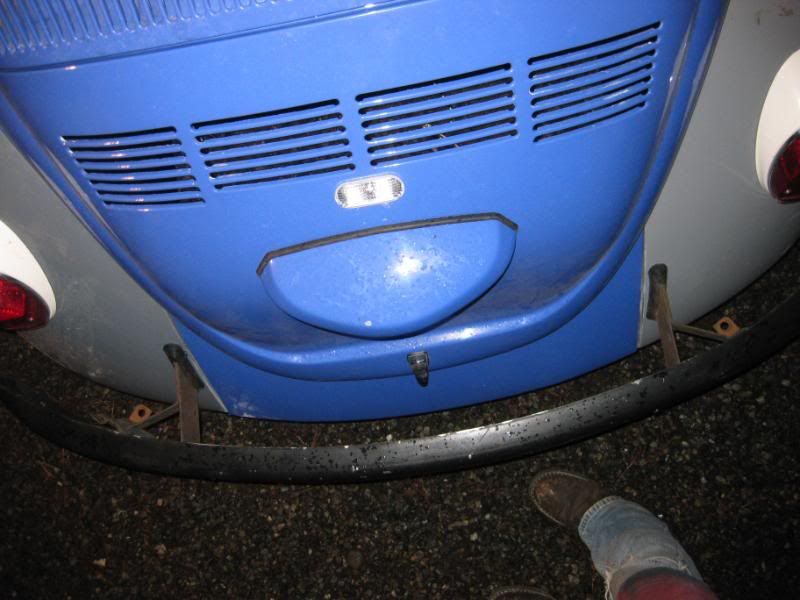
I messed around with the headlights some and then got on to the bumpers...Well the front one anyway. I Had to cut the fiberglass fenders for the bumper bracket grommets and also mount brackets. I had a donor `69 with the a complete front bumper system and also a spare `68-`73 bumper. I cut both 3" offset of center and came out with a 6" wider-than-stock bumper. It sits now with a stripe of electrical tape and clamped at the center.
-
Piledriver

- Moderator
- Posts: 22520
- Joined: Sat Feb 16, 2002 12:01 am
Re: Chris/Marc's project
Cabriolet (or maybe even any even Mk1 )seat belts might work, retract setup is rotated 90 degrees and moved out over the heater channel if they had them.They are power, and have about 1½" of lift and 9" of travel forward to back...the one thing that limits the rearward travel is the factory seatbelt inertia reel.
I've been looking at them for my T3 for same reason, I have to pull the stock ones to get the Corrado seats in/out.
(very minor gripe I realize, but if you need new belts, they are guaranteed to be much newer)
Addendum to Newtons first law:
zero vehicles on jackstands, square gets a fresh 090 and 1911, cabby gets a blower.
EZ3.6 Vanagon after that.(mounted, needs everything finished) then Creamsicle.
zero vehicles on jackstands, square gets a fresh 090 and 1911, cabby gets a blower.
EZ3.6 Vanagon after that.(mounted, needs everything finished) then Creamsicle.
-
Marc
- Moderator
- Posts: 23741
- Joined: Thu May 23, 2002 12:01 am
Re: Chris/Marc's project
The seat goes back further than I need as it is. Current plan is to retain the VW belt but fit a Lexus or Toyota male bit to it that'll be compatible with the receiver on the seat, but we're not set on that.
-
Chris V
- Posts: 3391
- Joined: Tue Sep 03, 2002 12:01 am
Re: Chris/Marc's project
Here's a pic with the bumper welded together and just hanging off the mounts:
Today we both made it into the garage, and finally able to put the last fuel line in the tunnel, a feed 5/16" line for an already in place 3/8" return, also leaving in place the original fuel line that I'm contemplating using to run Diesel to a Espar heater in back. The Holley pump here I'm nervous about, a friend had trouble with one after I picked it up my own. Thanks to Hotrodvw for the braided lines and fittings:
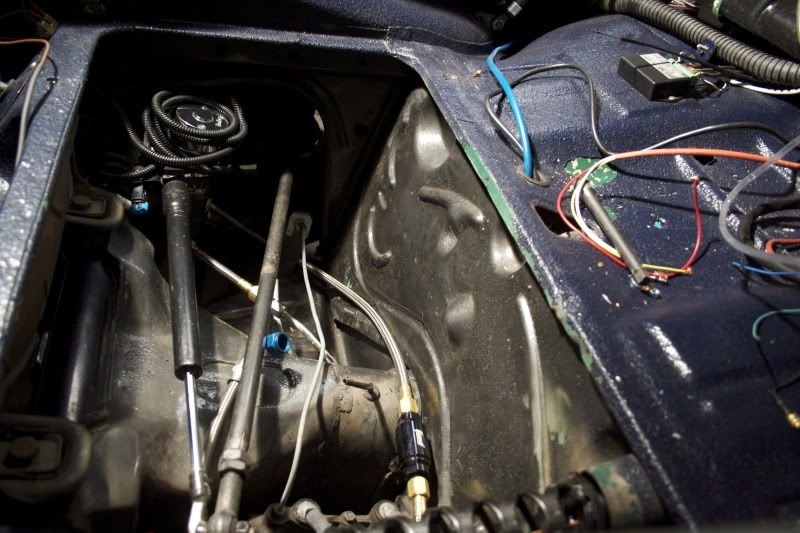
Today we both made it into the garage, and finally able to put the last fuel line in the tunnel, a feed 5/16" line for an already in place 3/8" return, also leaving in place the original fuel line that I'm contemplating using to run Diesel to a Espar heater in back. The Holley pump here I'm nervous about, a friend had trouble with one after I picked it up my own. Thanks to Hotrodvw for the braided lines and fittings:
-
Chris V
- Posts: 3391
- Joined: Tue Sep 03, 2002 12:01 am
Re: Chris/Marc's project
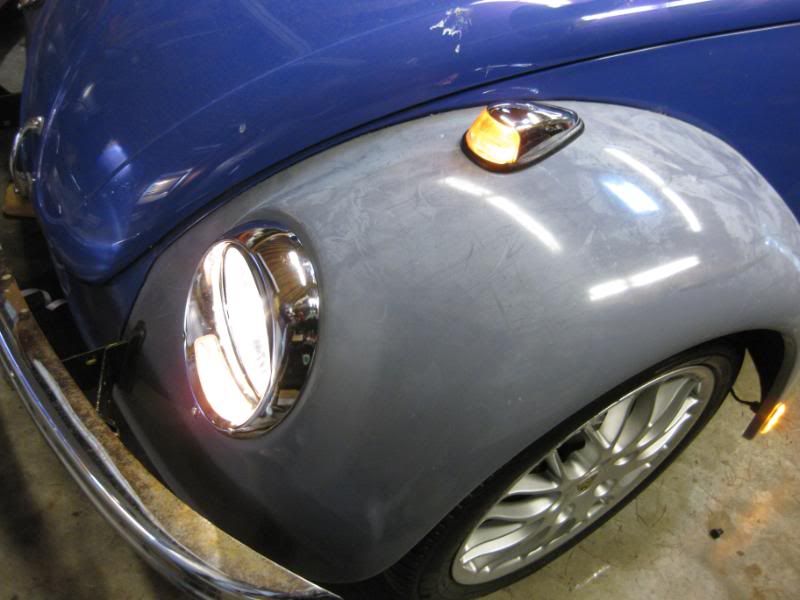
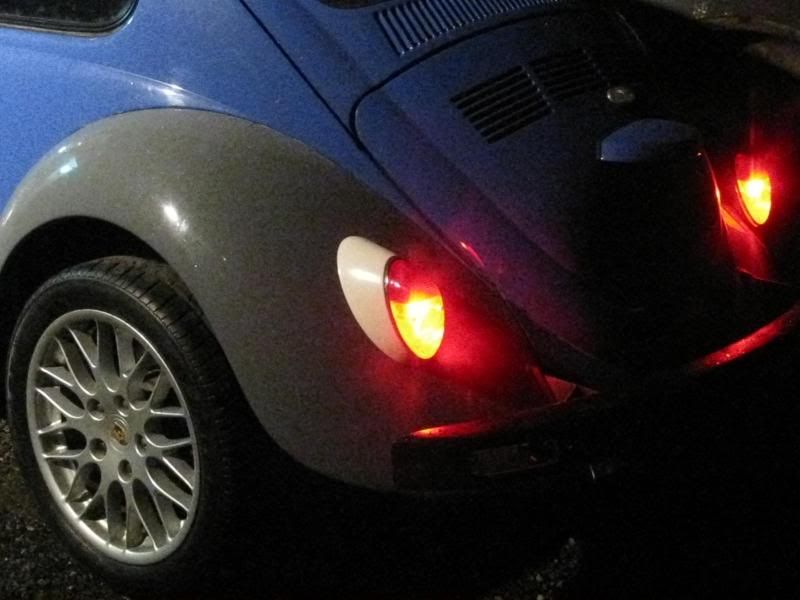
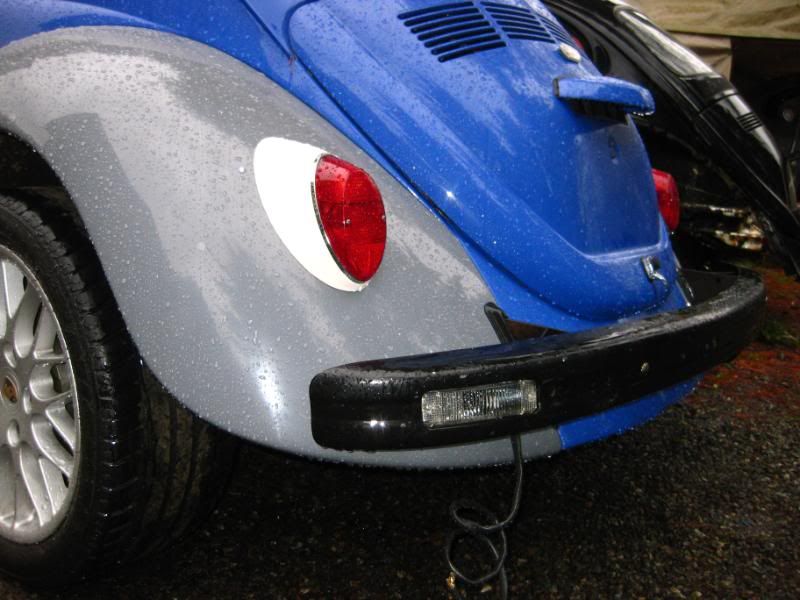
Today was cool...installed a bunch of new lamps, amber 1157's for the factory front turn signals, 1893's for the Rossi's, 80/100W Hella H4's. I pulled all of the wiring off the fuse panel and cut apart the busway, separating a segment of three down to a two and a one...took a stone to all of the wire terminals while everything was disconnected. Re-hooked everything up and the lights are all playing nice - with the Dakota Digital controlling nearly everything.
I also mounted the fresh-air box and wired up the two-speed fan, it's really putting out some air! With just a group 42 Rayovac maybe ~12.5V
On the `77 I swapped 47 idle jets in the DCNF's the other day (from 50's) and it drove rough on the one chance I had to drive it around town...the other day I pulled the #4 idle jet and blew it clean, and today fired it up for the first time and drove it around - running nicely again.
-
Chris V
- Posts: 3391
- Joined: Tue Sep 03, 2002 12:01 am
Re: Chris/Marc's project
Got the rear bumper brackets mounted and fit a Mexi front-bumper to the back - with the wider CCC fenders it really matches quite well. A stock `68-`73 bumper fouls on the fenders before it meets the bumper brackets. Dad found some clear tuner turn signals that will be wired in as back-up lamps, making having the back-up lamp on the decklid pointless, so it'll now become a third brake lamp.
Installed the Dakota Digital hidden power antenna and a little 200W amp in the back and hooked up an extra 6x8 speaker from my Mom's Ford Escape and got some tunes playing even.
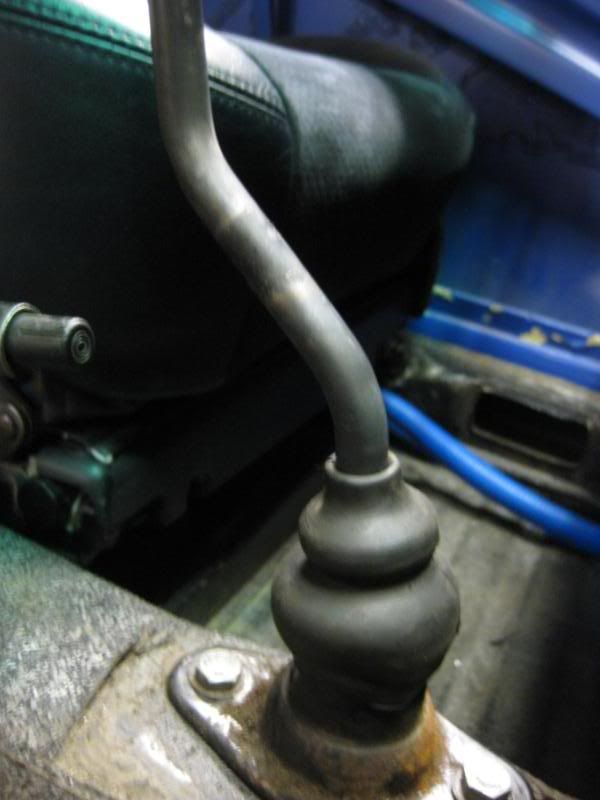
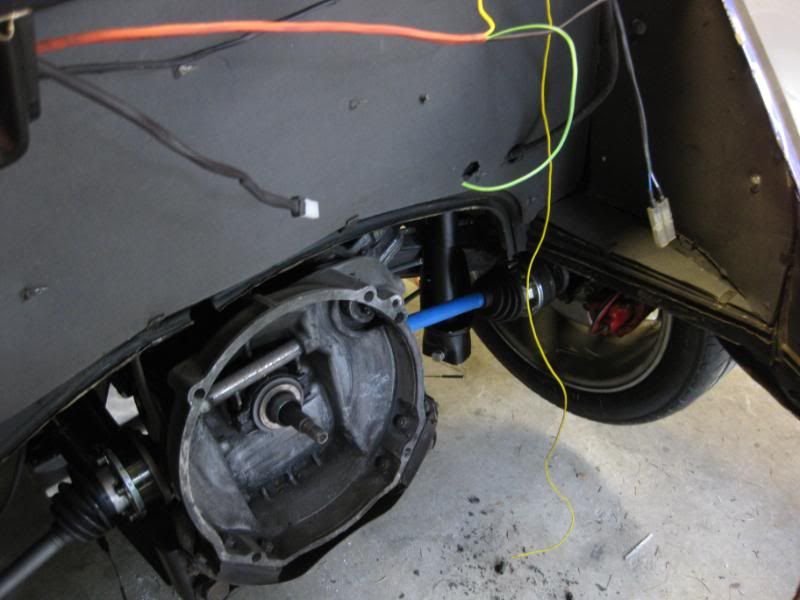
Also built the last Type II CV half-shaft and installed them both...offset a stock 10mm shifter some and bought a Subaru automatic shift knob for it. Bolted-in the driver's seat and wired it up and relaxed for a moment. Found a plastic glovebox trim too. Also installed a new tandem heat exchanger cable and chassis seals.
Installed the Dakota Digital hidden power antenna and a little 200W amp in the back and hooked up an extra 6x8 speaker from my Mom's Ford Escape and got some tunes playing even.
Also built the last Type II CV half-shaft and installed them both...offset a stock 10mm shifter some and bought a Subaru automatic shift knob for it. Bolted-in the driver's seat and wired it up and relaxed for a moment. Found a plastic glovebox trim too. Also installed a new tandem heat exchanger cable and chassis seals.
-
Chris V
- Posts: 3391
- Joined: Tue Sep 03, 2002 12:01 am
Re: Chris/Marc's project
I was fooling around with my camera and fixed it, then forgot how to upload them appropriately