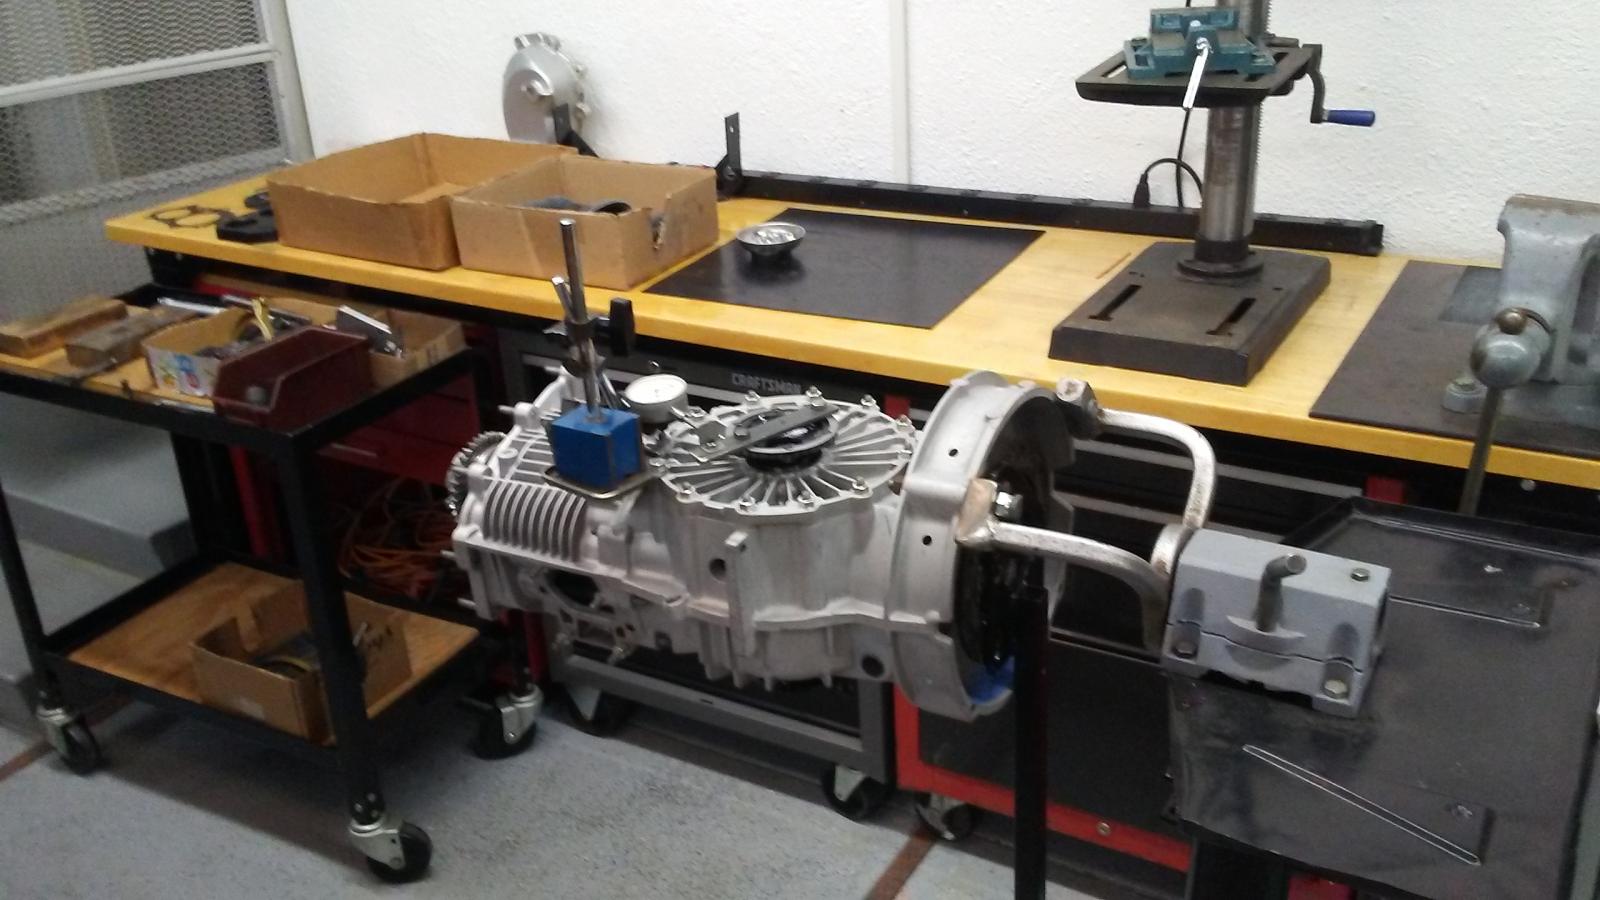
Newbie with 915

Discuss VW transaxles and transmissions. Gearheads wanted!
User avatar
Clatter
Posts: 2034
Joined: Sun Apr 28, 2002 1:01 am

Re: Newbie with 915

Post by Clatter »

Paul,

I'm having a herd time finding the Dremel tool you show in your pic.
All of the silicon carbide bits I can find are for softer materials,
And only the burrs are listed for hardened steel...

Any chance you could point me to the right bit for this job?
Image
Speedier than a Fasting Bullet!

Beginners' how-to Type 4 build thread ---> http://shoptalkforums.com/viewtopic.php?f=1&t=145853
Ol'fogasaurus
Posts: 17756
Joined: Mon Nov 13, 2006 10:17 pm

Re: Newbie with 915

Post by Ol'fogasaurus »

User avatar
Pablo2
Posts: 408
Joined: Sat Jun 25, 2011 5:37 pm

Re: Newbie with 915

Post by Pablo2 »

aka Pablo, gears, Geary
9.36 @ 146 in '86
User avatar
Clatter
Posts: 2034
Joined: Sun Apr 28, 2002 1:01 am

Re: Newbie with 915

Post by Clatter »

Thanks so much..

SO cheap!

Diamond, not carbide.. Got it.

That last one mentions that they are "to be used with water - do not run dry".
You really use these wet?


On another note, went ahead and took apart the 1-2 synchro assembly to inspect last night.
It all couldn't have been prettier/cleaner inside, or a bigger PITA to get back together.

The OD of the synchro ring being the wear part, and easily seen without disassembly,
I'm thinking I might just guess that the rest look inside like the one I did, and leave them alone.
Speedier than a Fasting Bullet!

Beginners' how-to Type 4 build thread ---> http://shoptalkforums.com/viewtopic.php?f=1&t=145853
User avatar
Pablo2
Posts: 408
Joined: Sat Jun 25, 2011 5:37 pm

Re: Newbie with 915

Post by Pablo2 »

I didn't closely read the instructions for the bits I linked .. I just looked for diamond dust coated bits. These are so cheap that you use one for 10 minutes, and then toss it.

It would be a HUGE mistake not to replace the synchro rings .. especially 2nd gear.

The often overlooked wear area is where the ring is held compressed on the inside of the dog teeth. This little 9* spot on the inside of each tooth wears as the ring rubs back & forth slightly. As compressed dimension of the ring increases, it becomes more difficult for the shift sleeve to engage the gear. So, it's important to measure compressed dimension of the new synchro rings.
aka Pablo, gears, Geary
9.36 @ 146 in '86
User avatar
Clatter
Posts: 2034
Joined: Sun Apr 28, 2002 1:01 am

Re: Newbie with 915

Post by Clatter »

Back at it..
Had a real struggle with cleaning the blasting grit out of the detent passages today.
Details here, if you scroll down --> https://www.thesamba.com/vw/forum/viewt ... start=1720

On that note,
Does anyone know where to get an on-line manual for the 915 trans?
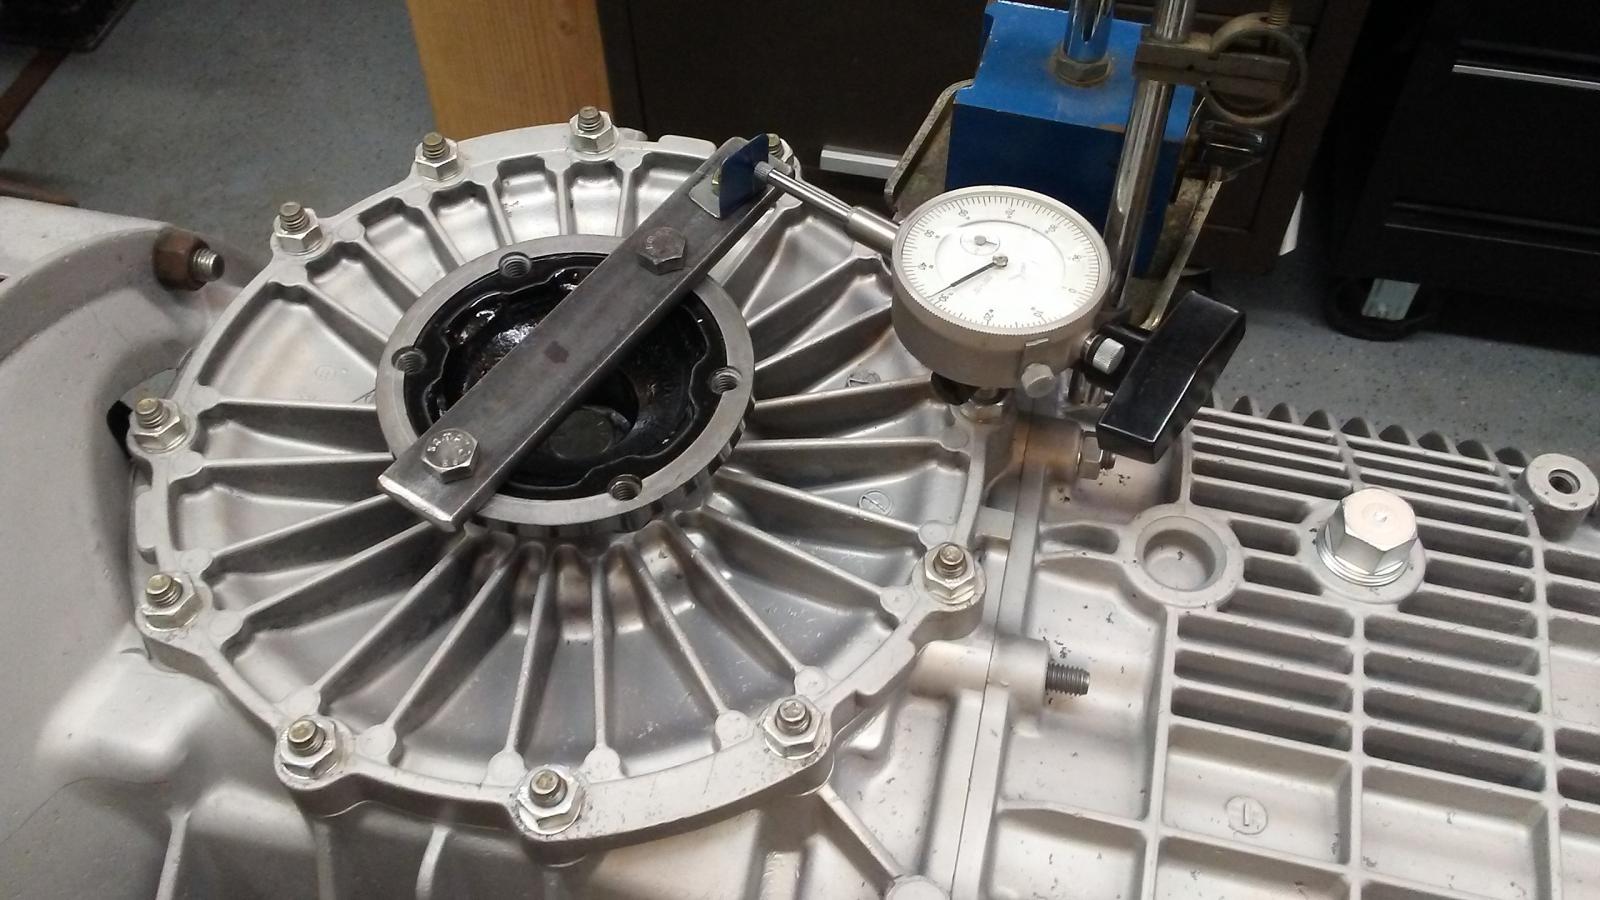
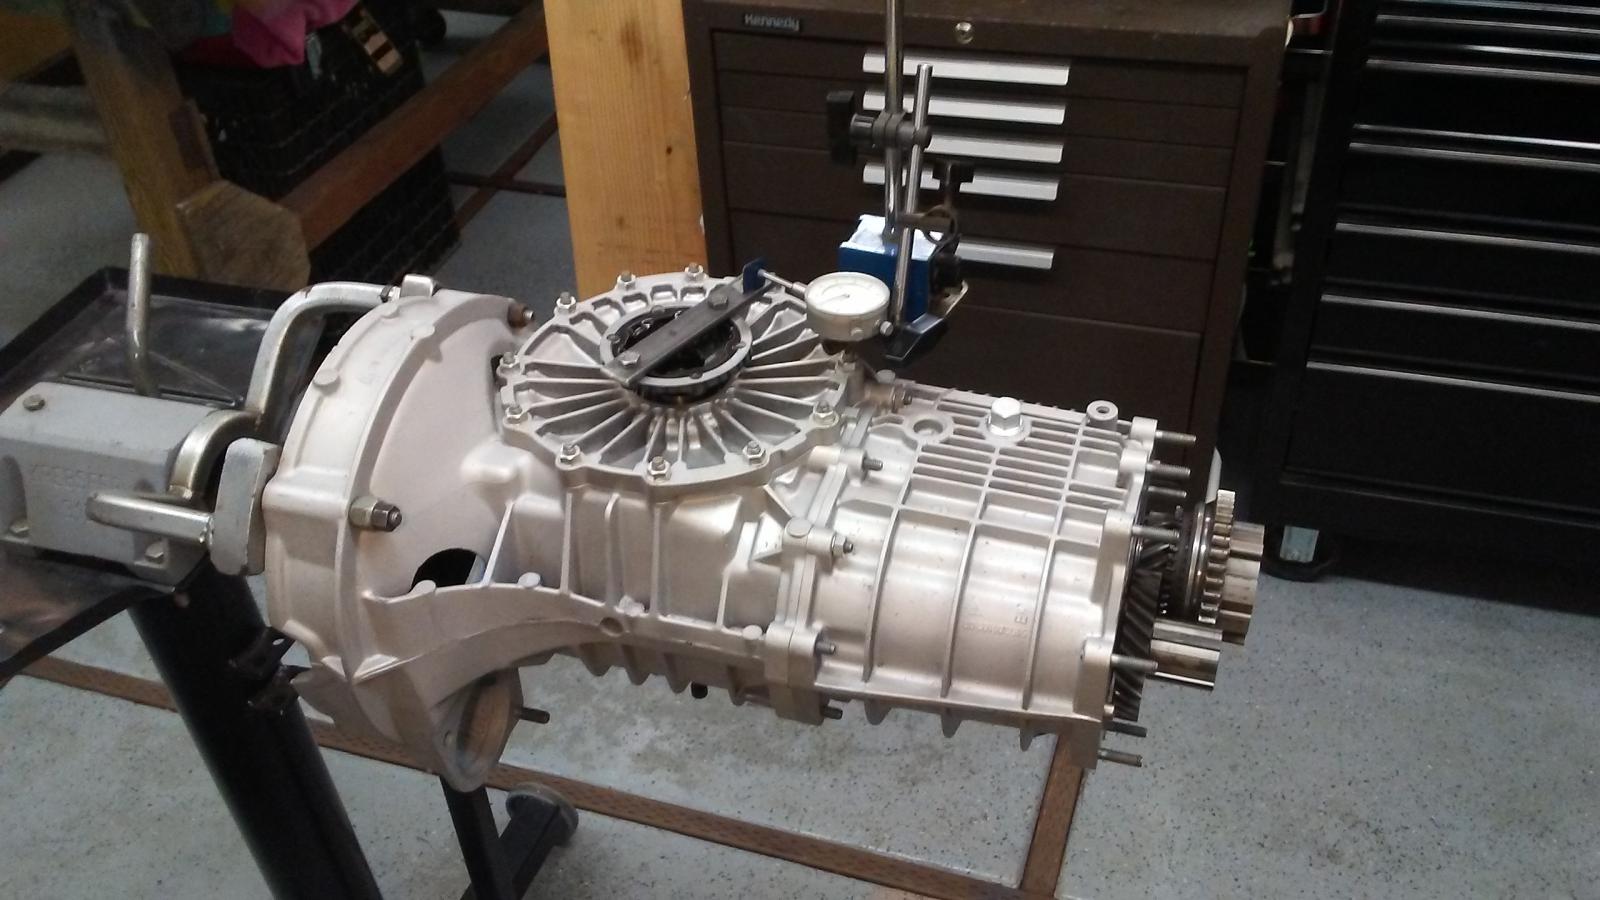
Apparently my '76 trans has a few differences from the one in Zimmerman's tutorial.
Would hate to pay Porsche prices for a shop manual to get just a couple of specs..
Been searching high and low to no avail.


Anyways,
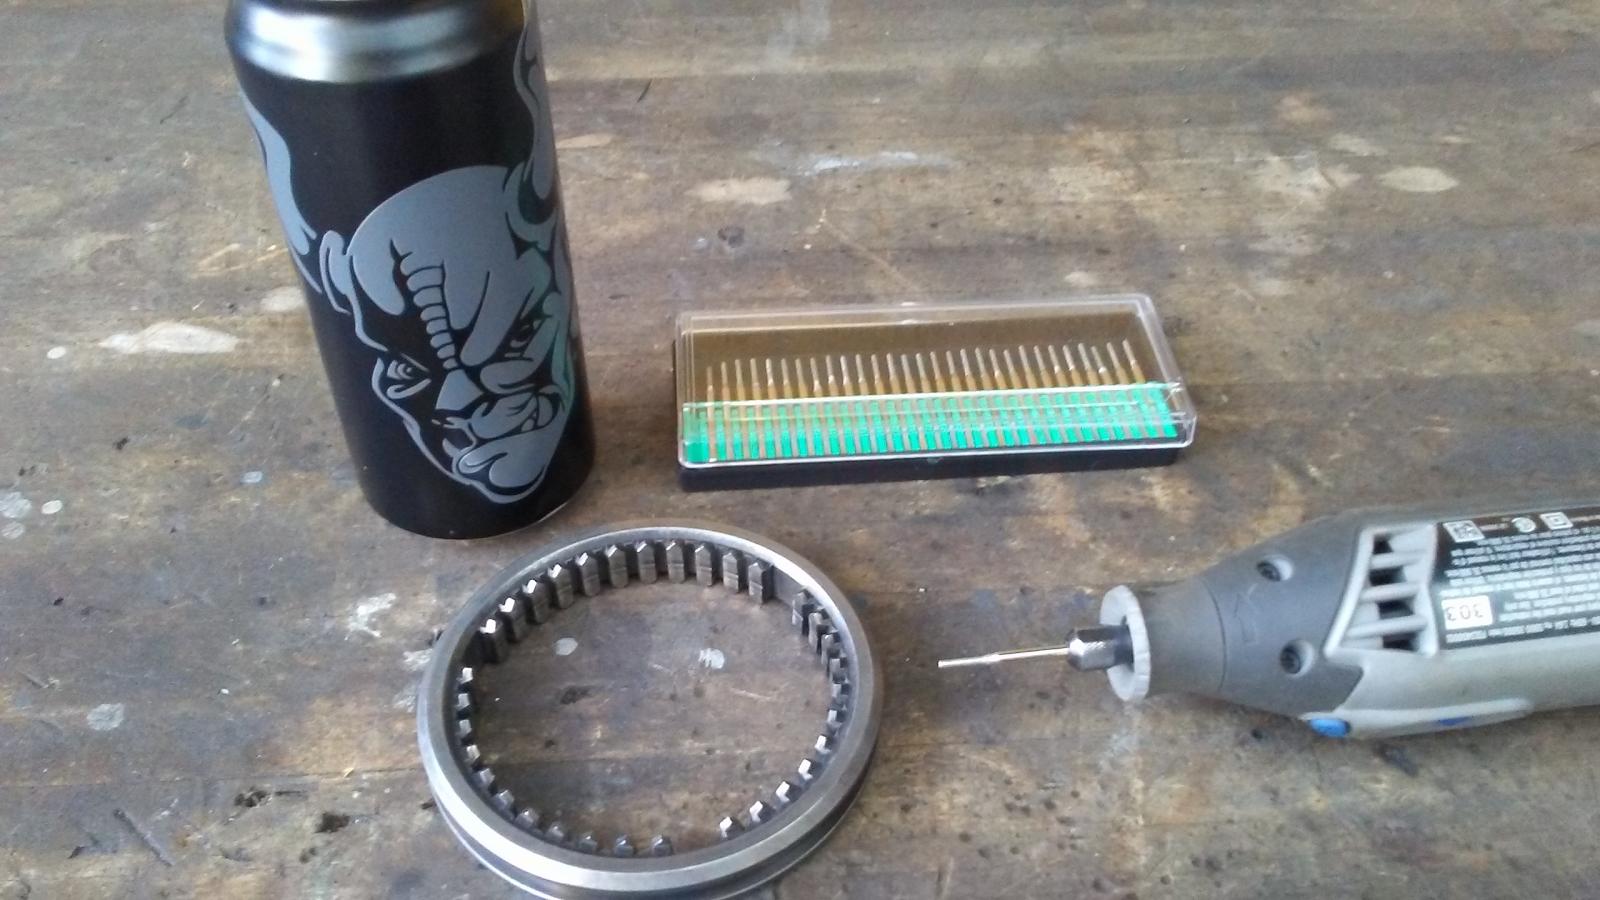
After Paul suggested a new synchro ring or two,
I started trying to wrap my head around this.. Started looking at 1-2.

The synchro ring supposedly has a super-hard sprayed-on coating that shows rough on the OD of the ring.
Any shiny spots, where the roughness has worn away, means that the ring needs replaced.
This doesn't seem to be my case here - right?
Image
Image

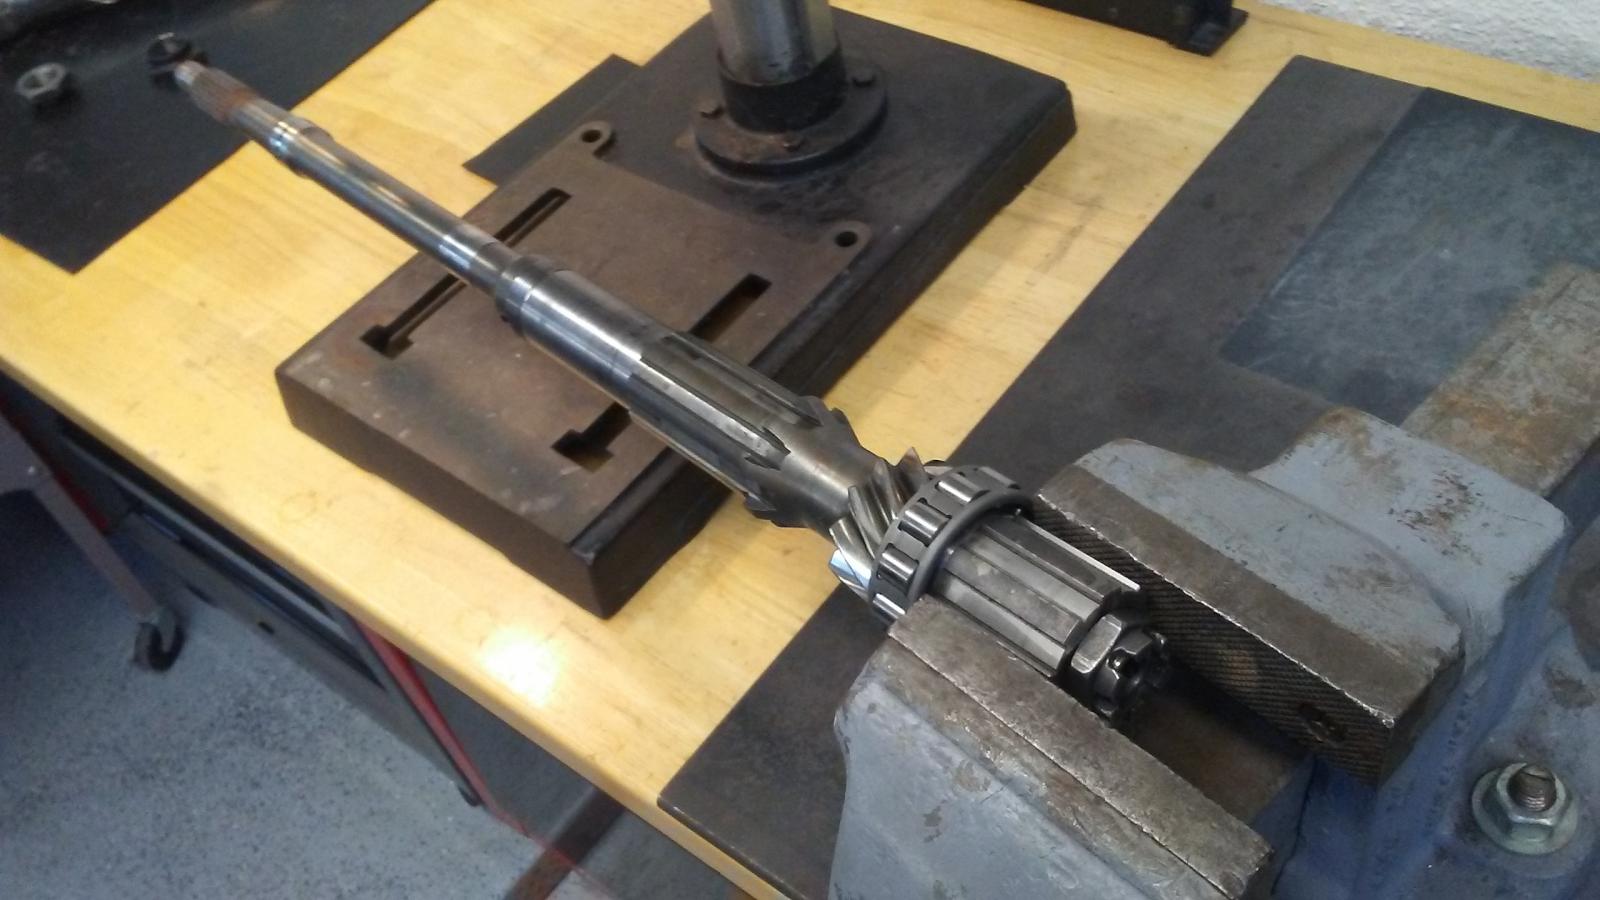
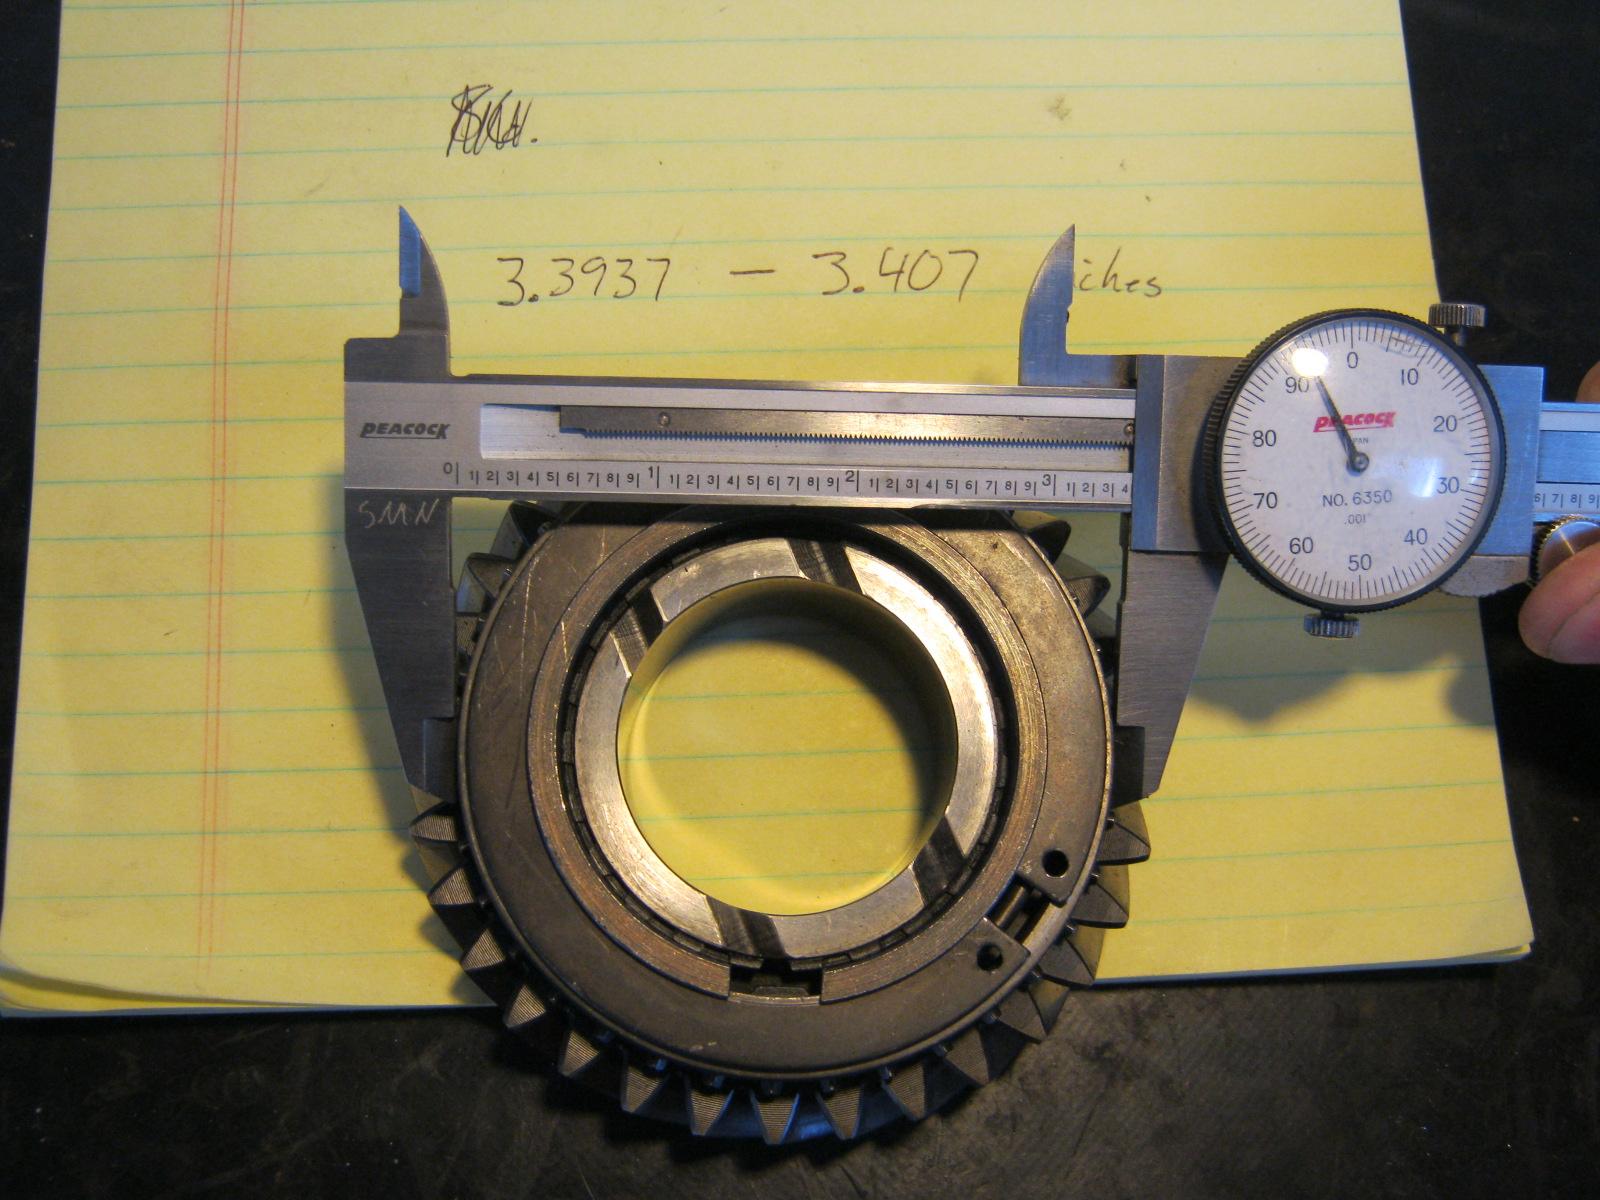
Measuring the OD of the ring assembled into the gear/teeth is showing some odd numbers.
One of these gears was pulled apart and inspected, the other was not.
Here are 1 and 2 showing the different measurements I'm getting at different points.
Image
Image
Image
Image
Image

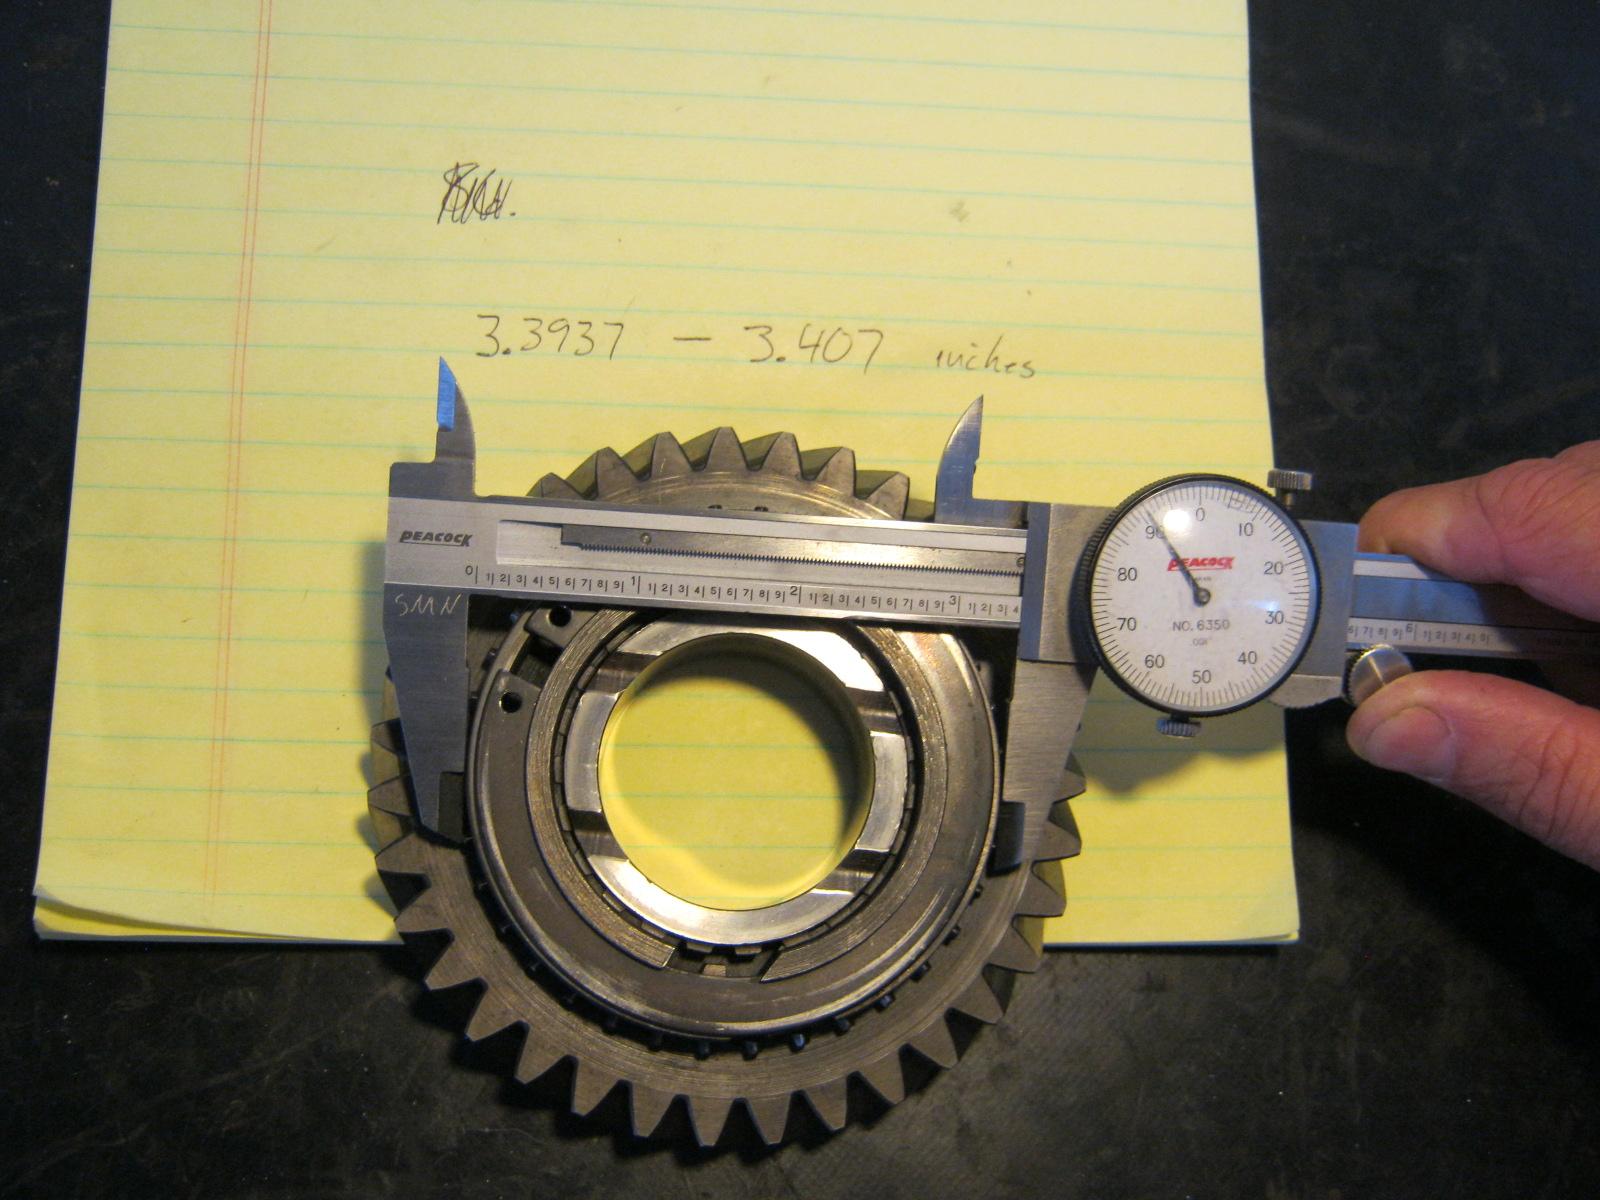
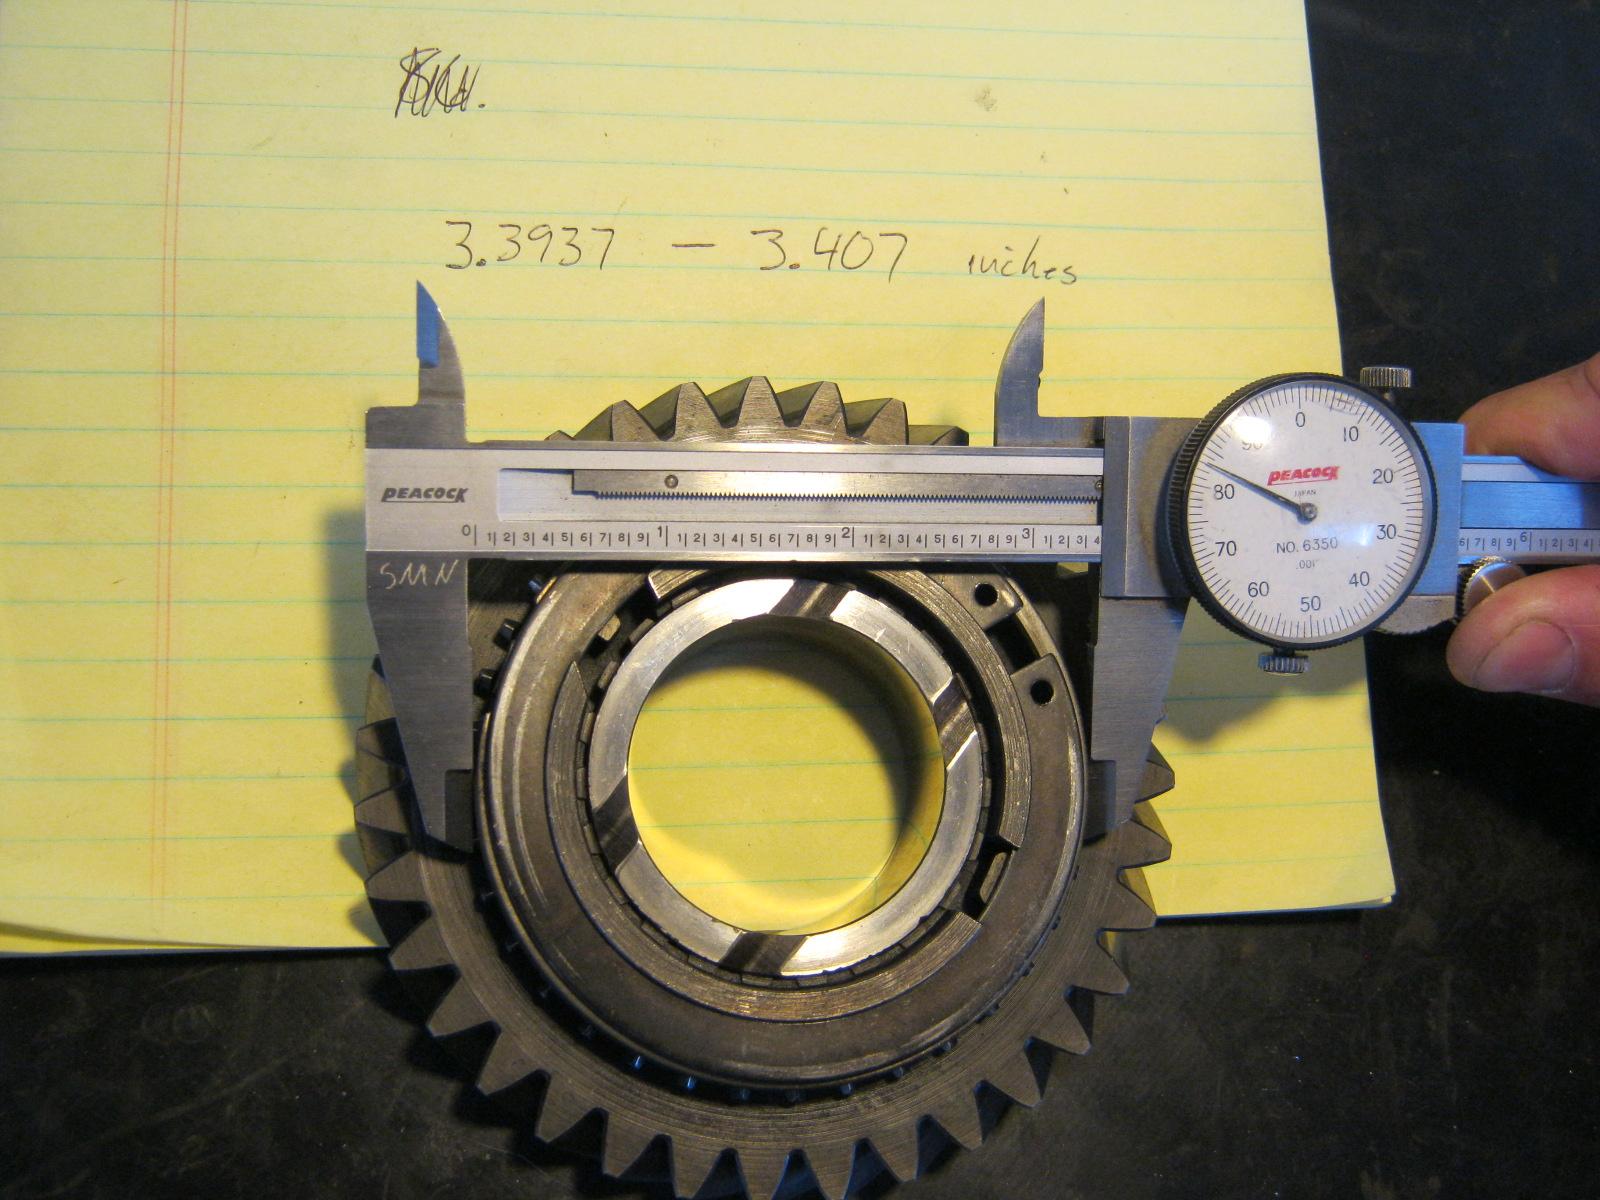
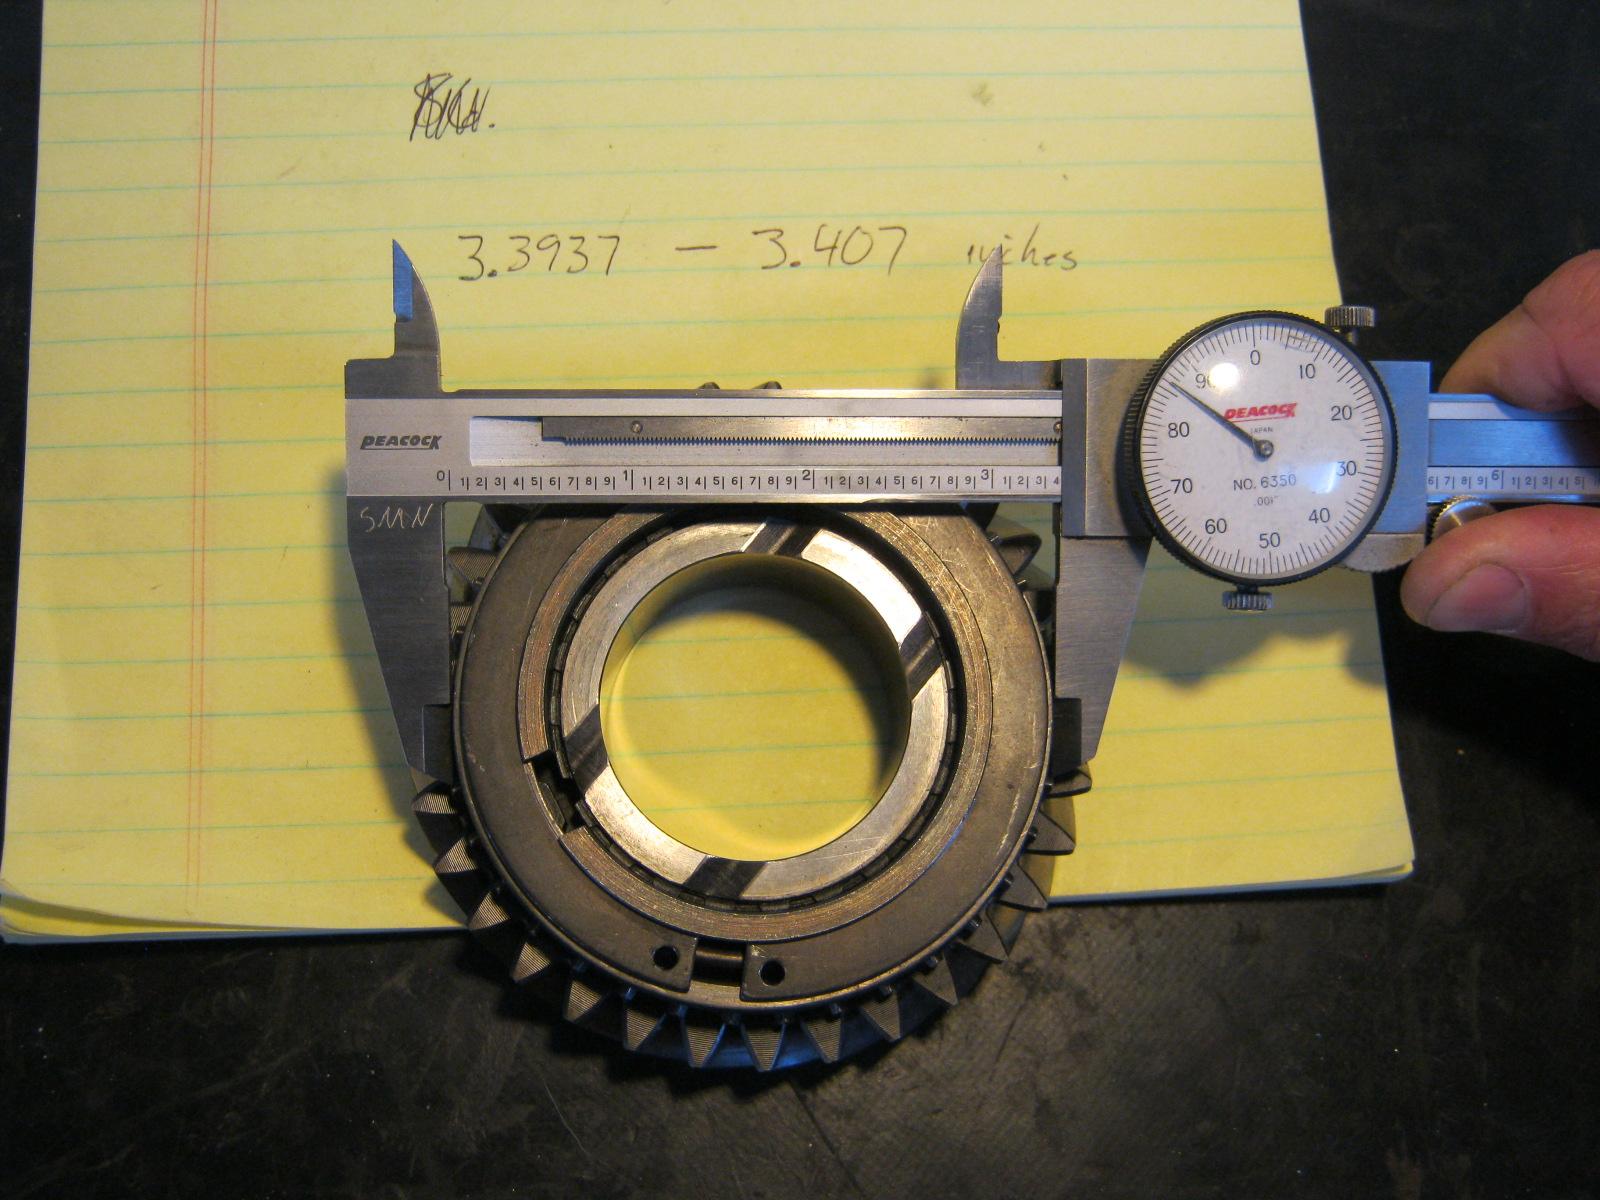
Note that many of those measurements are oddly under spec.
The measurement gets bigger with wear, right?
Wonder what is up with some of these measurements being so small??

I can read a caliper - And I promise I'm holding my mouth right..

If i'm getting this, the ID of those teeth gets bigger as they wear against the OD of the ring.
That's the 9 degree angle, that you spoke of, that wears, correct?

There is also wear at the ID of the synchro ring, inside the gear, that we are not measuring or checking for.
So this is why it's good to replace synchro rings while we have it all apart...

Also want to double-check that the synchro ring only is OK to replace..
Don't have to buy a new slider sleeve if we dress the corners of the slider teeth down - provided it's in decent shape.
Someone somewhere said you had to replace sliders with rings..

So,
Even though my measurements are all under spec,
And the visuals are good on them,
It's still worth the $176 each to replace the rings?

Just want to be sure...
It somehow comforts me to use parts that are already worn-in together.

Oh, and,
Thanks again for holding my hand.
Getting to the truth with these things is harder than I thought it would be..
Speedier than a Fasting Bullet!

Beginners' how-to Type 4 build thread ---> http://shoptalkforums.com/viewtopic.php?f=1&t=145853
User avatar
Pablo2
Posts: 408
Joined: Sat Jun 25, 2011 5:37 pm

Re: Newbie with 915

Post by Pablo2 »

It's probable that those synchro rings were replaced once before. However, you can see some wear where they have been slightly rotating back & forth within the dog teeth.

Until I get back to my manual in 10 days, I couldn't comment on your measurements.

The interconnectivity of wear between the various parts in the Porsche-patented synchronizing system is why it is generally recommended that all parts be replaced together. Wear points are difficult to properly assess (totally unlike the Borg Warner parts that most of us are familiar with, which are simple to assess). A shop doing this job can't afford a come-back, so trying to save the customer a buck is "penny wise / pound foolish". For instance, your Op Sleeve, with its displaced material, would be replaced without a second glance by a shop, despite how great it looks otherwise.

Again, I am NOT an expert with these earlier transaxles, but rather I'm just sharing info I've received from a number of shops who ARE experts. You can often get away with massaging used parts, but once in a while this will bite you in the butt.
aka Pablo, gears, Geary
9.36 @ 146 in '86
User avatar
Clatter
Posts: 2034
Joined: Sun Apr 28, 2002 1:01 am

Re: Newbie with 915

Post by Clatter »

My burrs came in, and away we go..

A magnifying glass really helps with these little tiny things.

Image

The burrs are pretty rough.
At first, when new, they chatter, and tend to grab and 'climb', making a rough finish of their own.
After a first pass with a new burr,
it seemed to help to make a finish pass, with a used-up burr, to smooth.

Image
Image

Would be nice to have an optical comparator or such, but a regular old magnifying glass certainly helps.
Tried to _just_ smooth out the nicks and make an even beveled edge..

What do you think?
Speedier than a Fasting Bullet!

Beginners' how-to Type 4 build thread ---> http://shoptalkforums.com/viewtopic.php?f=1&t=145853
User avatar
Pablo2
Posts: 408
Joined: Sat Jun 25, 2011 5:37 pm

Re: Newbie with 915

Post by Pablo2 »

.
I use my jeweler's binocular microscope to do this dremel work. I can't imagine not using magnification.

If this corner still catches your fingernail, you need to dremel it more:
Image

Your installed synchro rings appear to be right on the money: 86.37 +/- 0.17mm
.
aka Pablo, gears, Geary
9.36 @ 146 in '86
User avatar
Clatter
Posts: 2034
Joined: Sun Apr 28, 2002 1:01 am

Re: Newbie with 915

Post by Clatter »

Nice!
Thanks again, Paul, much appreciated.

I'm still digging for torque specs - mainly the big nut on the end of the main/input shaft.
Zimmerman says 181 ft. lbs., but that was for the later 80s 915...

My trans is technically a 923/05; Late 1975/early 1976.
But if these specs are not available, a 915/40 or 915/43 should have similar numbers.

Apparently, there were different figures for different years,
But finding what they are supposed to be is proving a challenge.
Seems Porsche really wants you to go and buy a manual..

Got the R hub from a 4-speed off of ebay to hold the input shaft while tightening.
Will probably have to weld some 'ears' on it before going to 188 Ft. Lbs. (or so)..
Image


Hopefully rigging up a R&P backlash setup here soon..
Image
Speedier than a Fasting Bullet!

Beginners' how-to Type 4 build thread ---> http://shoptalkforums.com/viewtopic.php?f=1&t=145853
User avatar
Pablo2
Posts: 408
Joined: Sat Jun 25, 2011 5:37 pm

Re: Newbie with 915

Post by Pablo2 »

This is the weak area of the 915 mainshaft. Quite often these tangs are broken off. The later shafts had a solid ring instead of the interrupted "stop".

Image
aka Pablo, gears, Geary
9.36 @ 146 in '86
User avatar
Pablo2
Posts: 408
Joined: Sat Jun 25, 2011 5:37 pm

Re: Newbie with 915

Post by Pablo2 »

Here's a good DIY thread on rebuilding a 915 with a 1-piece bearing retainer plate.
The one we sell (the original) is more expensive than the others (knock-offs), but it's still the best one, IMO.

http://forums.pelicanparts.com/porsche- ... plate.html
aka Pablo, gears, Geary
9.36 @ 146 in '86
User avatar
Clatter
Posts: 2034
Joined: Sun Apr 28, 2002 1:01 am

Re: Newbie with 915

Post by Clatter »

^^Some good info right there^^
Especially the exploded mainshaft diagram; the cheapest used manual I could find was $500(!)

Oh, those thousands of dollars' worth of new bearings and sliders.. So beautiful.
I wish I was rich.. *sniff* :cry:


Got some time yesterday to start playing with the Ring & Pinion;
Trying to find turning torque.

Because I don't have a proper inch-pound wrench, I rigged up a substitute:
Image


14 inch-pounds will hang, but break-away if nudged.
Image


11 or 10 seems to be the continuous turning torque.
Image


Spec for new carrier bearings is 30 or so, up to around 50,
But that's new.. Is there a spec anywhere for used?
Same as low spec for new?

Sure 'feels' stiff, FWIW, was really surprised it was such a low number!

Had the other flange locked, and only the diff installed when measuring.
Is that correct?
You don't just let the opposite flange turn (the opposite way) when measuring, do you?

Maybe I should put the pinion in to make the numbers right? :lol: :lol:


Zimmerman put a thicker shim in there to tighten it up a bit, and also tighten backlash.
Have those rollers really clean, and lightly oiled, and they are worn in, so... Hmmm.. :?


That brings up to backlash.. Need to know that before messing about with shims, right?

Managed to rig up a bracket to measure.
Image

Also used my 'buddy bar' and old pressure plate to lock the mainshaft,
Plus started making up my pinion shaft 'holder tool' from an old R hub from a 915 4-speed.
Both of these were still in the works when I had to stop.
Image
Image
Still need to get a washer for under the one CV flange to lock out the lash from splines.
And maybe some diff shims..?

I'm sloowwly starting to figure these things out, and how the measurements work..
Speedier than a Fasting Bullet!

Beginners' how-to Type 4 build thread ---> http://shoptalkforums.com/viewtopic.php?f=1&t=145853
User avatar
Pablo2
Posts: 408
Joined: Sat Jun 25, 2011 5:37 pm

Re: Newbie with 915

Post by Pablo2 »

Normal MO is to lock the measurement side flange against the diff with a specific-sized ring/shim, which gets pinched between flange and diff when the flange bolt is torqued. You may be able to use something like a piece of 12-gauge copper house wire as a substitute.

Regarding your method of diff bearing preload measurement, I honestly think a FAR better DIY method would be a combination of "by feel" and by observing side cover lift-off.

Keep in mind that when new, these bearings should receive about .006" preload each. But when setting up used bearings, "by feel" is the best method you can employ, IMO.

Oil your diff bearings.

After bolting the side cover down tight, loosen each nut and then retighten them all at "finger tight". Observe if there is at least a bit of cover lift-off. You can use a feeler gauge to confirm this if you wish. Now grasp both flanges, turning them in the same direction (obviously), and take a mental note of the "zero preload" feel. Retighten the side cover nuts, and now turn the diff. Confirm that there is now some preload.

Next, increase the shim size on the ring gear side (since you said you wished to eventually reduce R&P backlash) and recheck the turning torque. You'll know when you've increased the preload too much, because there will be a slightly "notchy" feel.

Welcome to the world of trial & error. The accuracy of your results will have a direct correlation with how much time you invest in determining precisely how much increased shimming is too much, and how much feels just right. "Correct" is usually no more than .002" increase in total shim size over original, but it could be .004" (one shim size increase). Half-sizes (.002" increments) are arrived at by using a combination of thick and thin shims.

It's worth noting that Porsche finally now offers shims that come in .05mm (.002") increments (GT3 are the same as 915), which eliminate those silly .25mm shims. GT3 shims are the only ones I'll now use.
aka Pablo, gears, Geary
9.36 @ 146 in '86
User avatar
Pablo2
Posts: 408
Joined: Sat Jun 25, 2011 5:37 pm

Re: Newbie with 915

Post by Pablo2 »

I remember now that unless you have the specific puller required to remove the ring gear side diff bearing without damaging it, the trial & error method of multiple shim changes can be risky. So, for the sake of arriving at Total Shim Thickness, you could increase the non-ring gear side shim. But you'll still have to remove that ring gear side shim eventually, if you wish to tweak the backlash. (If I remember correctly, disassembly of the diff allows you to press or drive the bearing off via two holes on the inside of the cover.)

Keep meticulous notes, so you remember your beginning shim sizes.

Honestly, diff bearings are cheap and should be replaced with new. If you get "silly" prices quoted to you by a Porsche shop, just go to a VW supplier and get 091 diff bearings. They're the same bearing.
aka Pablo, gears, Geary
9.36 @ 146 in '86
Post Reply