These prototypes are printed in PLA and will most likely not hold up well, but I have more engineering-friendly material like nylons that should be more durable if I decide to actually use 3D-printed parts. I have 3d-printed a radio block-off plate which we sanded and painted, so I already have some 3d-printed parts in this car:
Update and improvements on my Oxy build
-
grelland

- Posts: 990
- Joined: Fri May 13, 2005 2:47 am
Re: Update and improvements on my Oxy build
You do not have the required permissions to view the files attached to this post.
-
grelland
- Posts: 990
- Joined: Fri May 13, 2005 2:47 am
Re: Update and improvements on my Oxy build
It was my yongest son's birthday yesterday (turning 12), and when I asked what he wanted to do, he wanted to spend some time with me in the garage 
SO we had a look at the pulleys, as I had some issues last summer where I used a wbx crank pulley, but that had a very different offset than a type1, so I had to shim out the upper pulley way too much.
I trial fitted a type1 pulley that had the "threads" machined down, and then the alignment is much better. Still need some fine adjustments with shims, but this will be good.
I also (thankfully) noticed that I had forgotten one of the blind plugs on the flywheel side of the case, so the flywheel had to come off again.
You do not have the required permissions to view the files attached to this post.
Last edited by grelland on Tue Jan 23, 2018 4:13 am, edited 1 time in total.
-
ajdenette

- Posts: 717
- Joined: Wed Jan 20, 2010 1:18 pm
Re: Update and improvements on my Oxy build
lucky catch on the missing plug that could have caused a big head ache.
Alex
|_________oo_oo
/ /__/____[_____\
I I======[]IIIIIII[]
()_)-----()_)----)_)
|_________oo_oo
/ /__/____[_____\
I I======[]IIIIIII[]
()_)-----()_)----)_)
-
andy198712
- Posts: 2433
- Joined: Wed Apr 13, 2011 1:01 pm
Re: Update and improvements on my Oxy build
I’ve made that mistake! Great thread thanks for sharing 
-
grelland
- Posts: 990
- Joined: Fri May 13, 2005 2:47 am
Re: Update and improvements on my Oxy build
Ops, no updates in a little while.
The heads are back from machining, so I have mocked the longblock up in order to verify a few things before final assembly.
First I checked the cc of the combustion chambers, since these heads are new to me and also the machinist needed to shave off a little in order to get the heads equal: The heads measured out to be 43cc and with the copper gaskets from last years's version of the engine, I end up with 9.88:1 in static CR. A bit higher than I anticipated, but I hope thet will be ok.
Then I assembled the longblock without pistons just to check that the heads were machined ok, and it looks ok: I will be using cables for the throttle bodies, so I also mocked up the newly painted tins in order to verify that everything fits, and also mounted the cable system. It needed a bit of fiddeling as the kit is designed for DRLA carbs, but my TBs have a "Push" action on the levers when they face downwards, but these cables obvioulsy need to work with a pull action, but nothing major.
Starting to look good: Next on the list now is to clean up the heads, assemble the valves and valvetrain so that I can measure out the geometry and possibly order new pushrods.
We have about 2 feet of snow here still, so no immediate urgency
You do not have the required permissions to view the files attached to this post.
-
Dan Dryden

- Posts: 488
- Joined: Mon Nov 05, 2007 12:56 am
Re: Update and improvements on my Oxy build
Nice thread and some very nice work!
Somehow I've only just noticed it but will be keeping an eye on your updates.
Somehow I've only just noticed it but will be keeping an eye on your updates.
-
grelland
- Posts: 990
- Joined: Fri May 13, 2005 2:47 am
Re: Update and improvements on my Oxy build
ThanksDan Dryden wrote:Nice thread and some very nice work!
Somehow I've only just noticed it but will be keeping an eye on your updates.
Sent fra min SM-G950F via Tapatalk
-
Clatter

- Posts: 2034
- Joined: Sun Apr 28, 2002 1:01 am
Re: Update and improvements on my Oxy build
Love this thread!
My sons just want to spend their time on computers..
My sons just want to spend their time on computers..
Speedier than a Fasting Bullet!
Beginners' how-to Type 4 build thread ---> http://shoptalkforums.com/viewtopic.php?f=1&t=145853
Beginners' how-to Type 4 build thread ---> http://shoptalkforums.com/viewtopic.php?f=1&t=145853
-
grelland
- Posts: 990
- Joined: Fri May 13, 2005 2:47 am
Re: Update and improvements on my Oxy build
Oh my sons also spend quite a few hours on the computers
-
flat4olsen
- Posts: 14
- Joined: Wed Sep 25, 2013 3:00 am
Re: Update and improvements on my Oxy build
The solution with the central aircleaner will help you with dampen the intake roar. BUT the CB Turbo hats are far to restriktive! I made a central air cleaner system on my oxyboxer. I made my own carb hats from Epoxy/fiber with a 2” intake. The dyno showed, that I lost 10 hp because of the hats (I tried several dyno pulls to find out where the restriction was). You need the largest possible intake in your carb hats to avoid hp loss. And it looks like, the CB are rather small...

-
grelland
- Posts: 990
- Joined: Fri May 13, 2005 2:47 am
Re: Update and improvements on my Oxy build
Thanks, very valuable info. I will be 3D-printing a set first, then I might use those as a mold for fiber-glass if necessary.
Are you using a stock oil-bath type cleaner?
Are you using a stock oil-bath type cleaner?
-
flat4olsen
- Posts: 14
- Joined: Wed Sep 25, 2013 3:00 am
Re: Update and improvements on my Oxy build
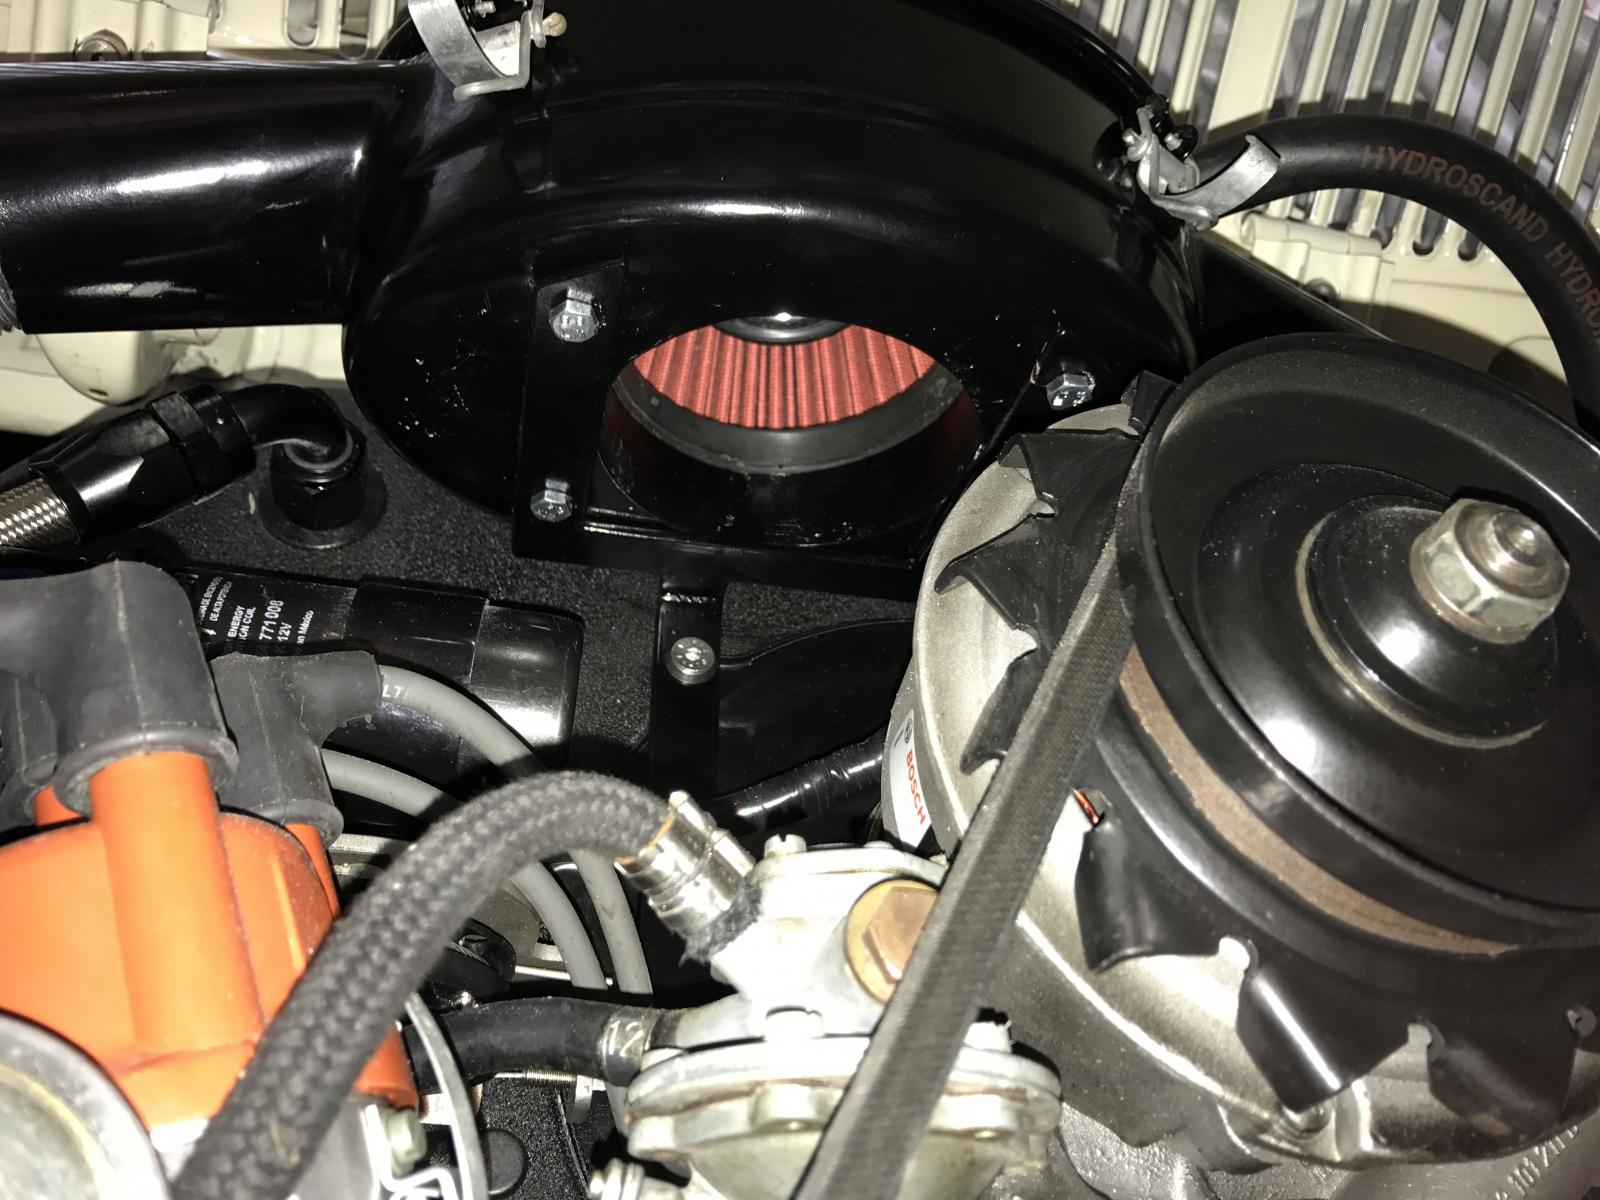
Yes, it´s a modified stock air cleaner. I enlarged the snouts to 2" and installed a large KN style filter inside the air cleaner. It sucks from a hole underneath (where the carb used to sit).
After the dyno run, where I found out that the carb hats were restrictive, I redid the carb hats to 2,5". Haven´t tried them yet. I will give it a try in the future. (sorry about the pic size )
)
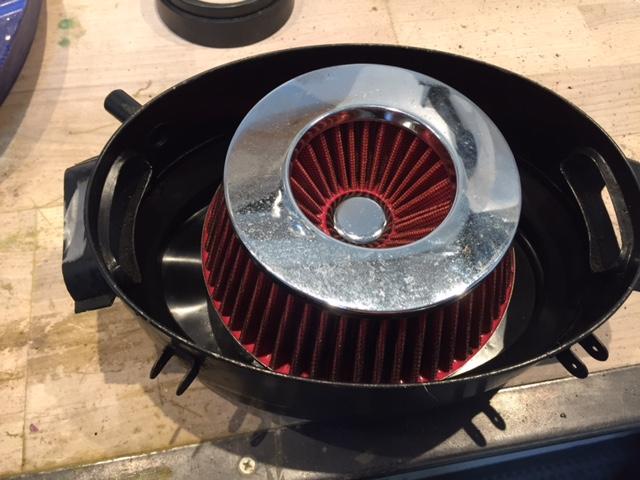
After the dyno run, where I found out that the carb hats were restrictive, I redid the carb hats to 2,5". Haven´t tried them yet. I will give it a try in the future. (sorry about the pic size
Last edited by flat4olsen on Tue Jan 30, 2018 3:49 am, edited 1 time in total.
-
grelland
- Posts: 990
- Joined: Fri May 13, 2005 2:47 am
Re: Update and improvements on my Oxy build
Meanwhile I have tested wrinkle-finish paint as an alternative to the hammerite, and I think I will go for this on the engine sheet-metal:
You do not have the required permissions to view the files attached to this post.
-
grelland
- Posts: 990
- Joined: Fri May 13, 2005 2:47 am
Re: Update and improvements on my Oxy build
Awesome.flat4olsen wrote: ↑Tue Jan 30, 2018 3:33 am Yes, it´s a modified stock air cleaner. I enlarged the snouts to 2" and installed a large KN style filter inside the air cleaner. It sucks from a hole underneath (where the carb used to sit).
After the dyno run, where I found out that the carb hats were restrictive, I redid the carb hats to 2,5". Haven´t tried them yet. I will give it a try in the future
Where are you located? I can se "hydroscand" on your hoses and your name indicates Scandinavia
-
flat4olsen
- Posts: 14
- Joined: Wed Sep 25, 2013 3:00 am
Re: Update and improvements on my Oxy build
Sharp eye I´m in Denmark. I love the wrinkle finish,- my wife hates me, when I put it in her oven, though