Hey there everyone,
Another quick question, This winter I am looking for someone in the Minneapolis area that can do some fiberglass work. I would like to fill some holes and cracks I have on the buggy and I really know nothing about how to do it myself. Is it something that I might be able to learn and do myself? They are just straight areas and not any type of custom work or curves needed to be done.
Any information would be great.
Have a great one,
Bugjamin
fiberglass work
-
dangerranger01
- Posts: 24
- Joined: Sat Jun 04, 2005 7:01 pm
Hey, I did some filling in holes and stuff on my Bugatti when I painted it. For small holes, you just use this fiberglass jelly from Bondo. Tape a small piece of wax paper behind the hole, mix the jelly up, then blob it over the hole, leave just a little extra to sand it smooth with the rest of the body. Just like Bondo on metal.
Then sand it after a few hours smooth. Remove wax, and you are good for primer and paint. I would have laid more primer if I would have known this: In the right sun light and right angle, you can barely see where i did this on fixing some spider cracks. Dremal out a small layer and fill in like above.
For big hole holes you will need to use fiberglass mat. Mix the epoxy up, brush some on the prepped area, then put the mat down, and brush more epoxy on top of that, getting rid of bubbles, wrinkles, etc.
If you got cracks cracks (not spider cracks in the paint/gel coat) I can not help you there.
This is what I did on my fiberglass car over the summer, and I am only 16. It is not that hard at all, just be have patients and talk to your local auto parts paint guy, he helped me a lot. Also check internet searches, too, they help.
-
bt
- Posts: 142
- Joined: Wed Jan 28, 2004 11:24 pm
Fiberglass repair is very, very easy. If there are just a few pin holes you can use regular (or fiberglass) body filler. Dont keep sanding thru the gelcoat, that will only get you more pin holes. If you have a crack you need to sand the edges down (pass the gel-coat) and just lay the saturated mat/cloth onto and into the crack. The top piece(s) should extend past the crack a little. Dont worry about it being too thick because you are going to sand it flush anyway. If the cracks are that deep you should do the underside as well. You can do a little at a time so you can get used to using the products. If its a stress crack you can drill a hole at each end to stop the crack and then glass over that. New fiberglass will bond with old fiberglass as long as there is nothing in the way ie: old paint, bondo, dirt, etc. A gallon of poly resin is only $30. 3 sqr ft of cloth or mat is about $5. I dont think you will need a gallon. BE CAREFULL when its time to sand, wear a mask, gloves and long sleeves. If not, you will itch for the rest of the week. Without looking at what you want to repair, I dont think you will spend more than $50. and a weekend to do it.
-
bt
- Posts: 142
- Joined: Wed Jan 28, 2004 11:24 pm
Go to a book store and look up fiberglass repair, just get a visual on what the other guy and I are talking about. Yes, it is as easy as we say. There is a book by Tex Smith or John A. Wills. The Wills book is a good book about building complete bodies but its from the 50s. The Smith book is more current.
I have been playing around with 'glass for years, I have experience.
I built a Porsche 356 A style front end for my Ghia. Sorry no pictures yet. (I'll post when I get it in primer). Im in Chicago and I am working outside so I have to shutdown this project until spring.
Bryan
I have been playing around with 'glass for years, I have experience.
I built a Porsche 356 A style front end for my Ghia. Sorry no pictures yet. (I'll post when I get it in primer). Im in Chicago and I am working outside so I have to shutdown this project until spring.
Bryan
-
bugjamin
- Posts: 137
- Joined: Thu Jan 23, 2003 12:01 am
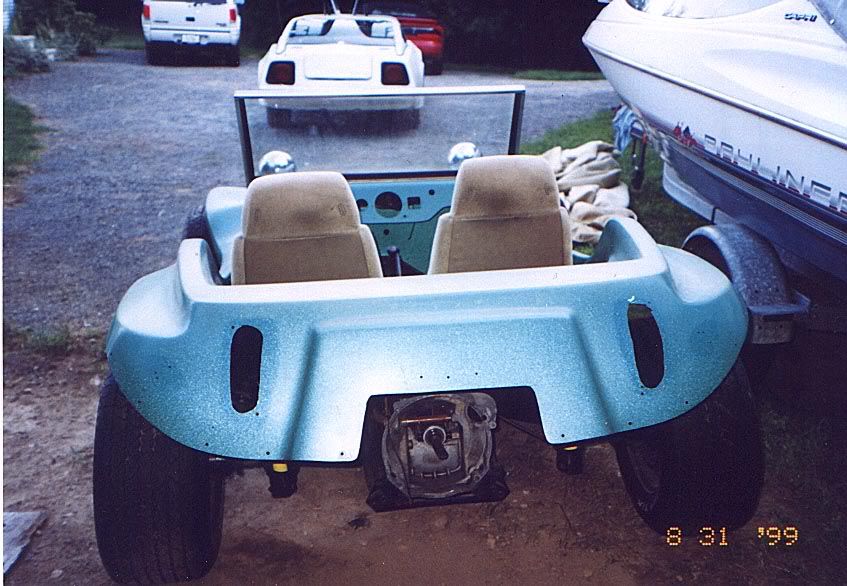
So you guys are all telling me that it is really that easy? I also have another question for you, I need to fill two quite large holes in each side of the buggy, on the inside where the past owner made them to fit larger than needed seats into the car. They are about a foot to a foot and a half accross and about a foot tall. Same technique for something like this? I wish I had pictures to show.
I would also like to glass in the dash area and drill holes for the gauges right into the fiberglass, is there any extra support needed to hold the gauges or is it ok for the gauges to hold right to the fiberglass?
I'll go to the bookstore and find some information/books to buy so that I know what I am doing.
Shoptalkforums is great for getting people information thta they are looking for, and it is the people that make it great.
Have a great one,
Bugjamin
-
letterman7
- Posts: 484
- Joined: Thu Mar 25, 2004 8:17 pm
Large holes you can patch basically the same way. I usually take a piece of rigid cardboard or really thin laminate, like you find on countertops, and tape it underneath the hole you want to patch. Sand the edges of the hole to provide some grip, and fiberglass away. If the cardboard or whatever is going to be seen, you can either try to peel it away, or just sand it off.
Dashboard gauges can install directly into a fiberglass dash. Just don't forget to run a grounding wire to each one.
Rick
Dashboard gauges can install directly into a fiberglass dash. Just don't forget to run a grounding wire to each one.
Rick
-
bt
- Posts: 142
- Joined: Wed Jan 28, 2004 11:24 pm
The same skills that are used for small holes will work for large holes. I have used cardboard but I like to use vinyl floor tile. Poly resin wont stick permently to it. The tile will stick to whatever shape you are making. If you have compound curves the tile works better than cardboard. I only use the tile to make the part. After it dries I remove the the tile(or cardboard) then I glass my new part to whatever I was fixing. This takes longer but the new part that I made looks much better because there is not anything attached to the inside of my new part. There are lots of other ways to make 'glass parts. Some people use sheet foam (or 2-part foam)then shape the foam with sandpaper and bondo. Sheet foam is kind of expensive if you are only making a small part or a simple shape.
One more thing, whatever you make dont build the part in one step. Do a thin layer of mat/resin first. Then once its dry you can add more layers if needed. If you try to 'glass a vertical object thats too thick, the wet 'glass will slide off your object because of its weight.
One more thing, whatever you make dont build the part in one step. Do a thin layer of mat/resin first. Then once its dry you can add more layers if needed. If you try to 'glass a vertical object thats too thick, the wet 'glass will slide off your object because of its weight.
-
jspbtown
- Posts: 88
- Joined: Wed Nov 20, 2002 12:01 am
There is nothing better then glass to play with. Use gloves and get your hands into it. Like what has been said here, use a backing material, get a layer in there and let it dry. Then come back, sand the first layer to give it some bite, and add more. I also like to taper all edges. If you have a gauge hole then ground about 1" all the way around the hole so the outter area is just below the surface, but the inner circle if almost paper thin. The cut aseries of circles from the matt and add them on, starting with the largest to the smallest. Probably about 4 layers or so...maybe 5. Get all the air bubbles out. I use the cheapo white bristle brushes you can get for about 50 cents. Your gonna toss them each time. Read the directions on the resin and make appropriate adjustments for weather and humidy (ie: shorter drying times for hot day with low humidity). You can add a larger section or two on the back for extra suport because it won't be seen. For cracks, again taper the crack towards the middle. The larger the taper the stronger the repair. I use a grinding wheel to cut it down quickly. Wear a mask for the dust! For large sections, make a repair patch on a large flat surface. Cut several pieces of matt (5 or 6) slightly larger then your repair section. Place a large pice of saran wrap on your flat surface. Then matt, soak with resin, then matt, then soak with resin, etc etc. Once you have your layers place some more saran wrap on top and place a pice of plywood on it to keep it from warping. When it dries you have a patch panel to work with. Cut it to size, taper the ends, and use a coupe pieces of wood screwed to either side of the repair and the panel itself. Once it is secrured, then attach it with strips of matt. Remove the screws when dry and use body filler (I like Rage Gold). So much fun fo so little costs. PM me if you need any help. I have rebuilt several trashed bodies and would be happy to send you some pics.
-
jspbtown
- Posts: 88
- Joined: Wed Nov 20, 2002 12:01 am
At work know...
So I can post some pics. Before these cars I had never worked with glass before. This is a CMC speedster that suffered some significant front end damage.

I bought a new fender from Intermecanica:
[/img]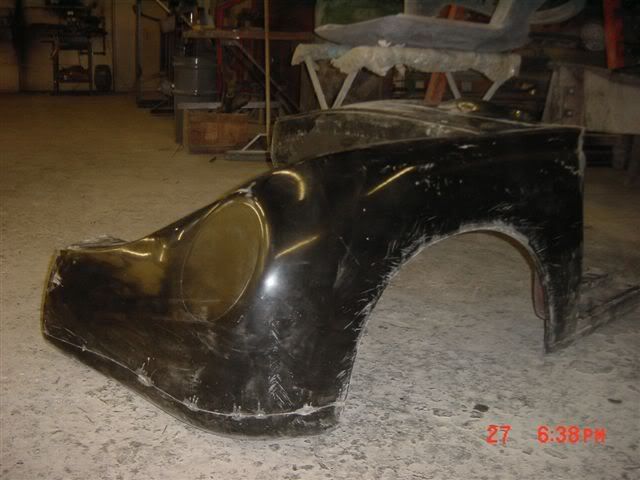
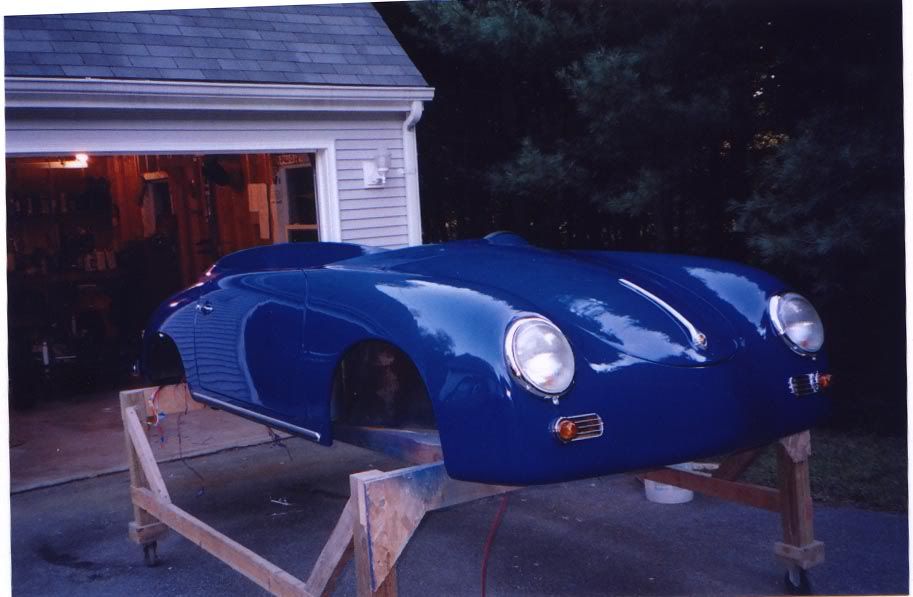
Some fiberglass work and paint and this is what I enede up with:
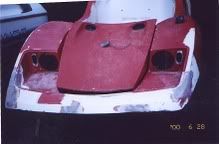
I also did a Sterling that had some front end damage as well:
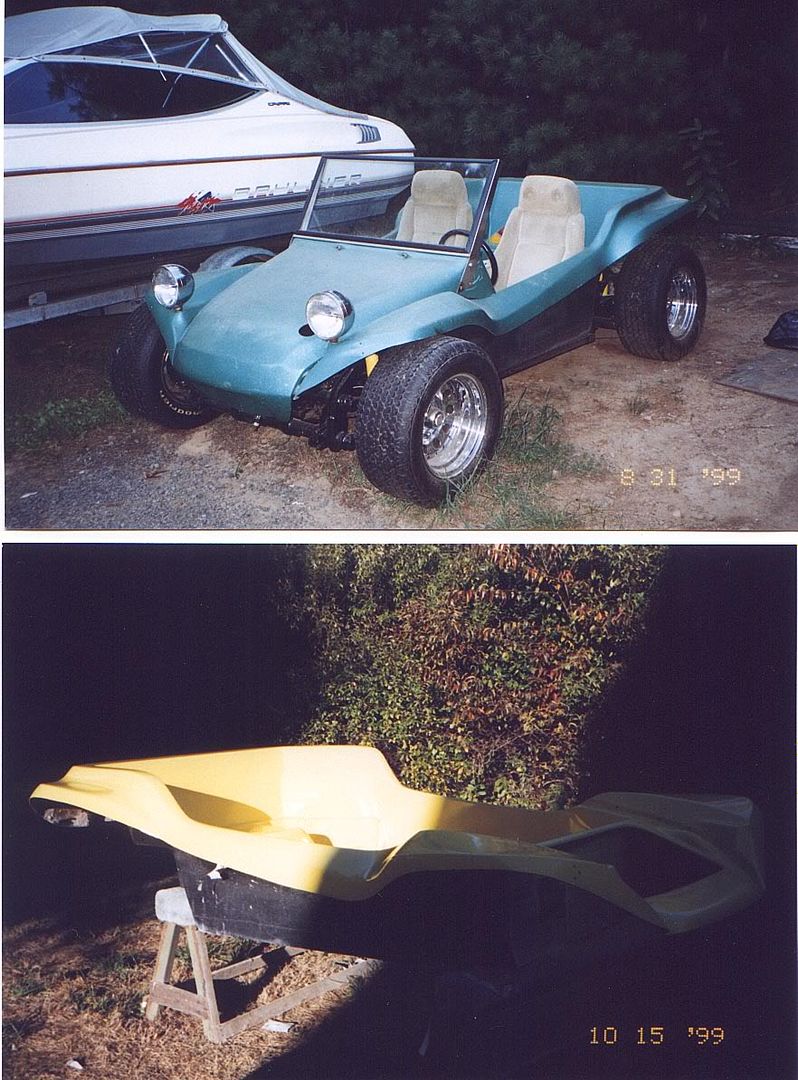
That came out like this:

So go ahead and dig in!
I bought a new fender from Intermecanica:
[/img]
Some fiberglass work and paint and this is what I enede up with:
I also did a Sterling that had some front end damage as well:
That came out like this:
So go ahead and dig in!
-
bugjamin
- Posts: 137
- Joined: Thu Jan 23, 2003 12:01 am
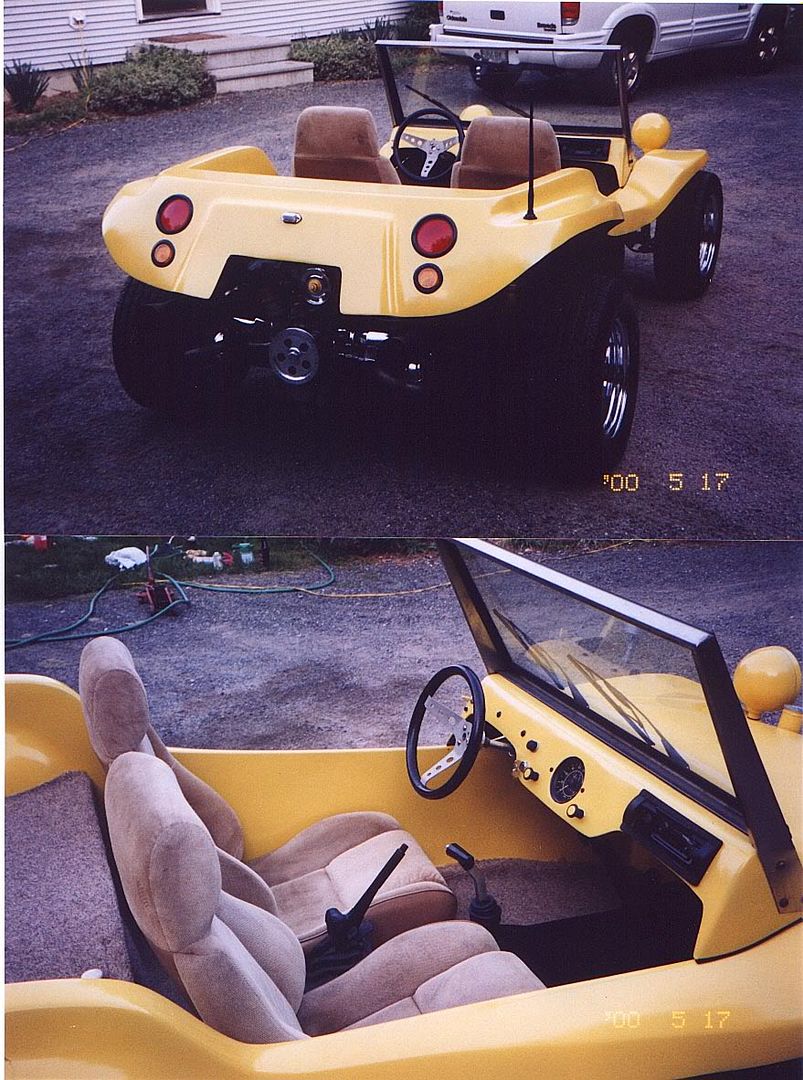
I love the tail lights on the yellow buggy that you have. Very nice. Thanks for all o fthe information. I look forward to getting the time to work on the body and getting it all cleaned up.
Where (what type of store) would I go to buy some quality fiberglass and everything needed to do a project like this? What is quality fiberglass? How is it measured?
Thanks,
Bugjamin
Where (what type of store) would I go to buy some quality fiberglass and everything needed to do a project like this? What is quality fiberglass? How is it measured?
Thanks,
Bugjamin
-
jspbtown
- Posts: 88
- Joined: Wed Nov 20, 2002 12:01 am
The tail lights are el-cheapos from NAPA. They are nice because they are dsigned to work in a rubber grommet so they have a grounding wire which is needed in a fiberglass buggy. When I did this buggy I just picked up the fiberglass supplies from home depot. If not there, usually walmart, or any auto parts house will carry resin, matt, and cloth. Use the resin relatively quickly, it has a short shelf life.