nilza wrote:I was once told by a baja guy that "baja bugs never die, they just evolve" This i know is true in my case and as i look around this site, I know this rings true to alot of people.
I have had my Baja for about 5 years now and have gone and done some far out places (I have the 3 largest sand islands in the world on my doorstep) It has gone though countless changes and is on its way to its third incarnation now, second by my hand (or grinder
)
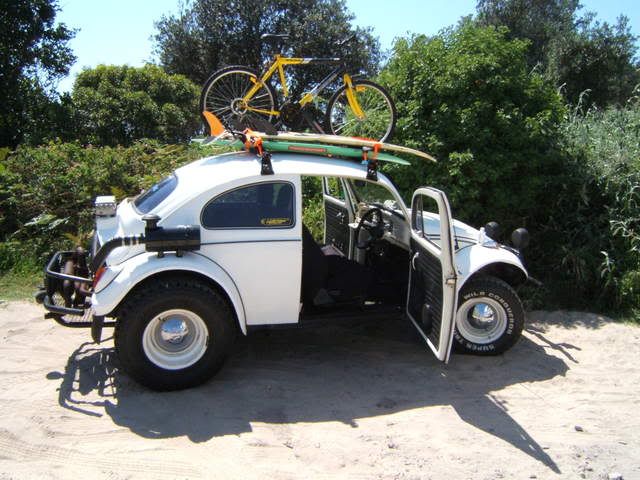
I was going to start i build thread for this lastest, but build threads are long and drawn out, and i know you guys love ALOT of photos. So to fill in the space i will start when i bought it.
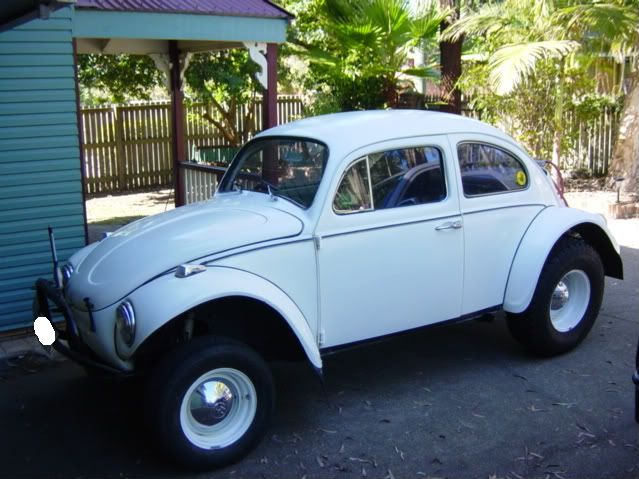
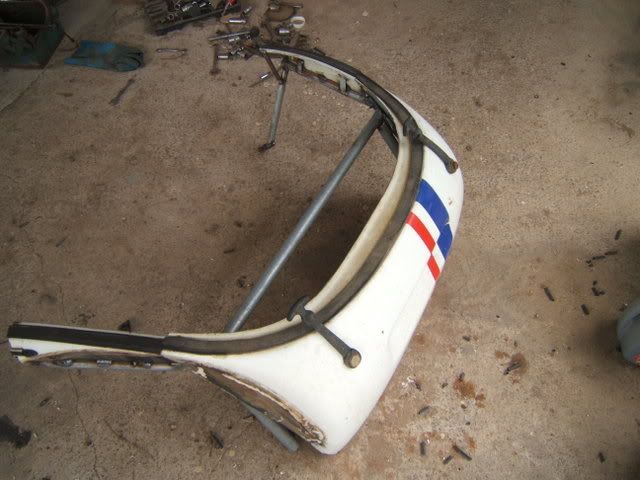
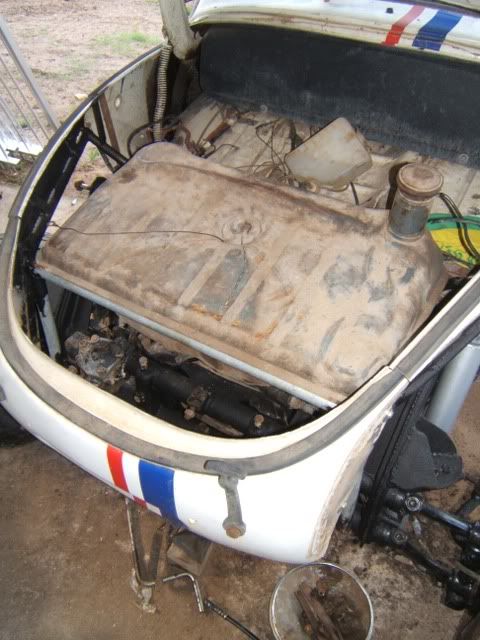
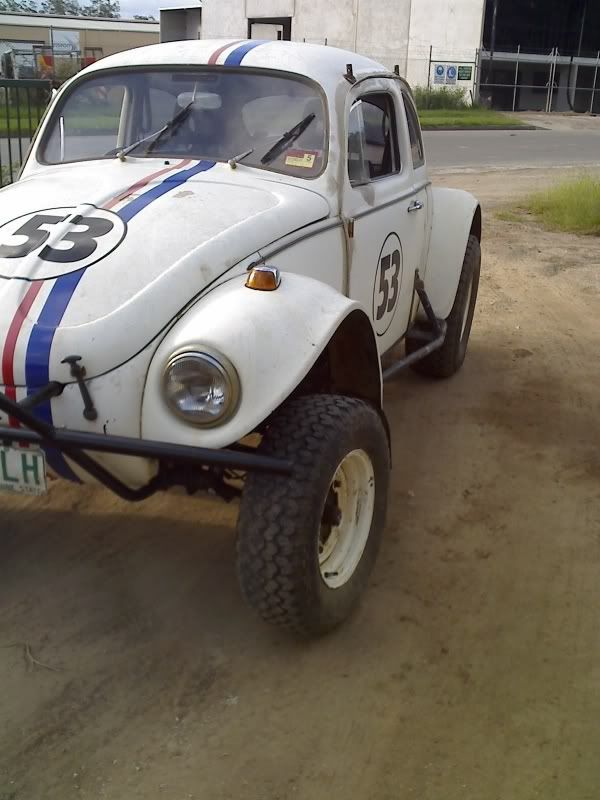
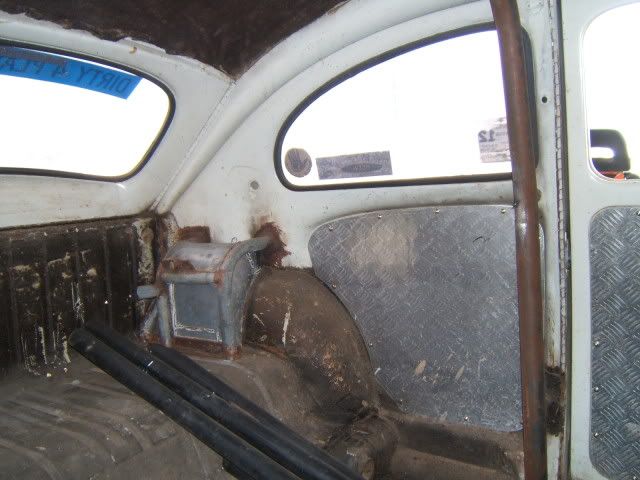
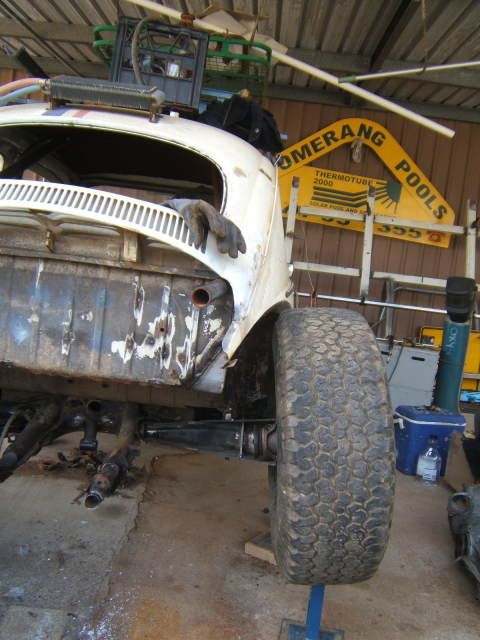
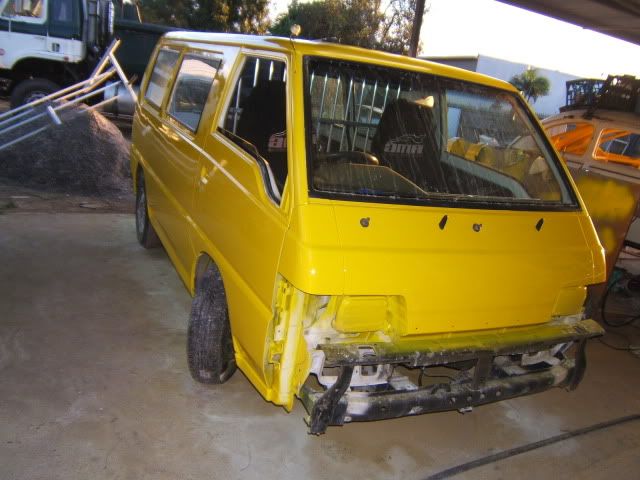
nilza wrote:yeah, looked real clean when i bought it. unfortunately it hid alot of nasty surprises, the reason it's a baja is it had a massive front and rear ender. The frame head is nothing but a whole lot of strips of metal trying desprately to hold together twisted OG chassis and the right rear quarter is constructed out of inch thick bog. (But didn't find that out till later)
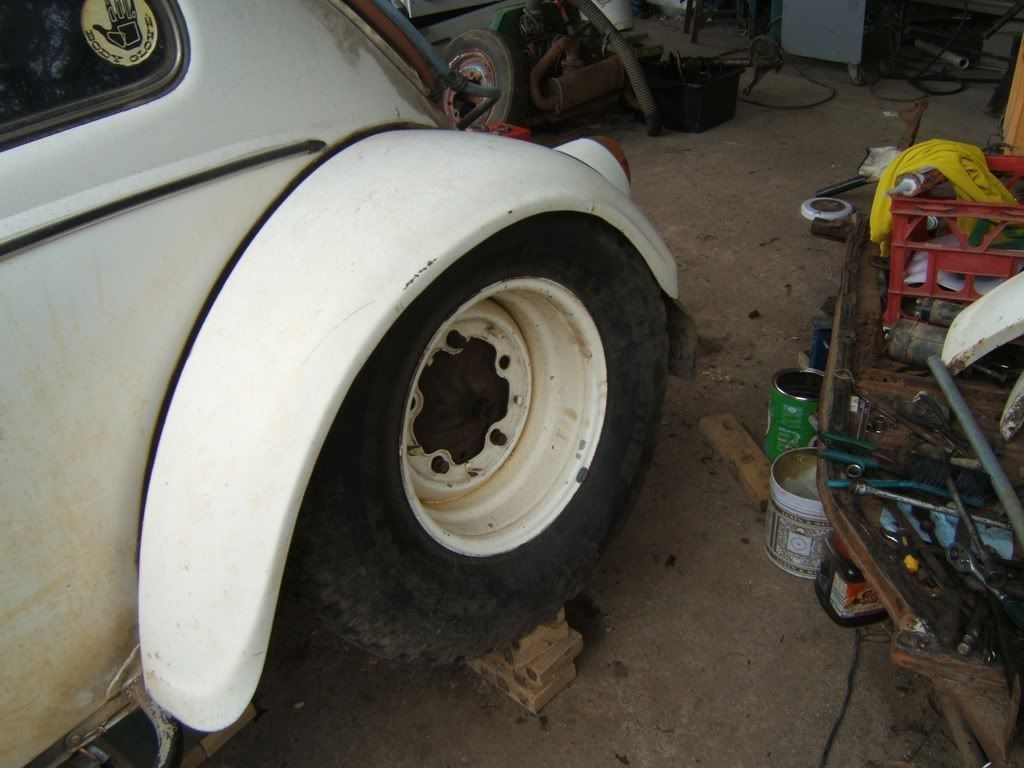
The rims are rebanded old smoothies, the front ones are actually 14's. which leads me to the first mod. Decent front tires! 195/60s just don't cut it in the sand.
The guys running reasonably stock baja's should try these, they are 27x8.5 14s, are only about an inch taller than standard tires, with a decent footprint, THEN . . . .. . . . pack up my gear and go on a short holiday in the new bug!
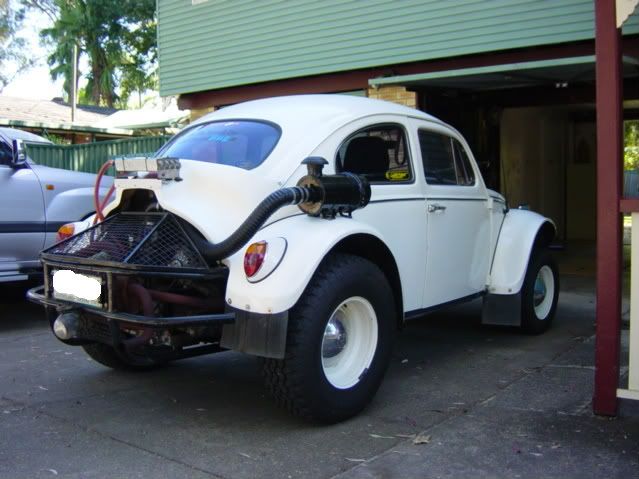
And the air cleaner is awesome, best working thing on the car, still have it today. unfortunatly cracked the fender up pretty bad
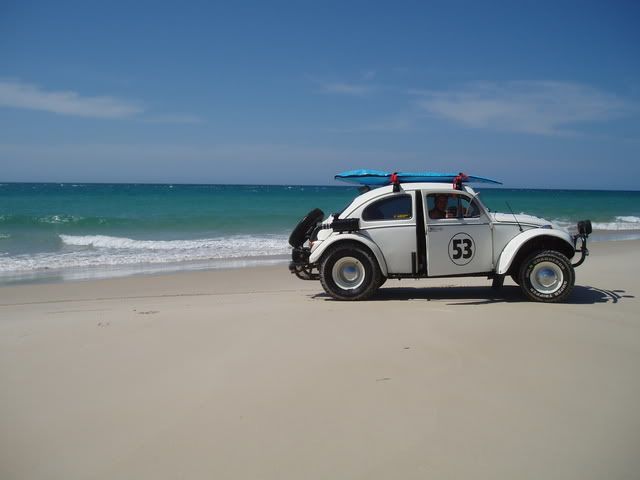
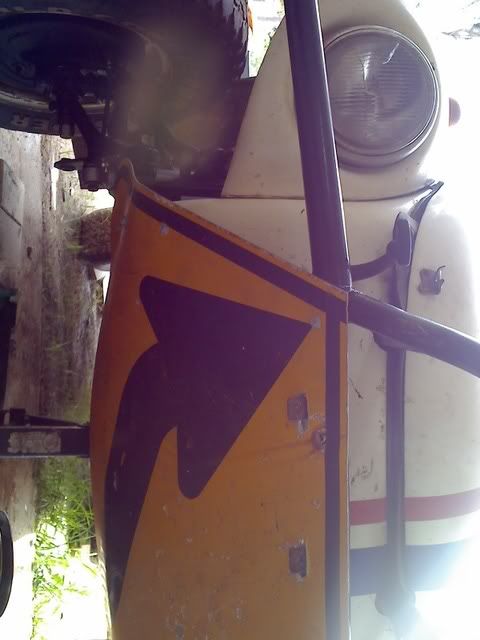
nilza wrote:Over the next weeks and months the beetle got plenty of drive time, and at some drunkin' moment we where playing with a mates vinyl plotter/cutter . . .. . . . . .and VOYLA! baja herbie! (some people think its dumb, but the looks on kids faces on the beach or in the bush is priceless)
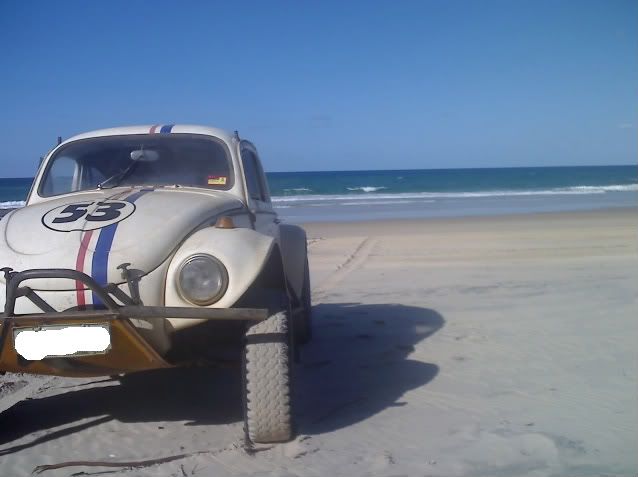
Anyways,back to the beach -

nilza wrote:yeah they are pretty heavy, and mine is braced from underneath now to the wheelwell because of that.
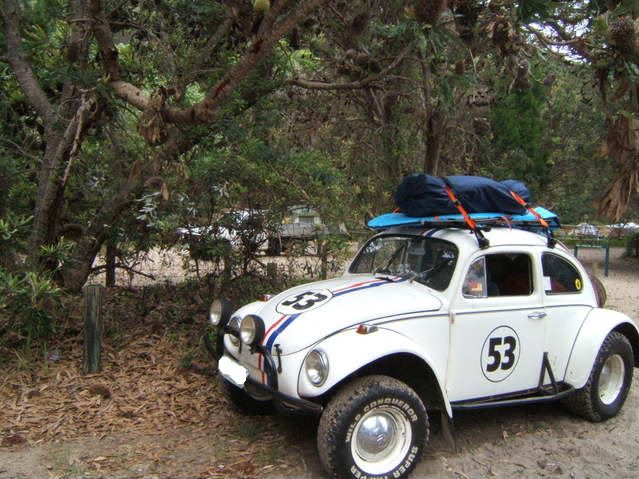
Ran round pretty much like in the first photos for about 3 years before i did too much on it, discovered how well these little buggys run on the trails aswell, much harder on the car though, lost hucaps, spotlights, shiny paint turned out to be rubbish and started to crazy crack and peel everywhere, the carpets and door trims turned too rot after too much water and mud, bearings started dieing from the same, about the time the rears bearings (swing axle) tore to pieces i decided was time to do abit of upgrading.
nilza wrote:yfz450 - I have so many hundreds of photos i could clog up the samba site with them, am just sharing a few of my favourites so you can see the car change
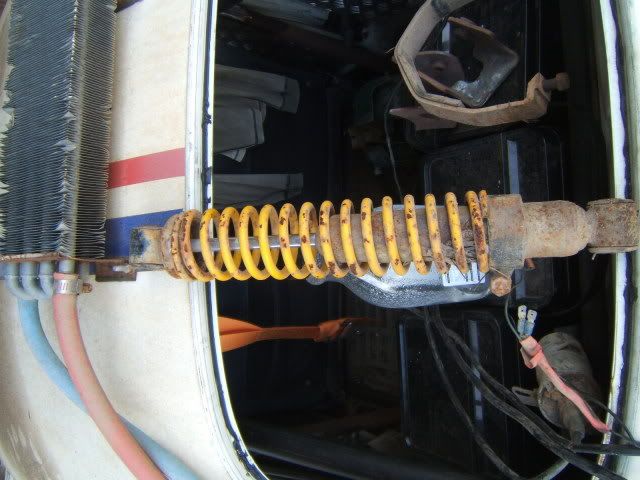
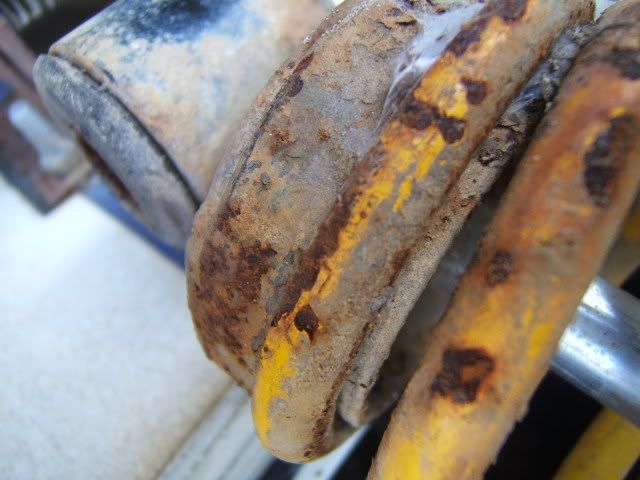
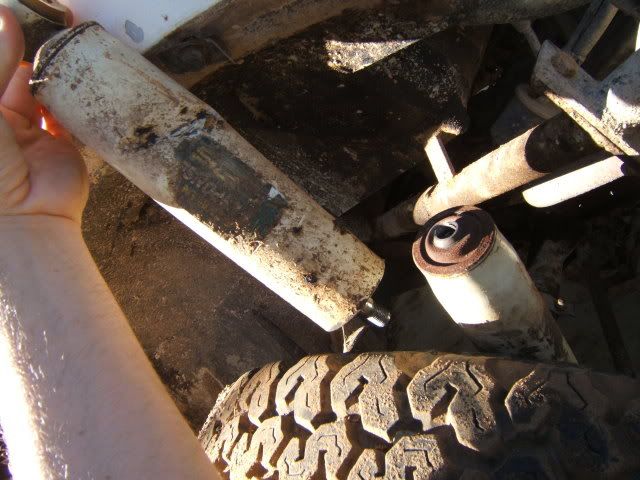
dustymojave - these are all pre spindle upgrade still linkpin/long swingaxel. the only suspention upgrade it came with are rear coil overs (the penguin would love these, are actually monroe gas shocks with the covers cut off to make room for coils and homemade holders) will get a picture next i dig them out of the parts bin.
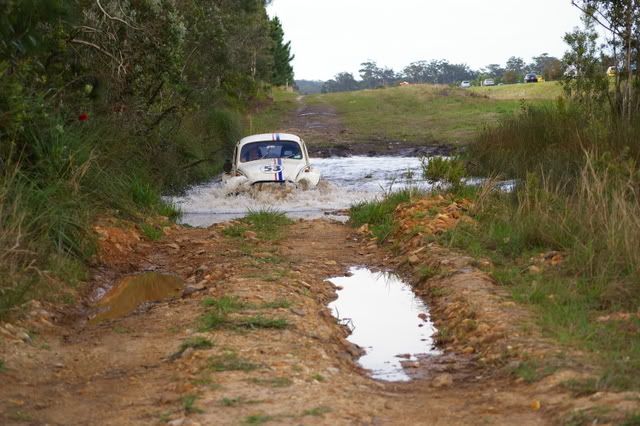
Have spent alot of time crossing water, the fire roads around here turn to rivers very quickly with a good down pour. . . . . .and there really is not a big difference between the combi and country buggy spindle untill you have them side by side, then it is really obvious (will take a photo wheni can get hold of a combi spindle just to show everyone the difference)
all that water and mud really take there toll on all your moving parts. was going to reco and reinforce the beetle spindles till a mate came across these. Will go into the photos from my first lot of upgrades in the next few days, till i put those together - here is some more water and an arty beach one
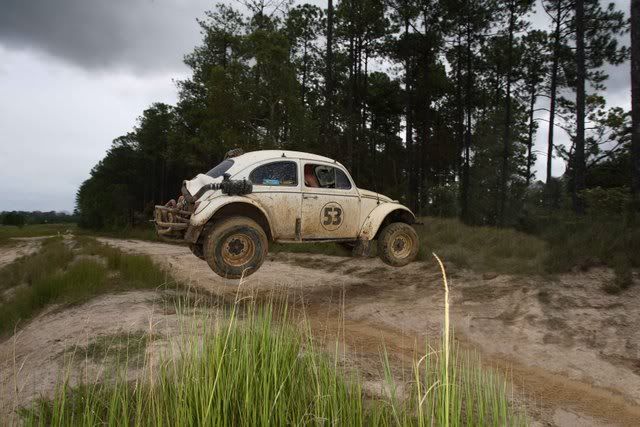
PS - too many jumps with stock suspension in hard on your body! - took 6 trys to get that photo

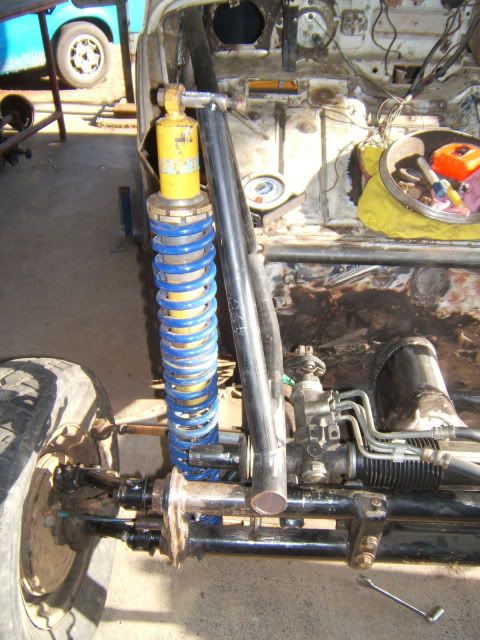
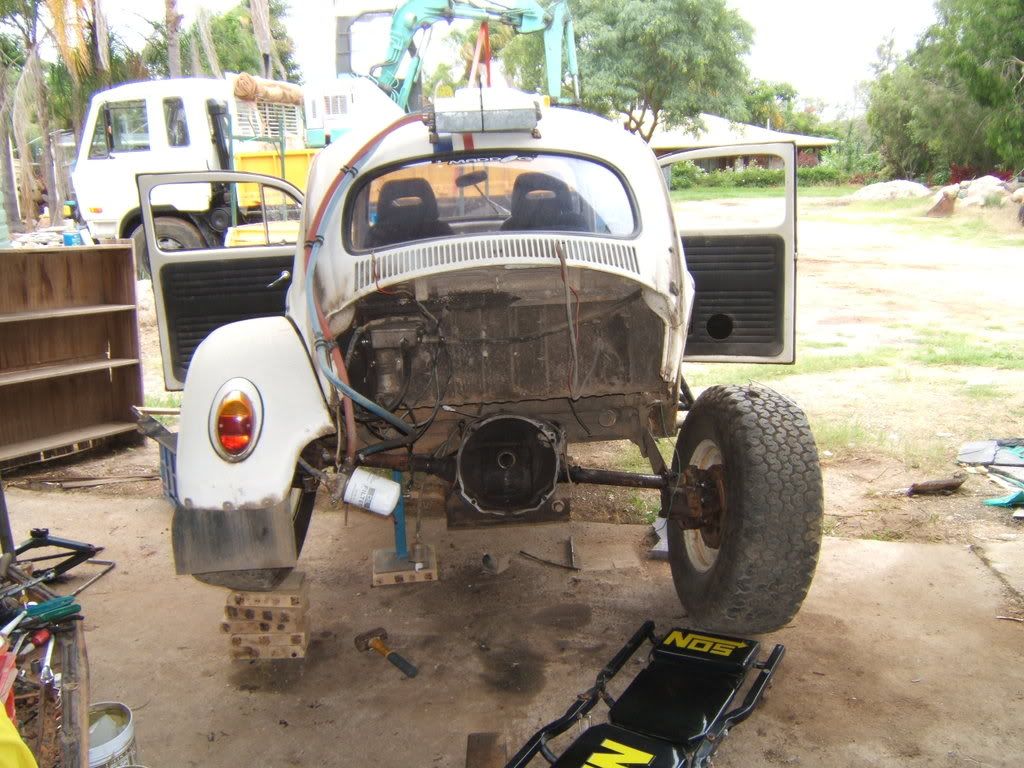
nilza wrote:So as i promised, it was time to upgrade (warning . . . . .this first build is a bit of a bodge up)
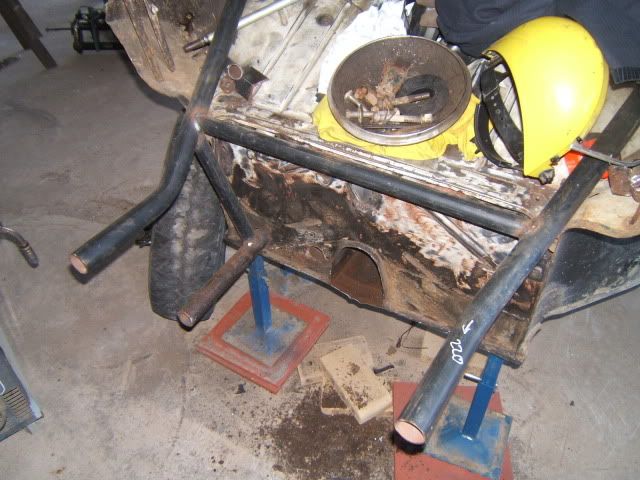
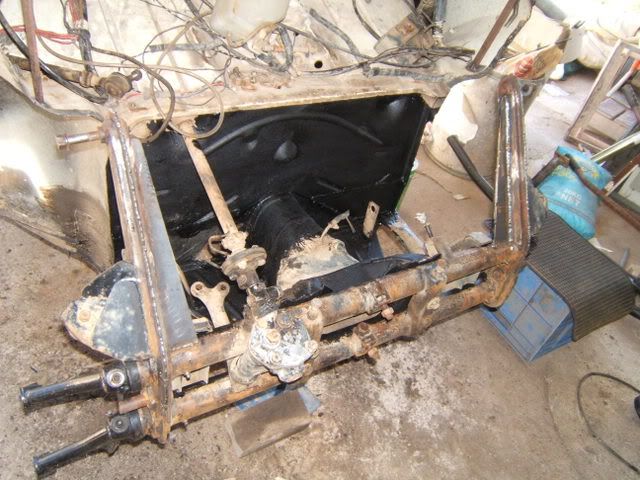
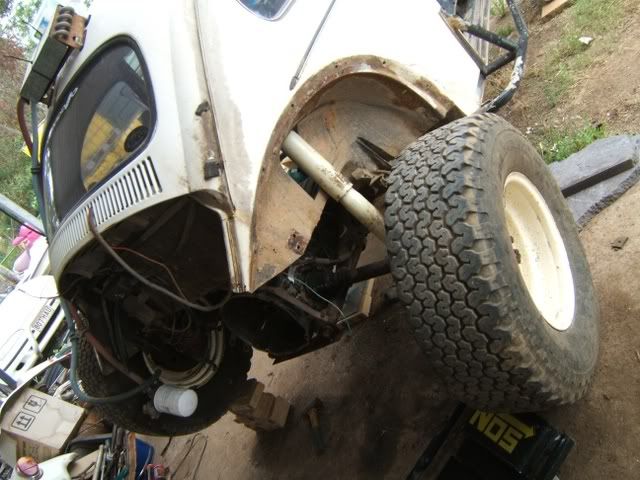
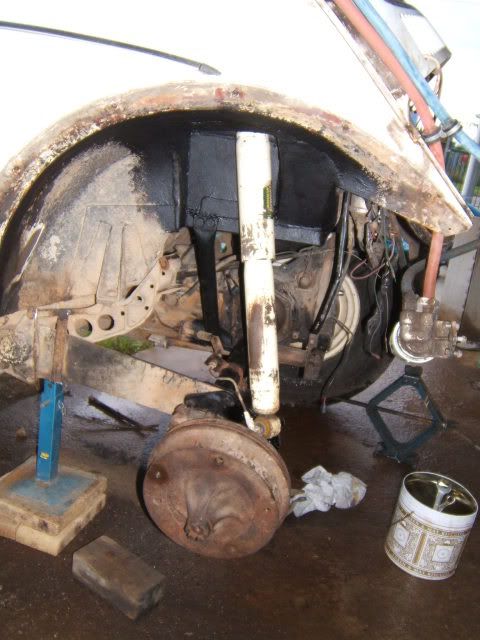
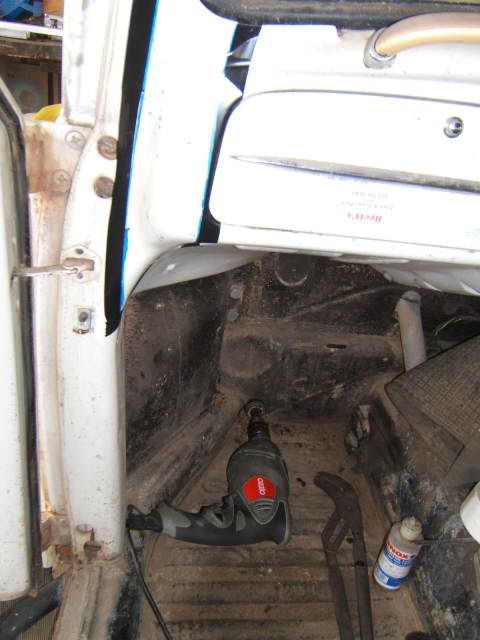
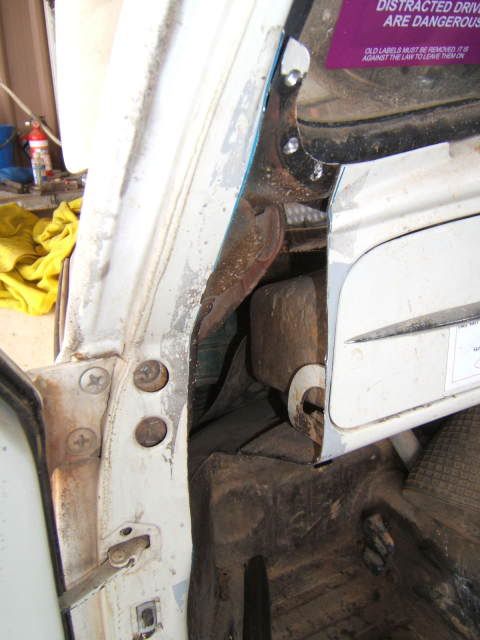
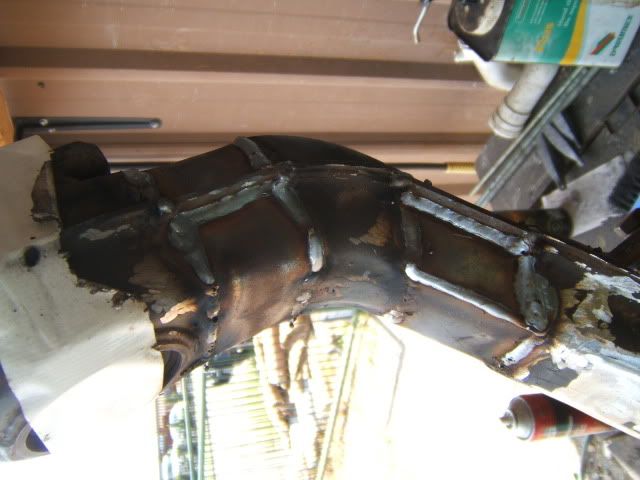
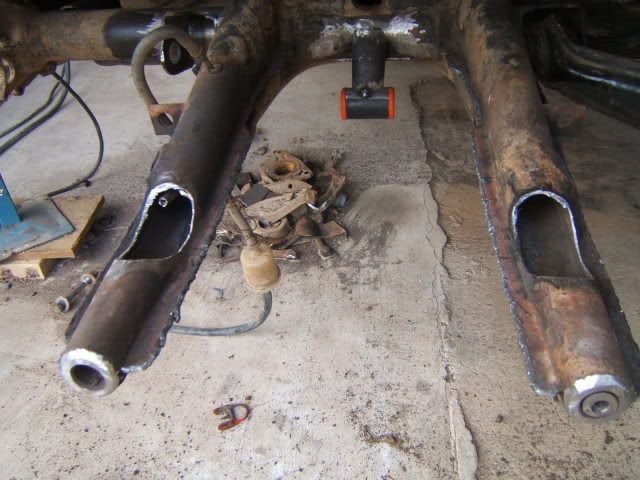
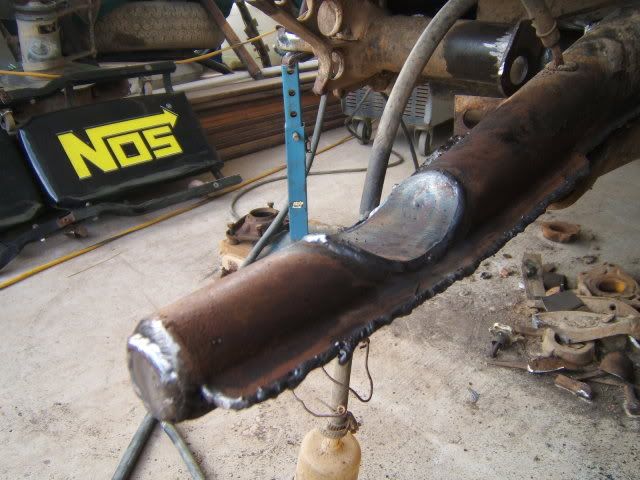
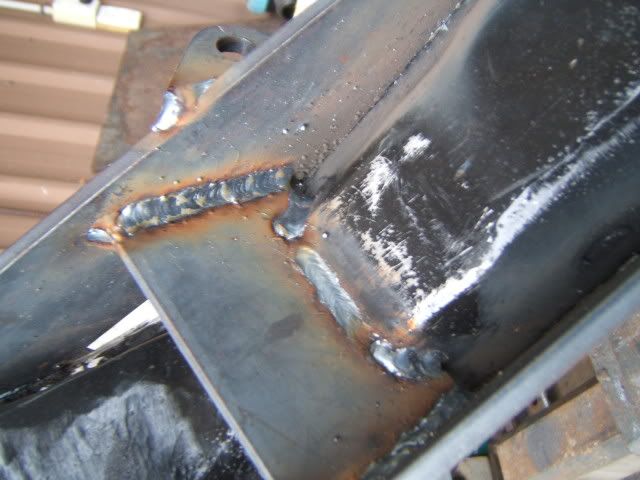
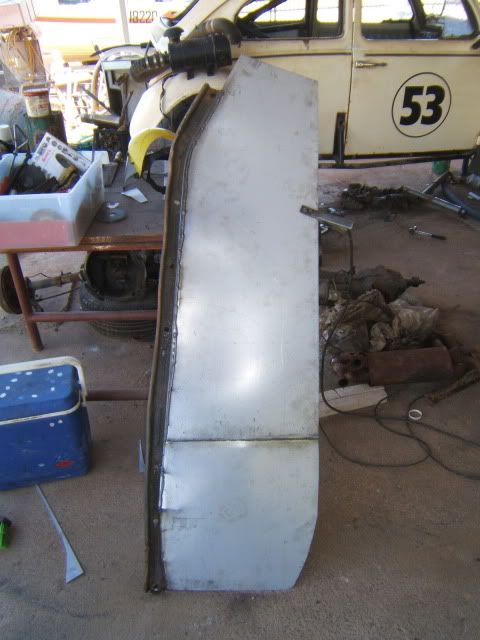
First thing is first i cut the front off to make it more accessible and make room for longer shock towers - for those who look at the photos and wonder why not just use a one pce front? though you can get then here is austraila, but they are imported from the states and the asking price is $1400 and has no compliance so is not legal for the road. i swear when put it back together you can barely notice
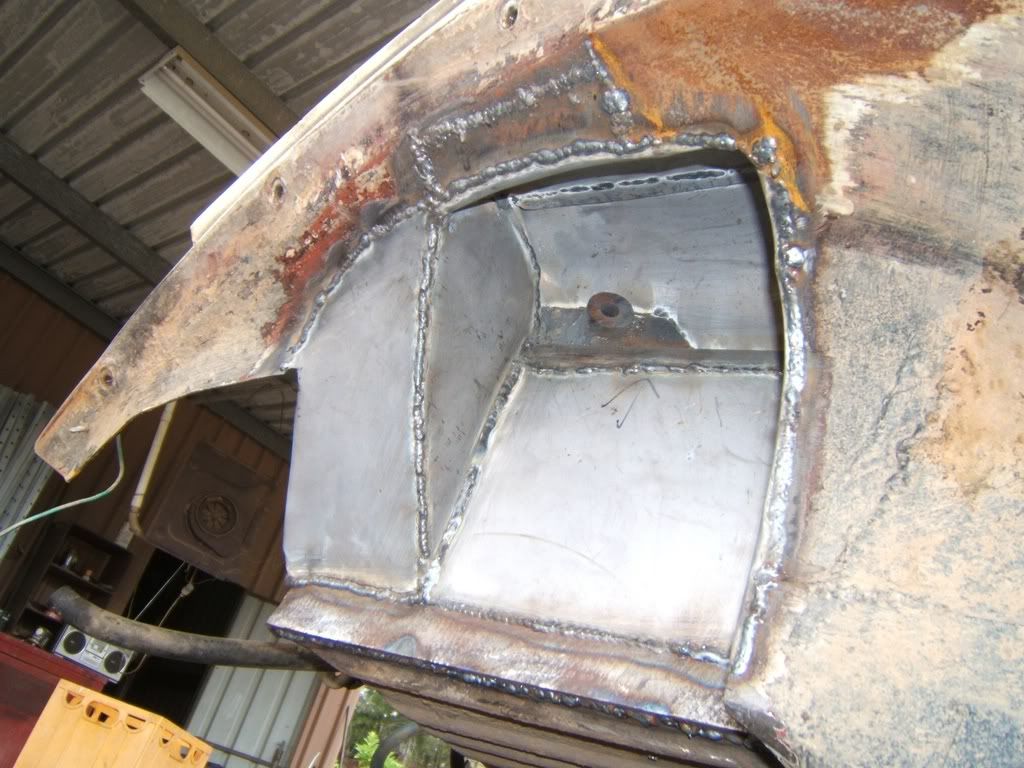
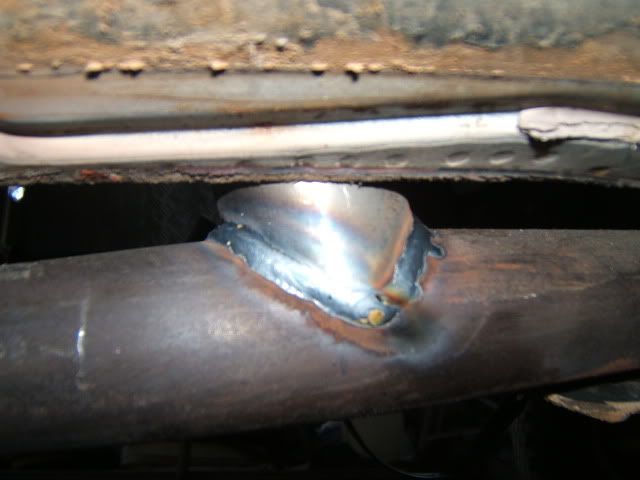
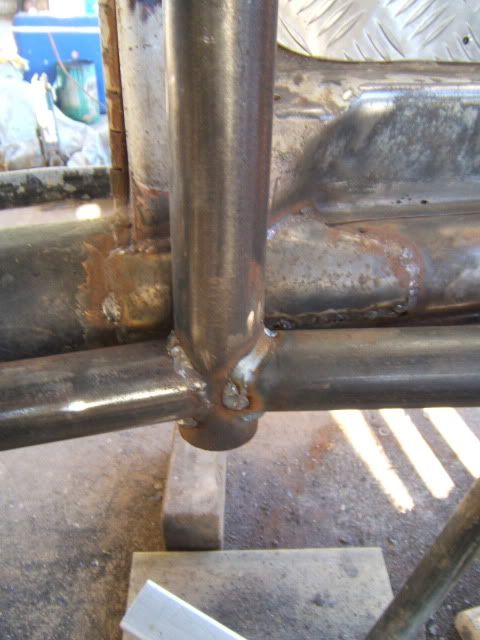
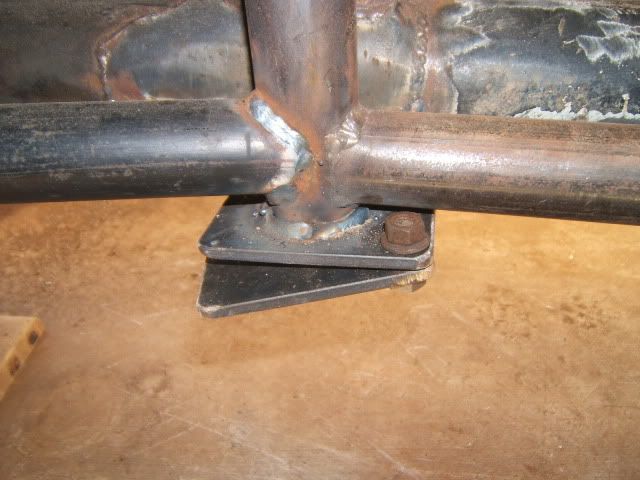
extended shock towers are braced internally and externally and skinned with OG metal, Why? because we are not actually allowed to modify suspension parts. so i make it look OG and lie
hows my welding?
the place where i work on/keep the car is not mine. . . . . can't take credit for the mess, the cleanest part in the yard is always 2 feet around my bug


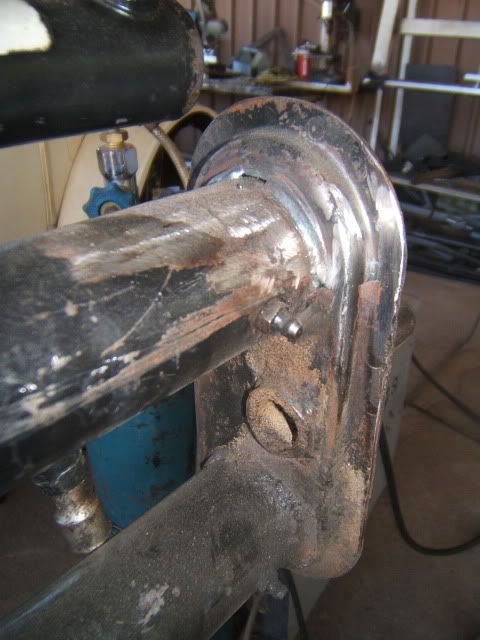
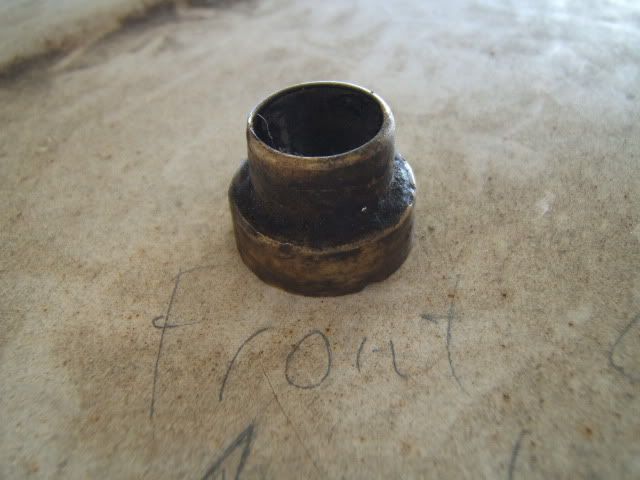
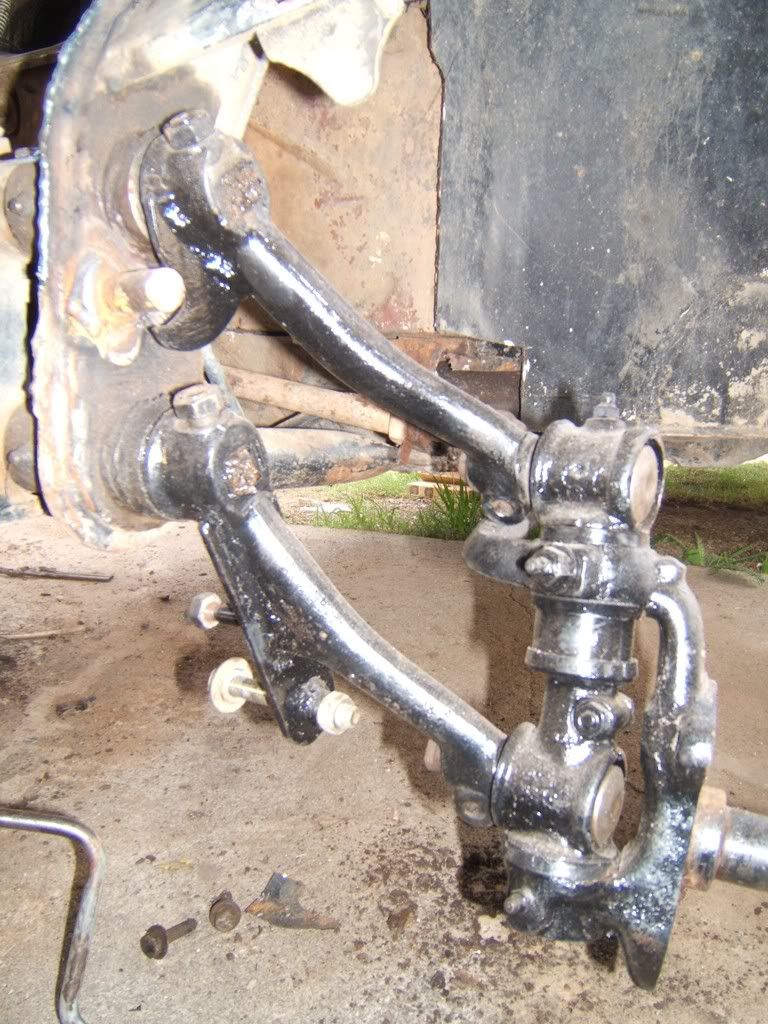
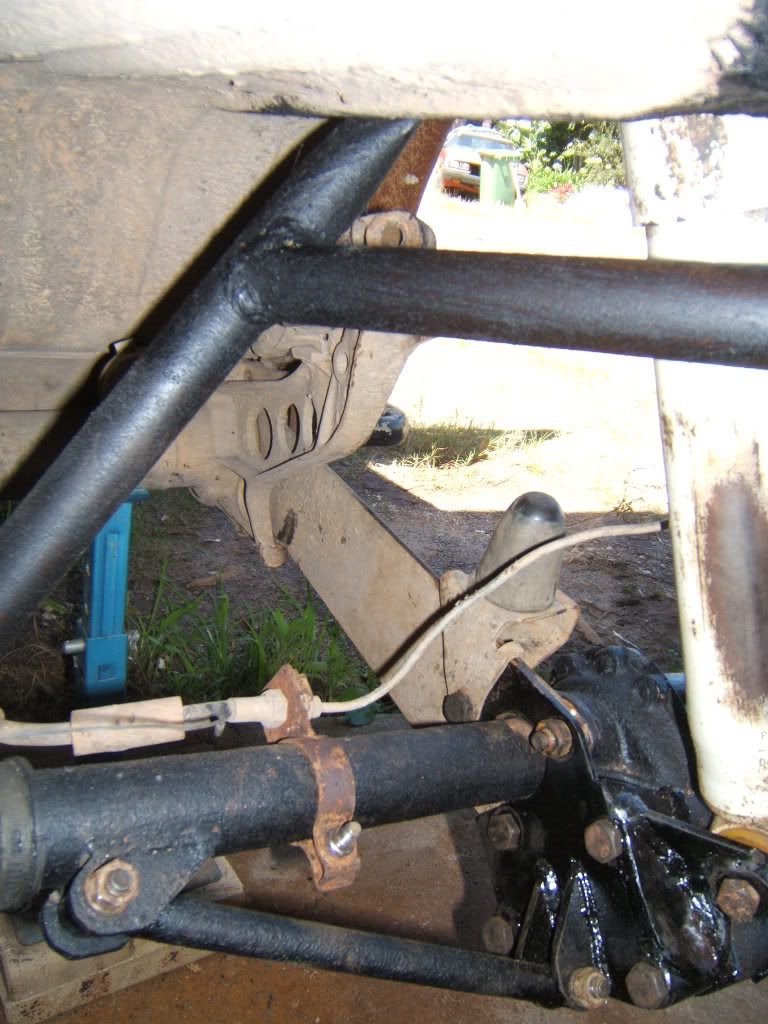
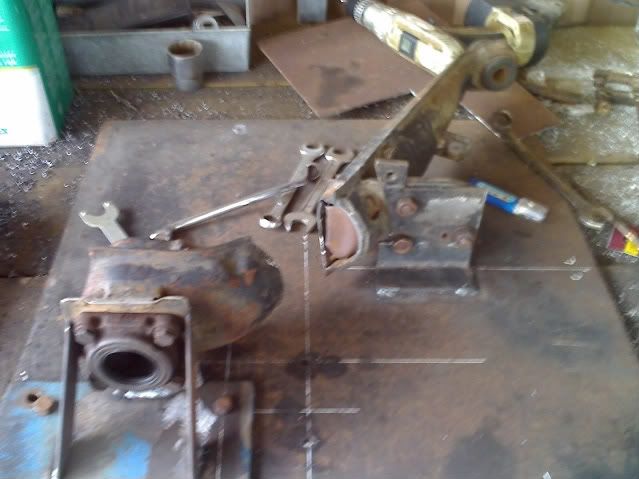
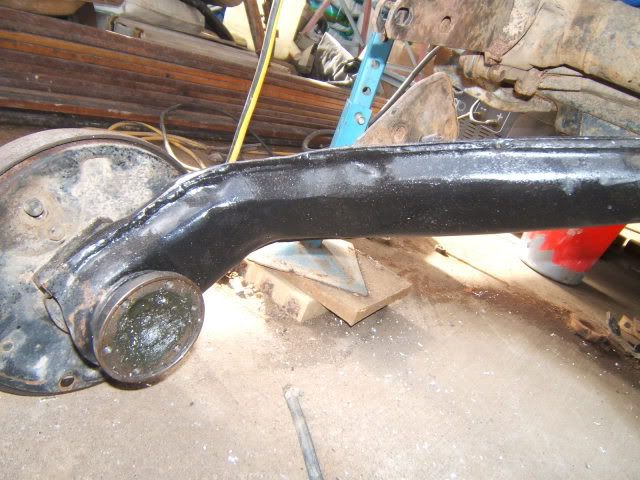
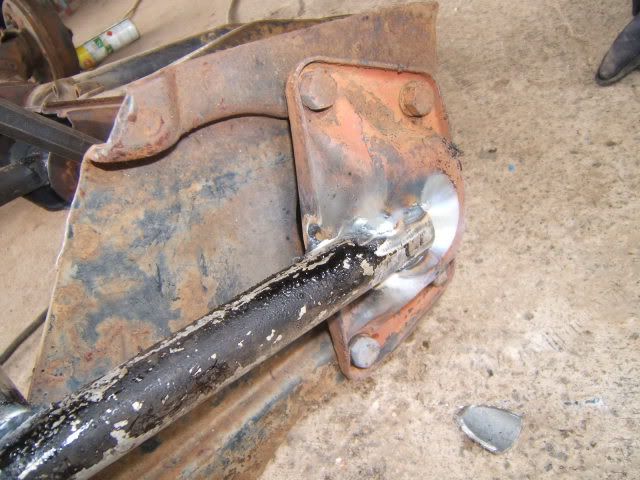
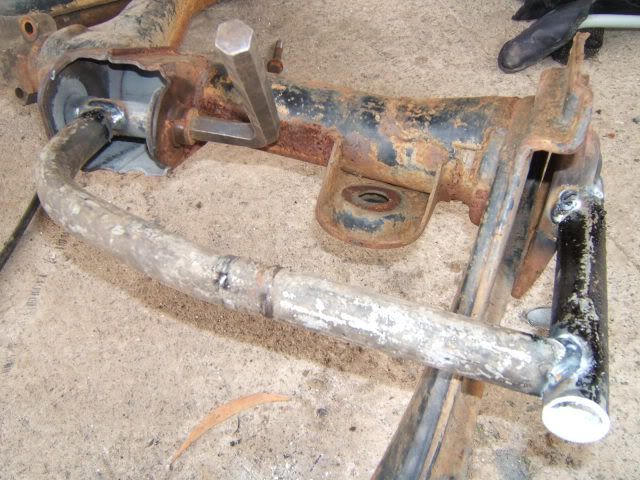
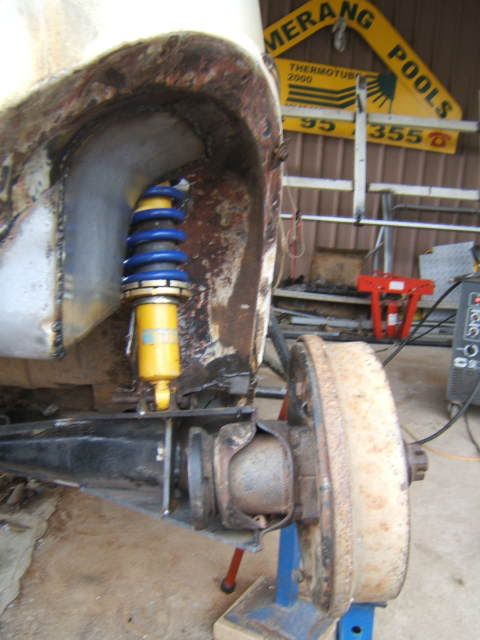
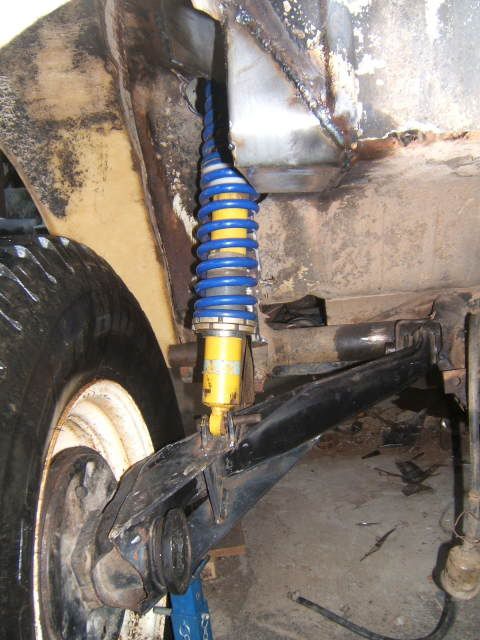
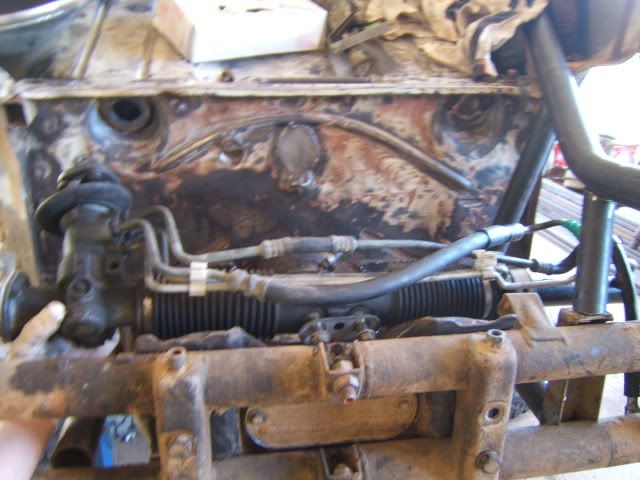
nilza wrote:Now the good bits - country buggy spindle (for those who still haveno idea what these are, is basically a kombi spindle with the steering arm forged differently
- New brakes
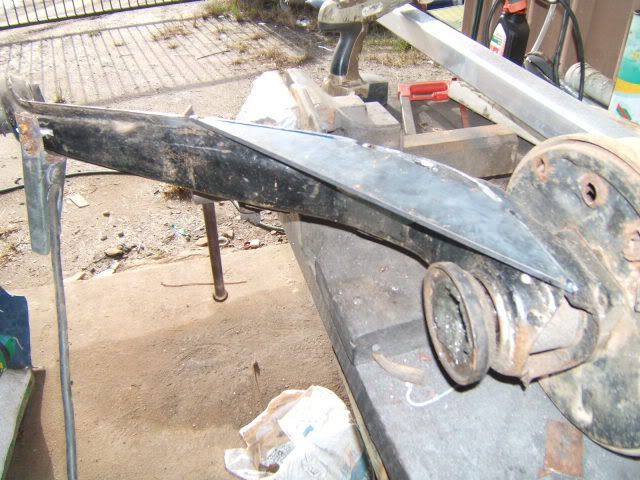
- gas baywindow shox, brace the beam top and bottom and have a pretty meaty set up (compaired to stock anyway)

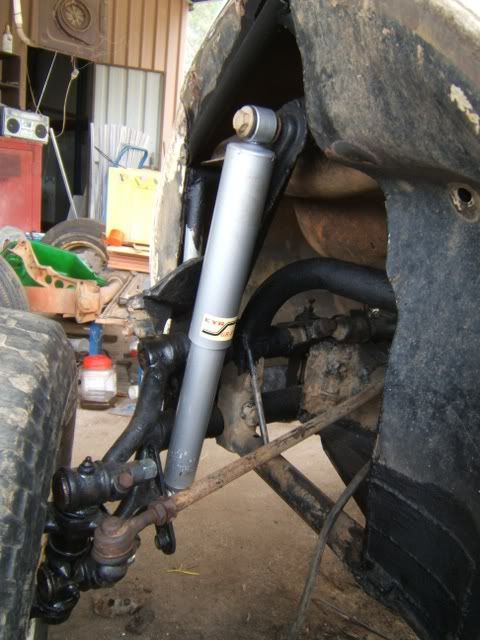
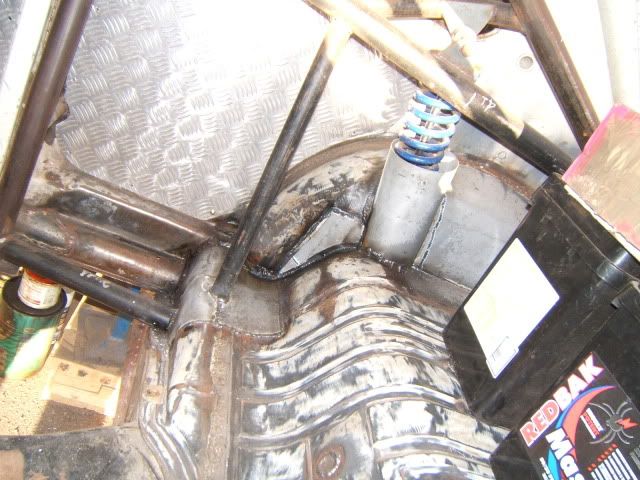
nilza wrote:The fuel tank also got spun around and raised up abit to stop the tie rods hitting the bottom of it.
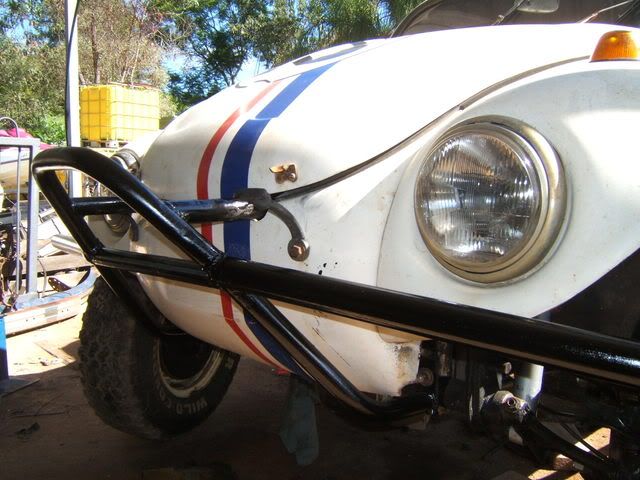
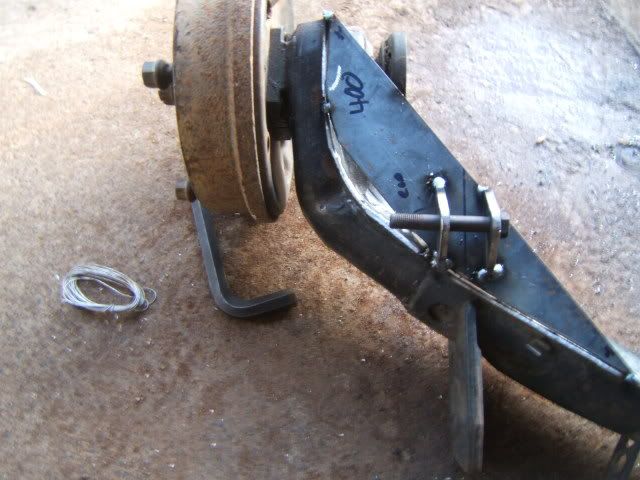
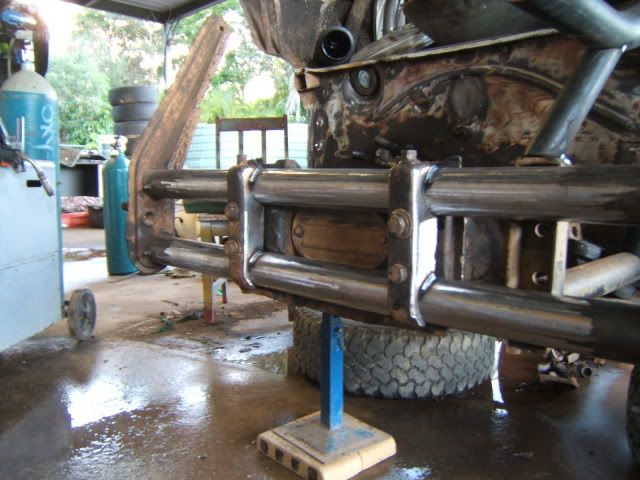
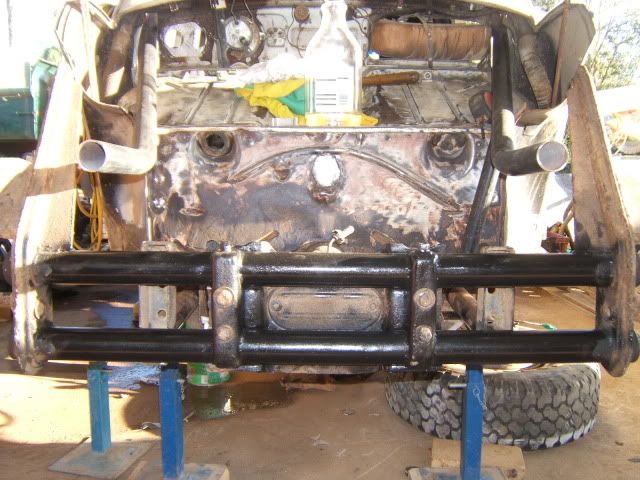
That sorted, time for a new bumper, having only 2 pionts of attachment really isn't for me. the top tubes go to the top of the beam
and a bash plate of coarse, i found the material on the side of the road, really!
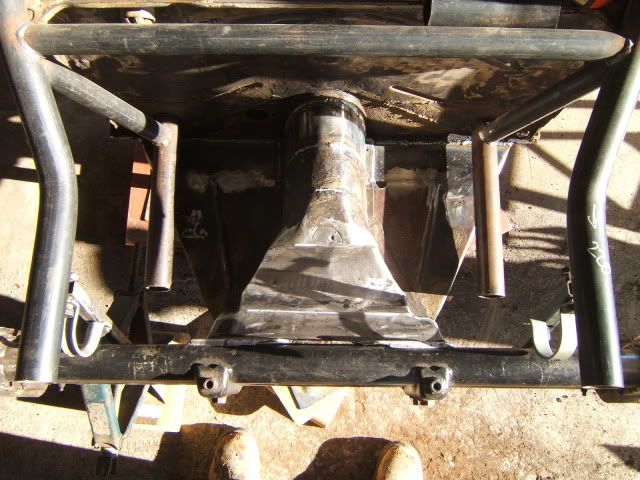
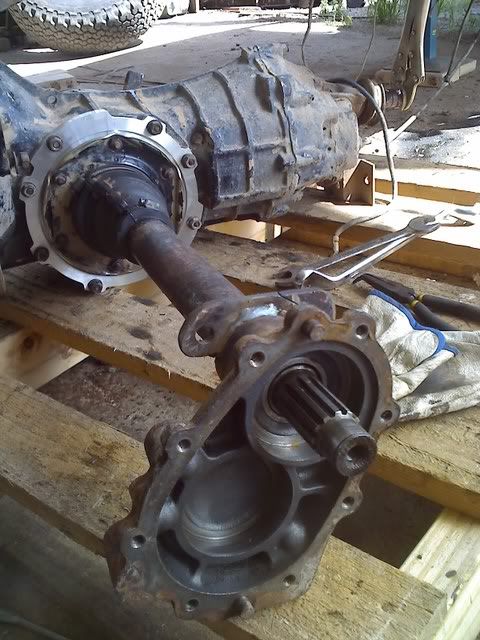
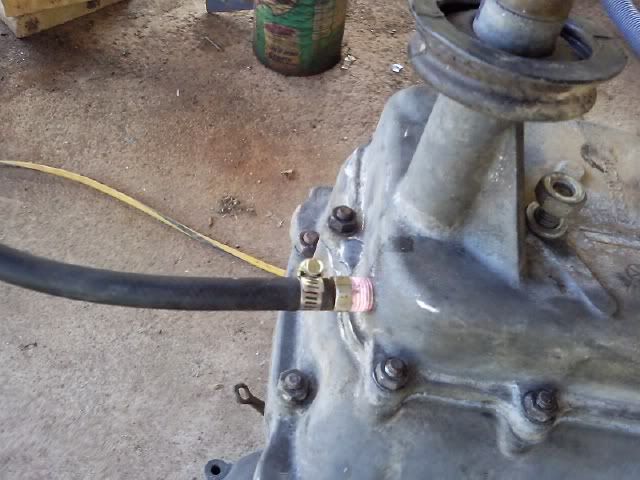
nilza wrote:Moving to the rear, budget was tight but it needed to come up to meet the front. Got hold of a small nut reduction box for nothing. The gearbox itself was cactus, but the redux where fine so knowing that the gearbox in the beetle was fine (except for the bearing that had destoryed itself) the two met each other in the middle.
Took the side covers off, (traded one for a heavy duty) flipped the diff and shims, checked the backlash and bobs your uncle. was really as easy as that! so now have a 1500 box with small nut redux


nilza wrote:yeah am kind of attached to the paint job, thought about changing it a while ago, but couldn't do it. Is actually up for a new coat of paint in the coming months, think i will rehash the herbie job and race it up a little (sponser stickers on the quarter panels, checks on the fenders and bonnet) that kind of thing
Back to the build, mocked up the trans next, checed some clearances and travel (Can"t believe the stock fenders fit!)
decided to lay the redux back at 15 degrees in the hope to control some of the hop. actually managed to weld a 3 bolt flange like the original onto the cast housing of the redux,will see them if you look closely on some of the pictures. it really looks standard! and made some adapters to add some strength, am actually using unmodified sping plates
nilza wrote:so turning to the top shock mount (planning to run kombi shocks all round)
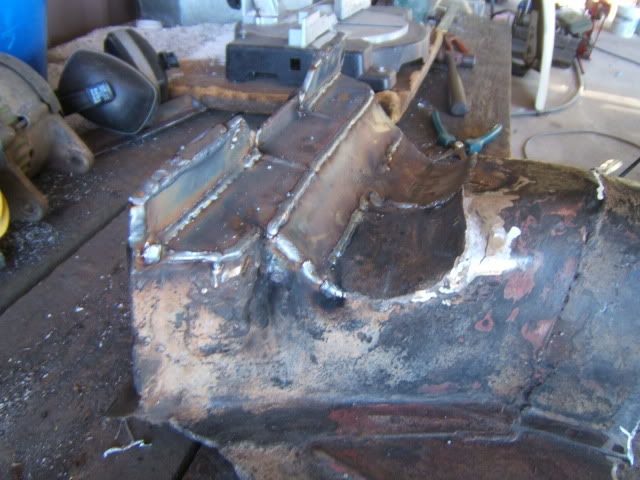
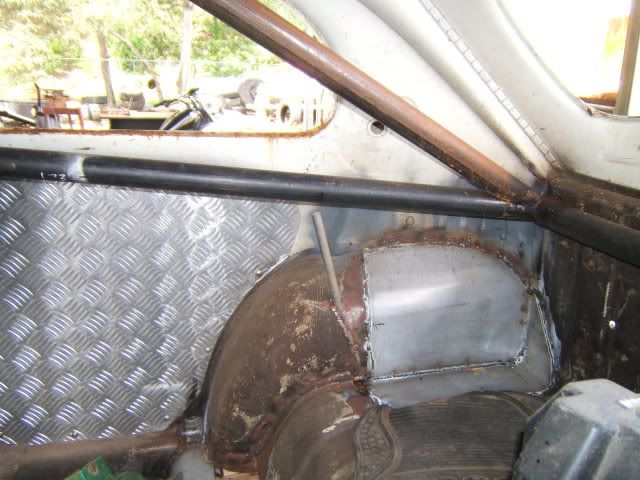
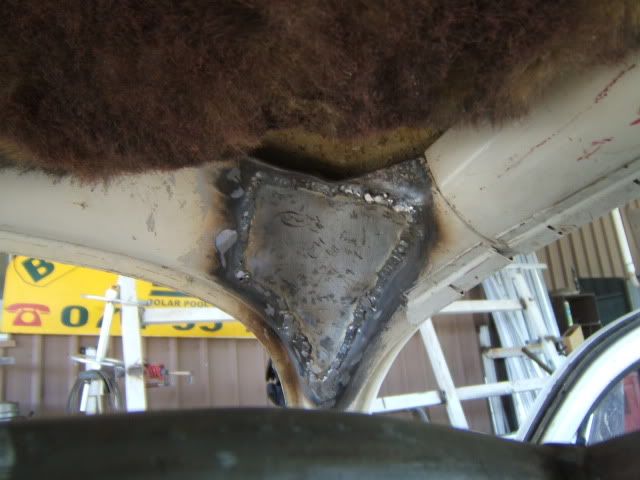
At the time i was very wieght consious and didn't like the idea of putting a cage in, not to mention all the trouble it would cause with the department of transport. decided to make "boxes" inside the fenders, stiffened toward each other and down to the frame horns.
where's that grinder?
Um. . . . . . .not enough
better
bent some basic frames to hang the shocks on
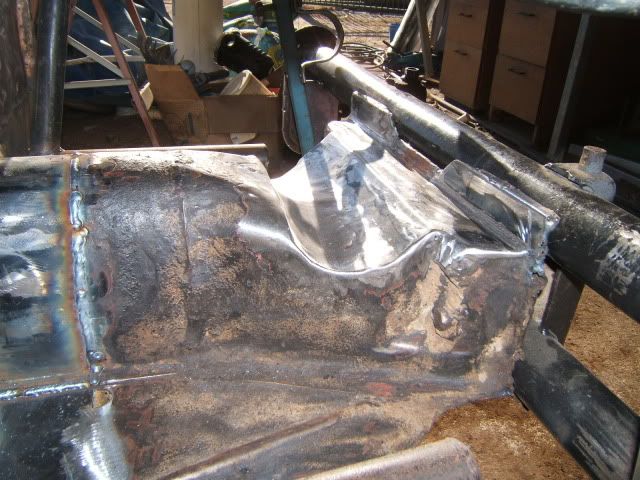
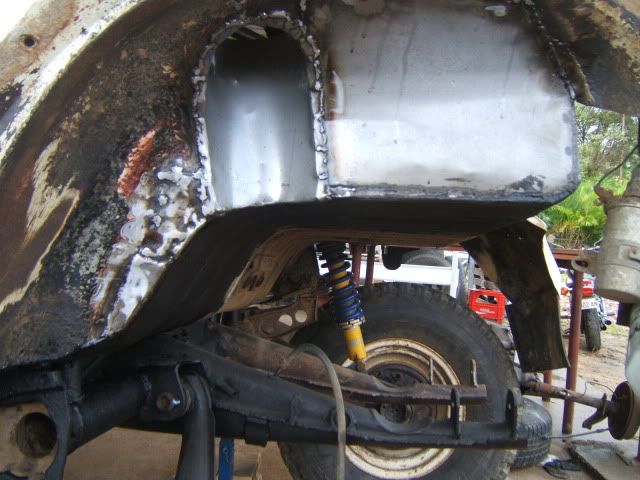
welded in some sheet and molded it all into the fenders, think it turned out well
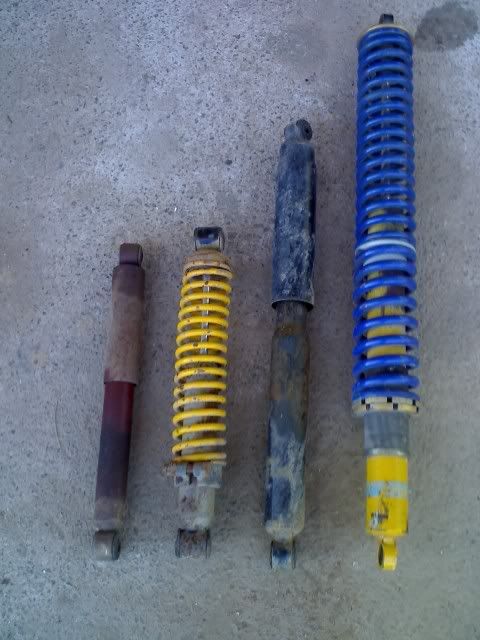
nilza wrote:here are some quick pics of old shocks i mentioned earlier
I braced the new inner fenders to the frame horns to stiffen up the whole lot abit
added the new rear shocks to complete the rear
and relocated and replaced the tail lights


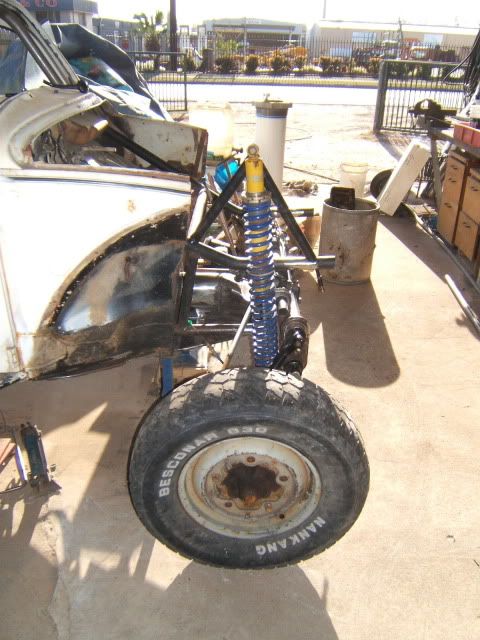
nilza wrote:right, front is reborn and the rear is . . . . .well alot heavier than what it was at the least. The new stance is cool, found out very quicky the the back jacks up alot everytime you hit the gas, even in forth and if you hit the botom stops it misbehaves very badly. Wind the rear back down a notch on the torsion bars. Looks a little funny at a stand still because of how the rear is lower, but sits level when i'm driving.
First day it was back together went on a night run with some friends in the forest, no photos unfortunatly. but i blew one of the gas shocks up (check your bumpstops people!) exploded all over the exhaust! stunk to high hell! spent the rest of the night on one shock and some funny noises, lucky was all slow going. the drive home was . . . . .. . interesting
pictures of the aftermarth - can see what i mean about the rear being low

nilza wrote:right! shocks sorted for sure this time - turns out the hopping of the redux broke the standard top out. I welded a strap between it and the bottom out catching the spring plate and strengthening it at the same time.
On the subject of hop, for those who have never had redux and wonder what they are like to drive? Mine are lay back, so i am told they hop less than upright. but, for rock climbing? not cool! everytime the wheel spins the suspention is forced to full joist, so you have to baby it and do everything very slowly. Instead of the old method of get a run up and hope for the best, that we al loveOne the up side the ratios are soooo low you real can just idle it over most things, really unlikely it is possible to stall it.
I give it 2 stars
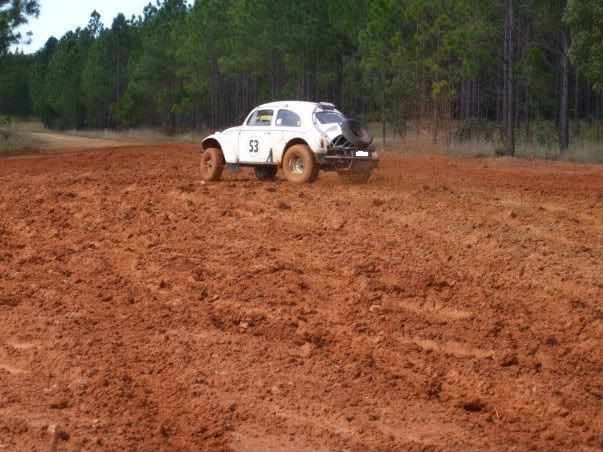
To the beach! going forward redux are great the extra force required jacks the rear right up and make for great clearance and if you do find yourself stuck, the jacking motion really does help you "jump" out of the bog. On the down side, reverse is a no go. soon as you try to reverse the back of your car is trasformed into a sand plow.
fun non the less!
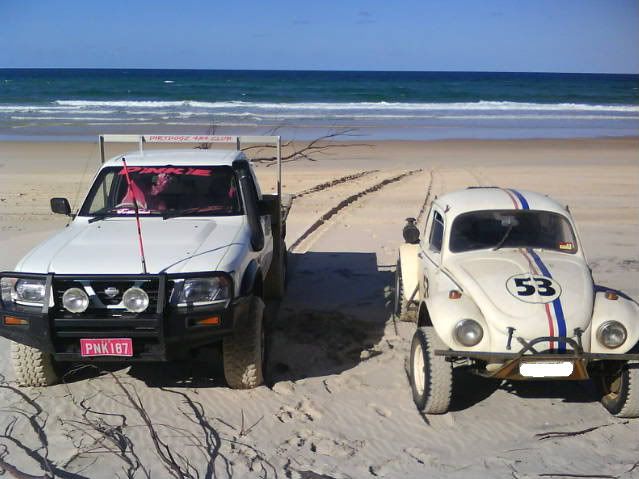
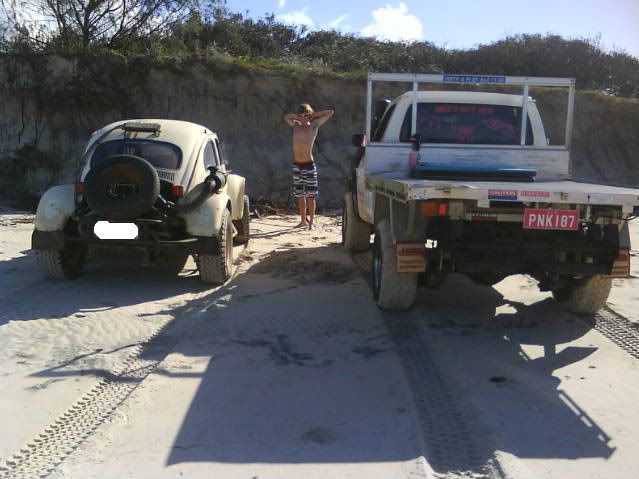
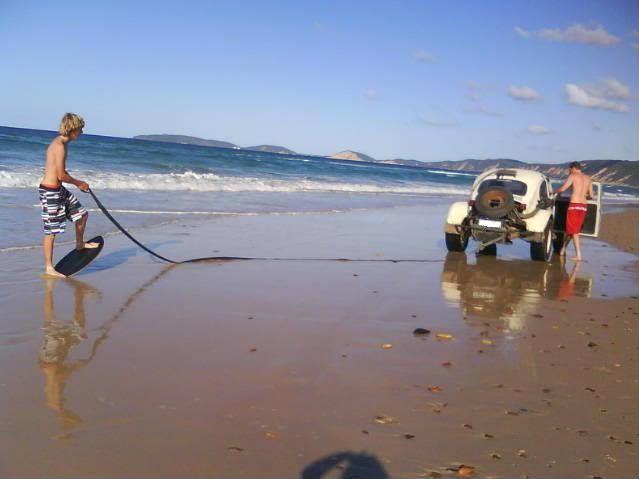
nilza wrote:yeah, had concidered that, but the unsprung wieght is already way out of control in my mind. So left it and changed my driving style alittle, besides its not all bad, the ground clearance and travel is cool. Getting maybe nine inchs front and rear. Was summer time so back to the beach! The 4x4 belongs to my friend kayla (or pinkie) she's a 5ft nothing blonde trucker
if you want a laugh, try and read all the stickers on the back
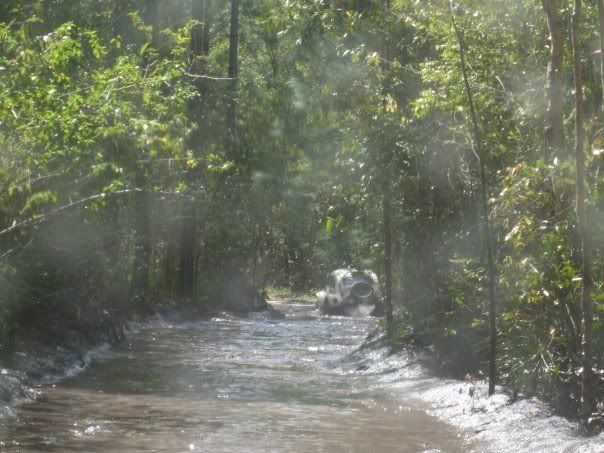
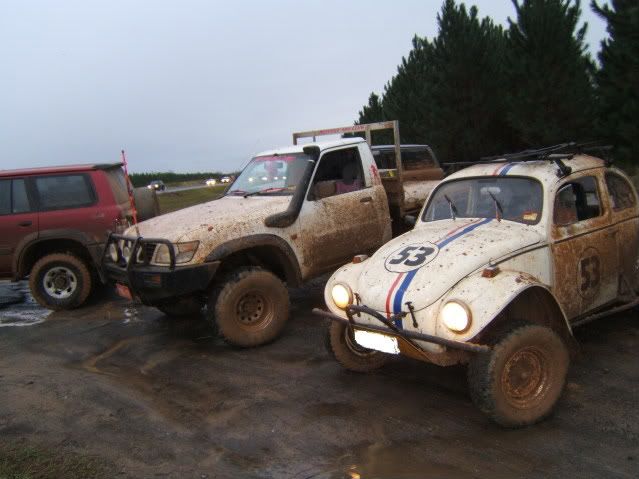
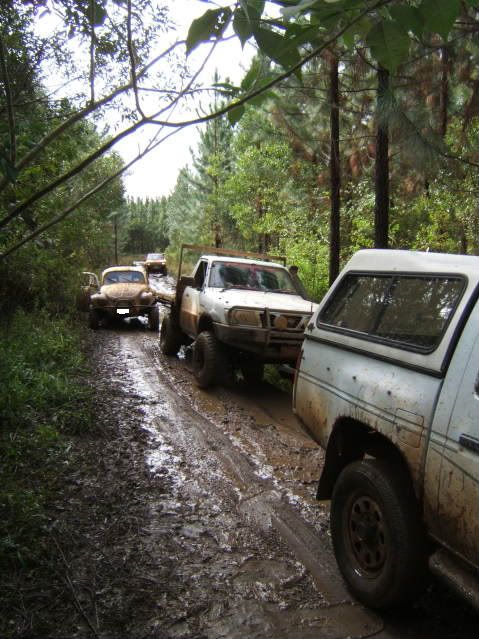
nilza wrote:as autumn comes around the rain makes the beach weather a bit ho-hum, but with the rain comes. .. .. .. . mud!
On the open trails and mud, redux really become something cool. The ability to adjust the the spring rate on the fly is just sensational! is definatly a differnt car to drive out there the extra width plus having better shocks and setup. The gear ratios are lower and the top speed is about 55, But can carry that right thru corners - -----with some awesome oversteer to show off
nilza wrote:This photo is from the last trip i did in that form, (i dropped the poor thing into a mud puddle just a little. . . . . . ok, alot too big) lost the whole rear end of the car in it. the motor was running although almost completely under. the rear wheels? who knows where they were. but as a result the engine sucked in too much mud this time and the bearings and valve guides, have now gone to a better place.
Wish i had thought to take a photo, back was a mad rush to try to get it out before i lost it intirely, there is a video on myspace i think one of the boys out on the day took. will try to chase it down.

nilza wrote:hmm. . . . .. . was under the impression that the 100 had more bottom end, will definatly keep that in mind though.
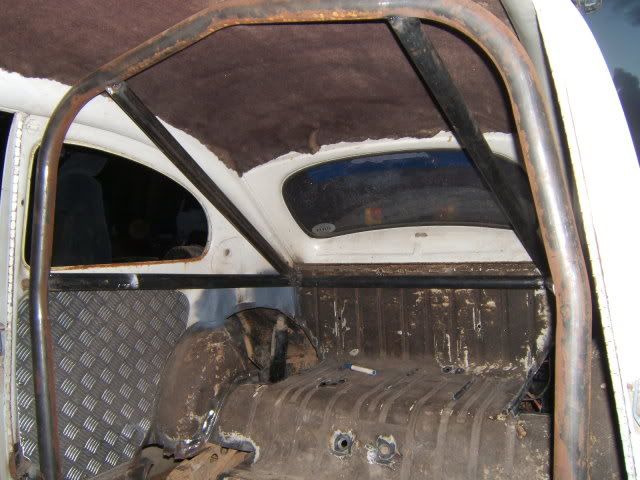
Started stripping the inside, and beginning on the cage, cutting out alot of rust and those stupid boxes that held onto the shocks.(was more work than putting them in in the first place)
Am using 1 3/4 tube (our laws state cages must be 45mm in dia) the tube is 44.57 and they let it slide. Using seamless for the main hoop, front doglegs and everything within the space you sit in, seamed for the rest 3.2mm for the car and 2.8 for the cages. add to that 1 1/2 tube for bracing, think the cage will be reasonibly beefy. Will probably have a bit less bracing that what you guys are used to but since i am using larger tube than what is normal should be fine.

nilza wrote:
There you go eddie, got that out of the way
And speaking of baja's the get used - i swear this was a good idea at the time, was looking for that earlier but didn't find it till now
And back to the build, hoping to have it done around august.
Who makes the VZ 14? never heard of anything but engle cams around here.
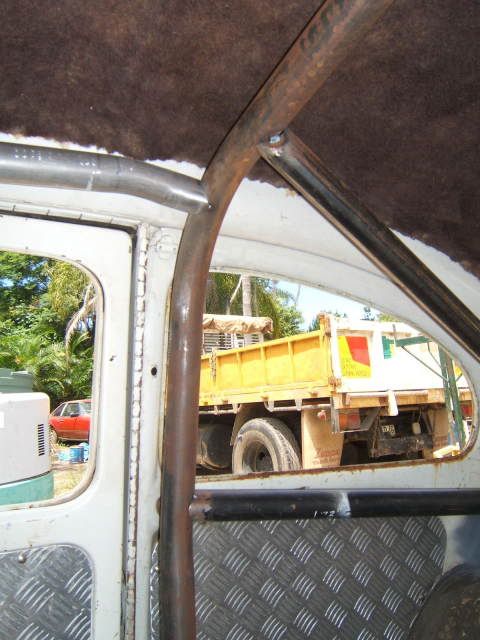
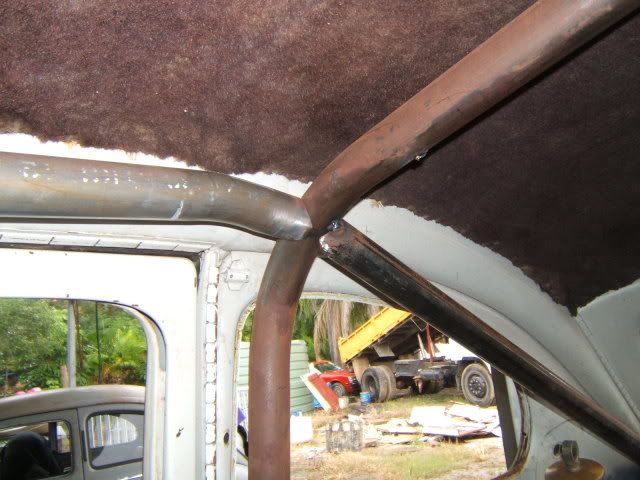
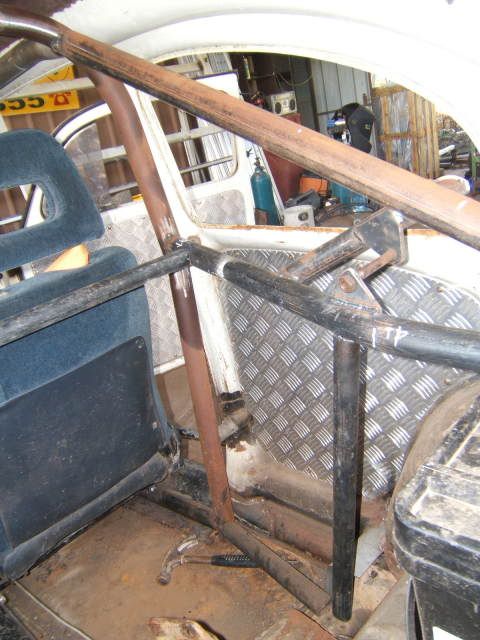
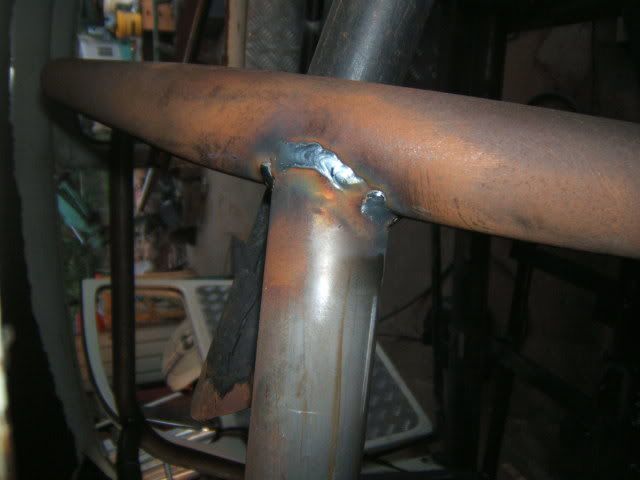
Done the front doglegs and the floor bars/side bars, (not sure what you call them) both of which came with its problems -
our laws state that roll cages are not allowed to encroach on the entry?exit of the vehicle and while sittng in the seat, your head may not strike any of the bars (yet they still make you pad them, go figure
I will fill in the sheet metal on the roof before i permanently weld anything,is all trial fitting at the moment. There is so many things to concider to get this thing road legal odds are the cage will be in and out 3 times. The dash will be welded around the tube after the cage is approved
The doglegs were a pain to keep so close to the body and out of the doorway, so I mocked them up out of pvc, so that "the guy" had a good visulisation of what i needed
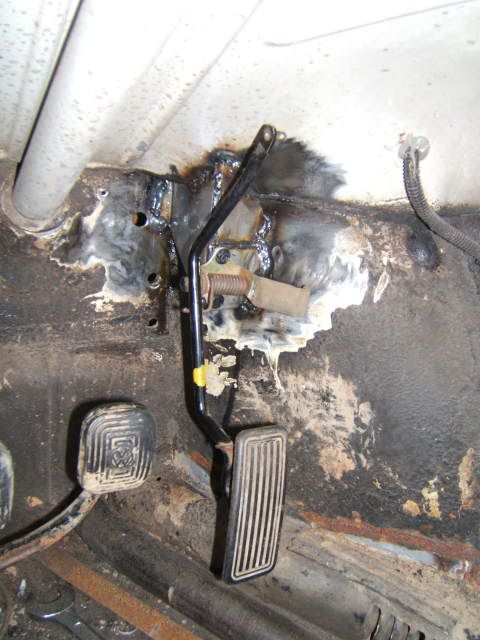
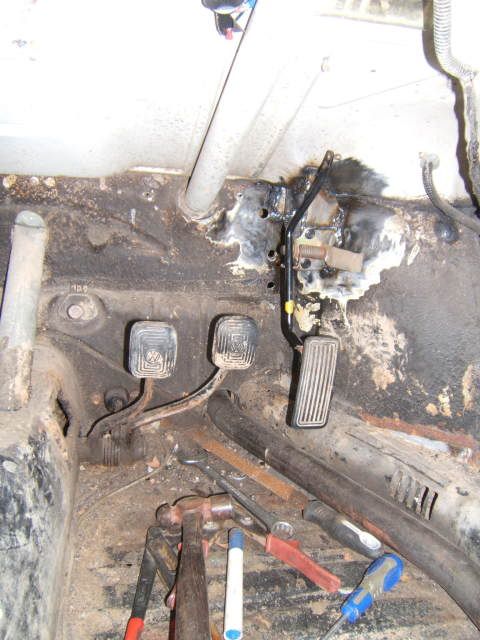
The problem i ran into with the floor bars is that the accelerator pedal gets in the was (not sure if this is a problem for you guys, cause yours is on the wrong side of the car

nilza wrote:Straying away from the cage, I found the alot of the tubes in the rear will have to do with where the rear shocks are mounted and that has to do with where bottom mounts are and arms and and and and . . . .. .
So to the rear end,
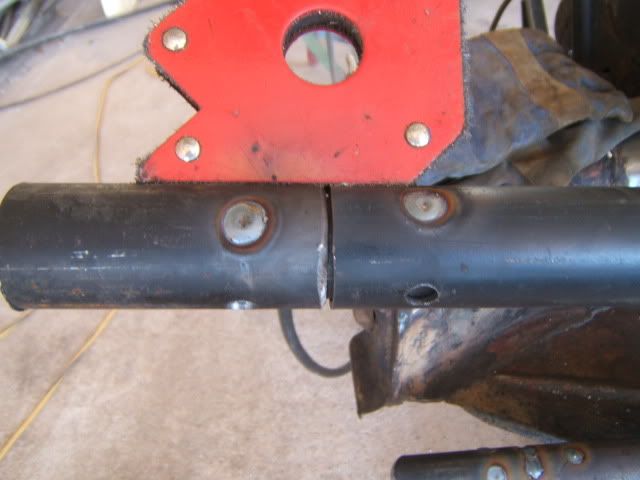
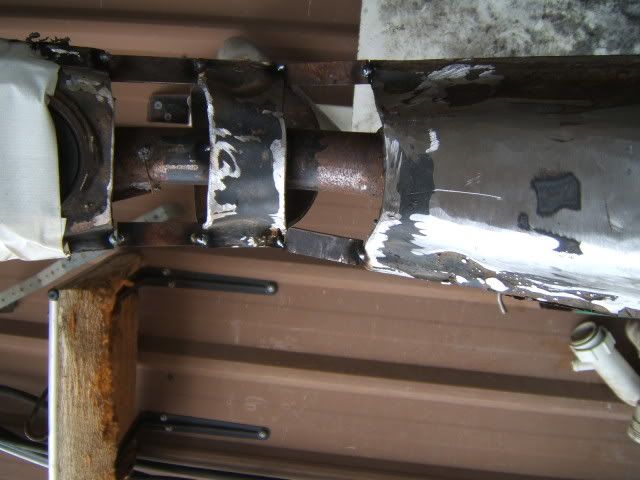
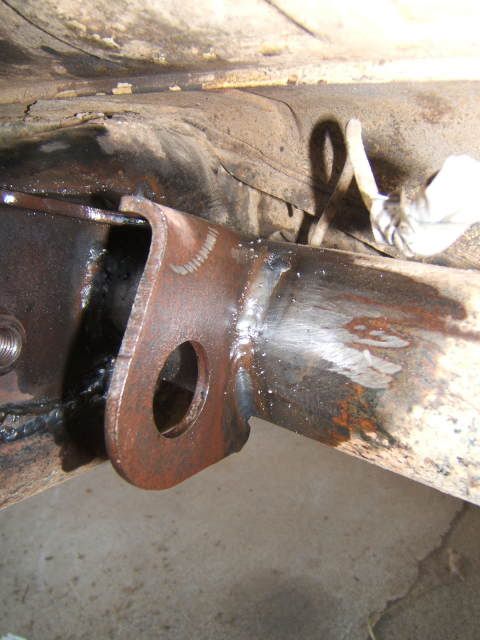
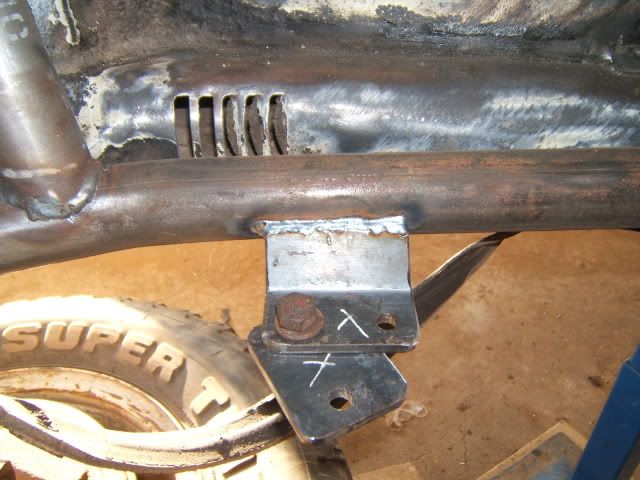
started with the 3x3's, was going to go 3x2, but want to go the 930 route later. Now the first thing with 3x3's here is that they are not legal, so .. . . . . had to make these things to look stockish - the shock mount will give it away but if thats all i get picked up for, should be fine.
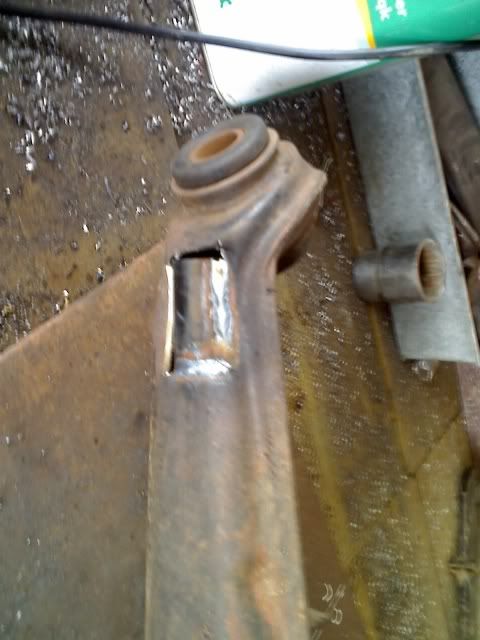
Made jigs to extended the OG arms, then reinforced them from inside with a piece of seamless tube
Had a look at alot of the photos of the avalible to buy arms for the shock mount position and think i have to bring mine in abit , because my wheels will have a smaller offset to bring the track in (am working on the same track as a kombi, argueing that by using kombi g'box, axels, cv's ect. it will be the same track as a kombi)
See any problems with this set up? made of 1/4 inch plate


nilza wrote:Well thats it. Ive been talked into putting another plate on the bottom aswell and a gusset between, should have bought more flatbar
On a note of the arms, because of the way i have done them, before i started on the shock mounts i was able to flip them left and right to check the camber and by flipping them have got really close to zero, sweet
The next few days of photos will be a little all over the place cause i got ask to show pctures of my gearbox mounts (I am still ahead of what i have posted) except for the arms,
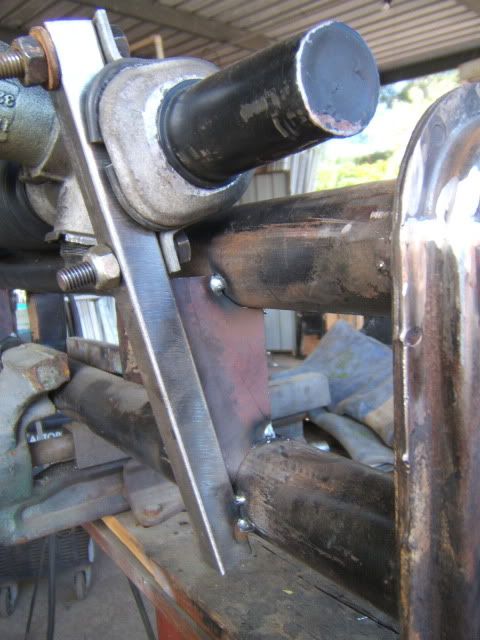
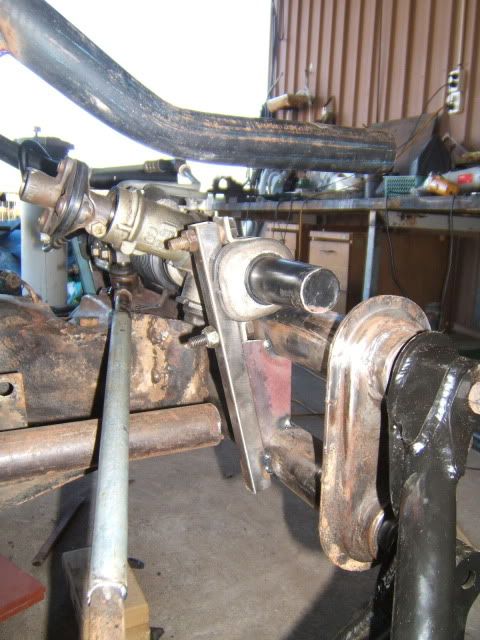
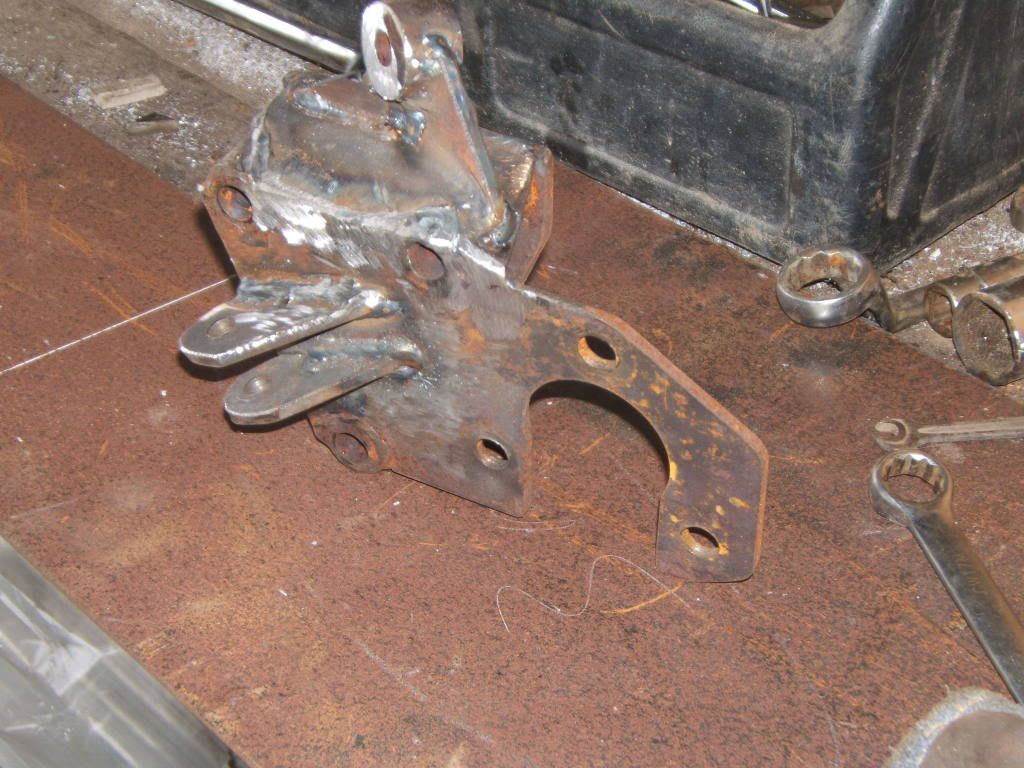
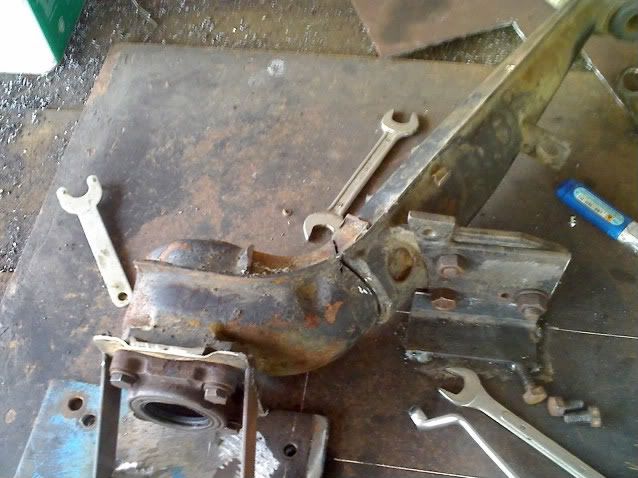
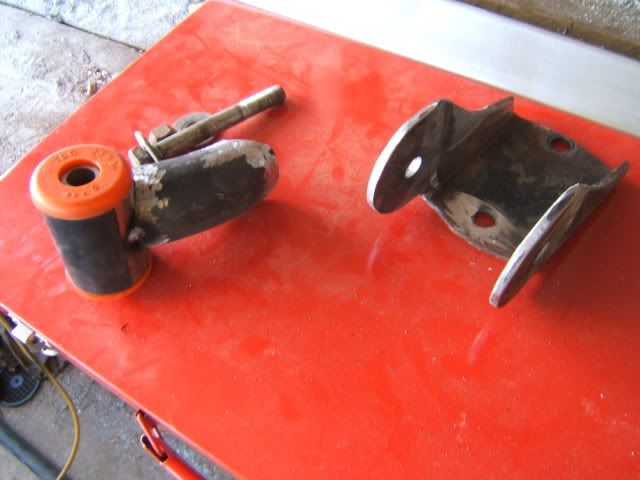
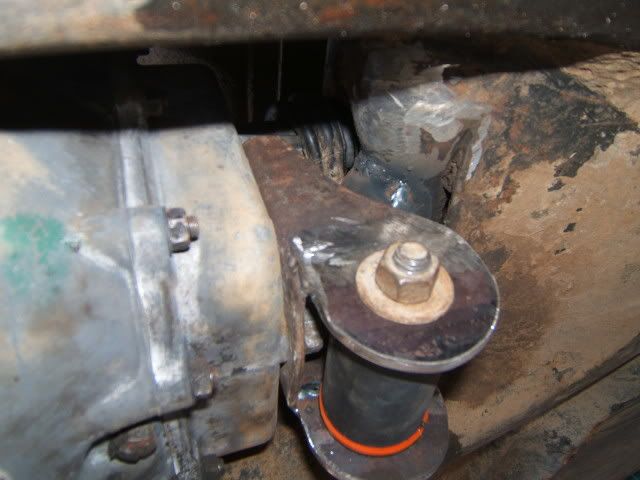
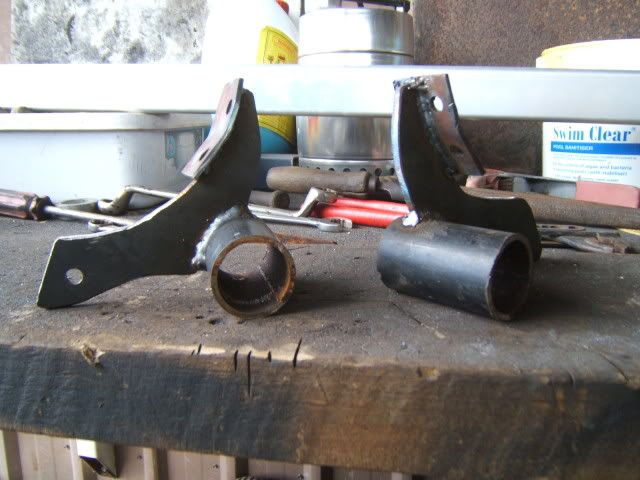
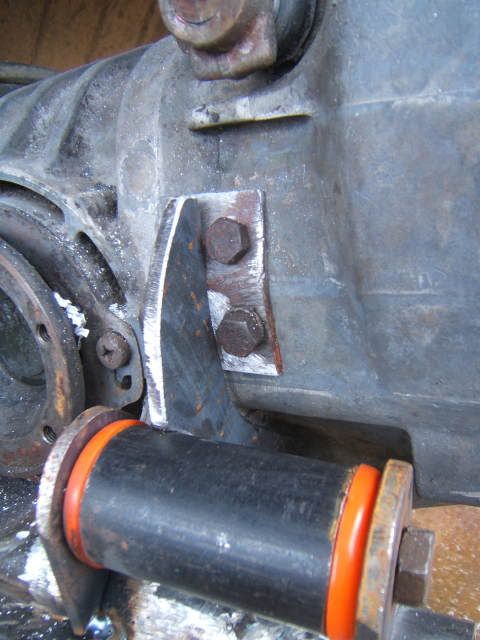
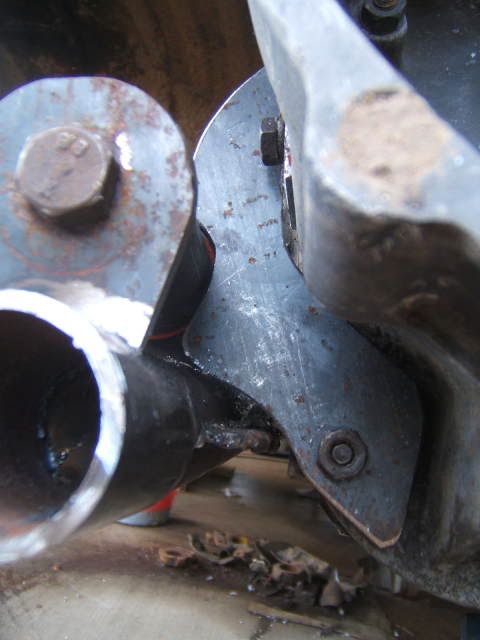
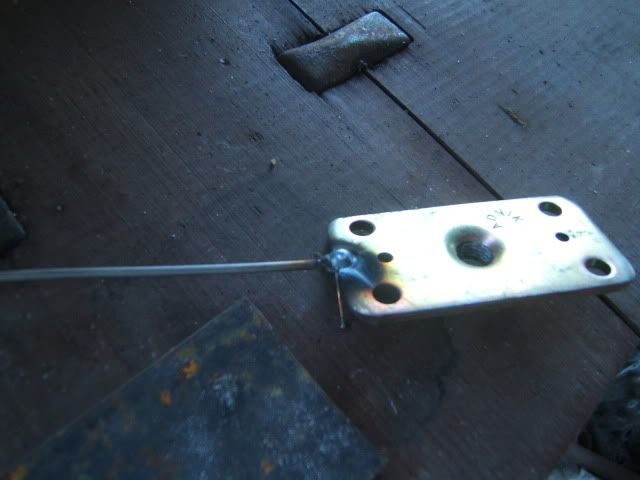
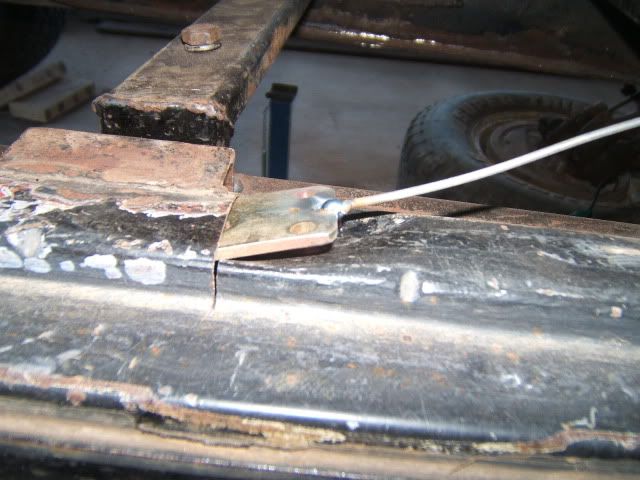
after looking at an ungodly amount of mounts on the samba search engine i decided that the mckenzies style 10* mount was for me, Of course the prospect of getting one from the states was out of the finacial question, so .. .. . . . . make my own
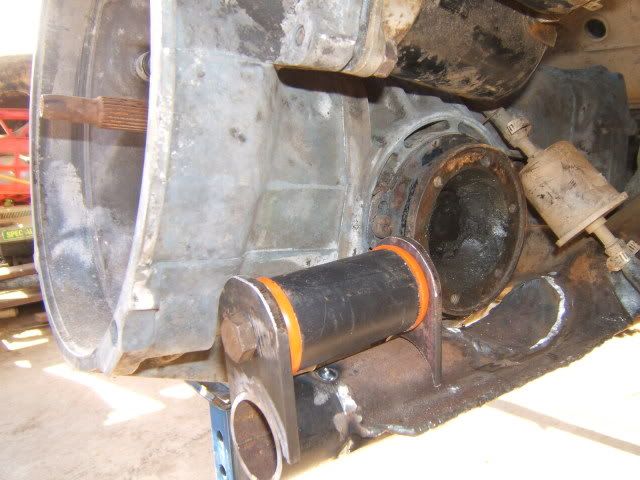
I changed a few things to make it simpler and to work with bushes that where avalible for cars over here. Also might find this a interesting question, all the posts on the mckenzies mount state that you had to trim the shift rod and have seen my pix of a hole cut in the body to clear the nose of the gearbox. Why not move the box back a little? running 3x3 anyway? Moved mine back a total of 20mm and the shifter bolts straight up and everything just looks good in its place. Anyway, pix. you be the judge.
Really would like some feed back on any problems caused by moving the gearbox back
Can you believe i forgot to take on all finished up?geez! anyway you get the idea

nilza wrote:Don't worry dusty, is definatly going to happen. the rear of the cage is on hold at the moment till the suspension comes together and the axels and engine are in so that all my clearances are correct. The rear cage is technically not part of the roll cage that the engineer will be looking at because it counts as part of the baja conversion (which already has the nod) He will only be interested i what is going on inside the cabin.
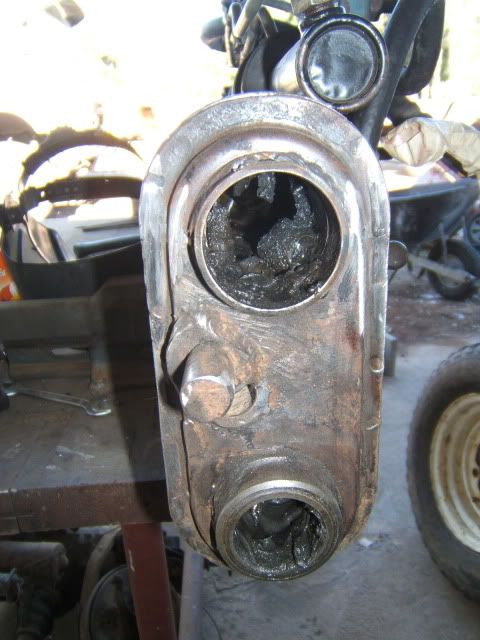
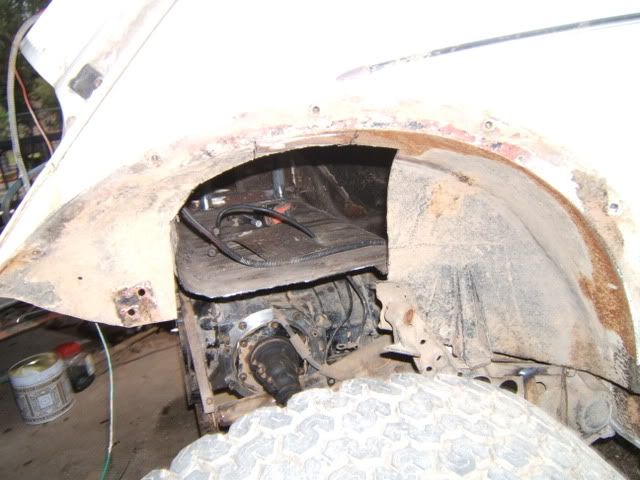
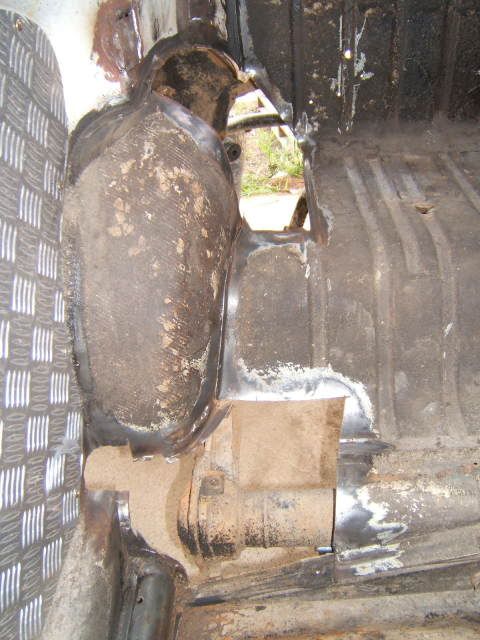
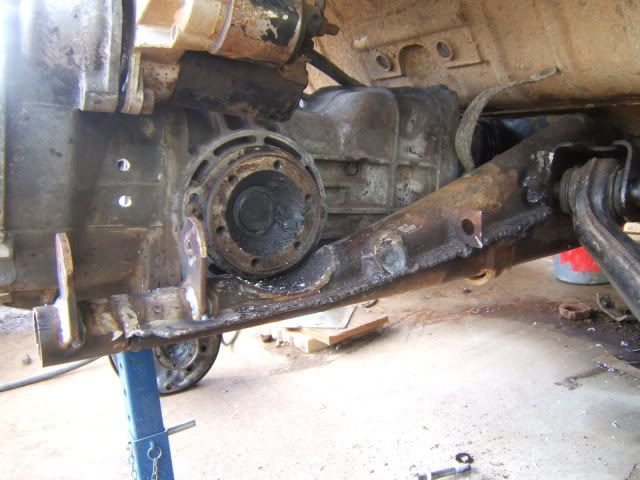
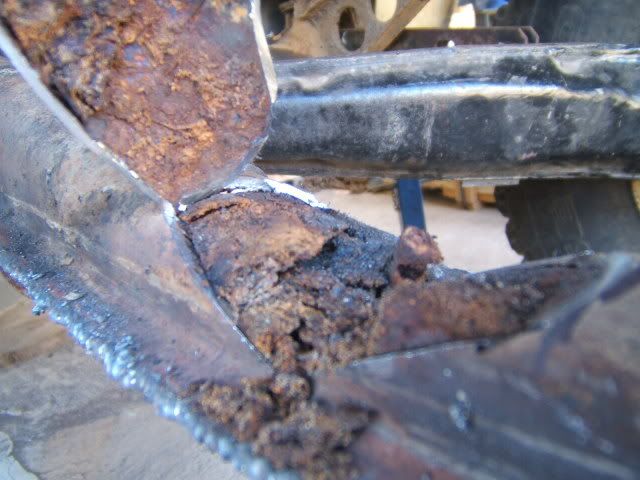
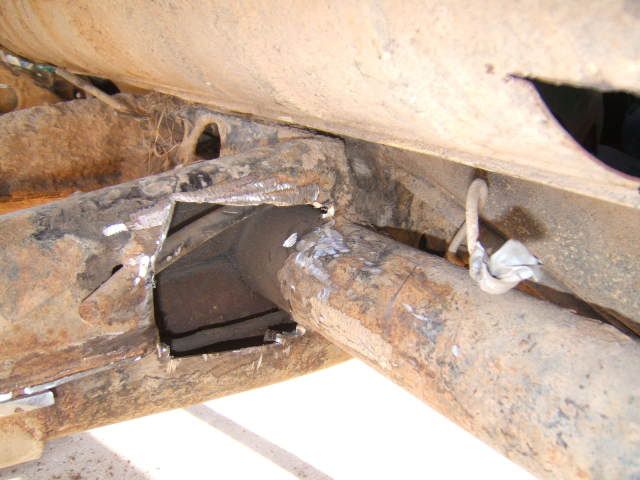
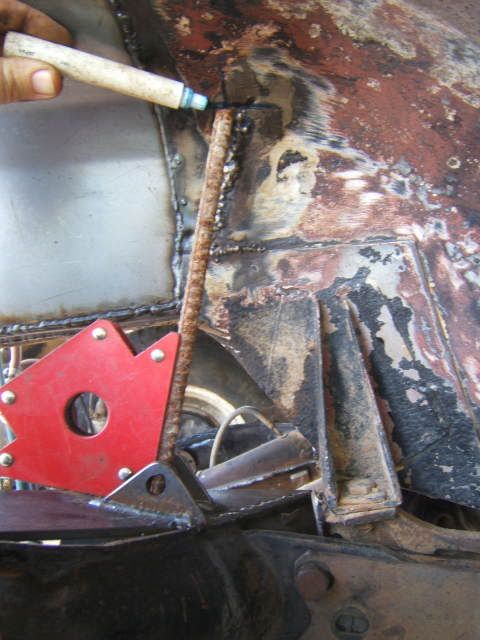
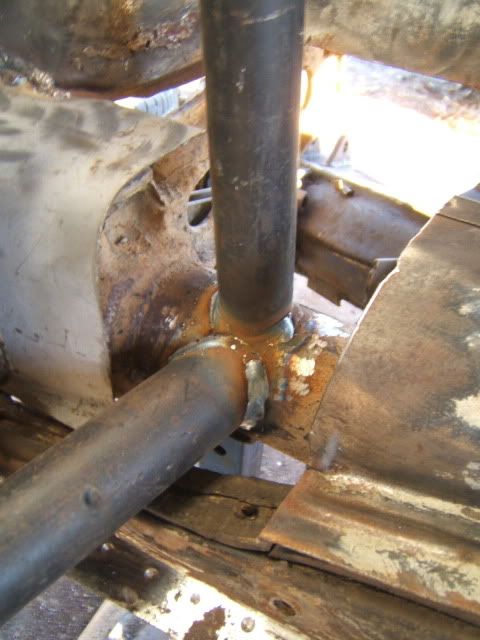
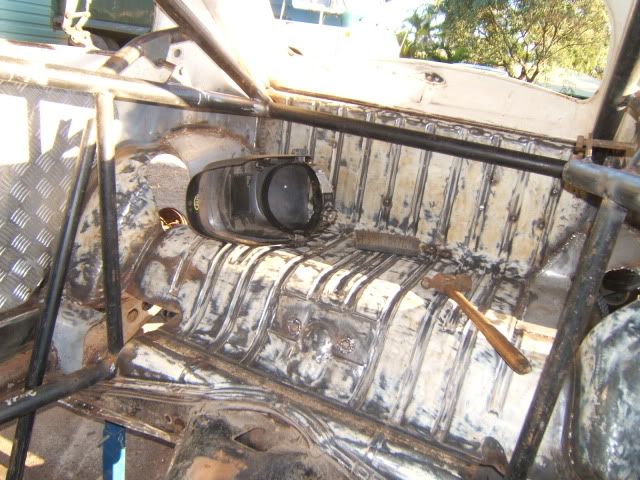
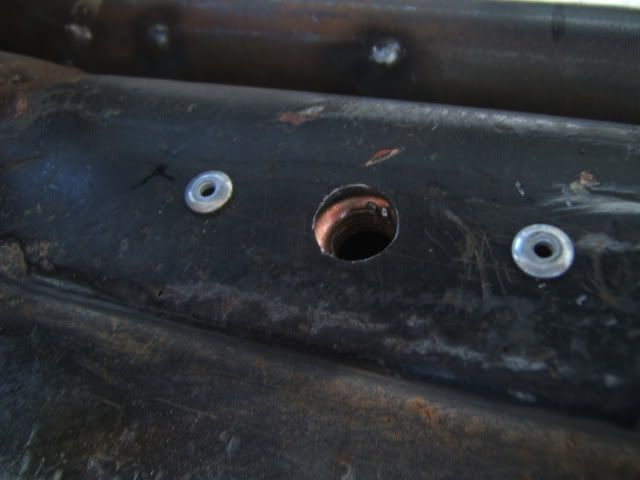
On the subject of those big holes in the frame horns, sure was a surprise when i open those up
Might give you some idea how much mud this thing has seen, i think there are plenty of guys that would be in the same boat if they looked!
ook some time the clean it out thats for sure and removed the heater wire tubes while i was at it
Thats better
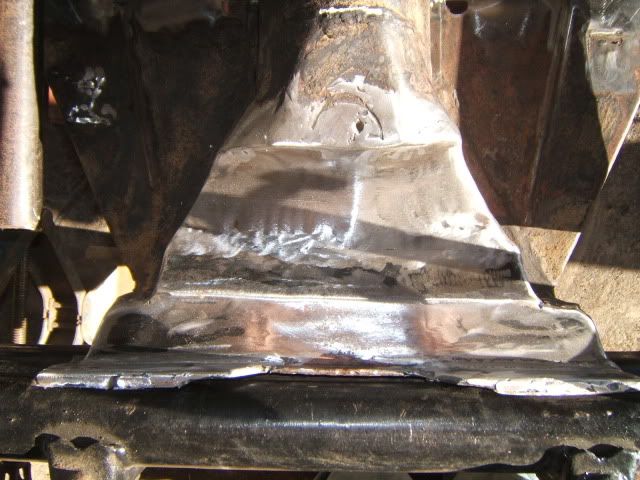
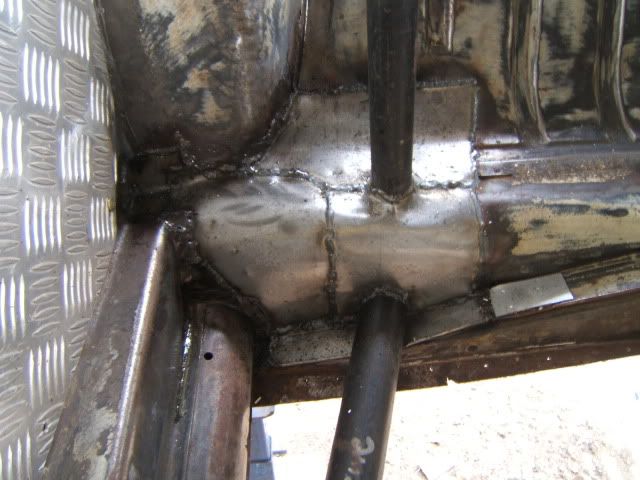
welded up the holes with some 4mm, to be sure i clearanced them at a radius of 128mm (just incase i lose my mind and go 934 cvs)also filled the bolt holes and clearanced and welded the perimeter of the frame horns
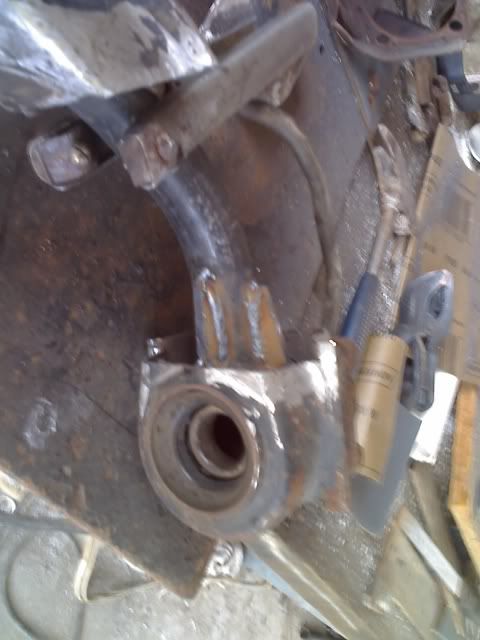
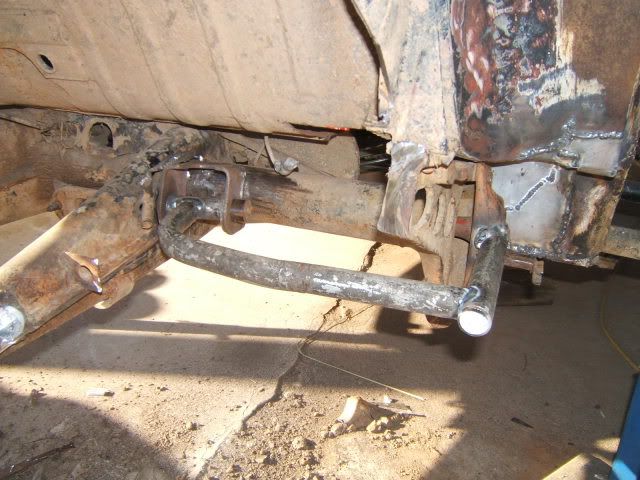
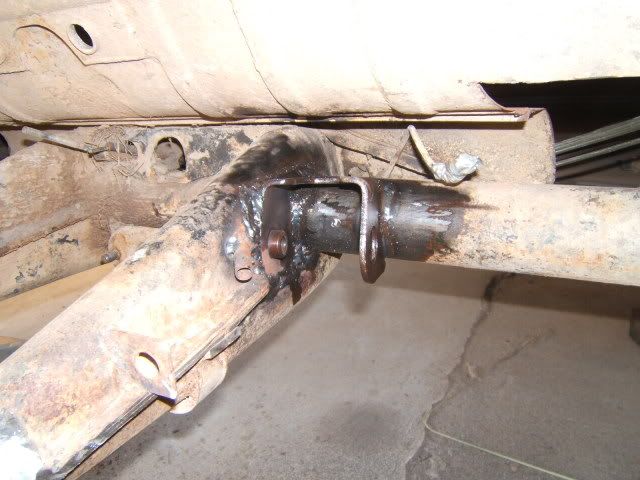
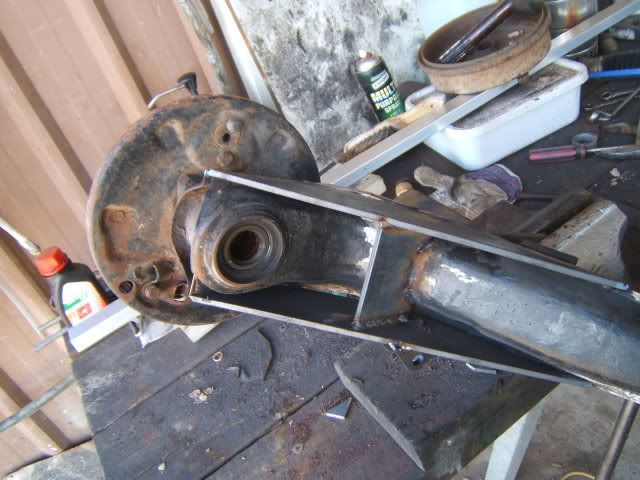
Next the important bit! Irs convertion. Wasn't sure how hard this actually was, and the those wordering weather the do it at home or not. It really is not that hard particularly if you start with good bits. A friend of mine actually had a t3 rear end lying around in his yard and some HD pivot boxes, SCORE!
I made up some some home made pivot jigs from the t3 rear end.
The real trick here is the cut these holes the right size, I got close but still had to add a small triangles of metal at the top and bottom, seeing as how the pivot boxes are round on the corners. Guess in hindsite i could have ground the matrial away a bit slower with a die grinder, but the real strength is where it is welded to,
All done, rear end just about ready. all thats left is some tubes welded over the pivot bolts so that i can pin them, a whole lot of cleaning and some paint back here. Oh, . . . . on the that subject, I use underbody sound deadener, is thick and rough enough to make any signs of welding disappear, being bituman based it stays soft and a light spay of oil once a year keeps it that way, as for getting it out from under your finger nails
Just about up to present day now, get my shocks and finish up those arms this weekend,
Happy Easter All!

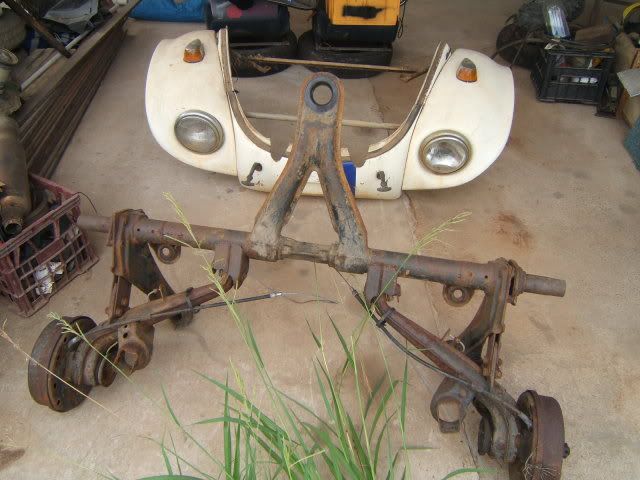
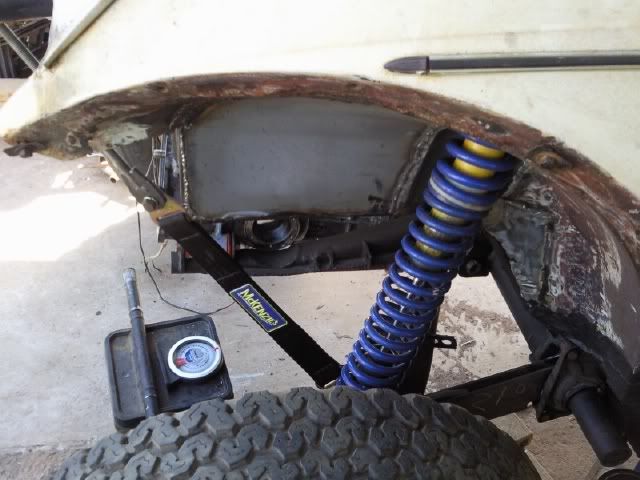
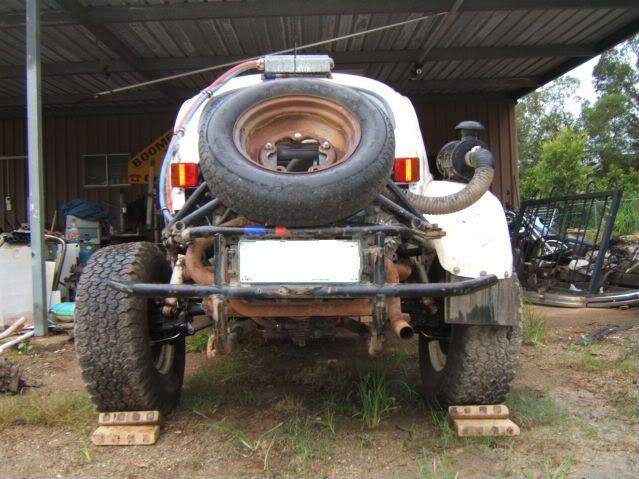
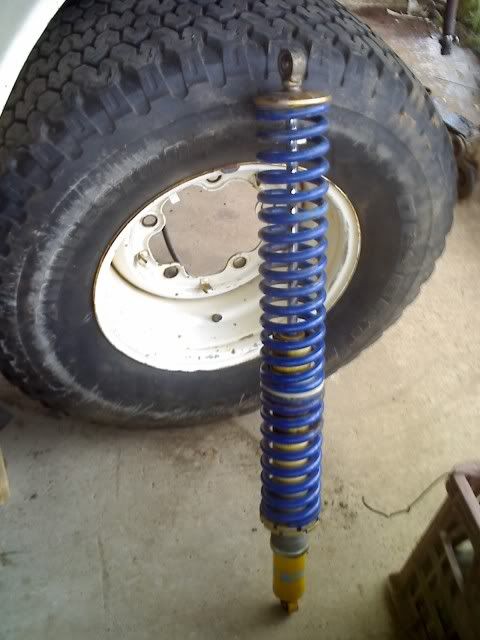
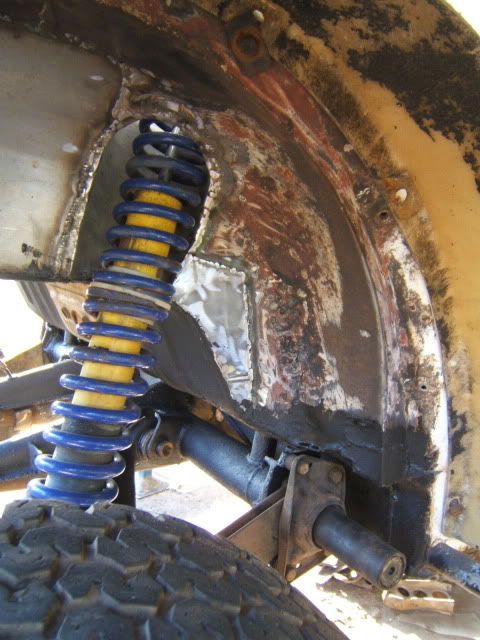
nilza wrote:HEH HEH HEH, guess what i got! They are actually second hand from a local vw racer who decided to go longer. Not sure if they will need some work, and haven't got my hands on spring compressor and coil nut pliers (got them for 1/4 of replacement)
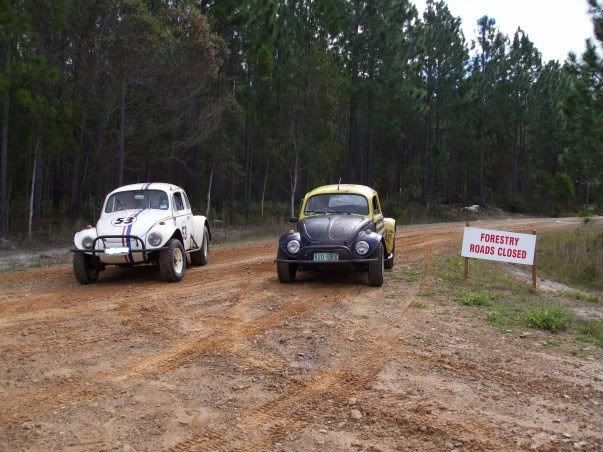
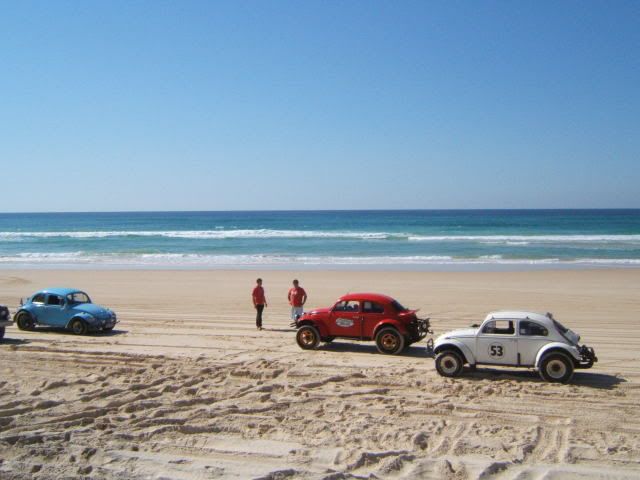
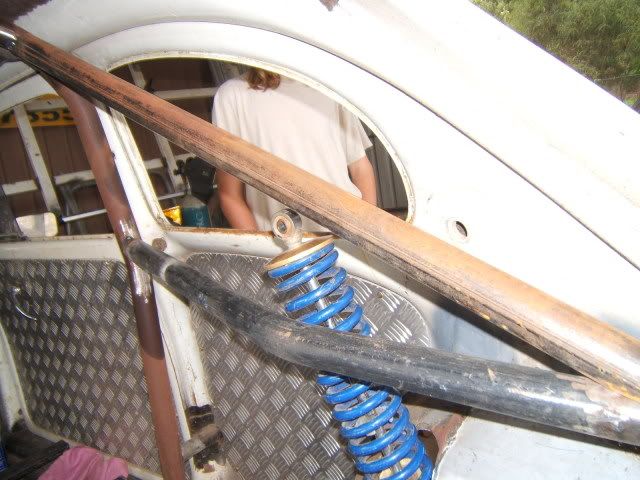
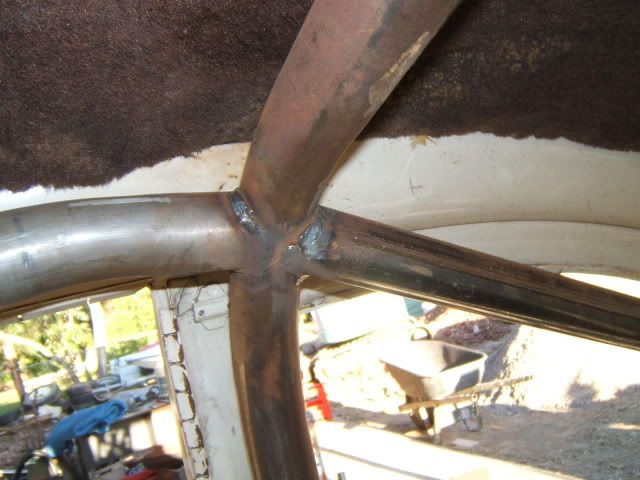
This is a cool photo and illustrates the "evolution" of the baja over the years. from stock, to modded stock, to kombi, to coil over
nilza wrote:
These brakes?
as CAB11 said i have country buggy spindles on the front, which are basically split combi spindles with a few slight differences. As a result I have split kombi brakes on the front (they are HUGE) and thats the duel cylinder going on there, any split kombi has them. As for type3, have never wrenched on one so don't know.
Is funny all the aussie blokes are all just finding my thread, is all down hill fom here
Yeah the shocks where a steal, cost me about the same as a new set of torsions where going to. That decision was a no brainer
The family and friends are pretty quiet this easter, the weather is horrible! I broke my surfboard a few weeks back and the girlfriend is out of the country. So. . . . . . . .guess who gets to play with the beetle most of the weekend! Was just aiming to get the arms finished, but things are going ahead fast.
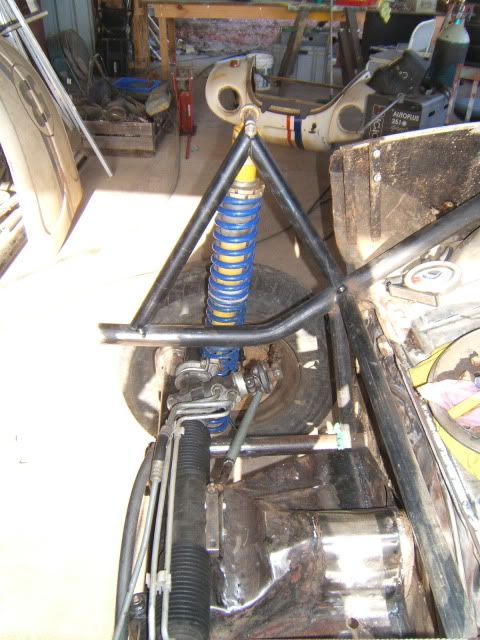
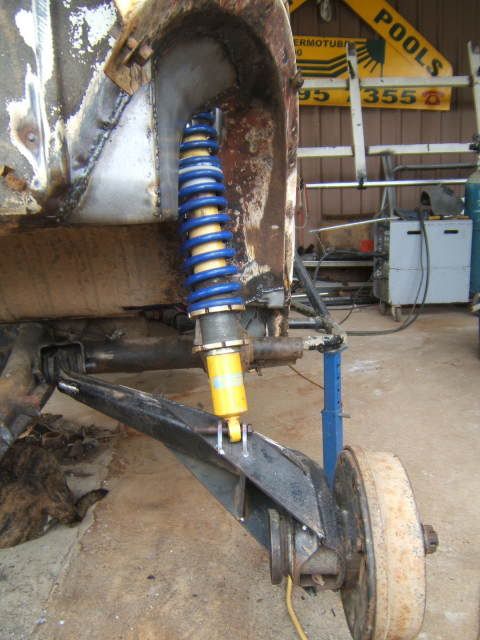
Got the arms finished up, added the bottom brace
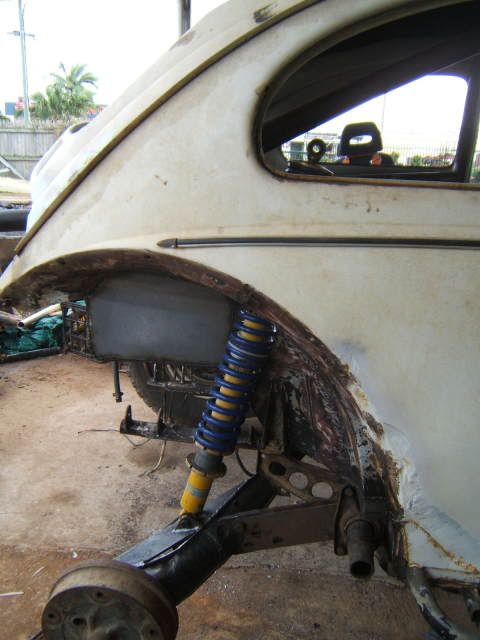
Bolted the right hand one on, found full compression. Tyre fits! (just) nothing extra to weld. From there found 90* from the bottom mount
This is where the center of the shaft will run, and bore a 4 inch hole at the same angle as the rod. So for all these people who cut half there car away trying the find the right amount to take out for there coil overs .. . . .. . . Stop it
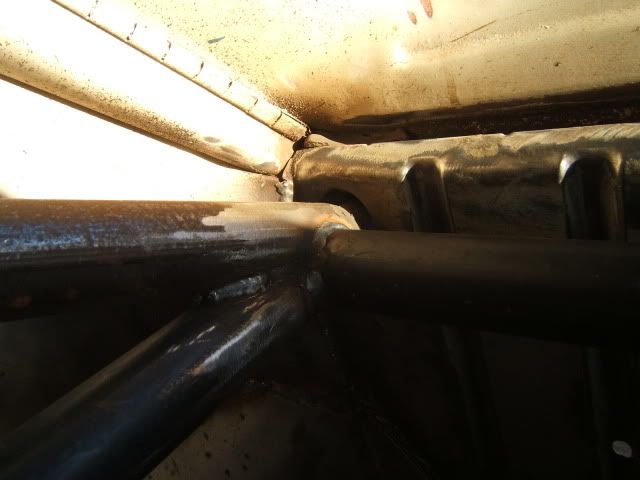
On the inside where does that rod go? Uh Oh, that will have to be rebent. glad i put the cage on hold? Gave me an opertunity to change the position of the tube coming from the top of the B pillar too
Now we're getting somewhere!
I ended up with 15mm deflection forward and back and less than 5mm left and right thoughtout the full travel of the shock (not bad for a first timer i reacon) goes to show, do your research, understand it and its a piece of cake
Now i know i need another tube to go from the top shock mount to the torsion bar, but where should it go? Here or here?(red)
and another tube between here? (green)


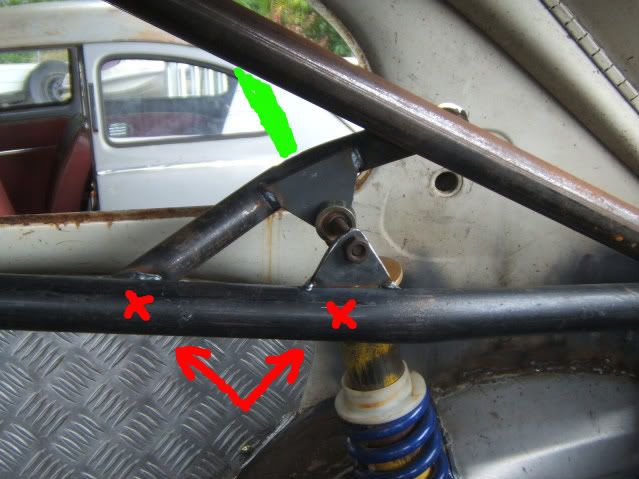
nilza wrote:As mentioned there was alot of progress last weekend, have rear shock mounts done on both sides, still curious on where to put this bar from the torsion bar to? Anybody?

nilza wrote:Feel like not much happened this weekend,
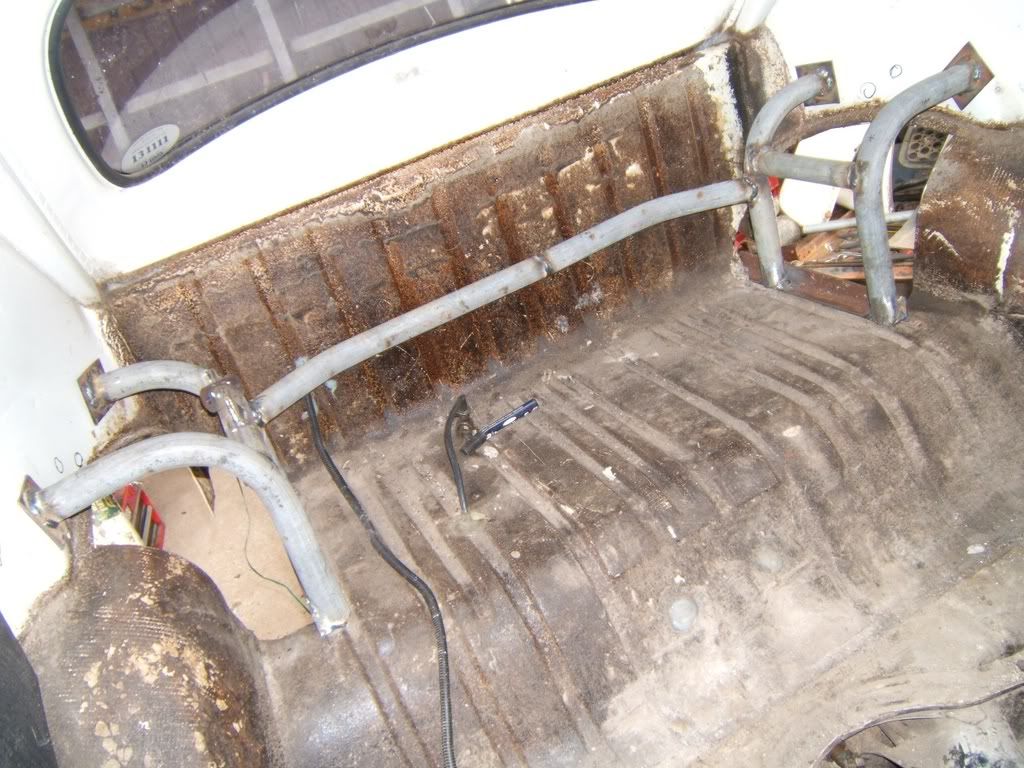
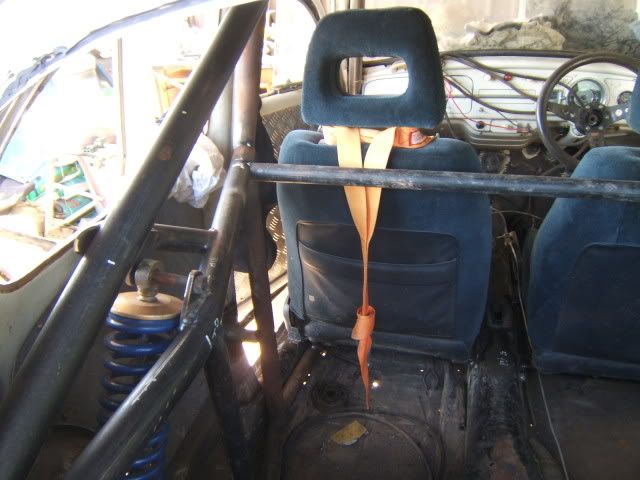
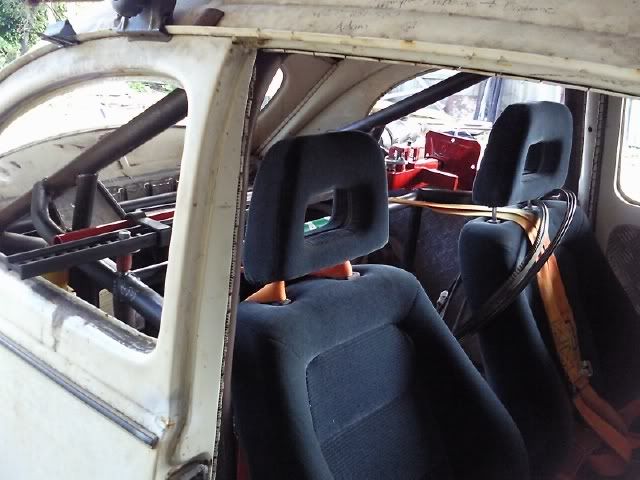
lowered the seats 30mm (so my head doesn't hit the bars on the cage)
put a bar behing the seats for the seatbealts to mount to
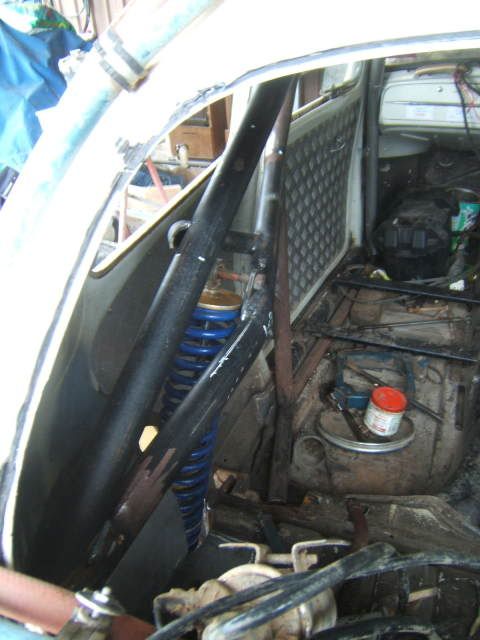
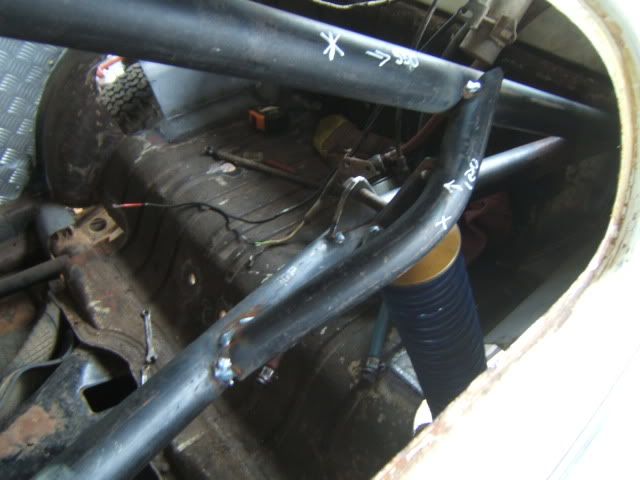
put a bar from the top shock mounts to the rear torsion, The cabin area is starting to look busy and closer to finished every week! Need to start looking for a fuel cell.
and started mocking up for the extended front clip, am going to use a 6 inch over beam. How much caster should i be building into it? I read in one of the other posts 6* does that sound right?
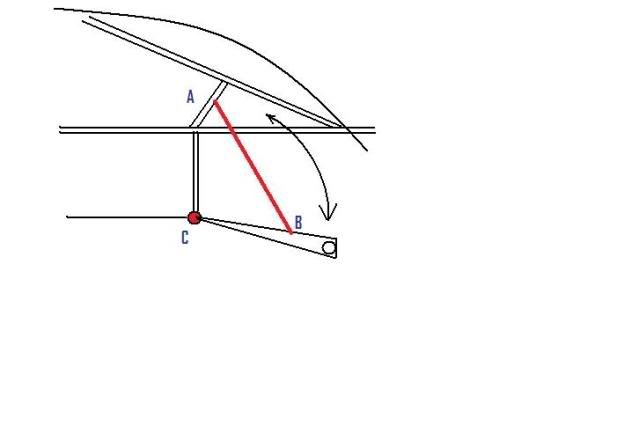
nilza wrote:OK,.. . . . .in the below picture, say this is the torsion (point C), rear arm and cage. the red line between, point A and B is the shock.
I need to know what the rotational pressure would on the torsion housing at full bump (With the torsion preloaded, baja style to make it interesting) I think i could probably just put a torsion wench on the torsion bar and pull it till it hits the top and take a reading, but i have a feeling that it would be close to 500lbs.
Would it Just be the wieght of the rear of the car divided by 2 perhaps?
Then the pressure of the coil on points A and B at full bump, I am using 250 and 350lb springs and have still the original torsion bars in place set at 0* preload at full joist (I would think 350lb?)
And lastly, the one I have no idea how to work out. The deflection change (thats left and right)on the arm and springplate now the spring load is at point B not at C.
And you are right penguin, they are pretty intense here. You guys have it pretty good it the states. I wonder sometimes if a race car would be easier easier!
nilza wrote:So its been awhile, the weather has been good and the girlfriend is back.. . . . so the baja took a bit of a backseat. But i picked up a few parts on the sly and still got a day in on the long weekend.
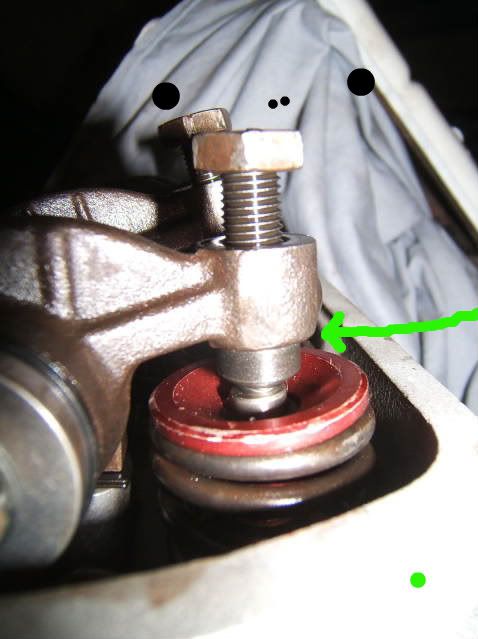
The engine is coming along nicely, getting started on the rocker geometery, speaking of - with swivel feet adjusters . . . . . is this shoulder at the bottom of the rocker that gets ground, right?
AND . . . . . back to the baja, got to drill the floor pans out, they are pretty rough. not sure wether to replace, repair or to make my own.
Add it to the 'to do' list
Anyone got pictures of home made floor pans?
nilza wrote:Put a whole good weekend into this hole in my wallet!
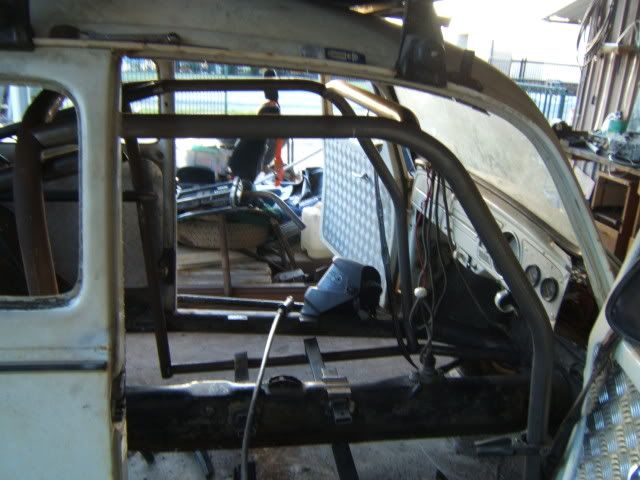
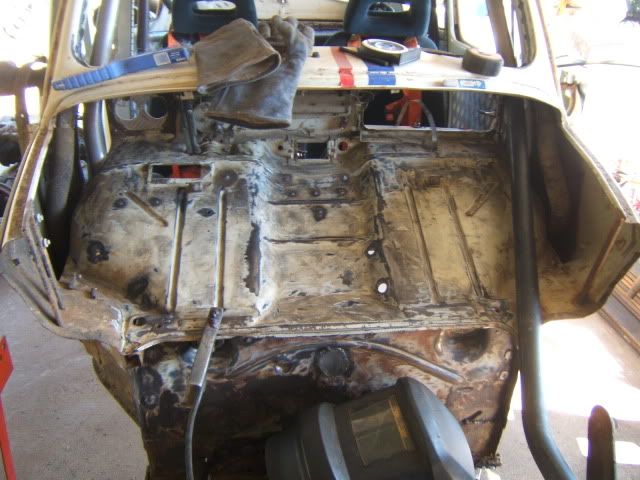
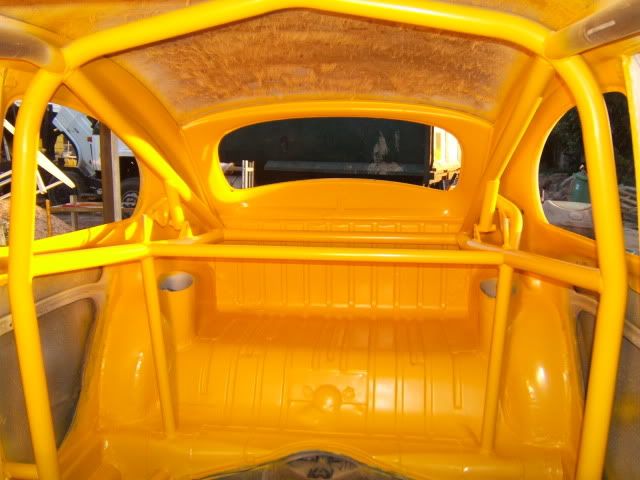
Cage is in and welded,as are those holes that i put in the A pillers. cleaned out the whole interior and finished the new seat rails.
Is great when you start to see the ends of things! Interior is just about ready for paint i think, just waiting for the engineer to put his tick of approval on it.
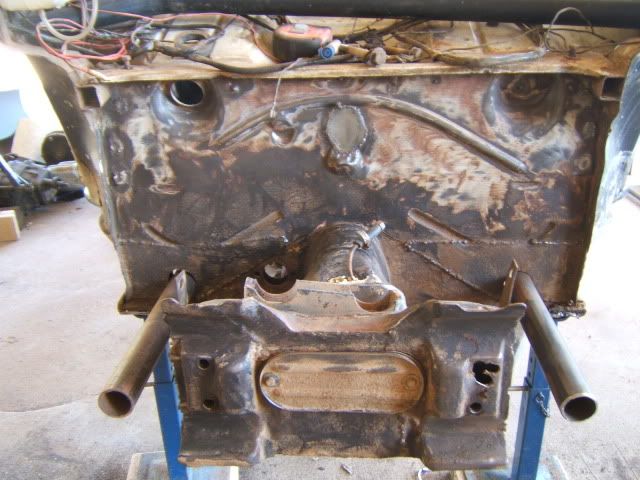
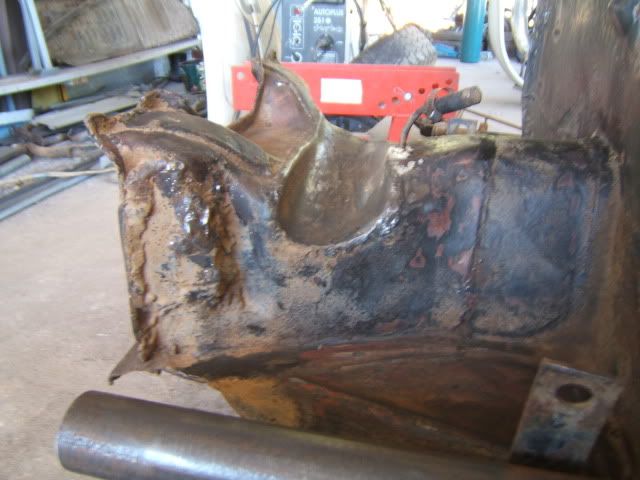
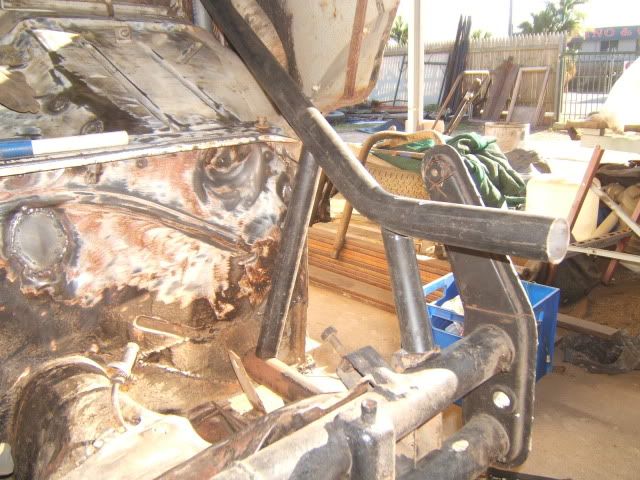
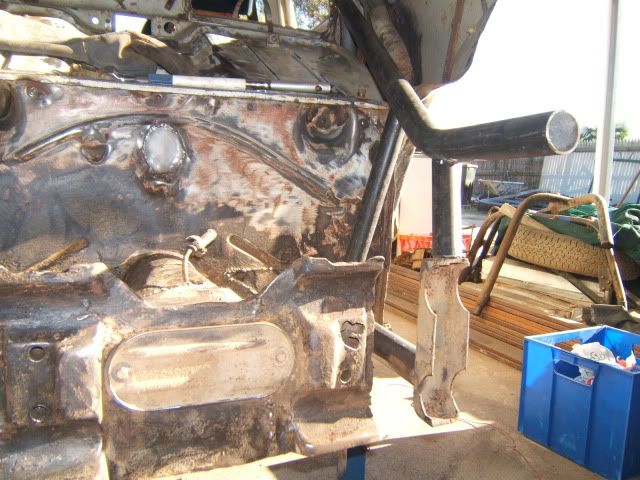
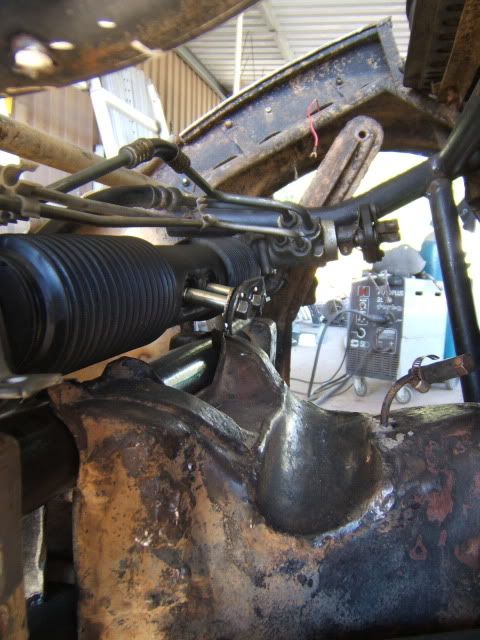
Moving right along to the front end. started on the bars for the front, not sure if this will be the final design. But i am quite keen on the idea of the front bumper attaching the same way the rear will. Not sure where these tubes will stick out of the front end, but it won't be a flip front now anyways (the legal problems with putting the fuel tank inside the cockpit are just to much of a pain. So fuel in the front and tyre on the back above the engine again. Also looking into a legal means of putting a rack and pinion in the front, the center mount VW box is an ok idea but is still old hat. Time to step up!
anyway some photos
You can see how damaged the front end really is, yes. . . . . I checked that it was straight

nilza wrote:Another busy weekend, unfortunatly not much on the VW. This is how projects get stretched over years isn't it?
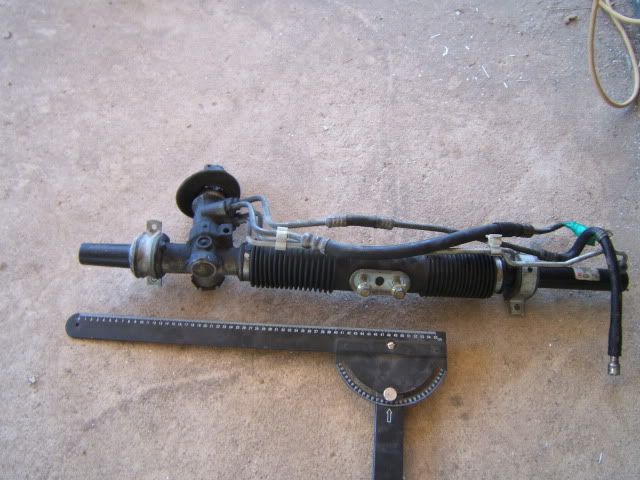
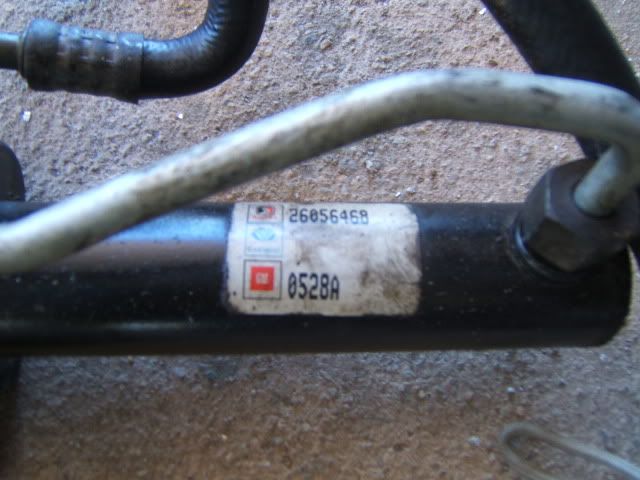
Came to a decision during the week that seeing as how much work i am putting into this thing, mixed with being unable to get the front tyres that i want. (can't get anything under a 8.5inch tyre that is 29-30 tall) going to make steering a cow, I decided . .. . . . . Rack and pinion!
Did a bit of research, and came up with either a Daewoo lanos rack or a Lada samari rack. Both are centre load and have the steering rod reward of the axel. At the end of the day the wrecker had a lanos one for cheap so i grabed it (got a power rack, because the ratios are quicker 3 turns lock to lock) and i have the option of going power laterI hear the manual rack has 4 1/2 lock to lock . . . .excessive!
Now.. . . . I'm off to do steering geometery and bumpsteer spreadsheets, so the engineer allows me to do this (the fun never ends here!)
nilza wrote:haven't had much of a chance to update this week, busy busy. The engineer is looking at the cage, seats, seat belt mounts, and gearbox mounts this thursday. Everybody cross your fingers. have been playing with the beam abit, cleaning it up, cutting the adjusters out and the such. did a bit more work on the front tubing. Added the brackets to the bottom of the rollcage to floorpan
nilza wrote:Haven't posted anything here for a while cause i lost the cable for my camera for awhile. But that's ok nothing exciting going on really anyways. Just filling in all the holes that putting a cage in has left, plus the rust.
Also adding metal around the coil-overs so that i can boot them at the top. coils look cool inside the car but the dust and mud can stay outside.
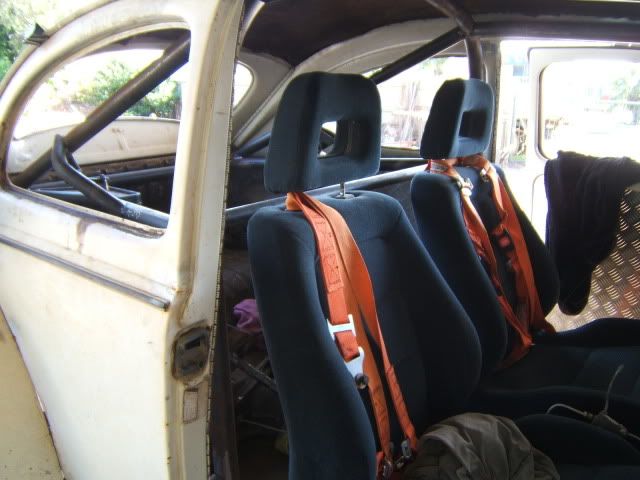
Fitted the seat belt mounts, now looking at the photos i'm sure alot of you are thinking WHA?!, but this is how they specify they need to be built to be legal. I don't know, i don't write this stuff.
Lastly decided to make the floors myself, have the sheet lying around and the cost of new halves is just not in the budget. Used the edges of the old pans for shape, turned out well.

nilza wrote:Unfortunatly has been a slow week, more work less buggy at the moment. Think alot of us are feeling the financial pinch at the moment.
I also have a finish date now, as I will be part of the airforce january of next year. Will have to get this thing done before otherwise there will be somewhat of a gap between updates.
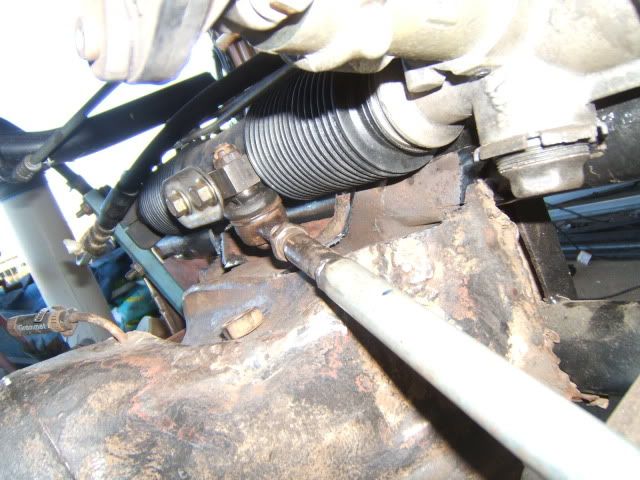
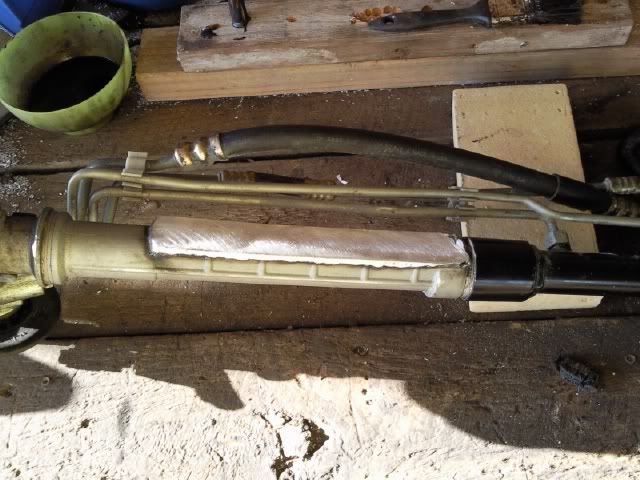
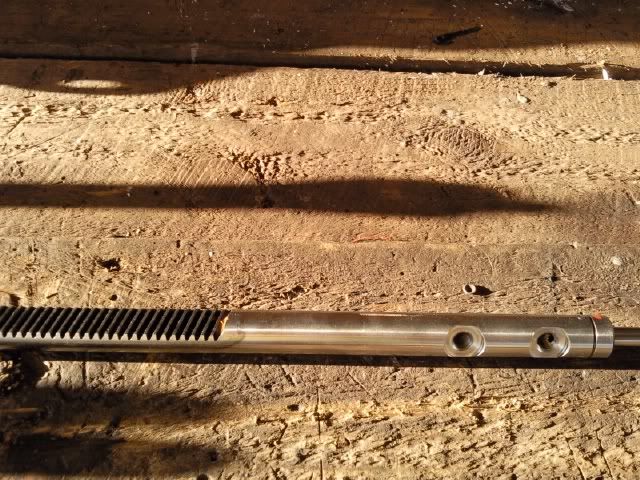
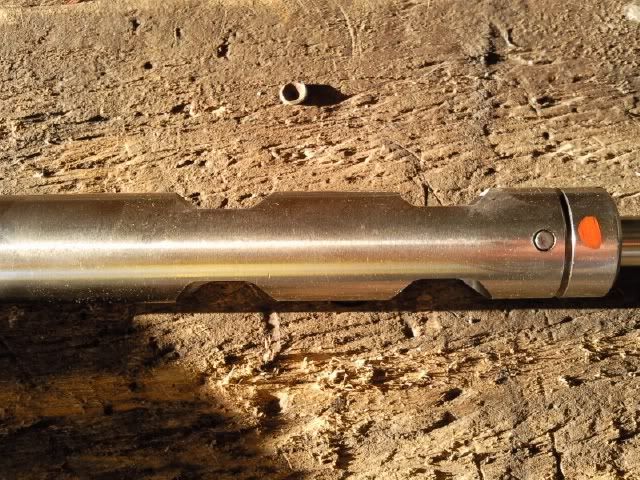
So to the steering rack, got a few parts back from the machine shop on friday and was able to reassemble that and get an idea of how it is going to be mounted.
I welded up the opening for the center load of the rack, cut the hole in the back end instead,
took the rack out and had the shaft machined same on the back
Put it all back together and .. . . . . . .voila!

nilza wrote:Hi guys been a while, don't have the time to post pictures on the net at the moment
Bugman, you are right on the money there. (people may mod there cars to the n'th degree, but often the neglected stockers are sooooo..... much more dangerous) we don't have yearly checks here in queensland, some other states do. They frown on modded cars and not only do the police pull over anything a little exciting, but we have roving patrols from the department of transport (They have PURPLE, YES PURPLE! flashing lights) and if you don't have the relivant paperwork and modification plates, look out! Your parting with alot of your cash.
I now have a - certificate for the quality and fit of my fibreglass,
- plate for seats
- plate for seatbelts (and the fact that it is a 2 seater now)
- plate for rack and pinion (*Pending * is only approved as a design athe present)
- plate for gearbox
- plate for IRS conversion
- plate for rollcage
before this thing is done am sure i will have one for the brakes too, then maybe an engine coversion (where does it end)
and it costs $90 for each one!
Anyways have been getting some work done of late, still pulling the rear suspension apart and putting it back together getting it sorted. Put a breather into the gearbox and sealed the old one, fitted it up again. While it was there I thought i would drop the oil, . . . . .um. bit dry and those teeth rattling around in the bottom sure do look like they should be part of the ring gear
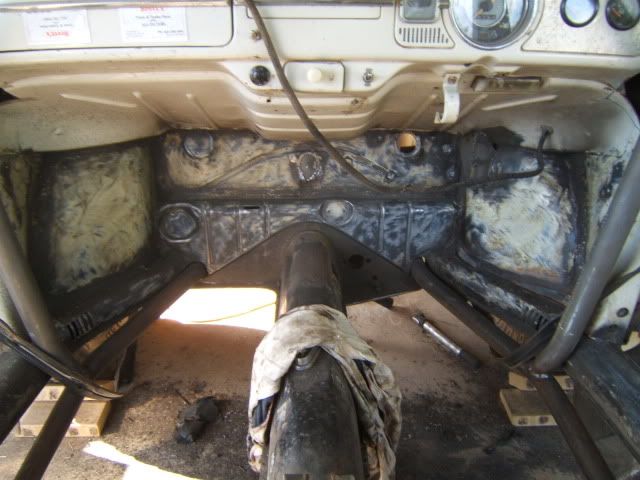
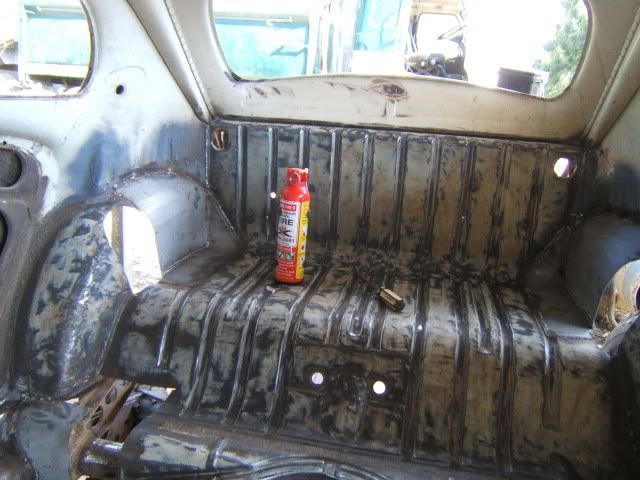
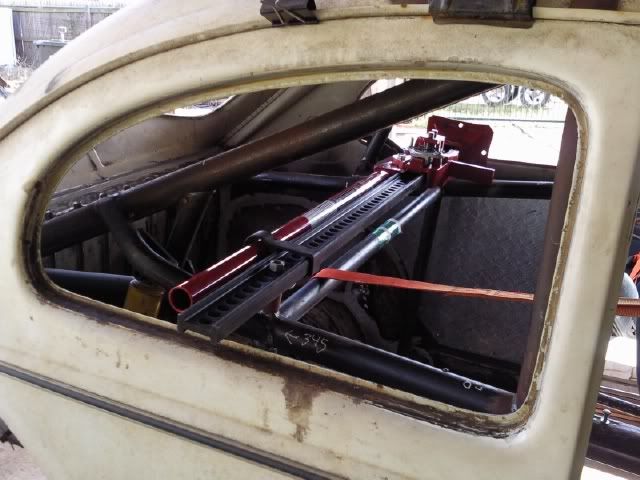
I fitted the seats and the belts and mounts for the highlift, things are looking busy so i busted out the spray gun. And pointed it in the wrong direction
Primed the rear with some epoxy and then hit it with some yellow, am kind of sick of the surface rust.

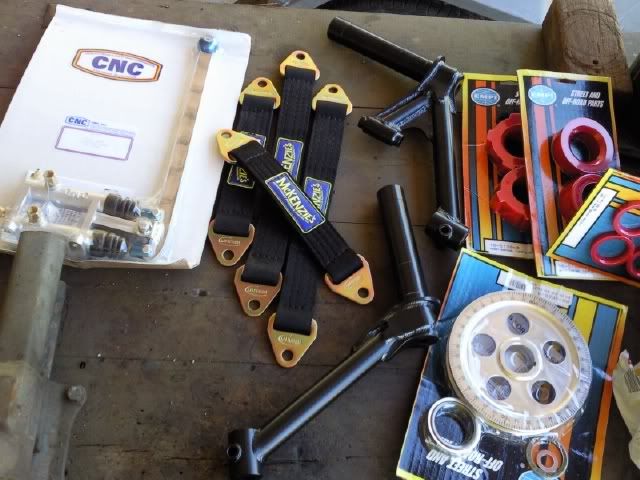
nilza wrote:Show and tell time! got a couple of boxes of parts this week just gone.
arms from dan's performance (I ask for forged, but got the welded chromoly one's for the same price) which is cool but going to be alot harder to hide them from the engineer and transport department
eurathane bushes and sand sealed pully kit is from classic vw in sydney, (I know its empi!
and the CNC cutting brake, limit straps and rollbar padding (opps not in picture) for racer imports in victoria.
anyone in AUS looking for sand buggy gear camron is an ace guy to order though, definatly will have my business again.
also got a little time and sorted the rear limit straps straight away, started on the rack and pinion setup as well but forgot to take photos (next time surely)
Oh! and got another gearbox, thanx josh. got it for great price