My '74 2.0 Restoration introduction... Dyno results!

VW based Porsche. In a league of its own.
User avatar
falcor
Posts: 201
Joined: Mon Aug 27, 2012 7:44 am

My '74 2.0 Restoration introduction... Dyno results!

Post by falcor »

Got it home last monday...barely had time to look at it becuase of work....

http://www.rejsa.com/im/user/395/2013-0 ... g_5047.jpg

Spec's:

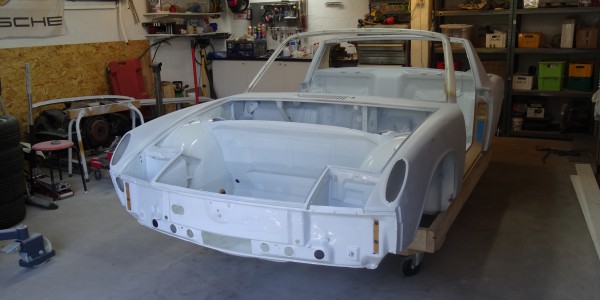
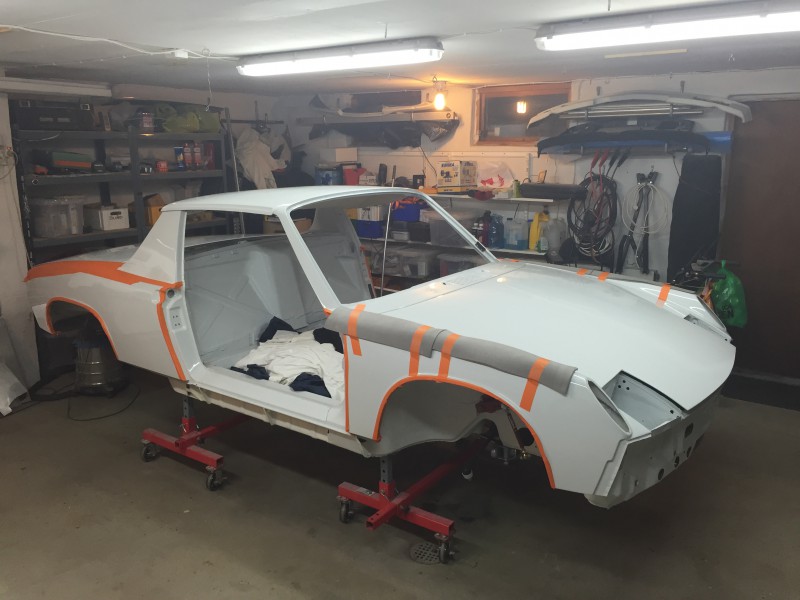
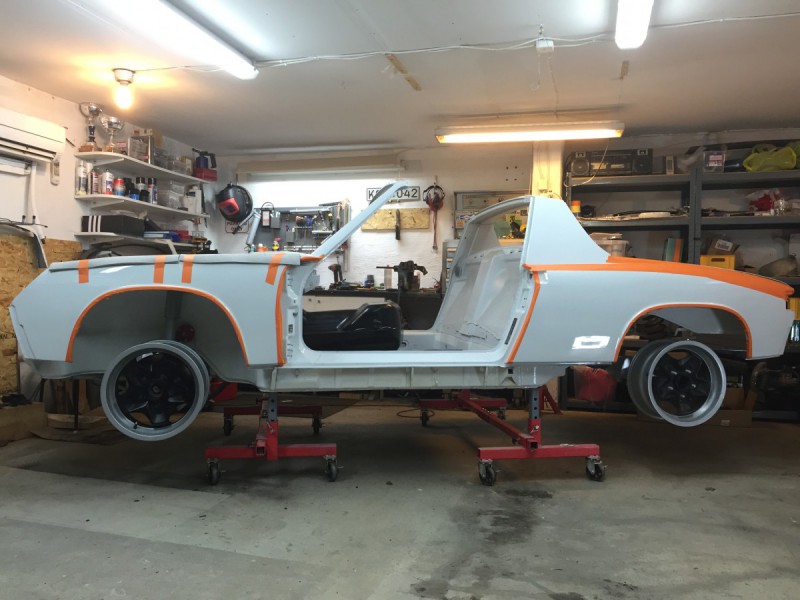
Front glasfibre hood
Rear glasfibre hood
Front GF bumper (cracked)
Rear GF bumper

Rollcage
Old five point harnesses, will probably be discarded.
Three point belts will be installed (needed to pass registration)

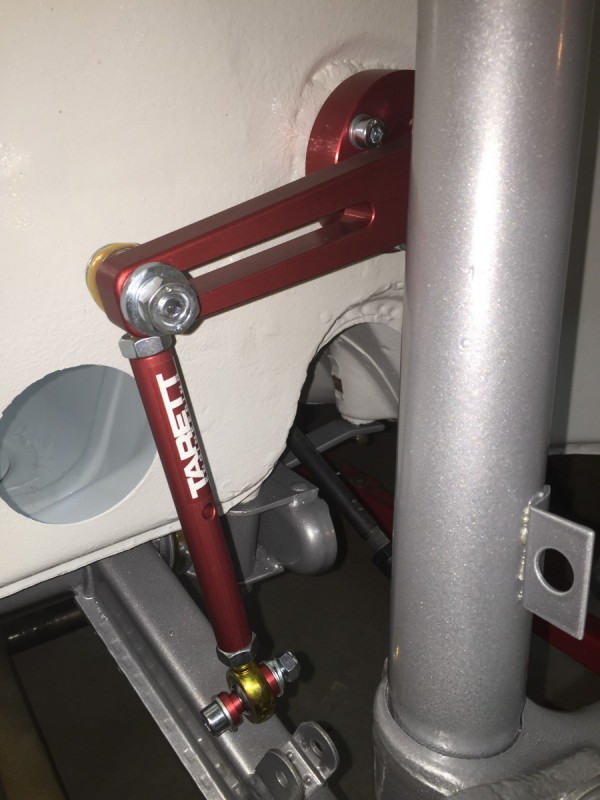
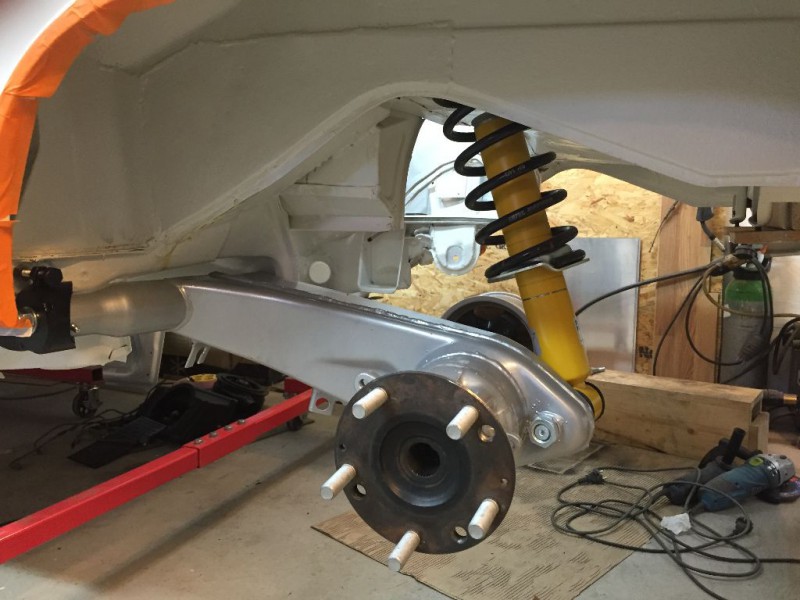
Rebound adjustable red Koni's front and rear
Springs "140 lb Weltmeister"

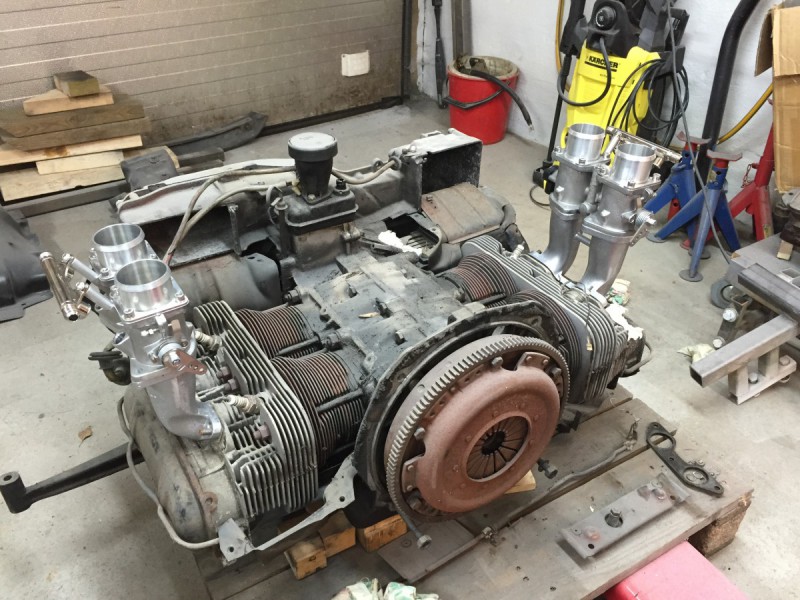
Engine overhauled 2001:
"Euro" pistons
Camshaft, unknown spec.
Overhauled heads with new valves and guides
Weltmeister oiltrap
Flywheel lightened 2 kg's
Frontmount oilcoover
External oilfilter
etc....

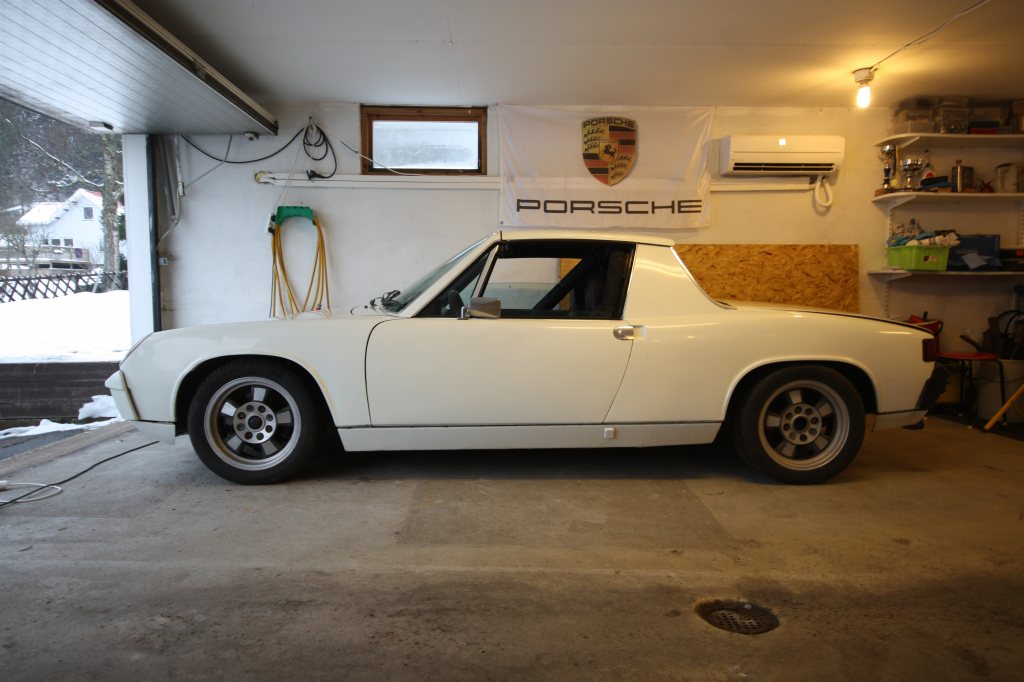
It's a pretty rough looking car but the plan is to get it registered (ex California car, I got it from Germany)
and then tear it to pieces and do it right, find all rust, fix it and have it resprayed.

Pics will follow tomorrow... :)
Last edited by falcor on Sun Mar 19, 2017 10:14 pm, edited 2 times in total.
User avatar
aircooledtechguy
Posts: 1709
Joined: Sun Oct 28, 2001 1:01 am

Re: My '74 2.0 Restoration introduction...

Post by aircooledtechguy »

I look forward to seeing your new car. Congrats!!
User avatar
Piledriver
Moderator
Posts: 22520
Joined: Sat Feb 16, 2002 12:01 am

Re: My '74 2.0 Restoration introduction...

Post by Piledriver »

Welcome to the STF, looking forwards to your build!
Addendum to Newtons first law:
zero vehicles on jackstands, square gets a fresh 090 and 1911, cabby gets a blower.
EZ3.6 Vanagon after that.(mounted, needs everything finished) then Creamsicle.
User avatar
falcor
Posts: 201
Joined: Mon Aug 27, 2012 7:44 am

Re: My '74 2.0 Restoration introduction...

Post by falcor »

Image
User avatar
aircooledtechguy
Posts: 1709
Joined: Sun Oct 28, 2001 1:01 am

Re: My '74 2.0 Restoration introduction...

Post by aircooledtechguy »

That doesn't look too rough. . . I think you and most others have a difference in opinion on what is the true definition of "rough" really is. Looks good!!
User avatar
falcor
Posts: 201
Joined: Mon Aug 27, 2012 7:44 am

Re: My '74 2.0 Restoration introduction...

Post by falcor »

aircooledtechguy wrote:That doesn't look too rough. . . I think you and most others have a difference in opinion on what is the true definition of "rough" really is. Looks good!!
It doesn't look half bad from a few meters away but....
Cracked windscreen
Some rust at the righ hand lower corner of the windscreen
Left front fender dented
Front cracked and taped up
Passenger door got a 3 foot scratch
Dash cracked
Rear trunk rusty (inside, middle rear part)
High beams doesn't work
Front fan doesn't work
Most rubbers perished and torn
Needs new carpets and seat covers

...the list goes on and on....but I've got a plan

:D
User avatar
falcor
Posts: 201
Joined: Mon Aug 27, 2012 7:44 am

Re: My '74 2.0 Restoration introduction...

Post by falcor »

My car...err body is currently in the bodyshop getting some rust treatment but front edge where the seal for the trunk fits
is badly smashed up and my bodyguy is unsure if he can fix it. $1000 for a new replacement panel is something I want to avoid as long as possible, is there anyone who's got this panel and is willing to part with it for a bit less?
You do not have the required permissions to view the files attached to this post.
User avatar
falcor
Posts: 201
Joined: Mon Aug 27, 2012 7:44 am

Re: My '74 2.0 Restoration introduction...

Post by falcor »

Problem above kinda sorted with a days work and a gas welder and a competent bodyshop guy. It's not pretty but at least straighter.
Rear suspension reinforcement kit from Tangerine welded in place, she will probably be done this week and then I'll take the body home again and assemble the front for some fine adjustments before I tackle the underside and wheel arches for cleanup and paint prep.
User avatar
falcor
Posts: 201
Joined: Mon Aug 27, 2012 7:44 am

Re: My '74 2.0 Restoration introduction...

Post by falcor »

Here's a pic of the chilly morning we rolled off to the bodyshop....
You do not have the required permissions to view the files attached to this post.
User avatar
falcor
Posts: 201
Joined: Mon Aug 27, 2012 7:44 am

Re: My '74 2.0 Restoration introduction...

Post by falcor »

The car is back home from the body shop, straighter and with less rust and a rear reinforcement kit from Tangerine Racing welded in place. Still alot of work to be done, fixing the surface rust in the center tunnel currently and working my way outwards from there.

http://matsgarage.com/914/DSC00449.JPG

Cant insert the pic since STF's limit on 800 pixels height. :wink:
E_bug
Posts: 260
Joined: Mon Dec 28, 2009 11:05 pm

Re: My '74 2.0 Restoration introduction...

Post by E_bug »

Such a tease. I love 914s.

Definitely my next project :D
My welding sucks .
User avatar
falcor
Posts: 201
Joined: Mon Aug 27, 2012 7:44 am

Re: My '74 2.0 Restoration introduction...

Post by falcor »

Image

Got the first paint on the car last week, I'm only doing the areas that will be sortof covered up myself. The outside I will leave to a professional.

More pictures and updates on my website. :D

http://www.matsgarage.com
User avatar
Piledriver
Moderator
Posts: 22520
Joined: Sat Feb 16, 2002 12:01 am

Re: My '74 2.0 Restoration introduction...

Post by Piledriver »

Looking great!

I need to start on mine RSN...
Addendum to Newtons first law:
zero vehicles on jackstands, square gets a fresh 090 and 1911, cabby gets a blower.
EZ3.6 Vanagon after that.(mounted, needs everything finished) then Creamsicle.
User avatar
falcor
Posts: 201
Joined: Mon Aug 27, 2012 7:44 am

Re: My '74 2.0 Restoration introduction...

Post by falcor »

Image

Body is back from the paintshop and today I did some trial reassembly.
User avatar
falcor
Posts: 201
Joined: Mon Aug 27, 2012 7:44 am

Re: My '74 2.0 Restoration introduction...

Post by falcor »

Image

All parts back from paint late november.

Image

Rear suspension mounted.

Image

Trialfitting the Cookie cutters.

Image

Mmmm....goodies...
Post Reply