Page 2 of 3
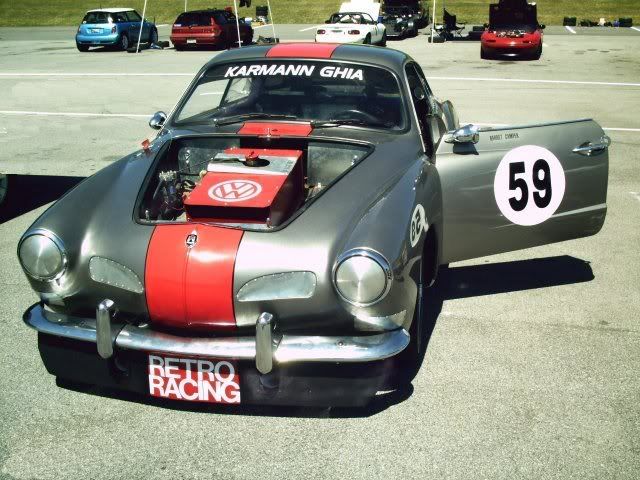
Re: Grassroots Motorsports $201X Challenge Build
Posted: Tue Jun 07, 2011 10:36 am
by FJCamper
Hi Bruce,
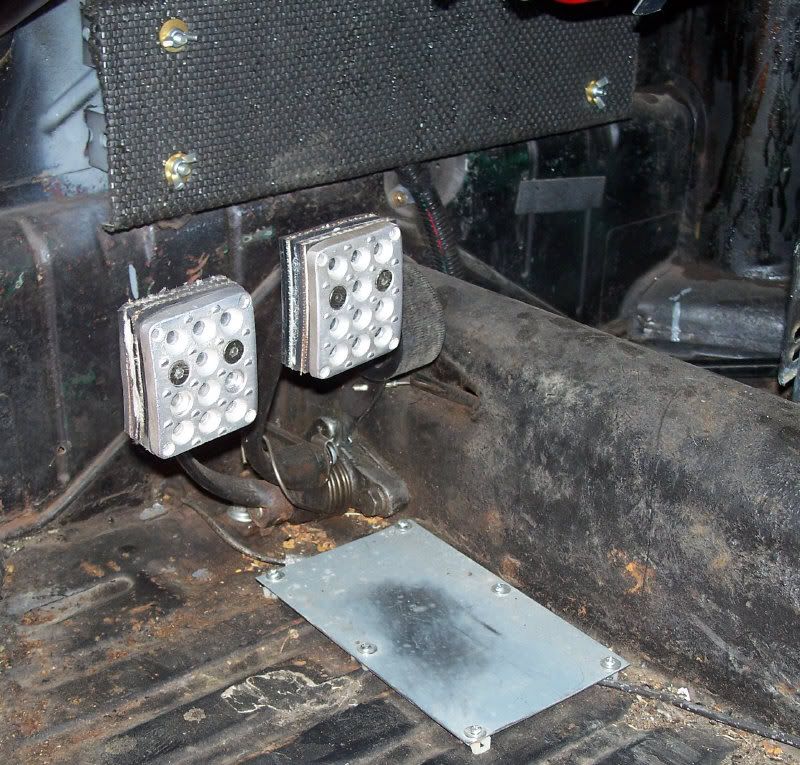
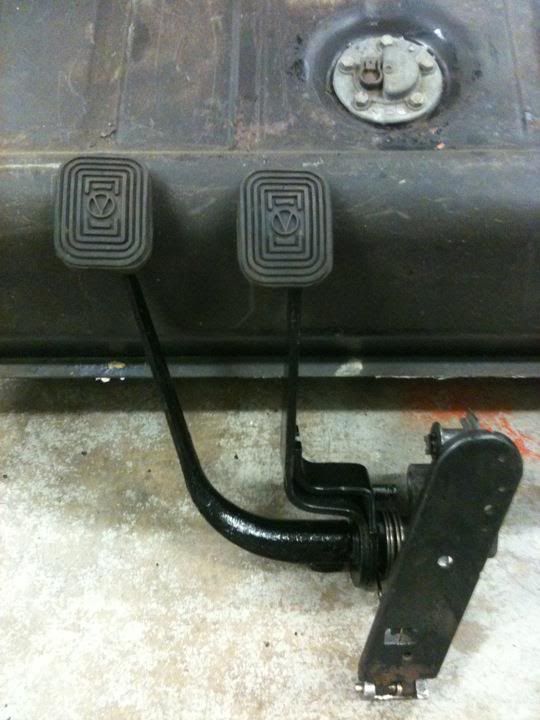
Above is the foot well in our PanAm Ghia. We put an aluminum plate as a heel rest there to protect the brake line.
You can see how we used the aluminum pedal pads, spaced out to the desired length with old conveyor belt rubber.
The wing-nutted and padded cover on the firewall covers our fuel pump and relay system, so we can reach through to the fuel cell easy.
FJC
Re: Grassroots Motorsports $201X Challenge Build
Posted: Tue Jun 07, 2011 12:53 pm
by VWguyBruce
Hmmm. So that rubber line is supposed to be there? It looked like a repair to me, especially if you consider that tab on the tunnel. It looks like it should snake around the pedal assembly, under it and along the tunnel thru the tab. I was going to repair it.

Apologies for the ignorance.
Re: Grassroots Motorsports $201X Challenge Build
Posted: Wed Aug 24, 2011 1:21 pm
by VWguyBruce
Guys, I'm struggling with the idea of sacrificing my seat bases to mount my Kirkey seat. Should I feel that bad about cutting up a seat base from a '67 Ghia at all? They don't make them anymore after all. I just can't seem to come up with any other ideas for this seat so it's adjustable for multiple drivers. Maybe I'm over thinking this. Can you guys brainstorm with me?
Sorry for the lack of updates. I've nearly got the brakes finished. The last few pieces should be here today for the pedal cluster. Pressure washing the longblock tonight. Got the fan shroud and rear tin painted. Soaking the pulley nut in hopes it will come off easier.
Re: Grassroots Motorsports $201X Challenge Build
Posted: Wed Aug 24, 2011 8:01 pm
by FJCamper
Hi Bruce,
Cut whatever you need to cut, and mount your new seat.
You're building a racer, not a show car.
FJC
Re: Grassroots Motorsports $201X Challenge Build
Posted: Thu Aug 25, 2011 6:30 am
by VWguyBruce
Thanks for the push.
Got the pulley off with a great deal of force but that's behind me now. A couple of opinion questions...
I like the look of the 40hp shroud and lack of heater ducts, will save tons of time shaving a DP doghouse duct. SP motor, header, Kadrons, 009. Can I cool enough with this shroud?
There aren't any of the little clip-in tins under the cylinders, was this a DP thing or are they just missing? Was a running motor so I assume they were running without them.
Apologies for the simple questions but I've lost some data over the years working on watercooled cars.
Re: Grassroots Motorsports $201X Challenge Build
Posted: Thu Aug 25, 2011 7:06 am
by VWguyBruce
FJC, can you show how you mount your hood on the 53 car? Did you skin the hood? Looks like it would be easy to do. I see the front pins but more insterested in the back.
Re: Grassroots Motorsports $201X Challenge Build
Posted: Thu Aug 25, 2011 3:39 pm
by FJCamper
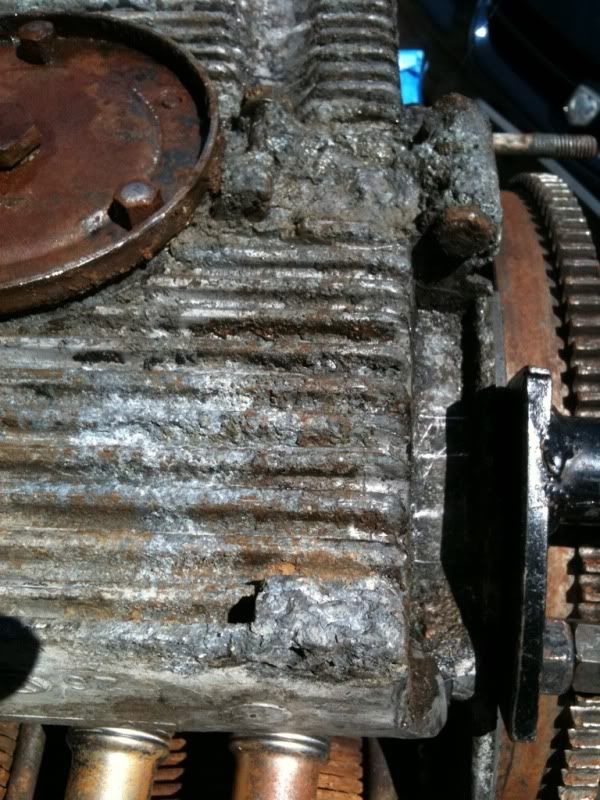
 Above:
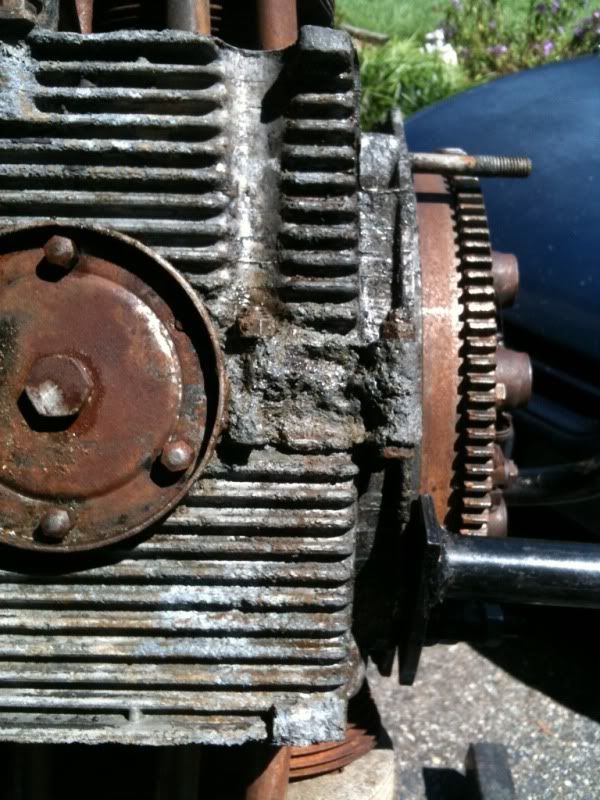
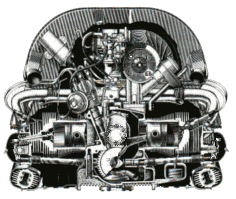
 Stock Engine 40 to 60 HP VW engine fan housing with fresh-air heater outlets
 Above:
 Porsche and 36HP VW's used fan housings very much alike in appearance
Hi Bruce,
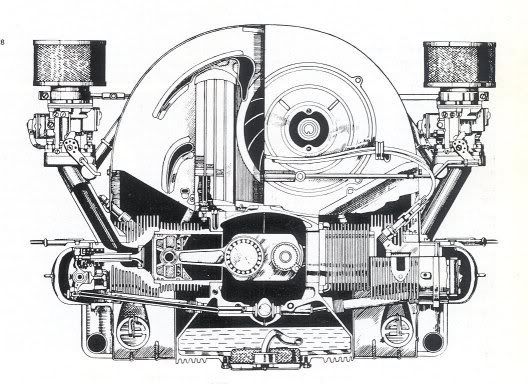
The clean, rounded fan housing (no heater outlets) is the 36HP shroud. You can get them with and without the doghouse oil cooler configuration, and even with or without fresh-air heater outlets.
 Above
Above: The aftermarket 36HP VW fan housing, which is what we use.
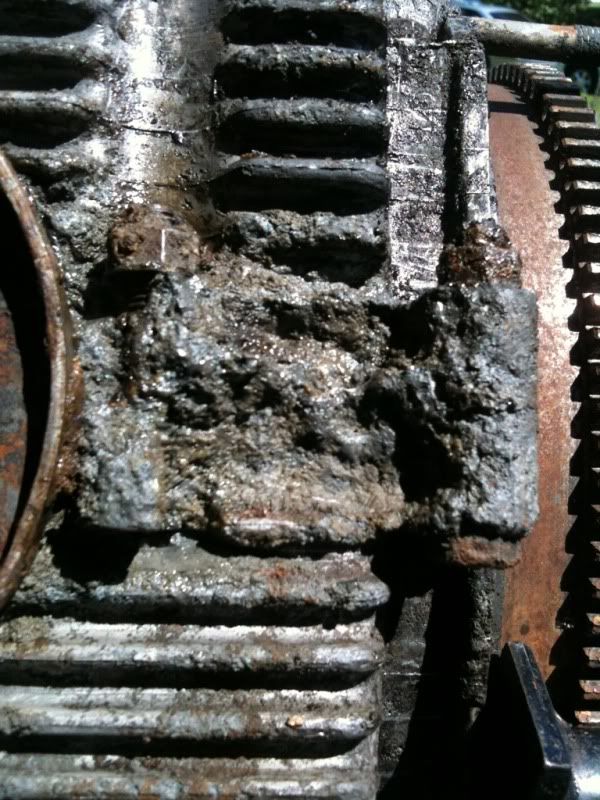
And you asked about the cylinder air deflector tins --
yes, they should have been there, 36HP to the last 1600. Without them, the cylinders run too hot.
And, on our 1970 Ghia, we have no hood hinges, and use two hood pins up front and one in the rear, center. We have front and rear handles to lift off the hood.
FJC
Re: Grassroots Motorsports $201X Challenge Build
Posted: Fri Aug 26, 2011 6:26 am
by VWguyBruce
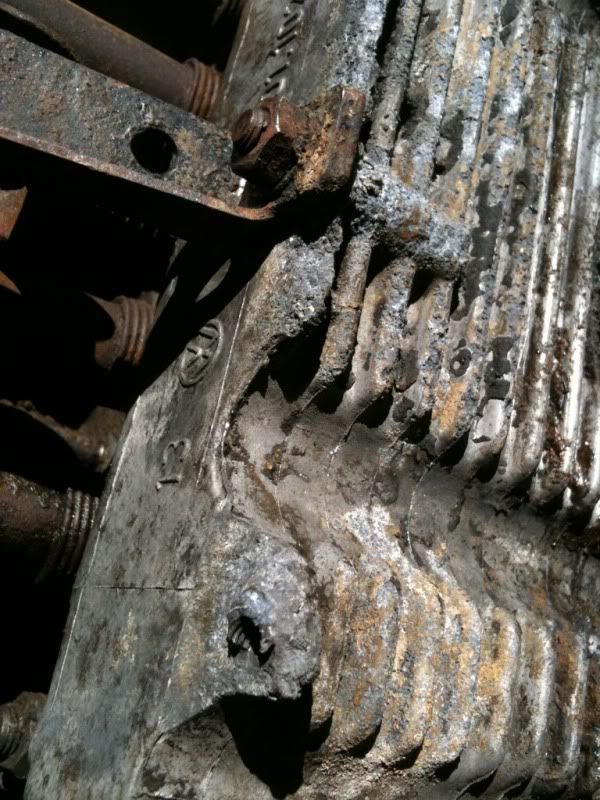
Can you get the cylinder tins in there with the head on? I found a whole box of them in my stash but haven't looked at actually installing them yet.
And thanks for the replies. Motor could be in one piece this weekend if we don't get blown away by Irene.
Re: Grassroots Motorsports $201X Challenge Build
Posted: Fri Aug 26, 2011 9:49 am
by FJCamper
Hi Bruce,
The cylinder air deflectors are hard to install with the heads on, but not impossible, as you have to bend them to slip them in above the studs, and then bend them back again. And the push rod tubes are in the way.
It is actually easier to pull the rocker arm assemblies, remove the head nuts and washers, and slide the heads back enough to slip in the deflectors, then reassemble.
Do not leave them out. As simple a bit of stamped sheet metal as they are, they are critical to proper cylinder cooling. Without them, the cylinders will hotspot and distort, and your rings will fail to seal.
FJC
Re: Grassroots Motorsports $201X Challenge Build
Posted: Fri Aug 26, 2011 10:36 am
by VWguyBruce
I'm definitely going to put them in. If I'm going to pull the heads back I should probably just open up the case and put a cam in huh?
I could measure the cyclinders while I'm in there and find out if it's a 1300.
Re: Grassroots Motorsports $201X Challenge Build
Posted: Sun Aug 28, 2011 10:58 am
by VWguyBruce
Pedal assembly in one piece. Hope to have brakes this week. Maybe even a motor! Stupid tin screws keep twisting off.
Re: Grassroots Motorsports $201X Challenge Build
Posted: Thu Sep 01, 2011 9:26 am
by VWguyBruce
Re: Grassroots Motorsports $201X Challenge Build
Posted: Sun Sep 04, 2011 8:32 am
by FJCamper
Damn the magnesium, full speed ahead!
FJC
Re: Grassroots Motorsports $201X Challenge Build
Posted: Sun Sep 04, 2011 6:53 pm
by VWguyBruce
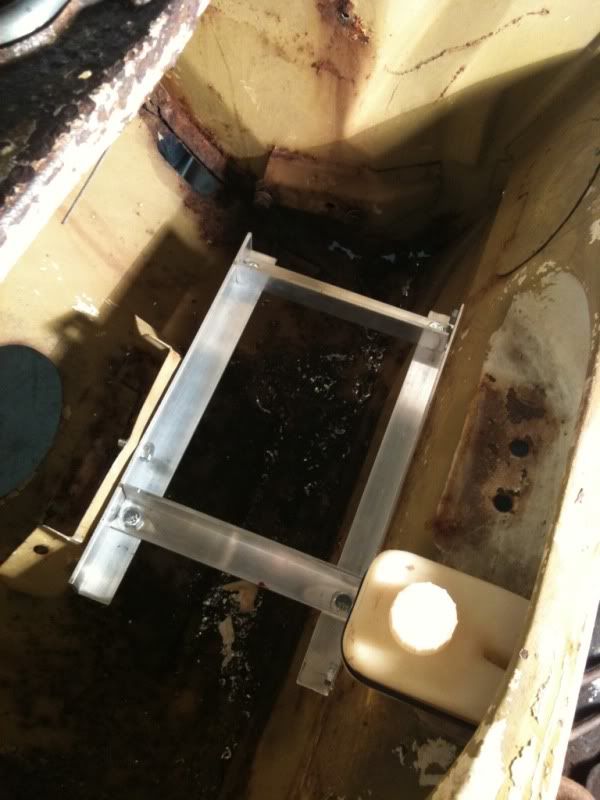
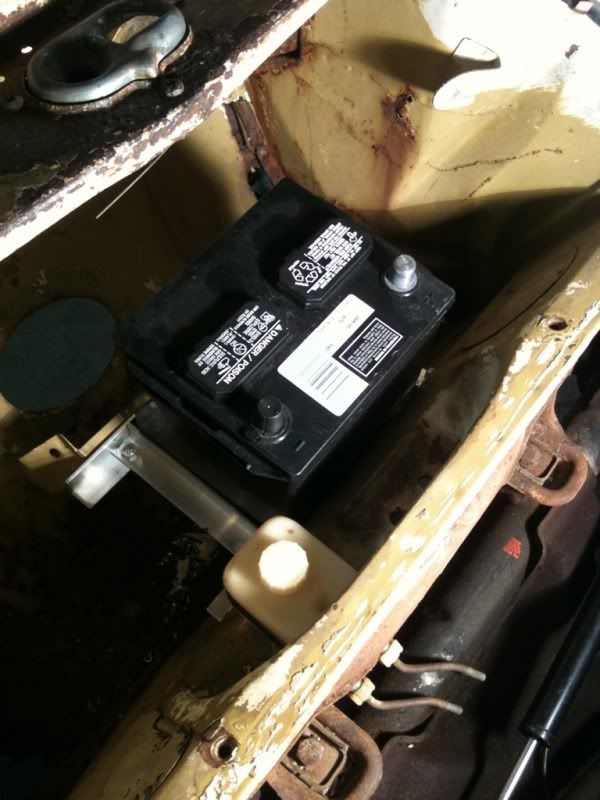
Got my battery mount nearly complete. Thanks FJCamper for the design.
Re: Grassroots Motorsports $201X Challenge Build
Posted: Fri Oct 14, 2011 8:28 am
by VWguyBruce
Decided to head to the Challenge this year without the Ghia. I went down with Busted Knuckle Racing crew and had a great time. I needed the recharge. They finished 13 of 50 this year with their Mk2 Scirroco.
I'm seriously considering putting a watercooled motor into the Ghia. This may be heresy but I have a race prepped JH motor at my disposal for $75 and a turbo for it. Since this is a Challenge car engineering and ingenuity are factors in the Concours judging. There's more power to be made even with basic CIS which is what we're thinking.
Is there someone that's done a succesful conversion on a Ghia? Google is turning up a lot of half finished cars.
Video from the banquet. There's a clown(literally) that brings a car called Uranus: Fast, Butt Ugly
http://youtu.be/CwTdFjshDcE
The few pics I managed to take.
http://s13.photobucket.com/albums/a279/ ... Challenge/
Other albums from the Challenge:
http://grassrootsmotorsports.com/challenge/updates/
http://grassrootsmotorsports.com/forum/ ... 582/page1/
https://picasaweb.google.com/1051447115 ... 1Challenge
You guys get the point. And yes, we lost a wheel for those paying attention.